https://www.cnblogs.com/wupeiqi/articles/5713330.html
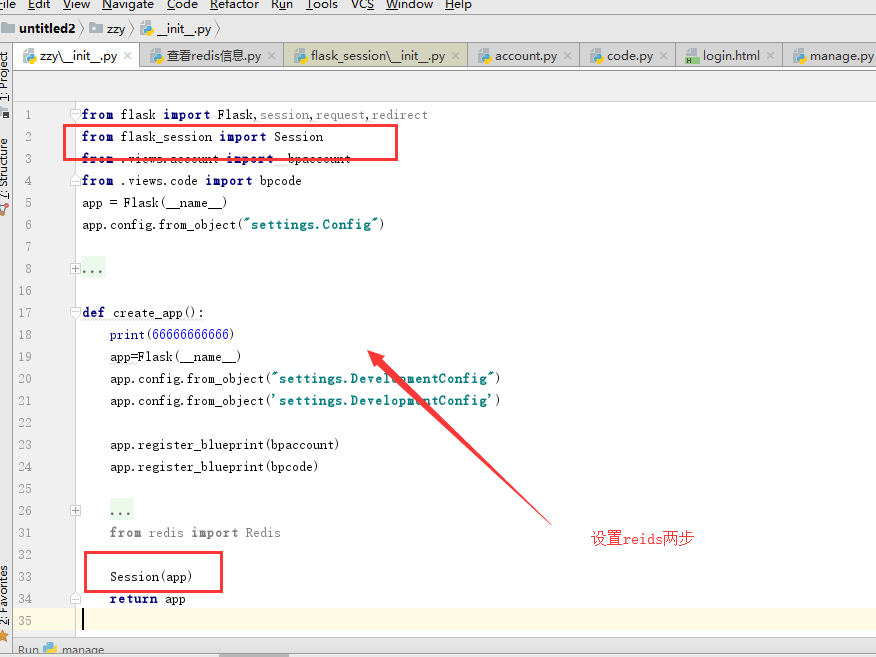
session
def create_app():
    print(66666666666)
    app=Flask(__name__)
    app.config.from_object("settings.DevelopmentConfig")
    app.config.from_object('settings.DevelopmentConfig')

    app.register_blueprint(bpaccount)
    app.register_blueprint(bpcode)

    # app.before_request(auth)
    # app级别的在登录
    # @app.before_request
    # def check_login():
    #         print("checklogin")
      from redis import Redis
    app.config["SESSION_TYPE"]="redis"
    app.config["SESSION_REDIS"]=Redis(host="132.232.55.209",port=6379)
    Session(app)
    return app

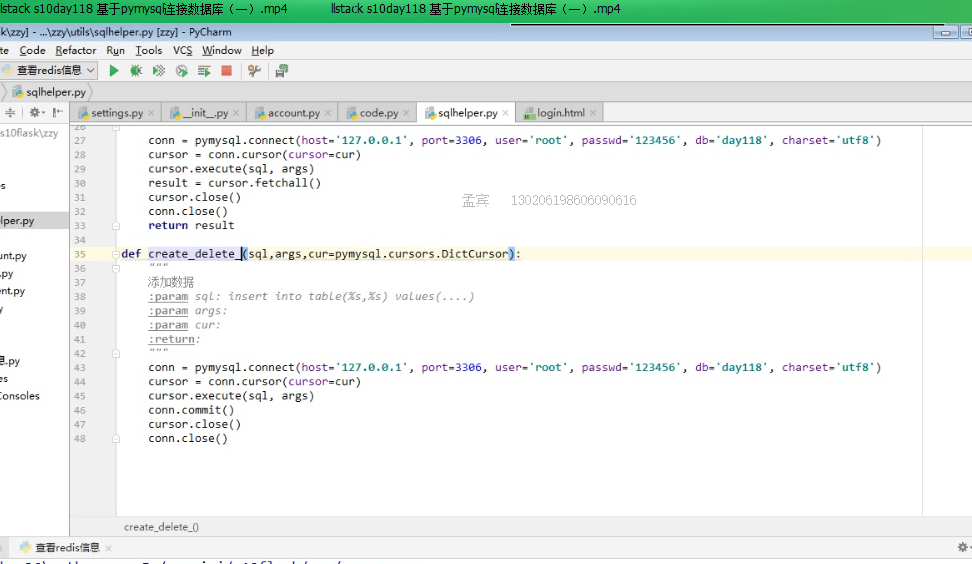
DBUtils 数据库连接池
import time
import pymysql
from DBUtils.PooledDB import PooledDB, SharedDBConnection
POOL = PooledDB(
    creator=pymysql,  # 使用链接数据库的模块
    maxconnections=20,  # 连接池允许的最大连接数,0和None表示不限制连接数
    mincached=2,  # 初始化时,链接池中至少创建的空闲的链接,0表示不创建
    maxcached=5,  # 链接池中最多闲置的链接,0和None不限制
    maxshared=0,  # 链接池中最多共享的链接数量,0和None表示全部共享。PS: 无用,因为pymysql和MySQLdb等模块的 threadsafety都为1,所有值无论设置为多少,_maxcached永远为0,所以永远是所有链接都共享。
    blocking=True,  # 连接池中如果没有可用连接后,是否阻塞等待。True,等待;False,不等待然后报错
    maxusage=None,  # 一个链接最多被重复使用的次数,None表示无限制
    setsession=[],  # 开始会话前执行的命令列表。如:["set datestyle to ...", "set time zone ..."]
    ping=0,
    # ping MySQL服务端,检查是否服务可用。# 如:0 = None = never, 1 = default = whenever it is requested, 2 = when a cursor is created, 4 = when a query is executed, 7 = always
    host='127.0.0.1',
    port=3306,
    user='root',
    password='123456',
    database='day118',
    charset='utf8'
)


def func():
    # 去连接池中获取一个连接
    conn = POOL.connection()
    cursor = conn.cursor()
    # cursor.execute('select * from users')
    print('开始去执行了')
    cursor.execute('select sleep(5)')
    result = cursor.fetchall()
    # 将连接返还到连接池中
    conn.close()
    # print(result)

import threading
for i in range(20):
    t = threading.Thread(target=func)
    t.start()
创建env
pip install virtualenv
virtualenv 'name"
cd name
activated

1. 下载一个项目
git clone https://github.com/miguelgrinberg/flasky.git
2. 下载下来后,进入flasky目录,安装virtualenv
cd flasky
virtualenv venv
3. 进入 Script目录下 通过activate命令激活虚拟环境.
activate
譬如
(venv) C:UsersNorthK_PCDesktop11flaskyvenvScripts>
退出:通过deactivate 命令.
4.安装flask
pip install flask