flume是实时收集的一种大数据框架
sqoop是一个数据转换的大数据框架,它可以将关系型数据库,比如mysql,里面的数据导入到hdfs和hive中,当然反过来也可以
一、Flume的搭建
1、将/opt/software目录下的flume安装包,解压到/opt/app目录下
2、进入flume目录下,修改配置文件
1>将flume-env.sh.tem...文件重命名为flume-env.sh,并进去里面指定JAVA_HOME路径
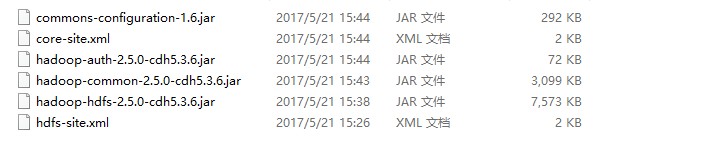
2>导入HDFS的有关jar包
3、使用
1>实时收集数据(监听一个端口,并实时接收该端口的数据)
a.安装telnet
将telnet-rpms包上传到/opt/software目录下,然后进入,直接sudo rpm -ivh ./*,安装
b.创建配置文件,这个文件名随意,比如我命名为a1.conf,内容如下


# The configuration file needs to define the sources,
# the channels and the sinks.

### define agent
a1.sources = r1
a1.channels = c1
a1.sinks = k1

### define sources
a1.sources.r1.type = netcat
a1.sources.r1.bind = 主机名(hadoop.spark.com)
a1.sources.r1.port = 端口号(44444)

### define channels
a1.channels.c1.type = memory
a1.channels.c1.capacity = 1000
a1.channels.c1.transactionCapacity = 100

### define sink
a1.sinks.k1.type = logger
a1.sinks.k1.maxBytesToLog = 2014

### bind the soures and  sink to the channel
a1.sources.r1.channels = c1
a1.sinks.k1.channel = c1
c.进入flume目录下,运行
bin/flume-ng agent
> -c conf
> -n a1
> -f conf/a1.conf
> -Dflume.root.logger=DEBUG,console
d.telnet连接,telnet 主机名 端口号,注意这里的主机名和端口号要和你的a1.conf中的要一致,然后就可以发送数据了
2>实时收集某个目录下的日志文件(我以Hive的日志文件为例)
a.创建配置文件,比如我命名为flume-tail.conf
# The configuration file needs to define the sources,
# the channels and the sinks.

### define agent
a2.sources = r2
a2.channels = c2
a2.sinks = k2

### define sources
a2.sources.r2.type = exec
a2.sources.r2.command = tail -f /opt/app/hive-0.13.1-cdh5.3.6/logs/hive.log
a2.sources.r2.shell = /bin/bash -c

### define channels
a2.channels.c2.type = memory
a2.channels.c2.capacity = 1000
a2.channels.c2.transactionCapacity = 100

### define sink
a2.sinks.k2.type = hdfs
a2.sinks.k2.hdfs.path = hdfs://hadoop.spark.com:8020/user/flume/hive-logs/

a2.sinks.k2.hdfs.fileType = DataStream
a2.sinks.k2.hdfs.writeFormat = Text
a2.sinks.k2.hdfs.batchSize = 10


### bind the soures and  sink to the channel
a2.sources.r2.channels = c2
a2.sinks.k2.channel = c2
b.进入flume目录下,运行
 bin/flume-ng agent
> -c conf
> -n a2
> -f conf/flume-tail.conf
> -Dflume.root.logger=DEBUG,console
c.另开一个窗口,启动hive,看看flume运行那一端有没有数据过来
3>实时收集某个目录下,指定文件名的数据(我还以Hive为例)
a.创建配置文件,比如我命名为flume-app.conf
# The configuration file needs to define the sources,
# the channels and the sinks.

### define agent
a3.sources = r3
a3.channels = c3
a3.sinks = k3


### define sources
a3.sources.r3.type = spooldir
a3.sources.r3.spoolDir = /opt/app/flume-1.5.0-cdh5.3.6/spoollogs
a3.sources.r3.ignorePattern = ^(.)*\.log$
a3.sources.r3.fileSuffix = .delete

### define channels
a3.channels.c3.type = file
a3.channels.c3.checkpointDir = /opt/app/flume-1.5.0-cdh5.3.6/filechannel/checkpoint
a3.channels.c3.dataDirs = /opt/app/flume-1.5.0-cdh5.3.6/filechannel/data

### define sink
a3.sinks.k3.type = hdfs
a3.sinks.k3.hdfs.path = hdfs://hadoop.spark.com:8020/user/flume/splogs/%Y%m%d
a3.sinks.k3.hdfs.fileType = DataStream
a3.sinks.k3.hdfs.writeFormat = Text
a3.sinks.k3.hdfs.batchSize = 10
a3.sinks.k3.hdfs.useLocalTimeStamp = true


### bind the soures and  sink to the channel
a3.sources.r3.channels = c3
a3.sinks.k3.channel = c3
4.更多使用,请详见官网
http://flume.apache.org/
二、sqoop的搭建
1、将/opt/software目录下的sqoop安装包,解压到/opt/app目录下
2、将sqoop-env.sh.tem....文件重命名为sqoop-env.sh,并进去里面指定路径
3、拷贝mysql驱动jar包
将/opt/software/mysql下的驱动jar包拷贝到sqoop的lib目录下
4、使用
1>将mysql中test数据库中的my_user表中的数据,导入到hdfs上,在hdfs上默认存储
bin/sqoop import
--connect jdbc:mysql://hadoop.spark.com:3306/test
--username root
--password centos
--table my_user
--target-dir /user/sqoop/imp_my_user
--num-mappers 1
2>将mysql中test数据库中的my_user表中的数据,导入到hdfs上,在hdfs上以parquet存储,除了parquet形式外,还有textfile(默认),orcfile
bin/sqoop import
--connect jdbc:mysql://hadoop.spark.com:3306/test
--username root
--password 123456
--table my_user
--target-dir /user/beifeng/sqoop/imp_my_user_parquet
--fields-terminated-by ','
--num-mappers 1
--as-parquetfile
3>将mysql中test数据库中my_user表中指定的列,导入到hdfs上
bin/sqoop import
--connect jdbc:mysql://hadoop.spark.com:3306/test
--username root
--password 123456
--query 'select id, account from my_user where $CONDITIONS'
--target-dir /user/beifeng/sqoop/imp_my_user_query
--num-mappers 1
4>将mysql中test数据库中my_user表中的数据,导入到hdfs上,压缩存储(以snappy为例)
bin/sqoop import
--connect jdbc:mysql://hadoop.spark.com:3306/test
--username root
--password 123456
--table my_user
--target-dir /user/sqoop/imp_my_sannpy
--delete-target-dir
--num-mappers 1
--compress
--compression-codec org.apache.hadoop.io.compress.SnappyCodec
--fields-terminated-by '	'
这种方式,一般结合下面的代码一起使用
drop table if exists default.hive_user_snappy ;
create table default.hive_user_snappy(
id int,
username string,
password string
)
ROW FORMAT DELIMITED FIELDS TERMINATED BY ',' ;

load data inpath '/user/sqoop/imp_my_sannpy' into table default.hive_user_snappy ;
先将mysql数据库中的数据导入到hdfs上压缩存储,然后将压缩的数据导入到hive表中
5>增量导入
bin/sqoop import
--connect jdbc:mysql://hadoop.spark.com:3306/test
--username root
--password 123456
--table my_user
--target-dir /user/sqoop/imp_my_incr
--num-mappers 1
--incremental append
--check-column id
--last-value 4
6>直接导入(第二次会覆盖第一次)
bin/sqoop import
--connect jdbc:mysql://hadoop.spark.com:3306/test
--username root
--password 123456
--table my_user
--target-dir /user/beifeng/sqoop/imp_my_incr
--num-mappers 1
--delete-target-dir
--direct
7>将hdfs上的数据,导出到mysql中
touch /opt/datas/user.txt
vi /opt/datas/user.txt
12,zhangsan,zhangsan
13,lisi,lisi

bin/hdfs dfs -mkdir -p /user/sqoop/exp/user/
bin/hdfs dfs -put /opt/datas/user.txt /user/sqoop/exp/user/


bin/sqoop export
--connect jdbc:mysql://hadoop.spark.com:3306/test
--username root
--password 123456
--table my_user
--export-dir /user/beifeng/sqoop/exp/user/
--num-mappers 1
8>将mysql中的数据导入到hive表中
use default ;
drop table if exists user_hive ;
create table user_hive(
id int,
account string,
password string
)
ROW FORMAT DELIMITED FIELDS TERMINATED BY '	' ;

bin/sqoop import
--connect jdbc:mysql://hadoop.spark.com:3306/test
--username root
--password 123456
--table my_user
--fields-terminated-by '	'
--delete-target-dir
--num-mappers 1
--hive-import
--hive-database default
--hive-table user_hive
9>将hive表中的数据导入到mysql
CREATE TABLE `my_user2` (
  `id` tinyint(4) NOT NULL AUTO_INCREMENT,
  `account` varchar(255) DEFAULT NULL,
  `passwd` varchar(255) DEFAULT NULL,
  PRIMARY KEY (`id`)
);

bin/sqoop export
--connect jdbc:mysql://hadoop.spark.com:3306/test
--username root
--password 123456
--table my_user2
--export-dir /user/hive/warehouse/user_hive
--num-mappers 1
--input-fields-terminated-by '	'
10>也可以将语句写在一个文件里面
命令:
bin/sqoop --options-file /opt/datas/sqoop-import-hdfs.txt
11>更多使用请详见官网:
http://sqoop.apache.org/