转载请注明出处: http://blog.csdn.net/tianhai110
渲染到纹理:
- 新建一个空effect;
- 添加渲染目标纹理, Add Texture-> Add Render Texture

3. 添加一个渲染pass

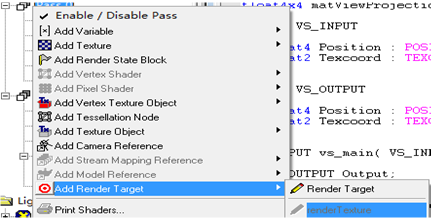
4. 将pass0 渲染到纹理上, add Render Target->renderTexture;
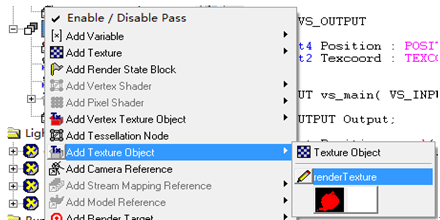
5. 在pass1中,引用纹理 Add Texture Object->renderTexture; 并改名为rttTexture;
6. 修改pass1的vertex shader 和pixel shader;
- float4x4 matViewProjection;
- struct VS_INPUT
- {
- float4 Position : POSITION0;
- float2 Texcoord : TEXCOORD0;
- };
- struct VS_OUTPUT
- {
- float4 Position : POSITION0;
- float2 Texcoord : TEXCOORD0;
- };
- VS_OUTPUT vs_main( VS_INPUT Input )
- {
- VS_OUTPUT Output;
- Output.Position = mul( Input.Position, matViewProjection );
- Output.Texcoord = Input.Texcoord;
- return( Output );
- }
PS:
- sampler2D rttTexture;
- float4 ps_main( float2 tex:TEXCOORD0) : COLOR0
- {
- return tex2D(rttTexture, tex) + float4( 0.6, 0.2, 0.5, 1);
- }
运行效果如下:
