http://www.sohu.com/a/236241465_100000368
Cura是Ultimaker公司开发的3D打印开源软件,在所有的3D打印开源软件中应属上乘之作,很有研究的价值。国内不少高校对其有深入研究,研究成果体现在其毕业论文之中。国内互联网上也有很多文章对其代码进行了剖析。
最近一段时间,读了几篇论文,分析了Cura的部分代码,打算写上若干篇分析文章。这里的视角与他人不一样,并不具体讲代码,不拘泥于具体的切片算法,而是通过使用软件与阅读代码后总结描述其软件的设计与架构。
所分析的代码是Cura最新的代码,分析过程中直接同步GitHub上的代码库,发现软件开发目前很活跃的,代码提交比较频繁,开发库中的版本已经合并到3.4了。
本篇主要描述:
- Cura软件使用的开发语言以及使用的第三方开源库;
- 切片引擎CuraEngine程序的四种命令行参数调用接口;
- Cura软件代码总体评价。
Cura软件简介
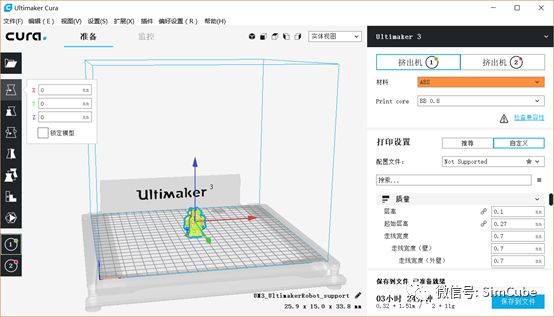
Cura软件实际上包含两个软件:Cura与CuraEngine。前者是图形界面程序,后者是专用于切片的后台程序,前者依赖于后者,在切片时将调用后者。

两个软件使用的编程语言与第三方库
|
Cura |
CuraEngine |
|
| 开源库网址 | https://github.com/Ultimaker/Cura | https://github.com/Ultimaker/CuraEngine |
|
开发语言 |
Python,细致点说还有Qt的QML语言 |
C++ |
|
第三方库 |
PyQt,QtQuick,Protobuf,Arcus |
Protobuf,Arcus,clipper,rapidjson |
|
图形界面 |
使用的是QtQuick而不是传统的QtWidgets,图形界面很新潮 |
控制台程序,无图形界面 |
第三方库的功用
|
开源库 |
说明 |
|
Protobuf |
Google的开源库,用于Cura与CuraEngine之间的结构数据序列化,简单说就是保证两个软件之间可以互相传递结构化的数据。目前支持多种语言,这里就使用了C++,Python |
|
Arcus |
包含C++代码与Python3的绑定,基于Protobuf库在一个线程中创建一个socket,然后发送与接受结构化的消息数据 |
|
PyQt,QtQuick |
Python语言下Qt库的包装,也就是可以使用Python语言访问Qt相关库了,Cura使用了QtQuick图形界面库 |
|
rapidjson |
C++库,用于解读JSON格式的文件,CuraEngine使用它解读打印机配置参数的JSON文件 |
|
clipper |
C++库,一个用于二维图形裁剪与偏移等功能的算法库,CuraEngine对模型上切出来的所有切片调用此库进行二维图形操作 |
在编译CuraEngine软件时也可不启用Arcus与protobuf库,这样编译出来的软件将导致Cura无法调用它,而只能单独使用。 CuraEngine软件命令行接口
CuraEngine是一个控制台程序,在cmd中运行CuraEngine help后,将打印其用法信息:
usage:
CuraEngine help
Show thishelp message
CuraEngine connect<host>[:<port>] [-j <settings.def.json>]
--connect<host>[:<port>]
Connect to<host> via a command socket,
instead ofpassing information via the command line
-j<settings.def.json>
Loadsettings.json file to register all settings and their defaults
-v
Increasethe verbose level (show log messages).
-m<thread_count>
Set thedesired number of threads. Supports only a single digit.
CuraEngine slice[-v] [-p] [-j <settings.json>] [-s<settingkey>=<value>] [-g] [-e<extruder_nr>] [-o<output.gcode>] [-l <model.stl>] [--next]
-v
Increasethe verbose level (show log messages).
-m<thread_count>
Set the desired number of threads.
-p
Logprogress information.
-j
Loadsettings.def.json file to register all settings and their defaults.
-s<setting>=<value>
Set asetting to a value for the last supplied object,
extruder train, or general settings.
-l<model_file>
Load an STLmodel.
-g
Switchsetting focus to the current mesh group only.
Used forone-at-a-time printing.
-e<extruder_nr>
Switchsetting focus to the extruder train with the given number.
--next
Generategcode for the previously supplied mesh group and append that to
the gcodeof further models for one-at-a-time printing.
-o<output_file>
Specify afile to which to write the generated gcode.
The settings are appended to the last supplied object:
CuraEngine slice [general settings]
-g [currentgroup settings]
-e0[extruder train 0 settings]
-lobj_inheriting_from_last_extruder_train.stl [object settings]
--next[next group settings]
... etc.
In order to load machine definitions from customlocations, you need to create the environment variable CURA_ENGINE_SEARCH_PATH,which should contain all search paths delimited by a (semi-)colon.
上面打印了三种命令行接口,实际上读其源代码发现有四种接口的,只是第四种适合于开发者使用。
下面罗列CuraEngine的四种命令行调用接口:
|
参数 |
说明 |
|
help |
第一种接口用法。打印上面的帮助信息。 |
|
connect |
第二种接口用法。在Cura中执行切片功能时就是这种用法。典型的调用方式是:CuraEngine.exe connect 127.0.0.1:49674 -j “d:Program FilesUltimaker Cura 3.3resourcesdefinitionsfdmprinter.def.json” “” 注意上面并没有传递stl文件之类的参数,模型数据是通过socket传递的,也即上面提到的Arcus与Protobuf库提供的功能。-j指定打印机的json文件。 |
|
slice |
第三种用法。不是通过Cura调用,直接传递stl模型文件等参数,进行切片操作。 CuraEngine slice[-v] [-p] [-j <settings.json>] [-s<settingkey>=<value>] [-g] [-e<extruder_nr>] [-o<output.gcode>] [-l <model.stl>] [--next] 这种方式的命令行参数比较多,具体的例子以后提供。这里再提供一个通过阅读代码发现的一个用法:-v 可以打印出日志信息,但不会打印调试信息,当你要更多的输出日志信息时,可以连写两个-v参数。 |
|
analyse |
第四种用法,不看源代码是不知道这个用法的,主要给开发者用。可以输出打印机设置json文件中的信息。调用方法:CuraEngineanalyse[json][output.gv][engine_settings]-[p|i|e|w] p=showparent-childrelations i=show inheritance function e=show error functions w=show warning functions 示例:CuraEngine analyse /home/cubetan/code/fdmprinter.def.json /home/cubetan/code/output.gv -p -i -e -w 生成的output.gv文件可通过dot程序创建一个图片文件,如dot output.gv > abc.png |
Cura软件代码总体评价
Cura软件新版本根据 https://github.com/Ultimaker/Cura 中的描述:
This is the new, shiny frontend for Cura. Check daid/LegacyCurafor the legacy Cura that everyone knows and loves/hates. We re-worked the whole GUI code at Ultimaker, because the old code started to become unmaintainable.
Cura代码做了全部重写,以前用的是Python下的wxWidgets实现图形界面,实在维护不下去了,只好重写。现在用的是PyQt+QUICK实现,Cura的代码可读性不错,注释量偏少。阅读此代码如果不深究三维渲染,则需要对Python,Qt,QML,QUICK有一定基础,否则还需要深入研究Uranium(https://github.com/Ultimaker/Uranium)。
CuraEngine为了追求切片效率,代码是全部使用C++编写,代码可读性很好,注释较多,也能发现一些设计缺陷,以后会提到。在Windows下使用VC编译器编译不了,需要修改代码,我是在Ubuntu系统下编译的。CuraEngine是一个控制台程序,代码的主线逻辑非常简单,从main函数入手,顺着slice命令行调用模式的流程往下看,可很快了解代码顶层的设计实现。