一、Consul介绍
1.1Consul是什么
Consul 是 HashiCorp 公司推出的开源工具,Consul 由 Go 语言开发,部署起来非常容易,只需要极少的可执行程序和配置文件,具有绿色、轻量级的特点。Consul 是 分布式的、高可用的、 可横向扩展的 用于实现分布式系统的服务发现与配置。
1.2 Consul 特点
- 服务发现(Service Discovery): Consul 提供了通过 DNS 或者 HTTP 接口的方式来注册服务和发现服务。一些外部的服务通过Consul很容易的找到它所依赖的服务。
- 健康检查(Health Checking): Consul 的 Client 可以提供任意数量的健康检查,既可以与给定的服务相关联,也可以与本地节点相关联。操作员可以使用这些信息来监视集群的健康状况,服务发现组件可以使用这些信息将流量从不健康的主机路由出去。
- Key/Value存储: 应用程序可以根据自己的需要使用 Consul 提供的 Key/Value 存储。Consul 提供了简单易用的 HTTP 接口,结合其他工具可以实现动态配置、功能标记、领袖选举等等功能。
- 安全服务通信: Consul 可以为服务生成和分发 TLS 证书,以建立相互的 TLS连接。意图可用于定义允许哪些服务通信。服务分割可以很容易地进行管理,其目的是可以实时更改的,而不是使用复杂的网络拓扑和静态防火墙规则。
- 多数据中心: Consul 支持开箱即用的多数据中心. 这意味着用户不需要担心需要建立额外的抽象层让业务扩展到多个区域。
1.3 Consul的使用场景
Consul 的应用场景包括服务发现、服务隔离、服务配置:
- 服务发现场景中 consul 作为注册中心,服务地址被注册到 consul 中以后,可以使用 consul 提供的 DNS、HTTP 接口查询,consul 支持 health check。
- 服务隔离场景中 consul 支持以服务为单位设置访问策略,能同时支持经典的平台和新兴的平台,支持 TLS 证书分发,service-to-service加密。
- 服务配置场景中 consul 提供 key-value 数据存储功能,并且能将变动迅速地通知出去,借助 Consul 可以实现配置共享,需要读取配置的服务可以从 Consul 中读取到准确的配置信息。
- Consul 可以帮助系统管理者更清晰的了解复杂系统内部的系统架构,运维人员可以将 Consul 看成一种监控软件,也可以看成一种资产(资源)管理系统。
二、Consul应用
2.1 安装 Consul
这里我们采用 Docker 形式安装:
# 拉取镜像
docker pull consul
# 创建容器
docker run --name consul -d -p 8500:8500 -p 8600:8600/udp  consul
2.2 创建 consul-client 模块
- 新建 consul-client 模块 添加相关依赖:
<properties>
    <java.version>1.8</java.version>
    <project.build.sourceEncoding>UTF-8</project.build.sourceEncoding>
    <project.reporting.outputEncoding>UTF-8</project.reporting.outputEncoding>
    <spring-boot.version>2.3.0.RELEASE</spring-boot.version>
    <spring-cloud.version>Hoxton.SR4</spring-cloud.version>
</properties>

<dependencyManagement>
    <dependencies>
        <dependency>
            <groupId>org.springframework.cloud</groupId>
            <artifactId>spring-cloud-dependencies</artifactId>
            <version>${spring-cloud.version}</version>
            <type>pom</type>
            <scope>import</scope>
        </dependency>
        <dependency>
            <groupId>org.springframework.boot</groupId>
            <artifactId>spring-boot-dependencies</artifactId>
            <version>${spring-boot.version}</version>
            <type>pom</type>
            <scope>import</scope>
        </dependency>
    </dependencies>
</dependencyManagement>

<dependencies>
    <dependency>
        <groupId>org.springframework.boot</groupId>
        <artifactId>spring-boot-starter-web</artifactId>
    </dependency>
    <dependency>
        <groupId>org.springframework.cloud</groupId>
        <artifactId>spring-cloud-starter-consul-discovery</artifactId>
    </dependency>
	<dependency>
   		<groupId>org.springframework.boot</groupId>
    	<artifactId>spring-boot-starter-actuator</artifactId>
	</dependency>
    <dependency>
        <groupId>org.springframework.boot</groupId>
        <artifactId>spring-boot-starter-test</artifactId>
        <scope>test</scope>
    </dependency>
</dependencies>
- 在配置文件
resources/application. yml中添加相关配置:
server:
  # 指定运行端口
  port: 8800

spring:
  application:
    # 指定服务名称
    name: consul-client

  cloud:
    consul:
      # 配置服务IP
      host: 192.168.205.10
      # 配置端口
      port: 8500
      discovery:
        # 注册时使用IP而不是hostname
        prefer-ip-address: true

management:
  endpoint:
    health:
      # 显示应用健康信息
      show-details: always
  endpoints:
    web:
      exposure:
        include: "*"
- 在启动类上添加 @EnableDiscoveryClient 注解
@EnableDiscoveryClient
@SpringBootApplication
public class ConsulClientApplication {

    public static void main(String[] args) {
        SpringApplication.run(ConsulClientApplication.class, args);
    }

}
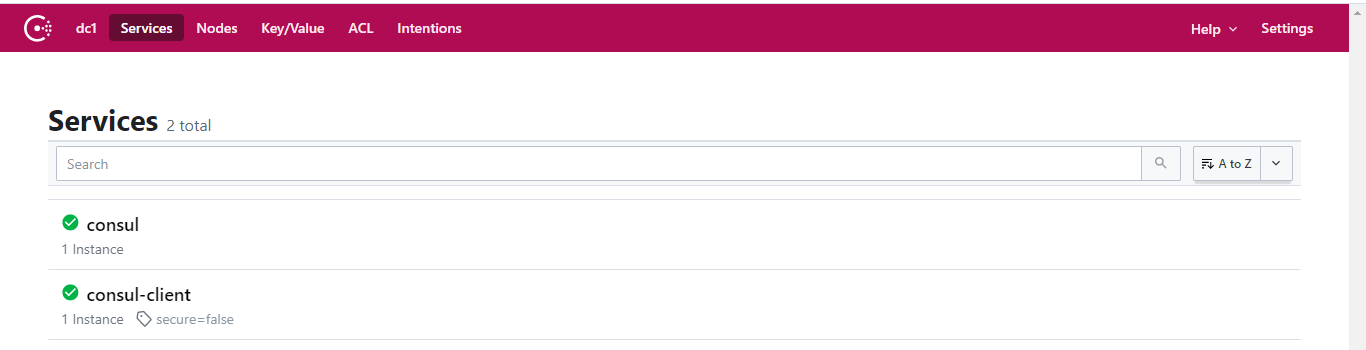
- 启动应用,访问 http://192.168.205.10:8500 控制台是否注册成功