实验环境:
192.168.200.111 nginx主+tomcat
192.168.200.112 nginx备+tomcat
在111和112上安装tomcat的目的只是为了测试
也可以在其他两台服务器上安装tomcat
模式一:双机 主从模式
在111和112上首先安装tomcat
yum -y ipvsadm keepalived
源码安装nginx
安完启动服务(省略)
111和112的配置

112的就修改state BACKUP
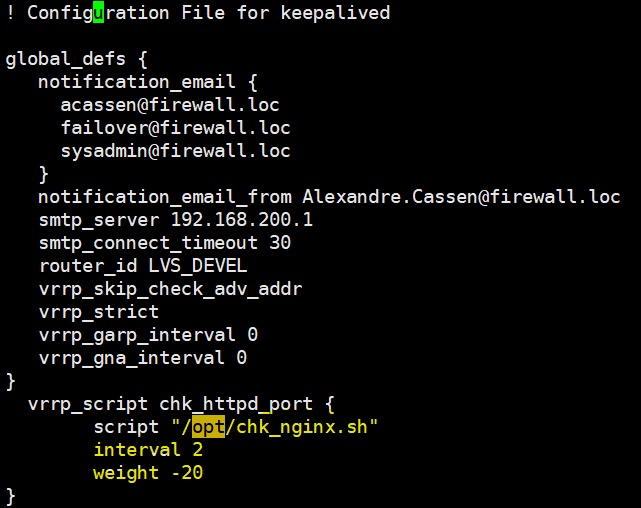
vrrp_script chk_http_port {
script "/opt/chk_nginx.sh"
interval 2
weight -20
}
[root@localhost ~]# vim /opt/chk_nginx.sh
#!/bin/bash
counter=$(ps -C nginx --no-heading|wc -l)
if [ "${counter}" = "0" ]; then
/usr/local/nginx/sbin/nginx ##如果是yum安装的nginx的话-c 指向配置文件,如果是源码编译的话 可以用这个
sleep 2
counter=$(ps -C nginx --no-heading|wc -l)
if [ "${counter}" = "0" ]; then
/etc/init.d/keepalived stop
fi
fi
chmod 755 /opt/chk_nginx.sh
sh /opt/chk_nginx.sh
vim /usr/local/nginx/conf/nginx.conf
如果是yum安装的nginx 步骤
vim /etc/nginx/conf.d/node1.conf
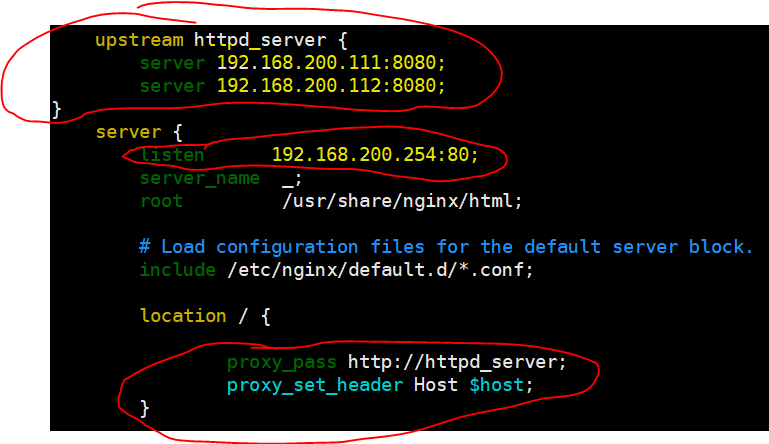
upstream web1 {
server 192.168.200.111:8080;
server 192.168.200.112:8080;
}
server {
listen 192.168.200.254:80;
server_name www.node.com;
index index.html index.htm;
location / {
proxy_set_header Host $host;
proxy_pass http://web1;
}
}
systemctl start keepalived
systemctl start nginx
killall -1 nginx
测试:
关闭nginx,看看nginx是否启动,启动则成功
killall -9 nginx
netstat -lnpt |grep 80
ip a
systemctl stop keepalived
来回测试
echo "111111" > /usr/local/tomcat8/webapps/ROOT/index.jsp (112可以是"22222")


二。双机 双主模式
111:
vrrp_instance VI_2 {
state BACKUP
interface ens32
virtual_router_id 52
priority 90
advert_int 1
authentication {
auth_type PASS
auth_pass 1111
}
virtual_ipaddress {
192.168.200.253
}
track_script {
chk_http_port
}
}
112:
vrrp_instance VI_2 {
state MASTER
interface ens32
virtual_router_id 52
priority 100
advert_int 1
authentication {
auth_type PASS
auth_pass 1111
}
virtual_ipaddress {
192.168.200.253
}
track_script {
chk_http_port
}
}
重启服务
ip a 查看