部署Nginx软件
1)安装支持软件:
Nginx的配置及运行需要pcre、zlib等软件包的支持,因此应预先安装这些软件的开发包(devel),以便提供相应的库和头文件,确保Nginx的安装顺利完成。
[root@nginx~]#systemctl stop firewalld
[root@nginx~]#iptables -F
[root@nginx~]#setenforce 0
[root@nginx~]# yum -y install pcre-devel zlib-devel openssl-devel
2)创建运行用户、组:
Nginx服务程序默认以nobody身份运行,建议为其创建专门的用户账号,以便更准确地控制其访问权限,增加灵活性、降低安全风险。如:创建一个名为nginx的用户,不建立宿主目录,也禁止登录到shell环境。
[root@nginx~]#useradd -M -s /sbin/nologin nginx
指定shell /sbin/noligin 是不允许用户登录的意思
3)编译安装nginx:
释放nginx源码包
[root@nginx~]# tar xf nginx-1.16.0.tar.gz -C /usr/src/
4)配置编译:
[root@nginx~]# cd /usr/src/nginx-1.16.1/
[root@nginxnginx-1.14.2]# ./configure --prefix=/usr/local/nginx --user=nginx --group=nginx --with-http_stub_status_module --with-http_ssl_module --with-http_flv_module --with-http_gzip_static_module && make && make install
注:配置前可以参考:./configure --help给出说明
l --prefix 设定Nginx的安装目录
l --user和--group 指定Nginx运行用户和组
l --with-http_stub_status_module 启用http_stub_status_module模块以支持状态统计
l --with-http_ssl_module 启用SSL模块
l --with-http_flv_module 启用FLV模块,提供寻求内存使用基于时间的偏移量文件
为了使Nginx服务器的运行更加方便,可以为主程序nginx创建链接文件,以便管理员直接执行nginx命令就可以调用Nginx的主程序。
[root@nginxnginx-1.14.2]# ln -s /usr/local/nginx/sbin/nginx /usr/local/bin/
[root@nginxnginx-1.14.2]#ll /usr/local/sbin
lrwxrwxrwx 1 root root 27 12-29 07:24 /usr/local/sbin-> /usr/local/nginx/sbin/nginx
5)Nginx的运行控制:
与Apache的主程序httpd类似,Nginx的主程序也提供了"-t"选项用来对配置文件进行检查,以便找出不当或错误的配置。配置文件nginx.conf默认位于安装目录/usr/local/nginx/conf/目录中。若要检查位于其他位置的配置文件,可使用"-c"选项来指定路径。
[root@nginxconf]#nginx -t
nginx: the configuration file /usr/local/nginx/conf/nginx.conf syntax is ok
nginx: configuration file /usr/local/nginx/conf/nginx.conf test is successful
6)启动、停止Nginx:
直接运行nginx即可启动Nginx服务器,这种方式将使用默认的配置文件,若要改用其他配置文件,需添加"-c 配置文件路径"选项来指定路径。需要注意的是,若服务器中已安装有httpd等其他WEB服务软件,应采取措施(修改端口,停用或卸载其他软件)避免部突。
[root@nginxconf]# netstat -anpt |grep :80
[root@nginxconf]#nginx
[root@nginxconf]# netstat -anpt |grep :80
tcp 0 0 0.0.0.0:80 0.0.0.0:* LISTEN 6810/nginx: master
一。配置Nginx隐藏版本号
在生产环境中,需要隐藏Nginx的版本号,以避免安全漏洞的泄露
需要记住三个命令
1. elinks –dump 本机IP
2. curl -I 本机IP
3. lynx 本机IP
查看ngxin版本及型号
[root@localhost ~]# curl -I 192.168.200.112
HTTP/1.1 200 OK
Server: nginx/1.16.0 ##nginx版本号
1。。若是已安装ngxin的情况修改源码包
####清理已安装包及配置文件
[root@localhost ~]# rm -rf /usr/local/nginx/
[root@localhost ~]# cd /usr/src/nginx-1.16.0/
[root@localhost nginx-1.16.0]# make clean
rm -rf Makefile objs
[root@localhost nginx-1.16.0]# cd
[root@localhost ~]# rm -rf /usr/src/nginx-1.16.0/
####重新安装修改
[root@localhost ~]# tar xf nginx-1.16.0.tar.gz -C /usr/src/
[root@localhost ~]# vim /usr/src/nginx-1.16.0/src/core/nginx.h

修改nginx版本为8.8.8.8
网页版本为乱码
[root@localhost ~]# cd /usr/src/nginx-1.16.0/
[root@localhost nginx-1.16.0]# ./configure --prefix=/usr/local/nginx --user=nginx --group=nginx --with-http_stub_status_module --with-http_ssl_module --with-http_flv_module --with-http_gzip_static_module && make && make install
[root@localhost nginx-1.16.0]# /usr/local/nginx/sbin/nginx
nginx: [emerg] bind() to 0.0.0.0:80 failed (98: Address already in use)
nginx: [emerg] bind() to 0.0.0.0:80 failed (98: Address already in use)
nginx: [emerg] bind() to 0.0.0.0:80 failed (98: Address already in use)
nginx: [emerg] bind() to 0.0.0.0:80 failed (98: Address already in use)
nginx: [emerg] bind() to 0.0.0.0:80 failed (98: Address already in use)
nginx: [emerg] still could not bind()
2.直接修改配置文件
[root@localhost ~]# ln -s /usr/local/nginx/conf/nginx.conf /etc/nginx.conf ##因为需要经常需要修改这个配置文件所以做个软链接方便
[root@localhost ~]# vim /etc/nginx.conf
28行添加 :
server_tokens off;
[root@localhost ~]# killall -1 nginx
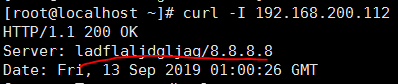
[root@localhost ~]# curl -I 192.168.200.112
HTTP/1.1 200 OK
Server: nginx ###Server变成了nginx,隐藏成功
Date: Fri, 13 Sep 2019 01:07:52 GMT
测试成功
如果php配置文件中配置了 fastcgi_param SERVER_SOFTWARE 选项,则编辑php-fpm配置文件,将fastcgi_param SERVER_SOFTWARE 对应值修改为fastcgi_param SERVER_SOFTWARE nginx;
二。修改Nginx用户与组
Nginx运行时进程需要有用户与组身份的支持,以实现对网站文件读取时进行访问控制。Nginx默认使用nobody用户账号与组账号,一般需要修改。
前面基本修改
[root@localhost ~]# nginx -t
nginx: the configuration file /usr/local/nginx/conf/nginx.conf syntax is ok
nginx: configuration file /usr/local/nginx/conf/nginx.conf test is successful
[root@localhost ~]# killall -1 nginx
[root@localhost ~]# ps -aux |grep nginx
root 34425 0.0 0.1 47544 1956 ? Ss 08:58 0:00 nginx: master process nginx
nginx 34763 0.0 0.1 50088 2004 ? S 09:26 0:00 nginx: worker process ##配置文件worker_processes 修改的是2 所以有两个进程
nginx 34764 0.0 0.1 50088 2004 ? S 09:26 0:00 nginx: worker process ##
root 34768 0.0 0.0 112656 972 pts/1 R+ 09:26 0:00 grep --color=auto nginx
三。配置Nginx网页缓存时间
当Nginx将网页数据返回给客户端后,可设置资源在客户端缓存的时间,以方便客户端在日后进行相同内容的请求直接返回,以避免重复请求,加快了访问速度,一般针对静态网页进行设置,对动态网页不用设置缓存时间
方法: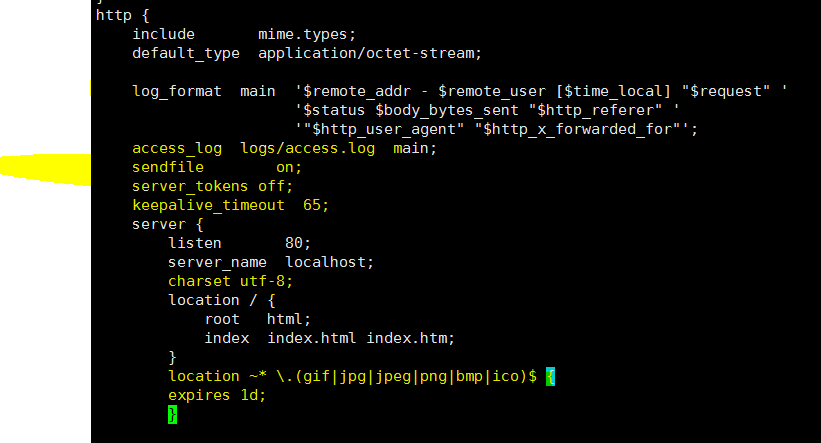
expires 1d; ##缓存时间为一天
[root@localhost ~]# nginx -t
nginx: the configuration file /usr/local/nginx/conf/nginx.conf syntax is ok
nginx: configuration file /usr/local/nginx/conf/nginx.conf test is successful
[root@localhost ~]# killall -1 nginx
测试:
[root@localhost ~]# cd /usr/local/nginx/html/
[root@localhost html]# ls
50x.html index.html
[root@localhost html]# rz
[root@localhost html]# ls
50x.html index.html linux.jpg
[root@localhost html]# vim index.html
<img src="linux.jpg">

在</body> 内添加
[root@localhost html]# killall -1 nginx
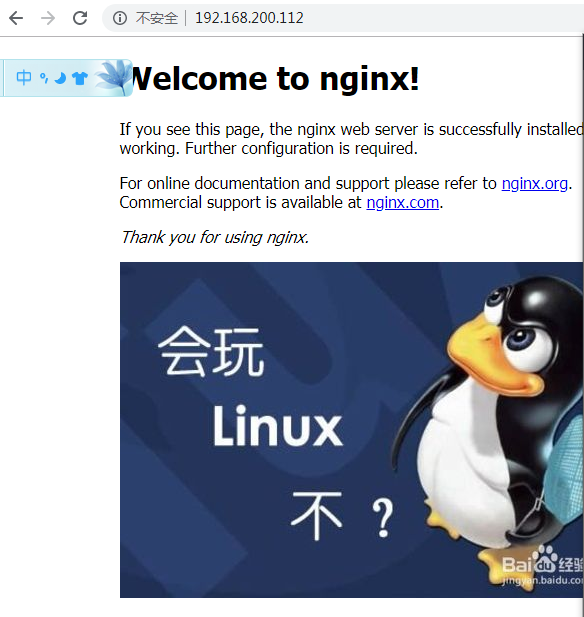

在谷歌浏览器中按F12 出现这个,很明显图片加载时间比文字加载时间长

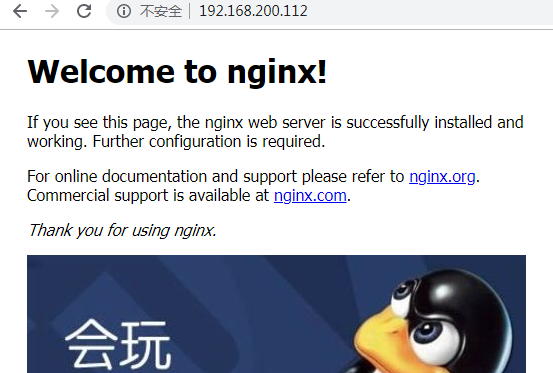
第二次加载时间为0,说明已经被缓存,执行成功!
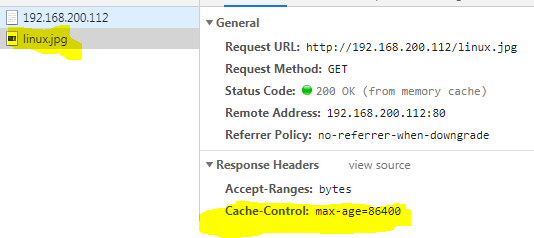
查看信息,最大缓存时间86400s=1D,完成
有个技巧Ctrl+F5刷新,图片不从缓存中取
八。实现Ngnxin日志切割
需要用脚本实现
nginx;
#!/bin/bash
#fenge.sh
datetime=$(date -d "-1 day" "+%Y%m%d") ##前一天的年月日
log_path="/usr/local/nginx/logs" ##Nginx的日志文件
pid_path="/usr/local/nginx/logs/nginx.pid" ##Nginx进程号
[ -d $log_path/backup ] || mkdir -p $logs_path/backup ##-d判断是不是目录
if [ -f $pid_path ];then ##-f判断是不是文件
mv $log_path/access.log $log_path/backup/access.log-$datetime ##移动到backup下并以时间戳来命名
kill -USR1 $(cat $pid_path) ##产生新的日志文件
find $log_path/backup -mtime +30 | xargs rm - f ##找出backup中30天前改动过的文件 ,并删除,意思就是指保留30的日志文件
else
echo "Error,Nginx is not working!" | tee -a /var/log/messages ##如果没有pid号说明nginx为启动
fi
[root@localhost ~]# bash /opt/fenge.sh
[root@localhost ~]# ls /usr/local/nginx/logs/backup/
access.log-20190912
成功
[root@localhost ~]# killall -9 nginx
[root@localhost ~]# rm -rf /usr/local/nginx/logs/nginx.pid ##必须删掉pid号否则报错
[root@localhost ~]# bash /opt/fenge.sh
Error,Nginx is not working!
[root@localhost ~]# nginx
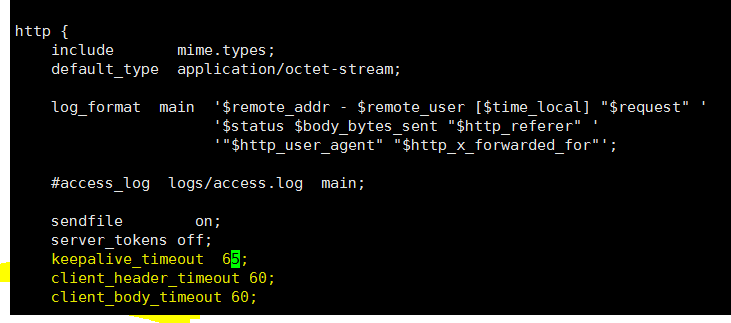
四。配置Nginx实现连接超时
在企业网站中,为了避免同一个客户长时间占用连接,造成服务器浪费,可以设置相应的连接超时参数,实现控制连接访问时间
keepalived_timeout:设置连接保持超时时间,一般只可设置该参数,默认为65秒,可根据网站的情况设置,或者关闭,可在http段,server段,或者location段设置
client_header_timeout:指定等待客户端发送请求头的超时时间。
Client_dody_timeout:设置请求体读取超时时间
注意:若出现超时,会出现408报错
[root@localhost logs]# vim /etc/nginx.conf
[root@localhost logs]# killall -1 nginx
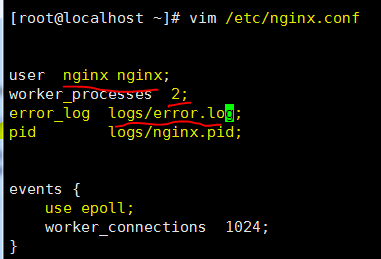
五。更改Nginx运行进程数
在高并发场景,需要启动更多的ngin进程以保证快速影响,以处理用户的请求,避免造成阻塞
修改配置文件的worker_processes参数,一般设置为CPU的个数或者核数的2倍
[root@localhost logs]# grep 'core id' /proc/cpuinfo |uniq |wc -l ##查看CPU内核个数
1
[root@localhost ~]# vim /etc/nginx.conf ##
worker_processes 2;
worker_cpu_affinity 01 10; ##CPU进程核心分配 如果是四核orker_processes 4; 那么就是0001 0010 0100 1000
[root@localhost logs]# killall -1 nginx
六。配置Nginx实现网页压缩功能
Nginx的nginx_http_gzip_module压缩模块提供了对文件内容压缩的功能,允许nginx服务器将输出内容发送到客户端之前进行压缩,以节约网站带宽,提升用户的访问体验,模块默认已经安装
在 http 中添加
[root@localhost ~]# vim /etc/nginx.conf
gzip on; ##开启gzip压缩输出
gzip_min_length 1k; ##用于设置允许压缩的页面最小字节数
gzip_buffers 4 16k; ##表示申请4个单位为16k的内存作为压缩结果流缓存,默认值是申请与原始数据大小相同的内存空间来储存gzip压缩结果
gzip_http_version 1.1; ##设置识别http协议版本,默认是1.1
gzip_comp_level 2; ##gzip压缩比,1-9等级
gzip_types text/plain test/jiavascript application/x-javasciript text/css
text/xml application/xml application/xml+rss; ##压缩类型,是就对哪些网页文档启用压缩功能
[root@localhost logs]# killall -1 nginx

七。配置Nginx实现防盗链功能
实验环境:
资源主机 www.source.com 192.168.200.111
盗链主机 www.steal.com 192.168.200.112
首先登录192.168.200.111复制图片链接地址
修改112的inxde.html
添加<img src="http://192.168.200.111/linux.jpg">

修改物理机的host文件
资源主机111设置防盗链
location ~* .(wma|wmv|asf|mp3|mmf|zip|rar|jpg|gif|png|swf|flv)$ {
valid_referers none blocked *.source.com source.com; ##信任的网站是*.source.com
if ($invalid_referer) {
rewrite ^/ http://www.source.com/error.txt; ##不信任的网站让他们访问html下得error.txt
}
valid_referers:设置信任网站
none:浏览器中referer为空的情况,就直接在浏览器访问图片
blocked :referer不为空的情况,但是值被代理或防火墙删除了,这些值不以http://或https://开头
[root@localhost ~]# vim /usr/local/nginx/html/error.txt
<h1>禁止盗链</h1>
[root@localhost ~]# killall -1 nginx
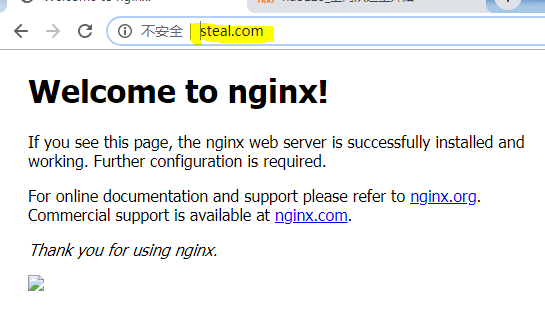
盗链设置成功
八。对FPM模块进行参数优化
FPM优化参数:
pm 使用哪种方式启动fpm进程,可以说static和dynamic,前者将产生固定数量的fpm进程,后者将以动态的方式产生fpm进程
pm.max._children static方式下开启的fpm进程数
pm.start_servers 动态方式下初始的fpm进程数量
pm.min_spare_servers 动态方式下最小的fpm空闲进程数
pm.max_spare_servers 动态方式下最大的fpm空闲进程数
#vim /usr/local/php5/etc/php-fpm.conf
pm = dynamic
pm = start_servers =5
pm.min_spare_servers=2
pm.max_spare_servers =8
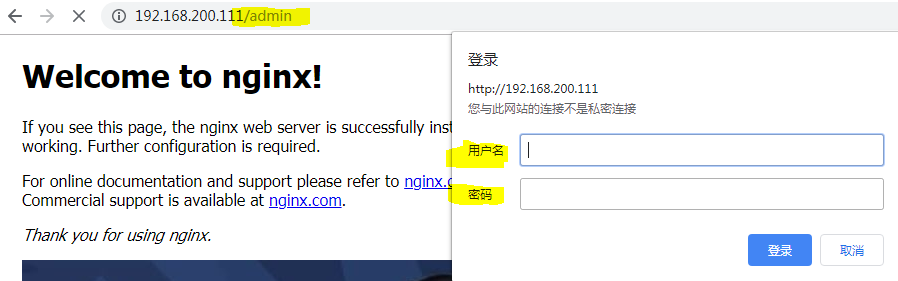
九。Nginx为目录添加访问控制
用户访问控制:使用apche的htpasswd 来创建密码文件
基本认证(基准认证)
摘要认证
[root@localhost ~]# yum -y install httpd-tools
[root@localhost ~]# htpasswd -c /usr/local/nginx/.user crushlinux ##这个是用户
New password:
Re-type new password:
Adding password for user crushlinux
[root@localhost ~]# cat /usr/local/nginx/.user
crushlinux:$apr1$Z1NC7BgP$2m8JBWCxCD7Qa7KQulL1m/
注意:第一次创建用户可以用-c 第二次创建就不需要创建了,若是还用-c 那么后面的用户就把前面的用户替代了
location /admin {
stub_status on;
access_log off;
auth_basic "Nginx Admin" ; ##认证方式基本认证
auth_basic_user_file /usr/local/nginx/.user; ##用户所存的位置目录
}
[root@localhost ~]# killall -1 nginx
客户端地址访问控制
location /admin {
stub_status on;
access_log off;
auth_basic "Nginx Status" ; ##认证方式基本认证
auth_basic_user_file /usr/local/nginx/con/.user; ##用户所存的位置目录
allow 192.168.200.0/24; ##允许哪个网段登录(可以不填,这样的话什么网段都可以登录)
deny 192.168.200.100; ##拒绝这个IP地址访问
}
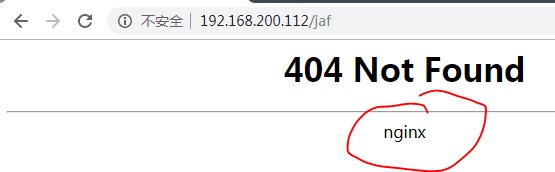
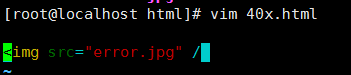
十。自定义错误页面


换个404界面,上传到html目录下

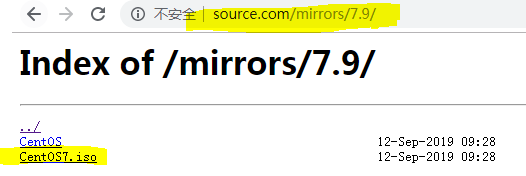
十一。自动索引
修改配置文件
location /mirrors {
autoindex on;
}
killall -1 nginx
[root@localhost html]# mkdir mirrors
[root@localhost html]# cd mirrors/
[root@localhost mirrors]# mkdir {3..9}.{1..9}
[root@localhost mirrors]# cd 7.9/
[root@localhost 7.9]# touch CentOS7.iso

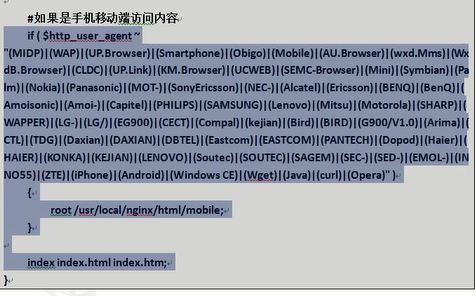
十二。通过UA实现手机端和电脑端的分离
[root@localhost html]# mkdir web mobile
[root@localhost html]# mv index.html web/
[root@localhost html]# vim mobile/index.html
www.mobile.com
vim /etc/nginx.conf
location / {
root /usr/local/nginx/html/web;
}
root下面添加
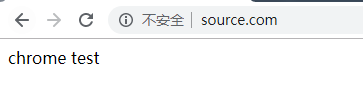
实验模拟:不同浏览器访问到不同的页面:
[root@localhost html]# mkdir chrome msie
[root@localhost html]# cat chrome/index.html
chrome test
[root@localhost html]# cat msie/index.html
msie test
修改配置文件
location / {
if ($http_user_agent ~ Chrome) { ##浏览器内核版本为Chrome,谷歌为例
root /usr/local/nginx/html/chrome;
}
if ($http_user_agent ~ WOW64) { ##这个是[root@localhost ~]# tail -f /usr/local/nginx/logs/access.log 刷新IE浏览器是出现的版本可以更改
root /usr/local/nginx/html/msie;
}
index index.html index.htm;
}

十四。Nginx平滑升级
nginx -v(小写) 查看nginx版本
nginx -V (大写)编译模块
假如我现在安装的时nginx-1.14.0版本 ##原来的安装路径也是/usr/src
我要升级成nginx-1.16.0版本
[root@localhost ~]# tar xf nginx-1.16.0.tar.gz -C /usr/src/
[root@localhost ~]# cd /usr/src/nginx-1.16.0/
[root@localhost nginx-1.16.0]# ./configure --prefix=/usr/local/nginx --user=nginx --group=nginx --with-http_stub_status_module --with-http_ssl_module --with-http_flv_module --with-http_gzip_static_module && make
注意:不要make install
[root@localhost nginx-1.16.0]# cd /usr/local/nginx/sbin/
[root@localhost sbin]# mv nginx nginx.old
[root@localhost sbin]# cd - ##返回上一路径
/usr/src/nginx-1.16.0
[root@localhost nginx-1.16.0]# cp objs/nginx /usr/local/nginx/sbin/
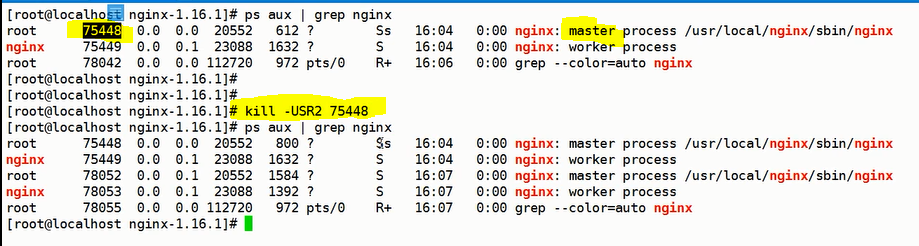
出现两个主进程前面的是旧的,后面的是新的

-WINCH杀死worker
-QUIT杀死master
nginx -v查看版本 完成