在IDEA中对Spring Boot项目进行远程debug调试
ideau版本:2019.1
tomcat版本:9.1.41,配置ip:192.168.2.234,端口:8080
打包方式:war
一、使用命令运行tomcat中的网站
1、在ideau中配置远程调试参数
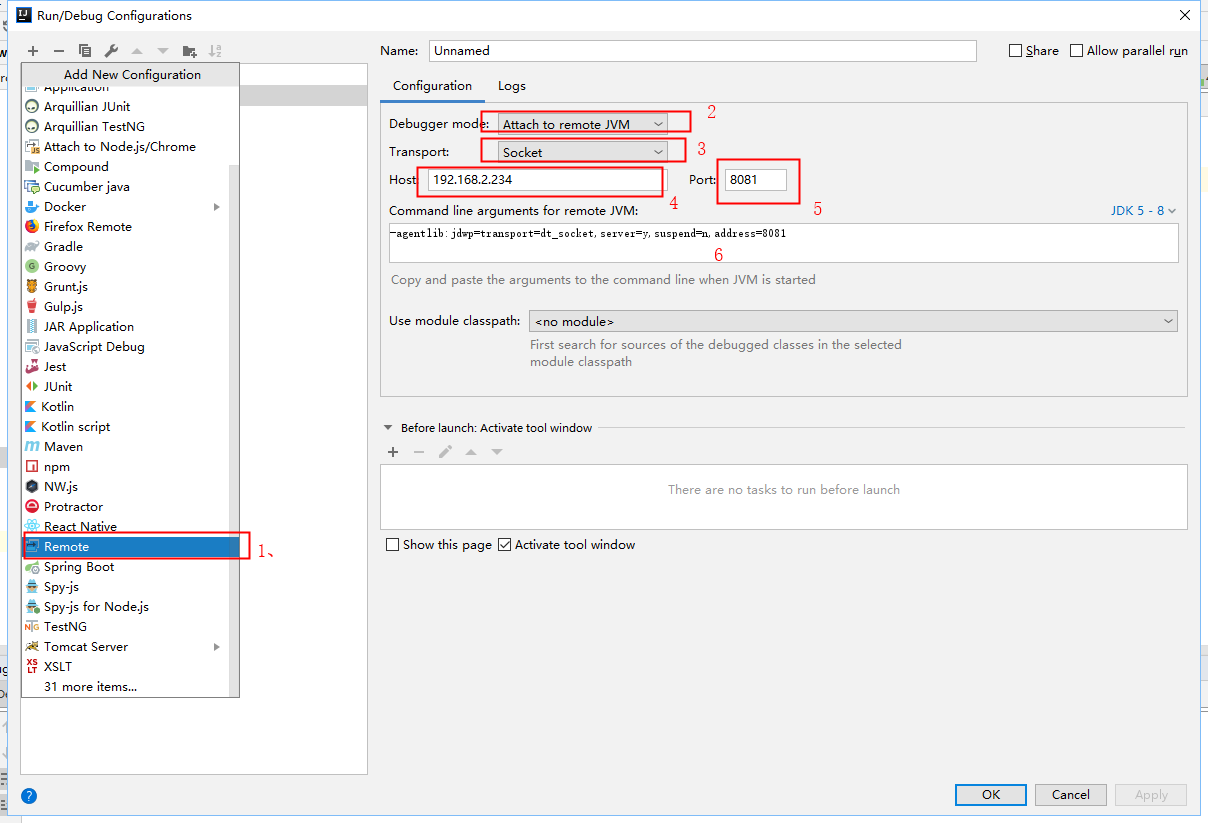
这里的端口填写调试端口。
将第六步中的参数复制出来,等下使用:'-agentlib:jdwp=transport=dt_socket,server=y,suspend=n,address=8081'
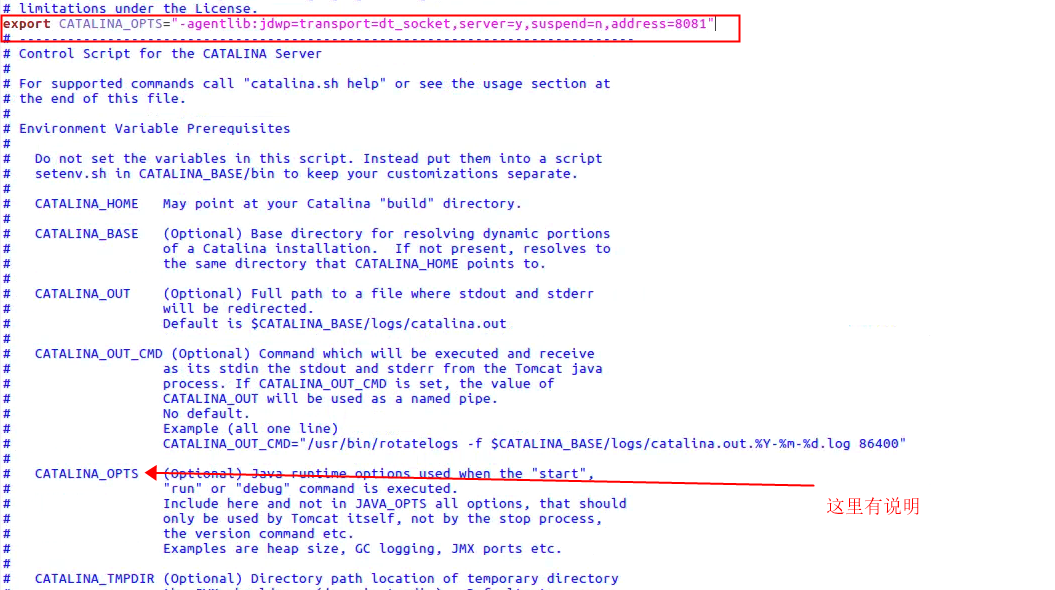
2、在服务器的tomcat的bin下中打开catalina.sh文件
在文件开始处添加:'export CATALINA_OPTS="-agentlib:jdwp=transport=dt_socket,server=y,suspend=n,address=8081"'
3、tomcat配置完成以后,启动:'./startup.sh'
4、启动完成后,在ideau中点击调试,连接成功后在ideau的console中打印'Connected to the target VM, address: '192.168.2.234:8081', transport: 'socket''表示成功
注意 tomcat配置的端口是8080,而调试使用的端口是8081
基本命令
使用命令查看端口的使用情况:'netstat -an | grep 8081'
在启动tomcat,而没有调试时, 是这样的:

调试连接成功后:

如果连接失败,可以查看下8081端口是被哪个进程占用:'lsof -i:8081'
删除该进程:'kill -9 xxx'
二、使用脚本运行网站
使用脚本的话,不需要修改catalina.sh文件。脚本内容:
#!/bin/bash

export BUILD_ID=dontKillMe
pid=`ps -ef | grep /home/mantishell/bldc.war | grep -v grep | awk '{print $2}'`
if [ -n "$pid" ]
then
kill -9 $pid
fi
#指定最后编译好的jar存放的位置
www_path=/home/mantishell

#Jenkins中编译好的jar名称
jar_name=bldc.war
#使变量生效
source /etc/profile
#进入最后指定存放jar的位置
cd  ${www_path}
war_path=${www_path}/${jar_name}
config_path=${www_path}/config

echo "开始启动"

nohup java -jar -Xdebug -Xrunjdwp:transport=dt_socket,server=y,suspend=n,address=8081 -Dfile.encoding=UTF-8 -Dcas.standalone.config="$config_path" "$war_path" > nohup.out 2>&1 &
> nohup.out
tail -f nohup.out
注意:启动命令上需要加上下面指令 才能使用远程调试
-Xdebug -Xrunjdwp:transport=dt_socket,server=y,suspend=n,address=8081
linux命令:
uptime查看服务器运行时间