android学习11"/>
android学习1
1 安装
- google为android开发准备了方便的环境,我的系统是debian6.0 stable,软件比较老, 在安装android开发环境前,还担心系统不支持,其实担心是多余的。
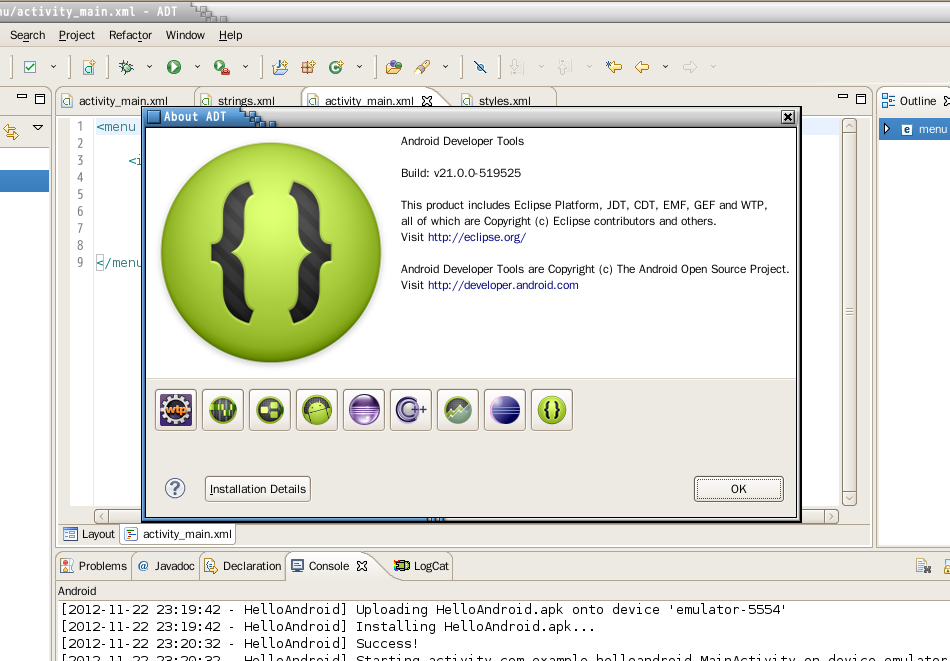
- 首先安装java,debian系统自带的java6.0够用了,ADT(Android Developer Tools),地 址是:http://developer.android.com/sdk/index.html,挑选适合自己的版本吧,我选 的是adt-bundle-linux-x86_64.zip,下载需要时间,耐心等待:),然后解压,我解压 到/opt/下,运行/opt/adt-bundle-linux/eclipse/eclipse,ok,成功。安装的 andorid版本是4.2,目前还没有android手机,先用软件模拟吧。
2 第一个程序
今天建一个最简单的程序hello world。
- 建立项目,点击File->New->Other,选择Android Application Project,在 Application Name处填写:HelloAndroid,剩下的默认选择,下一步,Configure Project,也选择默认,下一步,Configure Launcher Icon,下一步,Create Activity,选择第一项:BlankActivity,下一步,New Blank Activity,输入 "Activity Name", "Layout Name",保持不变,点击Finish,程序建立成功。程序进入 后,显示activity_main.xml设计的主界面,,我们暂时用默认界面。

- 运行一下,点击Run->Run As->Android Application,用模拟机运行。
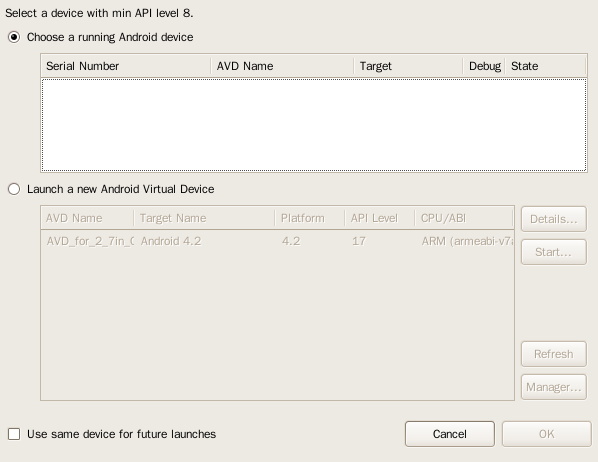
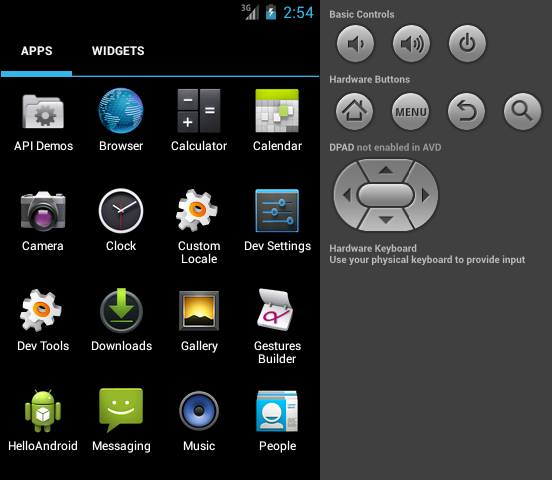
- 模拟比较慢,Console中显示模拟过程,稍等一下,一个完整的Andorid手机显示出来 了,基本框架都有,你可以操纵试试,我们编写的程序HelloAndroid也出现apps管理中。
[2012-11-23 10:57:05 - HelloAndroid] ------------------------------
[2012-11-23 10:57:05 - HelloAndroid] Android Launch!
[2012-11-23 10:57:05 - HelloAndroid] adb is running normally.
[2012-11-23 10:57:05 - HelloAndroid] Performing com.example.helloandroid.MainActivity activity launch
[2012-11-23 10:57:10 - HelloAndroid] Launching a new emulator with Virtual Device 'AVD_for_3_2in_HVGA_slider_ADP1'
[2012-11-23 10:57:10 - Emulator] waitpid(): No child processes
[2012-11-23 10:57:10 - Emulator] Failed to create Context 0x3005
[2012-11-23 10:57:10 - Emulator] emulator: WARNING: Could not initialize OpenglES emulation, using software renderer.
[2012-11-23 10:57:11 - HelloAndroid] New emulator found: emulator-5554
[2012-11-23 10:57:11 - HelloAndroid] Waiting for HOME ('android.process.acore')
to be launched...
[2012-11-23 10:57:51 - HelloAndroid] HOME is up on device 'emulator-5554'
[2012-11-23 10:57:51 - HelloAndroid] Uploading HelloAndroid.apk onto device 'emulator-5554'
[2012-11-23 10:57:51 - HelloAndroid] Installing HelloAndroid.apk...
3 程序分析
- 第一个程序运行成功,我们现在分析一下。
- 程序包结构是:com.example.helloandroid,包内只有一个类:MainActivity,我们先看看:
package com.example.helloandroid;

import android.os.Bundle;
import android.app.Activity;
import android.view.Menu;

public class MainActivity extends Activity {

  @Override
  protected void onCreate(Bundle savedInstanceState) {
    super.onCreate(savedInstanceState);
    setContentView(R.layout.activity_main);
  }

  @Override
  public boolean onCreateOptionsMenu(Menu menu) {
    // Inflate the menu; this adds items to the action bar if it is present.
    getMenuInflater().inflate(R.menu.activity_main, menu);
    return true;
  }

}
- MainActivity.java继承自Activity,内部只有两个函数,均是覆盖Activity的。每一个 Android程序必须继承Activity或其子类,有关Activity生命周期相关的有以下主要函 数,这些函数交给系统调研,今天Activity就了解这些,细节以后再分析。
protected void onCreate(Bundle savedInstanceState);
protected void onStart();
protected void onRestart();
protected void onResume();
protected void onPause();
protected void onStop();
protected void onDestroy();
- MainActivity.java程序很简单,程序建立时,onCreate中加载 R.layout.activity_main资源,onCreateOptionsMenu加载R.menu.activitymain资源, 这两个资源都是int类型,定义在R.java类中,R类不要手动编辑,系统会根据res设置自 动修改,我们看看R.java定义:
package com.example.helloandroid;

public final class R {
    public static final class attr {
    }
    public static final class drawable {
        public static final int ic_launcher=0x7f020000;
    }
    public static final class id {
        public static final int menu_settings=0x7f070000;
    }
    public static final class layout {
        public static final int activity_main=0x7f030000;
    }
    public static final class menu {
        public static final int activity_main=0x7f060000;
    }
    public static final class string {
        public static final int app_name=0x7f040000;
        public static final int hello_world=0x7f040001;
        public static final int menu_settings=0x7f040002;
    }
    public static final class style {
        /**
        Base application theme, dependent on API level. This theme is replaced
        by AppBaseTheme from res/values-vXX/styles.xml on newer devices.


            Theme customizations available in newer API levels can go in
            res/values-vXX/styles.xml, while customizations related to
            backward-compatibility can go here.


        Base application theme for API 11+. This theme completely replaces
        AppBaseTheme from res/values/styles.xml on API 11+ devices.

 API 11 theme customizations can go here.

        Base application theme for API 14+. This theme completely replaces
        AppBaseTheme from BOTH res/values/styles.xml and
        res/values-v11/styles.xml on API 14+ devices.

 API 14 theme customizations can go here.
         */
        public static final int AppBaseTheme=0x7f050000;
        /**  Application theme.
 All customizations that are NOT specific to a particular API-level can go here.
         */
        public static final int AppTheme=0x7f050001;
    }
}
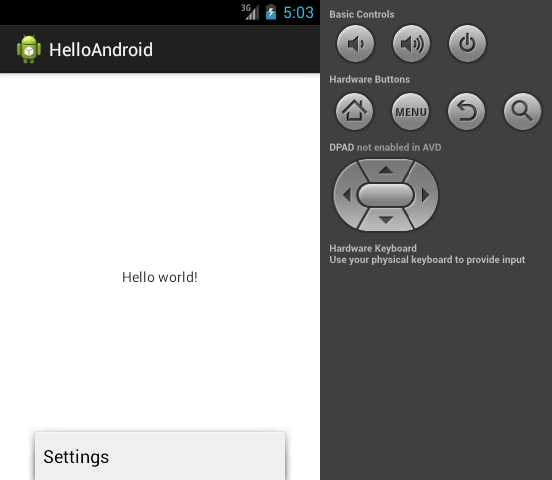
- layout.activity_main和menu.activity_main均是int类型,分别对应工程资源列表 res下layout的activity_main.xml,menu的activity_main.xml。 layout.activity_main.xml中定义了TextView,text是 @string/helloworld,menu.activity_main.xml中定义了item,title是 @string/menusettings,这两个都是字符串,定义在res下values的 strings.xml,strings.xml定义了三个字符串,程序运行后,主界面显示一个TextView 控件,内容是strings.xml中的helloworld(Hello world!),菜单只有一个item,名字是strings.xml 中的menusettings(Settings),
- layout.activity_main.xml
<RelativeLayout xmlns:android="http://schemas.android.com/apk/res/android"
    xmlns:tools="http://schemas.android.com/tools"
    android:layout_width="match_parent"
    android:layout_height="match_parent"
    tools:context=".MainActivity" >

    <TextView
        android:layout_width="wrap_content"
        android:layout_height="wrap_content"
        android:layout_centerHorizontal="true"
        android:layout_centerVertical="true"
        android:text="@string/hello_world" />

</RelativeLayout>
- menu.activity_main.xml
<menu xmlns:android="http://schemas.android.com/apk/res/android" >

    <itemy
        android:id="@+id/menu_settings"
        android:orderInCategory="100"
        android:showAsAction="never"
        android:title="@string/menu_settings"/>

</menu>
- values.strings.xml
<?xml version="1.0" encoding="utf-8"?>
<resources>

    <string name="app_name">HelloAndroid</string>
    <string name="hello_world">Hello world!</string>
    <string name="menu_settings">Settings</string>

</resources>
3.1 修改一下
- 我们修改一下程序的values.strings.xml,看看和分析的是否一样,将appname改 为:firest android,helloworld改为:the machine of awareness,menusetting改 为:first menu,再运行一下程序,程序名应该显示firest android,界面 内容显示the machine of awareness,菜单内容是first menu。

4 小结
- 从第一个程序可以看出,每一个Android程序都是从Activity继承而来,Activity生命周 期由系统统一管理,并从onCreate启动,程序的结构(layout),菜单(menu),数据 (values)均是配置在xml文件中,避免了硬编码。