这里的mybatis知识就不再多说了 直接上代码
1、首先写接口mapper类:
EmployeeMapper.java

//@Mapper或者@MapperScan将接口扫描到扫描装配到容器中;这里在MybatisConfig中使用了@MapperScan
public interface EmployeeMapper {

    public Employee getEmpById(Integer id);

    public void insertEmp(Employee employee);

}

2、创建Employee的映射文件EmployeeMapper.xml
<?xml version="1.0" encoding="UTF-8" ?>
<!DOCTYPE mapper
        PUBLIC "-//mybatis.org//DTD Mapper 3.0//EN"
        "http://mybatis.org/dtd/mybatis-3-mapper.dtd">

<mapper namespace="com.atguigu.spring.mapper.EmployeeMapper">

    <select id="getEmpById" resultType="com.atguigu.spring.bean.Employee">
      select * from employee where id = #{id}
    </select>

    <insert id="insertEmp">
        insert into employee(lastName,email,gender,d_id) values (#{lastName},#{email},#{gender},#{d_id})
    </insert>
</mapper>
3、创建mybatis全局配置文件

暂时先不配置什么
<?xml version="1.0" encoding="UTF-8" ?>
<!DOCTYPE configuration
        PUBLIC "-//mybatis.org//DTD Config 3.0//EN"
        "http://mybatis.org/dtd/mybatis-3-config.dtd">
<configuration>

</configuration>
4、在application.yml或者application.properties中配置mybatis的全局配置文件位置和mapper映射文件的位置
这里以application.yml配置为例:
spring:
  datasource:
    #   数据源基本配置
    username: root
    password: 123
    driver-class-name: com.mysql.cj.jdbc.Driver
    url: jdbc:mysql://localhost:3306/springbootmybatis?serverTimezone=UTC
    type: com.alibaba.druid.pool.DruidDataSource
    #   数据源其他配置
    initialSize: 5
    minIdle: 5
    maxActive: 20
    maxWait: 60000
    timeBetweenEvictionRunsMillis: 60000
    minEvictableIdleTimeMillis: 300000
    validationQuery: SELECT 1 FROM DUAL
    testWhileIdle: true
    testOnBorrow: false
    testOnReturn: false
    poolPreparedStatements: true
    #   配置监控统计拦截的filters,去掉后监控界面sql无法统计,'wall'用于防火墙
    filters: stat,wall
    maxPoolPreparedStatementPerConnectionSize: 20
    useGlobalDataSourceStat: true
    connectionProperties: druid.stat.mergeSql=true;druid.stat.slowSqlMillis=500

#    schema:
#      - classpath:sql/department.sql
#      - classpath:sql/employee.sql
#    initialization-mode: always
mybatis:
  config-location: classpath:mybatis/mybatis-config.xml   #指定mybatis的全局配置文件
  mapper-locations: classpath:mybatis/mapper/*.xml        #指定mapper映射文件
5、创建EmployeeController
@RestController
public class EmployeeController {

    @Autowired
    EmployeeMapper employeeMapper;

    @GetMapping("/emp/id")
    public Employee getEmp(@PathVariable("id") Integer id){
        return employeeMapper.getEmpById(id);
    }
}
6、访问路径进行测试
数据库中的数据:

访问路径: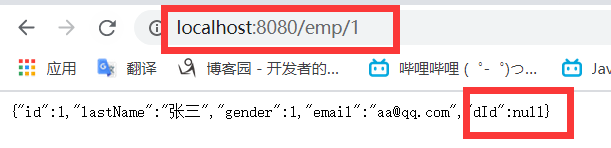
访问成功说明配置成功;但是dId的值为null;因为数据库中的字段名是d_id;而现在也没有开启驼峰命名法
7、开启驼峰命名法
在mybatis全局配置文件开启驼峰命名
<?xml version="1.0" encoding="UTF-8" ?>
<!DOCTYPE configuration
        PUBLIC "-//mybatis.org//DTD Config 3.0//EN"
        "http://mybatis.org/dtd/mybatis-3-config.dtd">
<configuration>
    <settings>
        <!--开启驼峰命名-->
        <setting name="mapUnderscoreToCamelCase" value="true"/>
    </settings>
</configuration>
重启项目,再次访问:
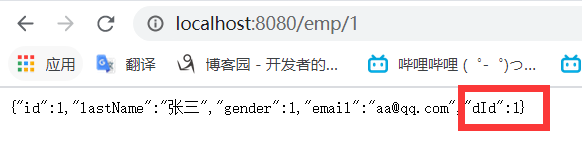
dId有值了,说明驼峰命名配置成功