一、ubuntu16.04虚拟环境安装(python3.5,激活状态)uwsgi问题:
1、问题
pip install uwsgi
Command "/home/lyb/myfile/myenv/bin/python3 -u -c "import setuptools, tokenize;__file__='/tmp/pip-build-yrfo9mta/uwsgi/setup.py';
exec(compile(getattr(tokenize, 'open', open)(__file__).read().replace('
', '
'), __file__, 'exec'))
" install --record /tmp/pip-d5q00h_f-record/install-record.txt --single-version-externally-managed --compile --install-headers /home/lyb/myfile/myenv/include/site/python3.5/uwsgi"
failed with error code 1 in /tmp/pip-build-yrfo9mta/uwsgi/
You are using pip version 8.1.1, however version 9.0.1 is available.
You should consider upgrading via the 'pip install --upgrade pip' command.
pip install --upgrade pip #9.0.1
2、问题
Command "/home/lyb/myfile/myenv/bin/python3 -u -c "import setuptools, tokenize;__file__='/tmp/pip-build-cz663np_/uwsgi/setup.py';
f=getattr(tokenize, 'open', open)(__file__);code=f.read().replace('
', '
');f.close();exec(compile(code, __file__, 'exec'))
" install --record /tmp/pip-2dlsn5h5-record/install-record.txt --single-version-externally-managed --compile --install-headers /home/lyb/myfile/myenv/include/site/python3.5/uwsgi"
failed with error code 1 in /tmp/pip-build-cz663np_/uwsgi/
sudo apt-get install python3-dev
pip install uwsgi #uwsgi-2.0.15
3、测试uwsgi创建test.py
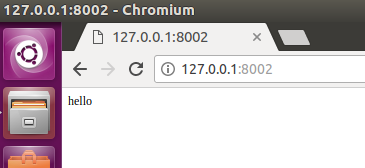
def application(env,start_response):
    start_response('200 OK',[('Content-Type','text/html')])
    return [b'hello']
4、uwsgi运行test.py
(myenv) l@l:~/myfile$ uwsgi --http :8002 --wsgi-file test.py
二、nginx
1、安装
l@l:~/myfile$ apt-get install nginx

E: 无法打开锁文件 /var/lib/dpkg/lock - open (13: 权限不够)
E: 无法对状态列表目录加锁(/var/lib/dpkg/),请查看您是否正以 root 用户运行?
l@l:~/myfile$ sudo apt-get install nginx
E: 无法获得锁 /var/lib/dpkg/lock - open (11: 资源暂时不可用)
E: 无法锁定管理目录(/var/lib/dpkg/),是否有其他进程正占用它?

l@l:~/myfile$ sudo rm /var/cache/apt/archives/lock
l@l:~/myfile$ sudo rm /var/lib/dpkg/lock

l@l:~/myfile$ sudo apt-get install nginx  #注意:没有在虚拟环境中
2、启闭、检查、版本
l@l:~/myfile$ service nginx restart #重启;还有stop、start
l@l:~/myfile$ sudo nginx -t  #检查配置文件是否有语法错误
nginx: the configuration file /etc/nginx/nginx.conf syntax is ok
nginx: configuration file /etc/nginx/nginx.conf test is successful
l@l:~/myfile$ nginx -V
nginx version: nginx/1.10.3 (Ubuntu)
built with OpenSSL 1.0.2g  1 Mar 2016
TLS SNI support enabled
3、修改默认port
该版本配置文件有:/etc/nginx/nginx.conf;/etc/nginx/conf.d/*(目前里面为空);/etc/nginx/sites-available/default(只读)
端口号在default中修改:
sudo gedit /etc/nginx/sites-available/default

4、重启nginx服务

三、部署django+uwsgi+nginx
1、在django项目根目录,创建ini文件(初始化配置文件):
(myenv) l@l:~/myfile/blogproject$ gedit blogproject_uwsgi.ini
[uwsgi]
socket = :8088
chmod-socket = 666

chdir = /home/l/myfile/blogproject  #项目路径

wsgi-file = /home/l/myfile/blogproject/blogproject/wsgi.py  #项目中wsgi.py文件路径

module = blogproject.wsgi

master = true
#主进程

vhost = true
#多站模式

no-site = true
#多站模式不设置入口模块和文件

pythonpath = /home/lyb/myfile/myenv/lib/python3.5/site-packages
#虚拟环境路径,写到django所在位置的上一级目录

enable-threads = true

processes = 2
threads = 2

vacuum = true
py-autoreload = 1
max-requests = 1000
2、在/etc/nginx/conf.d下创建nginx.conf来关联uwsgi
l@l:~/myfile$ sudo gedit /etc/nginx/conf.d/nginx.conf
upstream django {server 127.0.0.1:8088;}

server {
listen    88;
server_name    127.0.0.1;
charset UTF-8;
access_log    /var/log/nginx/blogproject_access.log;
error_log    /var/log/nginx/blogproject_error.log;

client_max_body_size 75M;

location / {
include /etc/nginx/uwsgi_params;
uwsgi_pass django;
uwsgi_read_timeout 2;
}
location /static {
expires 30d;
autoindex on;
add_header Cache-Control private;
alias /home/lyb/myfile/blogproject/static;
}
}
3、重启服务后,在ini文件所在目录运行:
(myenv) l@l:~/myfile/blogproject$ uwsgi --ini blogproject_uwsgi.ini  #出现以下内容即成功
[uWSGI] getting INI configuration from blogproject_uwsgi.ini
*** Starting uWSGI 2.0.15 (64bit) on [Mon Dec 25 23:51:54 2017] ***
compiled with version: 5.4.0 20160609 on 25 December 2017 21:33:54
os: Linux-4.10.0-28-generic #32~16.04.2-Ubuntu SMP Thu Jul 20 10:19:48 UTC 2017
nodename: lyb
machine: x86_64
clock source: unix
detected number of CPU cores: 2
current working directory: /home/lyb/myfile/blogproject
detected binary path: /home/lyb/myfile/myenv/bin/uwsgi
!!! no internal routing support, rebuild with pcre support !!!
chdir() to /home/lyb/myfile/blogproject
your processes number limit is 3712
your memory page size is 4096 bytes
detected max file descriptor number: 1024
VirtualHosting mode enabled.
lock engine: pthread robust mutexes
thunder lock: disabled (you can enable it with --thunder-lock)
uwsgi socket 0 bound to TCP address :8088 fd 3
Python version: 3.5.2 (default, Nov 23 2017, 16:37:01)  [GCC 5.4.0 20160609]
Python main interpreter initialized at 0x1a9ec70
python threads support enabled
your server socket listen backlog is limited to 100 connections
your mercy for graceful operations on workers is 60 seconds
mapped 249168 bytes (243 KB) for 4 cores
*** Operational MODE: preforking+threaded ***
added /home/lyb/myfile/myenv/lib/python3.5/site-packages/ to pythonpath.
WSGI app 0 (mountpoint='') ready in 4 seconds on interpreter 0x1a9ec70 pid: 6279 (default app)
mountpoint  already configured. skip.
*** uWSGI is running in multiple interpreter mode ***
spawned uWSGI master process (pid: 6279)
spawned uWSGI worker 1 (pid: 6281, cores: 2)
spawned uWSGI worker 2 (pid: 6282, cores: 2)
Python auto-reloader enabled
127.0.0.1:88 [pid: 6282|app: 0|req: 1/1] 127.0.0.1 () {50 vars in 934 bytes} [Mon Dec 25 23:52:19 2017] GET / => generated 14762 bytes in 1224 msecs (HTTP/1.1 200) 3 headers in 111 bytes (1 switches on core 0)
127.0.0.1:88 [pid: 6282|app: 0|req: 2/2] 127.0.0.1 () {46 vars in 860 bytes} [Mon Dec 25 23:52:31 2017] GET /post/4/ => generated 13047 bytes in 162 msecs (HTTP/1.1 200) 5 headers in 279 bytes (1 switches on core 1)
127.0.0.1:88 [pid: 6281|app: 0|req: 1/3] 127.0.0.1 () {46 vars in 853 bytes} [Mon Dec 25 23:52:40 2017] GET / => generated 14762 bytes in 358 msecs (HTTP/1.1 200) 3 headers in 111 bytes (1 switches on core 0)

有瑕疵,88端口