apidoc可以根据代码注释生成web api文档,支持大部分主流语言java javascript php coffeescript erlang perl python ruby go...,相对而言,web接口的注释维护起来更加方便,不需要额外再维护一份文档。
apidoc从注释生成静态html网页文档,不仅支持项目版本号,还支持api版本号。
安装
主页: http://apidocjs.com
github: https://github.com/apidoc/apidoc
可以使用npm install apidoc -g进行安装,目前0.12.x/4.0都可以使用。
apidoc支持Grunt,主页 https://github.com/apidoc/grunt-apidoc
- 在项目中使用
npm install grunt-apidoc --save-dev安装。 - 在
Gruntfile.js添加grunt.loadNpmTasks('grunt-apidoc');。 - 配置
grunt task
apidoc: {
      myapp: {
        src: "app/",
        dest: "apidoc/"
      }
}
// 在sails中2和3可以直接添加一个taskmodule.exports = function(grunt) { grunt.config.set('clean', { apidoc: { myapp: { src: "app/", dest: "apidoc/" } } }); grunt.loadNpmTasks('grunt-apidoc'); };
用法
可以在shell中执行apidoc -h就可以看到很多用法。
下面讲讲常用的几个参数。
// 典型用法
apidoc -i api/ -o doc/api [-c ./] -f ".*.js$"

-i 表示输入,后面是文件夹路径
-o 表示输出,后面是文件夹路径
默认会带上-c,在当前路径下寻找配置文件(apidoc.json),如果找不到则会在package.json中寻找 "apidoc": { }
-f 为文件过滤,后面是正则表达式,示例为只选着js文件
  与-f类似,还有一个 -e 的选项,表示要排除的文件/文件夹,也是使用正则表达式
如果项目输入和输出稳定,可以编辑Makefile保存命令,例如:

docs:
    @apidoc -i api/ -o doc/apidoc
之后使用make docs即可生成/更新api文档。
配置
项目配置
apidoc.json示例:
{
  "name" : "mysails",
  "version": "1.0.0",
  "title": "mysails", // 浏览器标题
  "description": "xun's test project"
}
如果放入package.json中,相同的字段可以直接使用package.json的定义,额外的字段放入apidoc下
{
  "name": "mysails",
  "private": true,
  "version": "1.0.0",
  "description": "xun's test project",
  "apidoc": {
    "title": "mysails"
  },
  ...
}
代码注释
apidoc支持如下关键字
@api {method} path [title]
  只有使用@api标注的注释块才会在解析之后生成文档,title会被解析为导航菜单(@apiGroup)下的小菜单
  method可以有空格,如{POST GET}
@apiGroup name
  分组名称,被解析为导航栏菜单
@apiName name
  接口名称,在同一个@apiGroup下,名称相同的@api通过@apiVersion区分,否者后面@api会覆盖前面定义的@api
@apiDescription text
  接口描述,支持html语法
@apiVersion verison
  接口版本,major.minor.patch的形式

@apiIgnore [hint]
  apidoc会忽略使用@apiIgnore标注的接口,hint为描述
@apiSampleRequest url
  接口测试地址以供测试,发送请求时,@api method必须为POST/GET等其中一种

@apiDefine name [title] [description]
  定义一个注释块(不包含@api),配合@apiUse使用可以引入注释块
  在@apiDefine内部不可以使用@apiUse
@apiUse name
  引入一个@apiDefine的注释块

@apiParam [(group)] [{type}] [field=defaultValue] [description]
@apiHeader [(group)] [{type}] [field=defaultValue] [description]
@apiError [(group)] [{type}] field [description]
@apiSuccess [(group)] [{type}] field [description]
  用法基本类似,分别描述请求参数、头部,响应错误和成功
  group表示参数的分组,type表示类型(不能有空格),入参可以定义默认值(不能有空格)
@apiParamExample [{type}] [title] example
@apiHeaderExample [{type}] [title] example
@apiErrorExample [{type}] [title] example
@apiSuccessExample [{type}] [title] example
  用法完全一致,但是type表示的是example的语言类型
  example书写成什么样就会解析成什么样,所以最好是书写的时候注意格式化,(许多编辑器都有列模式,可以使用列模式快速对代码添加*号)

@apiPermission name
  name必须独一无二,描述@api的访问权限,如admin/anyone
示例:
定义一个200的返回结果
/** js
 * @apiDefine CODE_200
 * @apiSuccess (Reponse 200) {number} code 200
 * @apiSuccess (Reponse 200) {json} [data='""'] 如果有数据返回
 * @apiSuccessExample {json} Response 200 Example
 *   HTTP/1.1 200 OK
 *   {
 *     "code": 200,
 *     "data": ""
 *   }
 */
定义一个500的返回结果
/**
 * @apiDefine CODE_500
 * @apiSuccess (Response 500) {number} code 500
 * @apiSuccess (Response 500) {string} [message] error description
 * @apiSuccessExample {json} Response 500 Example
 *   HTTP/1.1 500 Internal Server Error
 *   {
 *     "code": 500
 *     "message": "xxx"
 *   }
 */
定义接口
/**
 * @apiDefine Data
 *
 * @apiParam (data) {string} [firstname]  Optional Firstname of the User.
 * @apiParam (data) {string} lastname     Mandatory Lastname.
 * @apiParam (data) {string} country="cn" Mandatory with default value "DE".
 * @apiParam (data) {number} [age=18]     Optional Age with default 18.
 */

/**
 * @api {POST GET} /api/test/hello[/:id] /api/test/hello[/:id]
 * @apiName test api
 * @apiGroup Hello World
 * @apiVersion 1.0.0
 * @apiDescription just a test
 * @apiPermission anyone
 * @apiSampleRequest http://test.github.com
 *
 * @apiParam {number} [id] any id
 * @apiParam {json} data object
 * @apiUse Data
 *
 * @apiParamExample {json} Request Example
 *   POST /api/test/hello/1
 *   {
 *     "data": {
 *       "firstname": "test",
 *       "lastname": "sails",
 *       "country": "cn"
 *     }
 *   }
 *
 * @apiUse CODE_200
 * @apiUse CODE_500
 */
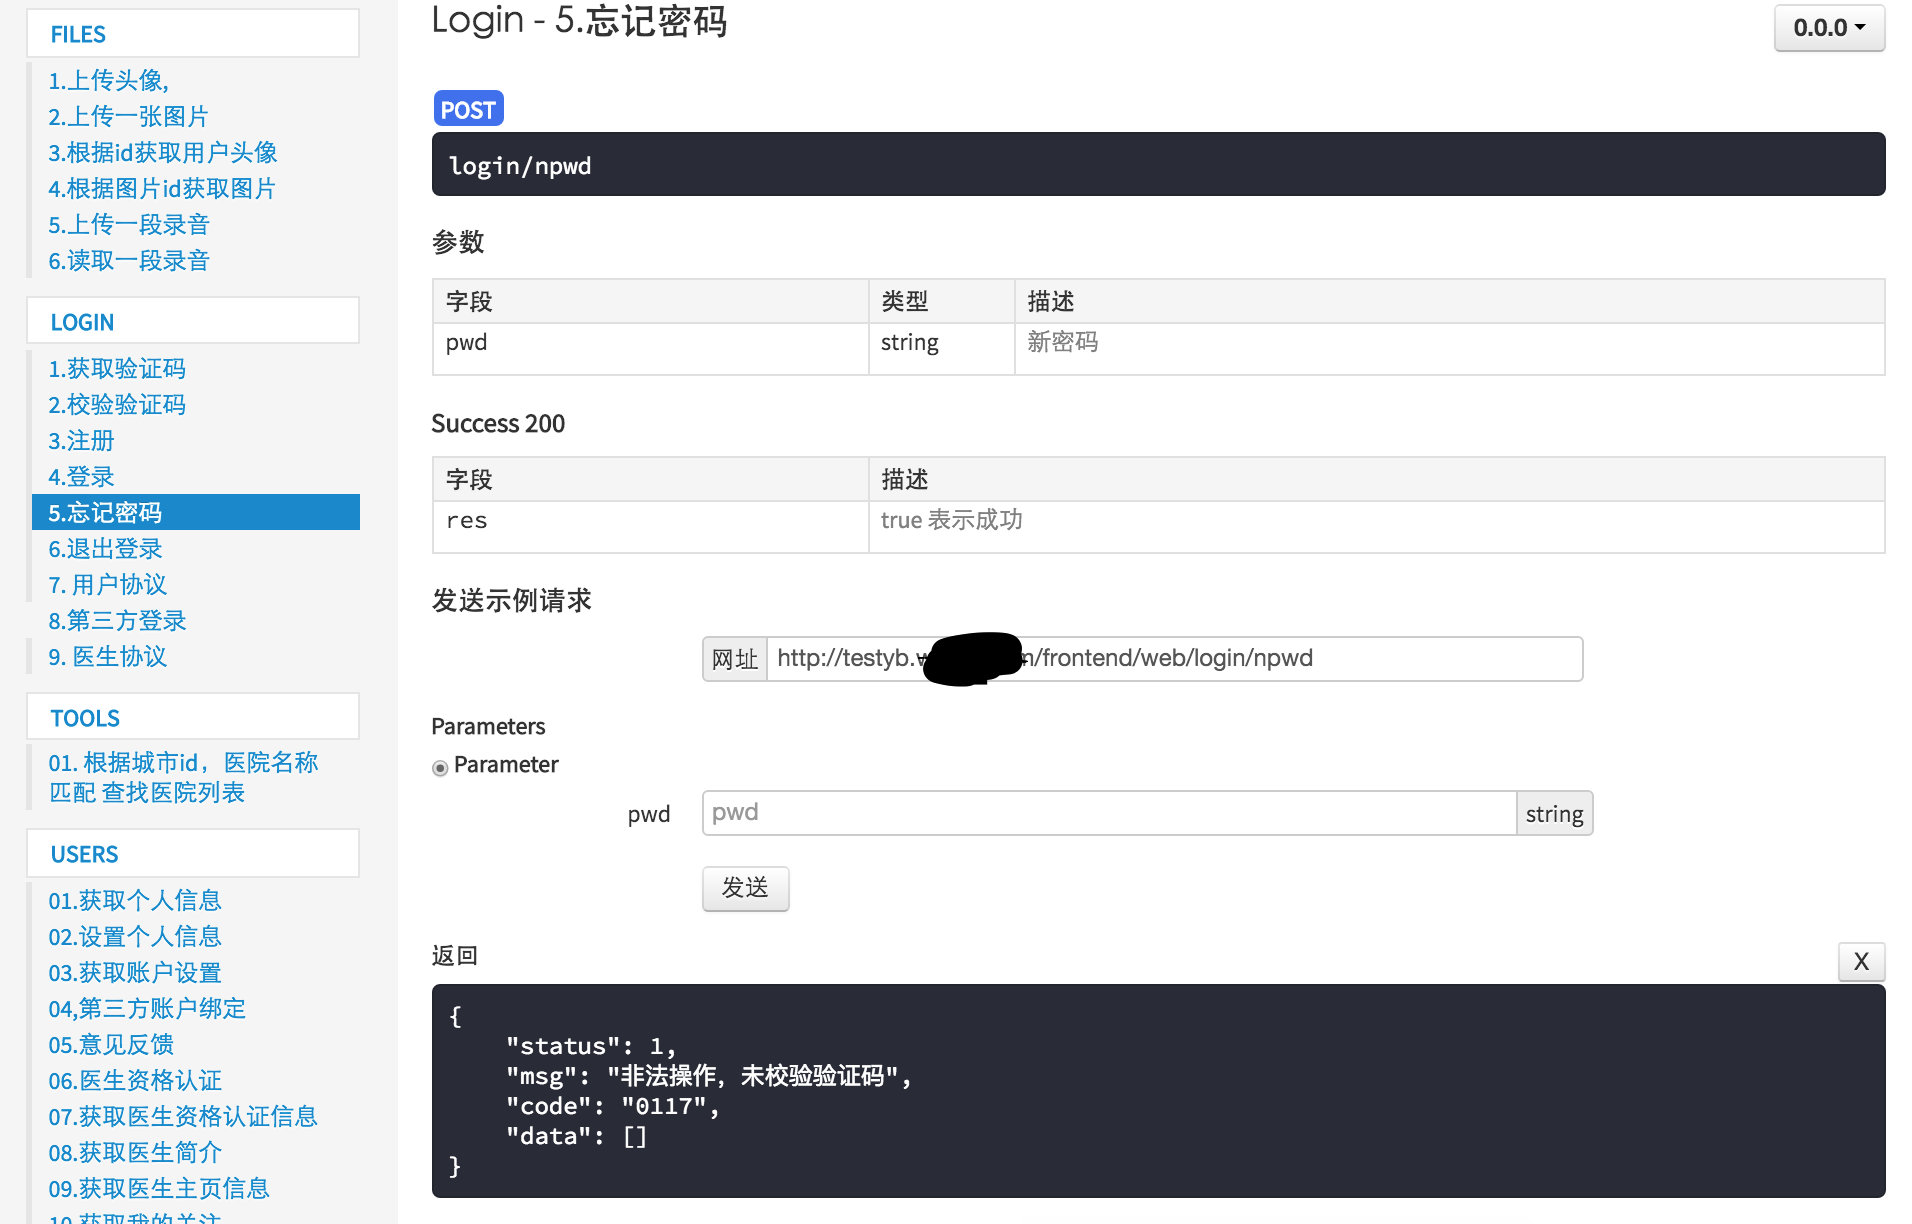
最后生成文档之后,结果如下所示

文/xun(简书作者)
原文链接:http://www.jianshu.com/p/bb5a4f5e588a
著作权归作者所有,转载请联系作者获得授权,并标注“简书作者”。
原文链接:http://www.jianshu.com/p/bb5a4f5e588a
著作权归作者所有,转载请联系作者获得授权,并标注“简书作者”。