默认缓存管理
Spring框架支持透明地向应用程序添加缓存对缓存进行管理,其管理缓存的核心是将缓存应用于操作数据的方法,从而减少操作数据的执行次数,同时不会对程序本身造成任何干扰。Spring Boot继承了Spring框架的缓存管理功能,通过使用@EnableCaching注解开启基于注解的缓存支持,Spring Boot就可以启动缓存管理的自动化配置。
接下来针对Spring Boot支持的默认缓存管理进行讲解
基础环境搭建
准备数据
使用创建的springbootdata的数据库,该数据库有两个表t_article和t_comment
创建项目,功能编写
(1)在Dependencies依赖选择项中添加SQL模块中的JPA依赖、MySQL依赖和Web模块中的Web依赖
(2)编写数据库表对应的实体类,并使用JPA相关注解配置映射关系
importjavax.persistence.*;
@Entity(name="t_comment") //设置ORM实体类,并指定映射的表名
public class Comment{
    	@Id //表明映射对应的主键id
    	@GeneratedValue(strategy=GenerationType.IDENTITY)//设置主键自增策略
        private Integer id;
        private String content;
        private String author;
        @Column(name="a_id")//指定映射的表字段名
    	private Integer aId;
    	// 省略属性getXX()和setXX()方法
       // 省略toString()方法
}
(3)编写数据库操作的Repository接口文件
public interface CommentRepository extends JpaRepository<Comment,Integer> {
    // 根据评论id修改评论作者author
    @Transactional
    @Modifying
    @Query("update t_comment c set c.author = ?1 where c.id=?2")
    public int updateComment(String author,Integer id);
}
(4)编写service层
@Service
public class CommentService {
	@Autowired
    private CommentRepository commentRepository;
    public Comment findCommentById(Integer id){
	Optional<Comment> comment = commentRepository.findById(id);
    if(comment.isPresent()){
    Comment comment1 = comment.get();
    	return comment1;
    }
    return null;
}
(5)编写Controller层
@RestController
public class CommentController {
    @Autowired
    private CommentService commentService;
    @RequestMapping(value = "/findCommentById")
    public Comment findCommentById(Integer id){
        Comment comment = commentService.findCommentById(id);
        return comment;
	}
}
(6)编写配置文件
在项目全局配置文件application.properties中编写对应的数据库连接配置
# MySQL数据库连接配置
spring.datasource.url=jdbc:mysql://localhost:3306/springbootdata?serverTimezone=UTC
spring.datasource.username=root
spring.datasource.password=root
#显示使用JPA进行数据库查询的SQL语句
spring.jpa.show-sql=true
#开启驼峰命名匹配映射
mybatis.configuration.map-underscore-to-camel-case=true
#解决乱码
spring.http.encoding.force-response=true
(7)测试

上图情况,是因为没有在Spring Boot项目中开启缓存管理。在没有缓存管理的情况下,虽然数据表中
的数据没有发生变化,但是每执行一次查询操作(本质是执行同样的SQL语句),都会访问一次数据库
并执行一次SQL语句 。
默认缓存体验
在前面搭建的Web应用基础上,开启Spring Boot默认支持的缓存,体验Spring Boot默认缓存的使用效
果
1)使用@EnableCaching注解开启基于注解的缓存支持 。
@EnableCaching // 开启Spring Boot基于注解的缓存管理支持
@SpringBootApplication
public class Springboot04CacheApplication {
    public static void main(String[] args) {
    	SpringApplication.run(Springboot04CacheApplication.class, args);
    }
}
(2)使用@Cacheable注解对数据操作方法进行缓存管理。将@Cacheable注解标注在Service类的查
询方法上,对查询结果进行缓存
// 根据评论id查询评论信息
@Cacheable(cacheNames = "comment")
public Comment findById(int comment_id){
    Optional<Comment> optional = commentRepository.findCommentById(comment_id);
    if(optional.isPresent()){
    	return optional.get();
	}
    return null;
}
上述代码中,在CommentService类中的findCommentById(int comment_id)方法上添加了查询缓存注
解@Cacheable,该注解的作用是将查询结果Comment存放在Spring Boot默认缓存中名称为comment
的名称空间(namespace)中,对应缓存唯一标识。
(即缓存数据对应的主键k)默认为方法参数comment_id的值 。
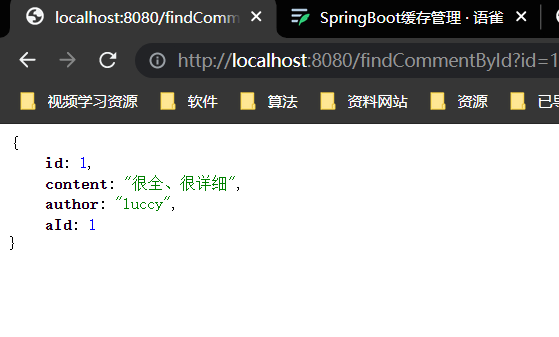
(3)测试访问
可以看出,再次 执行findCommentById()方法正确查询出用户评论信息Comment,在配置了Spring
Boot默认注解后,重复进行同样的查询操作,数据库只执行了一次SQL查询语句,说明项目开启的默认
缓存支持已经生效。
底层结构:在诸多的缓存自动配置类中, SpringBoot默认装配的是 SimpleCacheConfiguration ,
他使用的 CacheManager 是 ConcurrentMapCacheManager, 使用 ConcurrentMap 当底层的数据
结构,按照Cache的名字查询出Cache, 每一个Cache中存在多个k-v键值对,缓存值。
(4)缓存注解介绍
刚刚通过使用@EnableCaching、@Cacheable注解实现了Spring Boot默认的基于注解的缓存管
理,除此之外,还有更多的缓存注解及注解属性可以配置优化缓存管理。
1.@EnableCaching注解
@EnableCaching是由spring框架提供的,springboot框架对该注解进行了继承,该注解需要配置在类
上(在中,通常配置在项目启动类上),用于开启基于注解的缓存支持。
2.@Cacheable注解
@Cacheable注解也是由spring框架提供的,可以作用于类或方法(通常用在数据查询方法上),用于
对方法结果进行缓存存储。注解的执行顺序是,先进行缓存查询,如果为空则进行方法查询,并将结果
进行缓存;如果缓存中有数据,不进行方法查询,而是直接使用缓存数据。
@Cacheable注解提供了多个属性,用于对缓存存储进行相关配置 。
| 属性名 | 说明 |
|---|---|
| value/cacheNames | 指定缓存空间的名称,必配属性。这两个属性二选一使用 |
| key | 指定缓存数据的key,默认使用方法参数值,可以使用SpEL表达式 |
| keyGenerator | 指定缓存数据的key的生成器,与key属性二选一使用 |
| cacheManager | 指定缓存管理器 |
| cacheResolver | 指定缓存解析器,与cacheManager属性二选一使用 |
| condition | 指定在符合某条件下,进行数据缓存 |
| unless | 指定在符合某条件下,不进行数据缓存 |
| sync | 指定是否使用异步缓存。默认false |
执行流程&时机
方法运行之前,先去查询Cache(缓存组件),按照cacheNames指定的名字获取,(CacheManager
先获取相应的缓存),第一次获取缓存如果没有Cache组件会自动创建;
去Cache中查找缓存的内容,使用一个key,默认就是方法的参数,如果多个参数或者没有参数,是按
照某种策略生成的,默认是使用KeyGenerator生成的,使用SimpleKeyGenerator生成key,
SimpleKeyGenerator生成key的默认策略:
| 参数个数 | key |
|---|---|
| 没有参数 | new SimpleKey() |
| 有一个参数 | 参数值 |
| 多个参数 | new SimpleKey(params) |
常用的SPEL表达式
| 描述 | 示例 |
|---|---|
| 当前被调用的方法名 | #root.mathodName |
| 当前被调用的方法 | #root.mathod |
| 当前被调用的目标对象 | #root.target |
| 当前被调用的目标对象类 | #root.targetClass |
| 当前被调用的方法的参数列表 | #root.args[0] 第一个参数, #root.args[1] 第二个参数... |
| 根据参数名字取出值 | #参数名, 也可以使用 #p0 #a0 0是参数的下标索引 |
| 当前方法的返回值 | #result |
3.@CachePut注解
目标方法执行完之后生效, @CachePut被使用于修改操作比较多,哪怕缓存中已经存在目标值了,但是这个
注解保证这个方法依然会执行,执行之后的结果被保存在缓存中。
@CachePut注解也提供了多个属性,这些属性与@Cacheable注解的属性完全相同。
更新操作,前端会把id+实体传递到后端使用,我们就直接指定方法的返回值从新存进缓存时的
key="#id" , 如果前端只是给了实体,我们就使用 key="#实体.id" 获取key. 同时,他的执行时机是目标
方法结束后执行, 所以也可以使用 key="#result.id" , 拿出返回值的id。
4.@CacheEvict注解
@CacheEvict注解是由Spring框架提供的,可以作用于类或方法(通常用在数据删除方法上),该注解
的作用是删除缓存数据。@CacheEvict注解的默认执行顺序是,先进行方法调用,然后将缓存进行清
除。
整合Redis缓存实现
Spring Boot支持的缓存组件
在Spring Boot中,数据的缓存管理存储依赖于Spring框架中cache相关的
org.springframework.cache.Cache和org.springframework.cache.CacheManager缓存管理器接口。
如果程序中没有定义类型为CacheManager的Bean组件或者是名为cacheResolver的CacheResolver缓
存解析器,Spring Boot将尝试选择并启用以下缓存组件(按照指定的顺序):
(1)Generic
(2)JCache (JSR-107) (EhCache 3、Hazelcast、Infinispan等)
(3)EhCache 2.x
(4)Hazelcast
(5)Infinispan
(6)Couchbase
(7)Redis
(8)Caffeine
(9)Simple
上面按照Spring Boot缓存组件的加载顺序,列举了支持的9种缓存组件,在项目中添加某个缓存管理
组件(例如Redis)后,Spring Boot项目会选择并启用对应的缓存管理器。如果项目中同时添加了多个
缓存组件,且没有指定缓存管理器或者缓存解析器(CacheManager或者cacheResolver),那么
Spring Boot会按照上述顺序在添加的多个缓存中优先启用指定的缓存组件进行缓存管理。
刚刚讲解的Spring Boot默认缓存管理中,没有添加任何缓存管理组件能实现缓存管理。这是因为开
启缓存管理后,Spring Boot会按照上述列表顺序查找有效的缓存组件进行缓存管理,如果没有任何缓
存组件,会默认使用最后一个Simple缓存组件进行管理。Simple缓存组件是Spring Boot默认的缓存管
理组件,它默认使用内存中的ConcurrentMap进行缓存存储,所以在没有添加任何第三方缓存组件的
情况下,可以实现内存中的缓存管理,但是我们不推荐使用这种缓存管理方式 。
基于注解的Redis缓存实现
在Spring Boot默认缓存管理的基础上引入Redis缓存组件,使用基于注解的方式讲解Spring Boot
整合Redis缓存的具体实现
(1)添加Spring Data Redis依赖启动器。在pom.xml文件中添加Spring Data Redis依赖启动器。
<dependency>
    <groupId>org.springframework.boot</groupId>
    <artifactId>spring-boot-starter-data-redis</artifactId>
</dependency>
当我们添加进redis相关的启动器之后, SpringBoot会使用 RedisCacheConfigratioin 当做生效的自动
配置类进行缓存相关的自动装配,容器中使用的缓存管理器是
RedisCacheManager , 这个缓存管理器创建的Cache为 RedisCache , 进而操控redis进行数据的缓存
(2)Redis服务连接配置
# Redis服务地址
spring.redis.host=127.0.0.1
# Redis服务器连接端口
spring.redis.port=6379
# Redis服务器连接密码(默认为空)
spring.redis.password=
(3)对CommentService类中的方法进行修改使用@Cacheable、@CachePut、@CacheEvict三个注
解定制缓存管理,分别进行缓存存储、缓存更新和缓存删除的演示 。
@Service
public class CommentService {

    @Autowired
    private CommentRepository commentRepository;

    // 根据评论id查询评论信息
    @Cacheable(cacheNames = "comment",unless = "#result=null")
    public Comment findCommentById(Integer id){
        Optional<Comment> comment = commentRepository.findById(id);
        if(comment.isPresent()){
            Comment comment1 = comment.get();
            return comment1;
        }
        return null;
    }

    @CachePut(cacheNames = "comment",key = "#result.id")
    public Comment updateComment(Comment comment){
        commentRepository.updateComment(comment.getAuthor(),comment.getId());
        return comment;
    }

    @CacheEvict(cacheNames = "comment")
    public void deleteComment(int comment_id){
        commentRepository.deleteById(comment_id);
    }
}
以上 使用@Cacheable、@CachePut、@CacheEvict注解在数据查询、更新和删除方法上进行了缓存
管理。
其中,查询缓存@Cacheable注解中没有标记key值,将会使用默认参数值comment_id作为key进行
数据保存,在进行缓存更新时必须使用同样的key;同时在查询缓存@Cacheable注解中,定义了
“unless = "#result==null"”表示查询结果为空不进行缓存。
(4) 基于注解的Redis查询缓存测试

可以看出,查询用户评论信息Comment时执行了相应的SQL语句,但是在进行缓存存储时出现了
IllegalArgumentException非法参数异常,提示信息要求对应Comment实体类必须实现序列化
(“DefaultSerializer requires a Serializable payload but received an object of type”)。
(5)将缓存对象实现序列化。

(6)再次启动测试
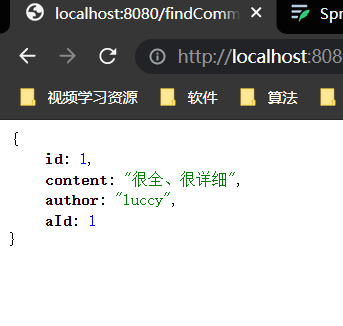
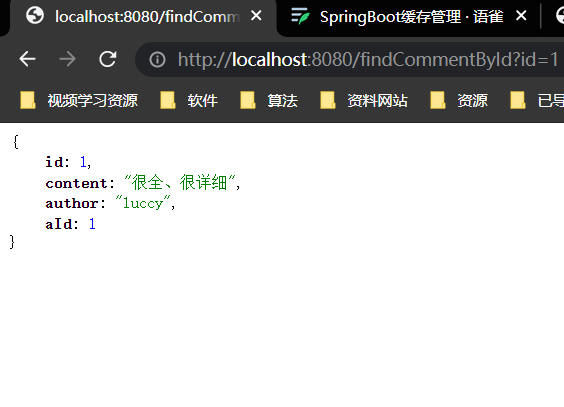
访问“http://localhost:8080/findCommentById?id=1”查询id为1的用户评论信息,并重复刷新浏
览器查询同一条数据信息,查询结果 。
查看控制台打印的SQL查询语句

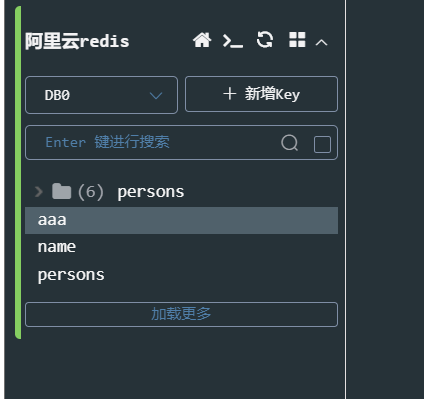
还可以打开Redis客户端可视化管理工具Redis Desktop Manager连接本地启用的Redis服务,查看具体
的数据缓存效果 。
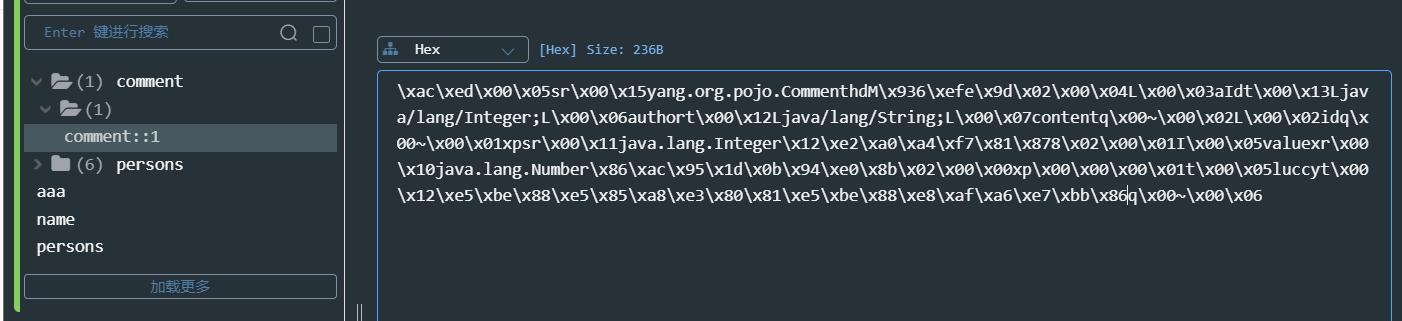
执行findById()方法查询出的用户评论信息Comment正确存储到了Redis缓存库中名为comment的
名称空间下。其中缓存数据的唯一标识key值是以“名称空间comment::+参数值(comment::1)”的字
符串形式体现的,而value值则是经过JDK默认序列格式化后的HEX格式存储。这种JDK默认序列格式化
后的数据显然不方便缓存数据的可视化查看和管理,所以在实际开发中,通常会自定义数据的序列化格
式
(7) 基于注解的Redis缓存更新测试。
先通过浏览器访问“http://localhost:8080/updateComment?id=1&author=shitou”更新id为1的评论作者名为shitou;
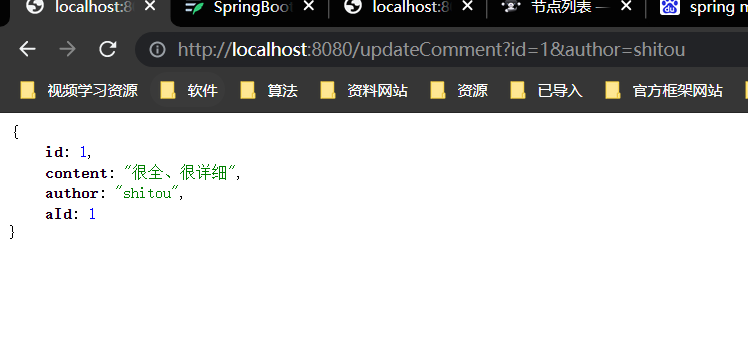
可以看出,执行updateComment()方法更新id为1的数据时执行了一条更新SQL语句,后续调用
findById()方法查询id为1的用户评论信息时没有执行查询SQL语句,且浏览器正确返回了更新后的结
果,表明@CachePut缓存更新配置成功
(8)基于注解的Redis缓存删除测试
通过浏览器访问“http://localhost:8080/deleteComment?id=1”删除id为1的用户评论信息;
执行deleteComment()方法删除id为1的数据后查询结果为空,之前存储在Redis数据库的
comment相关数据也被删除,表明@CacheEvict缓存删除成功实现
通过上面的案例可以看出,使用基于注解的Redis缓存实现只需要添加Redis依赖并使用几个注解
可以实现对数据的缓存管理。另外,还可以在Spring Boot全局配置文件中配置Redis有效期,示例代码
如下:
# 对基于注解的Redis缓存数据统一设置有效期为1分钟,单位毫秒
spring.cache.redis.time-to-live=60000
上述代码中,在Spring Boot全局配置文件中添加了“spring.cache.redis.time-to-live”属性统一配
置Redis数据的有效期(单位为毫秒),但这种方式相对来说不够灵活 。
基于API的Redis缓存实现
在Spring Boot整合Redis缓存实现中,除了基于注解形式的Redis缓存实现外,还有一种开发中常用
的方式——基于API的Redis缓存实现。这种基于API的Redis缓存实现,需要在某种业务需求下通过
Redis提供的API调用相关方法实现数据缓存管理;同时,这种方法还可以手动管理缓存的有效期。
# 对基于注解的Redis缓存数据统一设置有效期为1分钟,单位毫秒
spring.cache.redis.time-to-live=60000
下面,通过Redis API的方式讲解Spring Boot整合Redis缓存的具体实现
(1)使用Redis API进行业务数据缓存管理。在yang.org.service包下编写一个进行业务处理的
类ApiCommentService 。
@Service
public class ApiCommentService {
    @Autowired
    private CommentRepository commentRepository;

    @Autowired
    private RedisTemplate redisTemplate;

    public Comment findCommentById(Integer id){
        Object o = redisTemplate.opsForValue().get("comment_" + id);
        if(o != null){
            return ((Comment) o);
        } else {
            // 缓存中没有从数据库查询
            Optional<Comment> byId = commentRepository.findById(id);
            if(byId.isPresent()){
                Comment comment = byId.get();
                // 将查询结果放入缓存中并设置有效期限为1天
                redisTemplate.opsForValue().set("comment_" + id,comment,1, TimeUnit.DAYS);
                return comment;
            } else {
                return null;
            }
        }
    }

    public Comment updateComment(Comment comment){
        commentRepository.updateComment(comment.getAuthor(),comment.getaId());
        // 更新数据后缓存处理
        redisTemplate.opsForValue().set("comment_" + comment.getaId(),comment);
        return comment;
    }

    public void deleteComment(int comment_id){
        commentRepository.deleteById(comment_id);
        redisTemplate.delete("comment_" + comment_id);
    }
}
(2)编写Web访问层Controller文件
@RestController
@RequestMapping("api")
public class ApiCommentController {
    @Autowired
    private ApiCommentService commentService;

    @RequestMapping("/findCommentById")
    public Comment findCommentById(Integer id){
        Comment comment = commentService.findCommentById(id);
        return  comment;

    }

    @RequestMapping("/updateComment")
    public Comment updateComment(Comment comment){
        Comment commentById = commentService.findCommentById(comment.getId());
        commentById.setAuthor(comment.getAuthor());
        Comment comment1 = commentService.updateComment(commentById);
        return comment1;
    }

    @RequestMapping("/deleteComment")
    public void deleteComment(Integer id){
        commentService.deleteComment(id);
    }
}
基于API的Redis缓存实现的相关配置。基于API的Redis缓存实现不需要@EnableCaching注解开启
基于注解的缓存支持,所以这里可以选择将添加在项目启动类上的@EnableCaching进行删除或者
注释 。
自定义Redis缓存序列化机制
刚刚完成了Spring Boot整合Redis进行了数据的缓存管理,但缓存管理的实体类数据使用的是JDK
序列化方式,不便于使用可视化管理工具进行查看和管理。

接下来分别针对基于注解的Redis缓存实现和基于API的Redis缓存实现中的数据序列化机制进行介绍,
并自定义JSON格式的数据序列化方式进行数据缓存管理 。
自定义RedisTemplate
1.Redis API默认序列化机制
基于API的Redis缓存实现是使用RedisTemplate模板进行数据缓存操作的,这里打开
RedisTemplate类,查看该类的源码信息 。
public class RedisTemplate<K, V> extends RedisAccessor implements RedisOperations<K, V>,
BeanClassLoaderAware {
    // 声明了key、value的各种序列化方式,初始值为空
    @Nullable
    private RedisSerializer keySerializer = null;
    @Nullable
	private RedisSerializer valueSerializer = null;
    @Nullable
    private RedisSerializer hashKeySerializer = null;
    @Nullable
    private RedisSerializer hashValueSerializer = null;
    ...
    // 进行默认序列化方式设置,设置为JDK序列化方式
    public void afterPropertiesSet() {
        super.afterPropertiesSet();
        boolean defaultUsed = false;
        if(this.defaultSerializer == null) {
        this.defaultSerializer = new JdkSerializationRedisSerializer(
        this.classLoader != null?
        this.classLoader:this.getClass().getClassLoader());
	} .
	..
	} .
	..
}
从上述RedisTemplate核心源码可以看出,在RedisTemplate内部声明了缓存数据key、value的各
种序列化方式,且初始值都为空;在afterPropertiesSet()方法中,判断如果默认序列化参数
defaultSerializer为空,将数据的默认序列化方式设置为JdkSerializationRedisSerializer
根据上述源码信息的分析,可以得到以下两个重要的结论:
(1)使用RedisTemplate进行Redis数据缓存操作时,内部默认使用的是
JdkSerializationRedisSerializer序列化方式,所以进行数据缓存的实体类必须实现JDK自带的序列化接
口(例如Serializable);
(2)使用RedisTemplate进行Redis数据缓存操作时,如果自定义了缓存序列化方式
defaultSerializer,那么将使用自定义的序列化方式。
另外,在RedisTemplate类源码中,看到的缓存数据key、value的各种序列化类型都是
RedisSerializer。进入RedisSerializer源码查看RedisSerializer支持的序列化方式(进入该类后,使用
Ctrl+Alt+左键单击类名查看)
可以看出,RedisSerializer是一个Redis序列化接口,默认有6个实现类,这6个实现类代表了6种
不同的数据序列化方式。其中,JdkSerializationRedisSerializer是JDK自带的,也是RedisTemplate内
部默认使用的数据序列化方式,开发者可以根据需要选择其他支持的序列化方式(例如JSON方式)
自定义RedisTemplate序列化机制
在项目中引入Redis依赖后,Spring Boot提供的RedisAutoConfiguration自动配置会生效。打开
RedisAutoConfiguration类,查看内部源码中关于RedisTemplate的定义方式 。
public class RedisAutoConfiguration {
    @Bean
    @ConditionalOnMissingBean(name = {"redisTemplate"})
    public RedisTemplate<Object, Object> redisTemplate(RedisConnectionFactor redisConnectionFactory) throws
    UnknownHostException {
        RedisTemplate<Object, Object> template = new RedisTemplate();
        template.setConnectionFactory(redisConnectionFactory);
        return template;
    } .
    ..
}
从上述RedisAutoConfiguration核心源码中可以看出,在Redis自动配置类中,通过Redis连接工厂
RedisConnectionFactory初始化了一个RedisTemplate;该类上方添加了
@ConditionalOnMissingBean注解(顾名思义,当某个Bean不存在时生效),用来表明如果开发者自
定义了一个名为redisTemplate的Bean,则该默认初始化的RedisTemplate不会生效。
如果想要使用自定义序列化方式的RedisTemplate进行数据缓存操作,可以参考上述核心代码创建
一个名为redisTemplate的Bean组件,并在该组件中设置对应的序列化方式即可
接下来,在项目中创建名为yang.org.config的包,在该包下创建一个Redis自定义配置类
RedisConfig,并按照上述思路自定义名为redisTemplate的Bean组件 。
@Configuration
public class RedisConfig {

    @Bean
    public RedisTemplate<Object,Object> redisTemplate(RedisConnectionFactory redisConnectionFactory) {
        RedisTemplate<Object, Object> template = new RedisTemplate<>();
        template.setConnectionFactory(redisConnectionFactory);

        // 创建JSON格式序列化对象,对缓存数据的key和value进行转换
        Jackson2JsonRedisSerializer jackson2JsonRedisSerializer = new Jackson2JsonRedisSerializer(Object.class);


        // 解决查询缓存转换异常的问题
        ObjectMapper om = new ObjectMapper();
        om.setVisibility(PropertyAccessor.ALL, JsonAutoDetect.Visibility.ANY);
        om.enableDefaultTyping(ObjectMapper.DefaultTyping.NON_FINAL);

        jackson2JsonRedisSerializer.setObjectMapper(om);

        //设置redisTemplate模板API的序列化方式为json
        template.setDefaultSerializer(jackson2JsonRedisSerializer);


        return template;
    }
}
通过@Configuration注解定义了一个RedisConfig配置类,并使用@Bean注解注入了一个默认名
称为方法名的redisTemplate组件(注意,该Bean组件名称必须是redisTemplate)。在定义的Bean组
件中,自定义了一个RedisTemplate,使用自定义的Jackson2JsonRedisSerializer数据序列化方式;在
定制序列化方式中,定义了一个ObjectMapper用于进行数据转换设置。
3.效果测试
启动项目,项目启动成功后,通过浏览器访问“http://localhost:8080/api/findCommentById?id=
3”查询id为3的用户评论信息,并重复刷新浏览器查看同一条数据信息 。
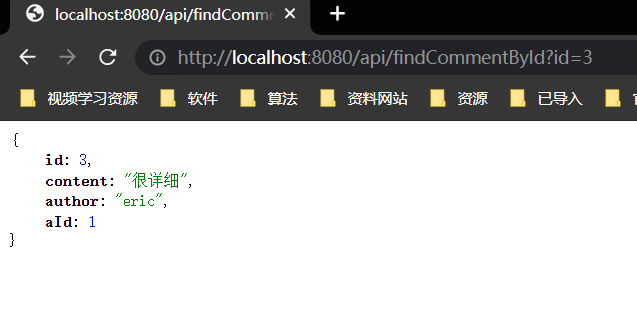
查看控制台打印的SQL查询语句 。

可以看出,执行findById()方法正确查询出用户评论信息Comment,重复进行同样的查询操作,数据库
只执行了一次SQL语句,这说明定制的Redis缓存生效。
使用Redis客户端可视化管理工具Redis Desktop Manager查看缓存数据 :
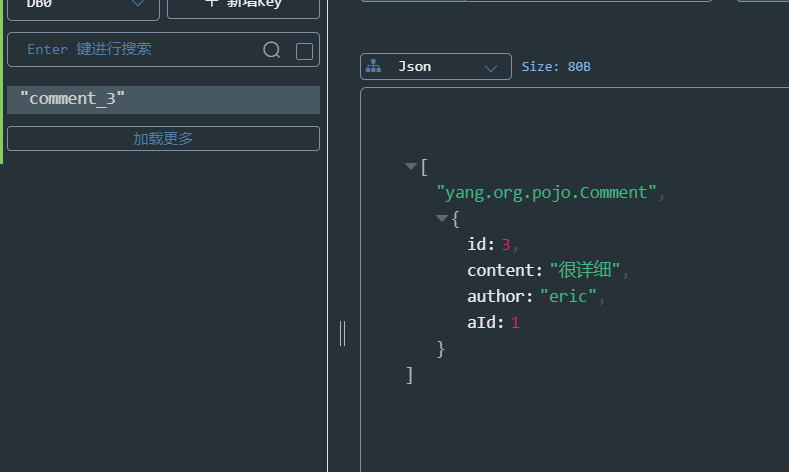
执行findById()方法查询出用户评论信息Comment正确存储到了Redis缓存库中,且缓存到Redis
服务的数据已经使用了JSON格式存储展示,查看和管理也非常方便,说明自定义的Redis API模板工具
RedisTemplate生效。
自定义RedisCacheManager
刚刚针对基于 API方式的RedisTemplate进行了自定义序列化方式的改进,从而实现了JSON序列化
方式缓存数据,但是这种自定义的RedisTemplate对于基于注解的Redis缓存来说,是没有作用的。
接下来,针对基于注解的Redis缓存机制和自定义序列化方式进行讲解
1.Redis注解默认序列化机制
打开Spring Boot整合Redis组件提供的缓存自动配置类
RedisCacheConfiguration(org.springframework.boot.autoconfigure.cache包下的),查看该类的
源码信息,其核心代码如下
@Configuration
class RedisCacheConfiguration {
    @Bean
    public RedisCacheManager cacheManager(RedisConnectionFactoryredisConnectionFactory,
                                          ResourceLoader resourceLoader) {
    RedisCacheManagerBuilder builder =RedisCacheManager.builder(redisConnectionFactory)
    .cacheDefaults(this.determineConfiguration(resourceLoader.getClassLoader()));
    List<String> cacheNames = this.cacheProperties.getCacheNames();
    if(!cacheNames.isEmpty()) {
    	builder.initialCacheNames(new LinkedHashSet(cacheNames));
    }
    	return (RedisCacheManager)this.customizerInvoker.customize(builder.build());
    }
    private org.springframework.data.redis.cache.RedisCacheConfiguration
    determineConfiguration(ClassLoader classLoader){
    if(this.redisCacheConfiguration != null) {
    	return this.redisCacheConfiguration;
    } else {
        Redis redisProperties = this.cacheProperties.getRedis();
        org.springframework.data.redis.cache.RedisCacheConfiguration config
        =org.springframework.data.redis.cache.RedisCacheConfiguration.defaultCacheConfig();
        config = config.serializeValuesWith(SerializationPair.fromSerializer(
        new JdkSerializationRedisSerializer(classLoader)));
        ...
        return config;
    }
    }
}
从上述核心源码中可以看出,同RedisTemplate核心源码类似,RedisCacheConfiguration内部同样通
过Redis连接工厂RedisConnectionFactory定义了一个缓存管理器RedisCacheManager;同时定制
RedisCacheManager时,也默认使用了JdkSerializationRedisSerializer序列化方式。
如果想要使用自定义序列化方式的RedisCacheManager进行数据缓存操作,可以参考上述核心代
码创建一个名为cacheManager的Bean组件,并在该组件中设置对应的序列化方式即可
注意,在Spring Boot 2.X版本中,RedisCacheManager是单独进行构建的。因此,在Spring
Boot 2.X版本中,对RedisTemplate进行自定义序列化机制构建后,仍然无法对
RedisCacheManager内部默认序列化机制进行覆盖(这也就解释了基 于注解的Redis缓存实现仍
然会使用JDK默认序列化机制的原因),想要基于注解的Redis缓存实现也使用自定义序列化机
制,需要自定义RedisCacheManager。
2.自定义RedisCacheManager
在项目的Redis配置类RedisConfig中,按照上一步分析的定制方法自定义名为cacheManager的
Bean组件
@Bean
public RedisCacheManager cacheManager(RedisConnectionFactory redisConnectionFactory) {
        // 分别创建String和JSON格式序列化对象,对缓存数据key和value进行转换
        RedisSerializer<String> strSerializer = new StringRedisSerializer();
        Jackson2JsonRedisSerializer jacksonSeial =
                new Jackson2JsonRedisSerializer(Object.class);

        // 解决查询缓存转换异常的问题
        ObjectMapper om = new ObjectMapper();
        om.setVisibility(PropertyAccessor.ALL, JsonAutoDetect.Visibility.ANY);
        om.enableDefaultTyping(ObjectMapper.DefaultTyping.NON_FINAL);
        jacksonSeial.setObjectMapper(om);

        // 定制缓存数据序列化方式及时效
        RedisCacheConfiguration config = RedisCacheConfiguration.defaultCacheConfig()
                .entryTtl(Duration.ofDays(1))
                .serializeKeysWith(RedisSerializationContext.SerializationPair
                        .fromSerializer(strSerializer))
                .serializeValuesWith(RedisSerializationContext.SerializationPair
                        .fromSerializer(jacksonSeial))
                .disableCachingNullValues();
        RedisCacheManager cacheManager = RedisCacheManager
                .builder(redisConnectionFactory).cacheDefaults(config).build();
        return cacheManager;
}
上述代码中,在RedisConfig配置类中使用@Bean注解注入了一个默认名称为方法名的
cacheManager组件。在定义的Bean组件中,通过RedisCacheConfiguration对缓存数据的key和value
分别进行了序列化方式的定制,其中缓存数据的key定制为StringRedisSerializer(即String格式),而
value定制为了Jackson2JsonRedisSerializer(即JSON格式),同时还使用
entryTtl(Duration.ofDays(1))方法将缓存数据有效期设置为1天。
完成基于注解的Redis缓存管理器RedisCacheManager定制后,可以对该缓存管理器的效果进行
测试(使用自定义序列化机制的RedisCacheManager测试时,实体类可以不用实现序列化接口)。