1.关于Properties类
概述


1.Properties作为Map使用
//      创建对象不可使用泛型
        Properties properties = new Properties();
//        存储元素
        properties.put("张飞","18");
        properties.put("关羽","19");
        properties.put("刘备","20");
        Set<Object> objects = properties.keySet();
//        遍历元素
        for (Object o:objects){
            System.out.println(o+":"+properties.get(o));
        }
2.Properties作为Map使用的特有方法

// setProperty(String key, String value) 设置集合的键和值,都是String类型,调用 Hashtable方法 put 。 Properties prop = new Properties(); prop.setProperty("001","张飞"); /** * public synchronized Object setProperty(String key, String value) {//注意学习这种设计方法 * return put(key, value); * } * public synchronized Object put(Object,Object){ * return map.put(Object,Object); * } */ prop.setProperty("002","关羽"); prop.setProperty("003","刘备"); // String getProperty(String key) 使用此属性列表中指定的键搜索属性。 System.out.println(prop.getProperty("001"));//张飞 // Set<String> stringPropertyNames() 从该属性列表中返回一个不可修改的键集,其中键及其对应的值是字符串 Set<String> strings = prop.stringPropertyNames(); for (String s:strings){ System.out.println(s+":"+prop.getProperty(s)); }
.properties文件读取方法汇总
方法1:Properties和IO相结合
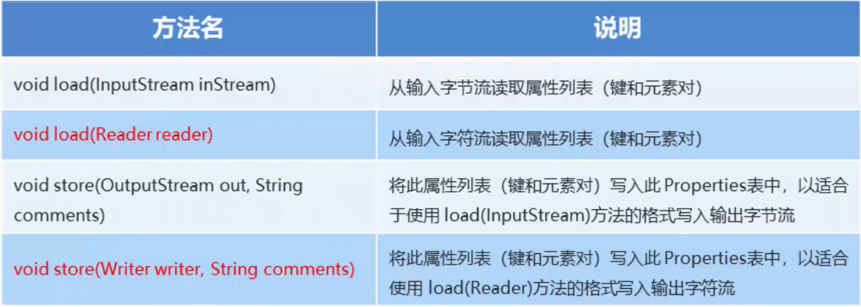
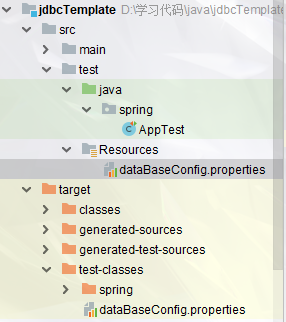

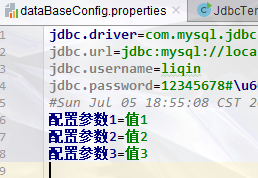
  @Test
    public void testProperties() throws IOException {
        //读取文件里面的内容
        Properties properties = new Properties();
        //下面的路径我使用的是 Relative path(相对路径) //src/test/Resources/dataBaseConfig.properties
        FileReader fileReader = new FileReader("src\test\Resources\dataBaseConfig.properties");
        properties.load(fileReader);
        Set<String> strings = properties.stringPropertyNames();
        System.out.println(strings);//[jdbc.password, jdbc.username, jdbc.url, jdbc.driver]
        System.out.println(properties.getProperty("jdbc.driver"));//com.mysql.jdbc.Driver;
        //将内容写到文件
        Properties properties2 = new Properties();
        FileWriter fileWriter = new FileWriter("src\test\Resources\dataBaseConfig.properties",true);//第二个参数为true,追加写入,不会覆盖之前内容
        properties2.setProperty("配置参数1","值1");
        properties2.setProperty("配置参数2","值2");
        properties2.setProperty("配置参数3","值3");
        properties2.store(fileWriter,"注释内容");
    }
方法2:ResourceBundle

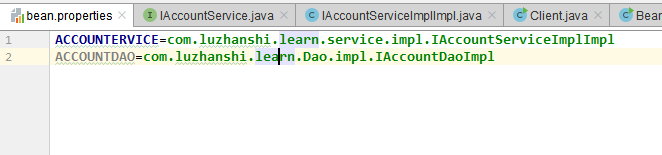
    /**
     * ResourceBundle:
     * 1.可以用于读取properties文件;
     * 2.只能读取不能写入
     * 3.只能读取类路径下的,不在类路径下的无法读取
     * */
    private static ResourceBundle resourceBundle=ResourceBundle.getBundle("config.bean");//参数指的是properties文件的位置,写法是包名.文件名的方式
    public static void main(String[] args) {
        System.err.println(resourceBundle.getString("ACCOUNTERVICE"));//com.luzhanshi.learn.service.impl.IAccountServiceImplImpl
    }

方法3:配合Spring注解:@Value获取值
前提:
1.我们要提前创建了相应的配置文件:

2.我们在spring的xml配置文件里面添加如下注解:
<!--    告知Spring,properties配置文件的位置-->
    <context:property-placeholder location="dataBaseConfig.properties"></context:property-placeholder>
3.使用如下方式获取:
@Repository(value = "IAccountService_annotation")
public class IAccountService_annotationImpl implements IAccountService_annotation {
    @Value("https://www.hao123.com/")
    public String url;
    @Value("${jdbc.driver}")
    private String driver;
 @Override
    public void saveAccount() {
        System.out.println(url);//https://www.hao123.com/
        System.out.println(driver);//com.mysql.jdbc.Driver;
        iAccountDao_annotation.save();
    }
}
********************************************************************************************************************************************
spring纯注解的情况下使用@value:
@Configuration//将该类声明为spring配置类
@ComponentScan("spring")//配置扫描包
@PropertySource("dataBaseConfig.properties")//配置properties的路径
public class AppTest {
...
}
声明一个类,使用配置文件内容装配变量值:
@Component("jdbc")
public class Jdbc {
    @Value("${jdbc.driver}")
    public String url;
}
获取bean对象,打印值:
public class Test {
    public static void
    main(String[] args) {
        AnnotationConfigApplicationContext context = new AnnotationConfigApplicationContext(AppTest.class);
        Jdbc jdbc = (Jdbc) context.getBean("jdbc");
        System.out.println(jdbc.url);//com.mysql.jdbc.Driver;
    }
}
方法4:读取出来的内容直接转为map
在很多项目中我们都会使用到.properties文件对我们的项目进行配置,今天就介绍一下.properties文件在项目中的使用:
如下图,我们项目中有一个名为project.properties的properties文件

从图中可以看出,该文件配置了许多参数的默认值,那么我们在项目中如何引用它呢?:
首先我们书写一个工具类ProjectUtils:
    /**
     * 传入配置文件路径,将其中属性映射到Map中
     *
     * @param filepath
     * @return map
     */
    public  Map<String, String> getPropertiesValueMap(String filepath) {
        InputStreamReader isr = null;
        logger.info("接收到配置文件路径是 filepath + " +filepath);
        Map<String, String> properties = new HashMap<>();
        if ("".equals(filepath)) {
            logger.info("传入配置文件路径不能为空!!");
            return properties;
        }
        try {
            Properties pro = new Properties();

            isr = new  InputStreamReader(getClass().getClassLoader()
                    .getResourceAsStream(filepath),"UTF-8");
            pro.load(isr);
            @SuppressWarnings("rawtypes")
                    Enumeration enu = pro.propertyNames();
            while (enu.hasMoreElements()) {
                String obj =(String) enu.nextElement();
                String objv = pro.getProperty(obj);
                properties.put(obj, objv);
            }
        } catch (Exception e) {
            properties.put("retCode","01");
            properties.put("retMsg","读取配置文件失败,请检查配置文件");
            logger.info("解析配置文件失败,请检查配置文件是否正确!!,原因是:"+e.getMessage());
            return properties;
        }
        return properties;
    }
然后在需要获取配置信息的地方调用上面我们封装的方法(传入配置文件的路径):
        ProjectUtils pro = new ProjectUtils();
        Map<String ,String> map = pro.getPropertiesValueMap("project.properties");
        //System.out.println(map.get("440600"));
         int port =Integer.valueOf(map.get("port"));
        System.out.println(map.get("port"));