https://mp.weixin.qq.com/s/aHZKDpHnl2uT1Sbu9N5QUQ
2. Swagger2 的 maven 依赖
使用 Swagger2 工具,必须要导入 maven 依赖,当前官方最高版本是 2.8.0,我尝试了一下,个人感觉页面展示的效果不太好,而且不够紧凑,不利于操作。另外,最新版本并不一定是最稳定版本,当前我们实际项目中使用的是 2.2.2 版本,该版本稳定,界面友好,所以本节课主要围绕着 2.2.2 版本来展开,依赖如下:
<dependency>
 <groupId>io.springfox</groupId>
 <artifactId>springfox-swagger2</artifactId>
 <version>2.2.2</version>
</dependency>
<dependency>
 <groupId>io.springfox</groupId>
 <artifactId>springfox-swagger-ui</artifactId>
 <version>2.2.2</version>
</dependency>
3. Swagger2 的配置
使用 Swagger2 需要进行配置,Spring Boot 中对 Swagger2 的配置非常方便,新建一个配置类,Swagger2 的配置类上除了添加必要的 @Configuration 注解外,还需要添加 @EnableSwagger2 注解。
import org.springframework.context.annotation.Bean;
import org.springframework.context.annotation.Configuration;
import springfox.documentation.builders.ApiInfoBuilder;
import springfox.documentation.builders.PathSelectors;
import springfox.documentation.builders.RequestHandlerSelectors;
import springfox.documentation.service.ApiInfo;
import springfox.documentation.spi.DocumentationType;
import springfox.documentation.spring.web.plugins.Docket;
import springfox.documentation.swagger2.annotations.EnableSwagger2;

/**
 * @author shengwu ni
 */
@Configuration
@EnableSwagger2
public class SwaggerConfig {

    @Bean
    public Docket createRestApi() {
        return new Docket(DocumentationType.SWAGGER_2)
                // 指定构建api文档的详细信息的方法:apiInfo()
                .apiInfo(apiInfo())
                .select()
                // 指定要生成api接口的包路径,这里把controller作为包路径,生成controller中的所有接口
                .apis(RequestHandlerSelectors.basePackage("com.itcodai.course06.controller"))
                .paths(PathSelectors.any())
                .build();
    }

    /**
     * 构建api文档的详细信息
     * @return
     */
    private ApiInfo apiInfo() {
        return new ApiInfoBuilder()
                // 设置页面标题
                .title("Spring Boot集成Swagger2接口总览")
                // 设置接口描述
                .description("跟武哥一起学Spring Boot第06课")
                // 设置联系方式
                .contact("倪升武," + "CSDN:http://blog.csdn.net/eson_15")
                // 设置版本
                .version("1.0")
                // 构建
                .build();
    }
}
在该配置类中,已经使用注释详细解释了每个方法的作用了,在此不再赘述。到此为止,我们已经配置好了 Swagger2 了。现在我们可以测试一下配置有没有生效,启动项目,在浏览器中输入 localhost:8080/swagger-ui.html,即可看到 swagger2 的接口页面,如下图所示,说明Swagger2 集成成功。
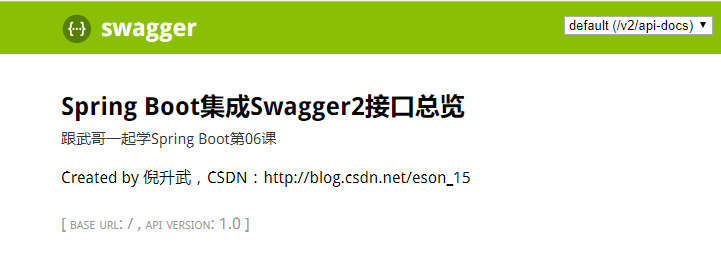
结合该图,对照上面的 Swagger2 配置文件中的配置,可以很明确的知道配置类中每个方法的作用。这样就很容易理解和掌握 Swagger2 中的配置了,也可以看出,其实 Swagger2 配置很简单。
4. Swagger2 的使用
上面我们已经配置好了 Swagger2,并且也启动测试了一下,功能正常,下面我们开始使用 Swagger2,主要来介绍 Swagger2 中的几个常用的注解,分别在实体类上、 Controller 类上以及 Controller 中的方法上,最后我们看一下 Swagger2 是如何在页面上呈现在线接口文档的,并且结合 Controller 中的方法在接口中测试一下数据。
4.1 实体类注解
本节我们建一个 User 实体类,主要介绍一下 Swagger2 中的 @ApiModel 和 @ApiModelProperty 注解,同时为后面的测试做准备。
import io.swagger.annotations.ApiModel;
import io.swagger.annotations.ApiModelProperty;

@ApiModel(value = "用户实体类")
public class User {

    @ApiModelProperty(value = "用户唯一标识")
    private Long id;

    @ApiModelProperty(value = "用户姓名")
    private String username;

    @ApiModelProperty(value = "用户密码")
    private String password;

 // 省略set和get方法
}
解释下 @ApiModel 和 @ApiModelProperty 注解:
@ApiModel 注解用于实体类,表示对类进行说明,用于参数用实体类接收。
@ApiModelProperty 注解用于类中属性,表示对 model 属性的说明或者数据操作更改。
该注解在在线 API 文档中的具体效果在下文说明。
4.2 Controller 类中相关注解
我们写一个 TestController,再写几个接口,然后学习一下 Controller 中和 Swagger2 相关的注解。
import com.itcodai.course06.entiy.JsonResult;
import com.itcodai.course06.entiy.User;
import io.swagger.annotations.Api;
import io.swagger.annotations.ApiOperation;
import io.swagger.annotations.ApiParam;
import org.springframework.web.bind.annotation.GetMapping;
import org.springframework.web.bind.annotation.PathVariable;
import org.springframework.web.bind.annotation.RequestMapping;
import org.springframework.web.bind.annotation.RestController;

@RestController
@RequestMapping("/swagger")
@Api(value = "Swagger2 在线接口文档")
public class TestController {

    @GetMapping("/get/{id}")
    @ApiOperation(value = "根据用户唯一标识获取用户信息")
    public JsonResult<User> getUserInfo(@PathVariable @ApiParam(value = "用户唯一标识") Long id) {
        // 模拟数据库中根据id获取User信息
        User user = new User(id, "倪升武", "123456");
        return new JsonResult(user);
    }
}
我们来学习一下 @Api 、 @ApiOperation 和 @ApiParam 注解。
@Api 注解用于类上,表示标识这个类是 swagger 的资源。
@ApiOperation 注解用于方法,表示一个 http 请求的操作。
@ApiParam 注解用于参数上,用来标明参数信息。
这里返回的是 JsonResult,是第02课中学习返回 json 数据时封装的实体。以上是 Swagger 中最常用的 5 个注解,接下来运行一下项目工程,在浏览器中输入 localhost:8080/swagger-ui.html 看一下 Swagger 页面的接口状态。
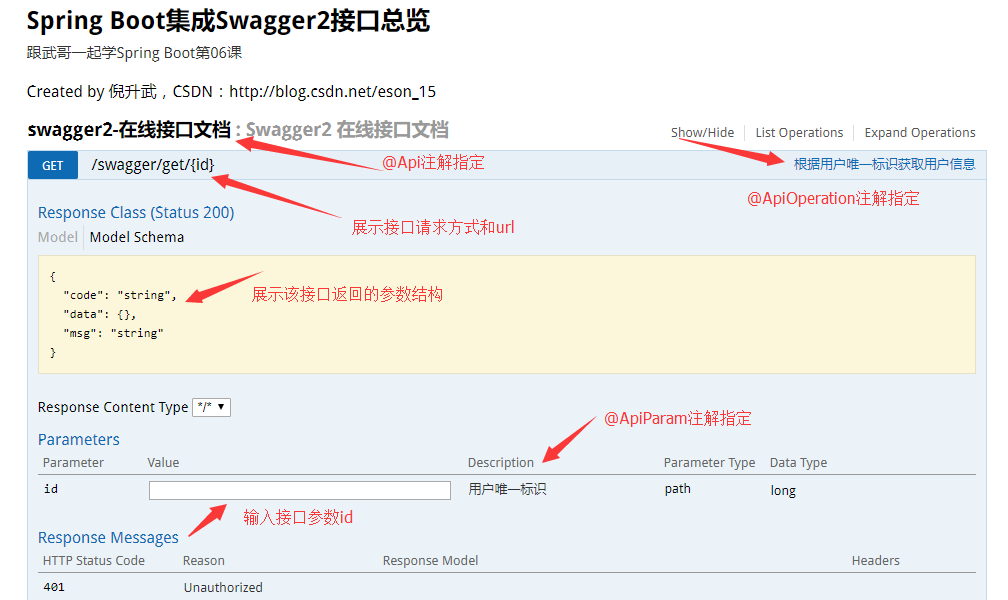
可以看出,Swagger 页面对该接口的信息展示的非常全面,每个注解的作用以及展示的地方在上图中已经标明,通过页面即可知道该接口的所有信息,那么我们直接在线测试一下该接口返回的信息,输入id为1,看一下返回数据:

可以看出,直接在页面返回了 json 格式的数据,开发人员可以直接使用该在线接口来测试数据的正确与否,非常方便。上面是对于单个参数的输入,如果输入参数为某个对象这种情况,Swagger 是什么样子呢?我们再写一个接口。
@PostMapping("/insert")
    @ApiOperation(value = "添加用户信息")
    public JsonResult<Void> insertUser(@RequestBody @ApiParam(value = "用户信息") User user) {
        // 处理添加逻辑
        return new JsonResult<>();
    }
重启项目,在浏览器中输入 localhost:8080/swagger-ui.html 看一下效果:
