今天是软件测试的上机,主要内容是对junit的安装以及对一个简单类的测试实践。老师推荐用eclipse,但是我原来一直在
用intellj Idea,所以我试了试intellj Idea对junit的安装使用。下面介绍过程。
安装:
intellj Idea 自带了junit模块,所以安装起来很简单。
首先,打开intellj Idea,双击shift键,搜索plugins,点击下图中画红线的button。
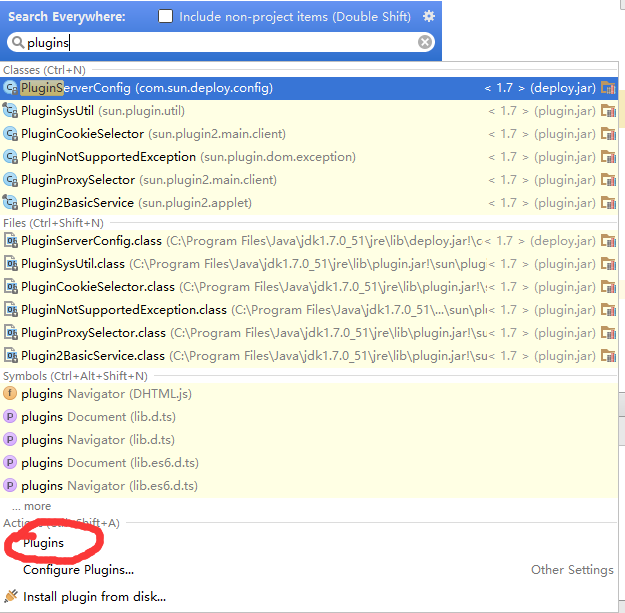
进入plugins后,搜索junit,选中下面画红圈插件后面的对勾,然后确定并重启intellj Idea。
至此安装完成。
顺带一提,大量的快捷键也是intellj Idea的魅力之一,让人感觉非常方便,开发起来很舒服。
使用:
intellj idea 上junit的使用非常方便。首先在src平级目录中创建测试文件夹,这样可以将测试代码和被测试代码分开。我这里创建
的是test文件夹,在该文件夹上右键,点击Mark Directory as --->Test Source Root

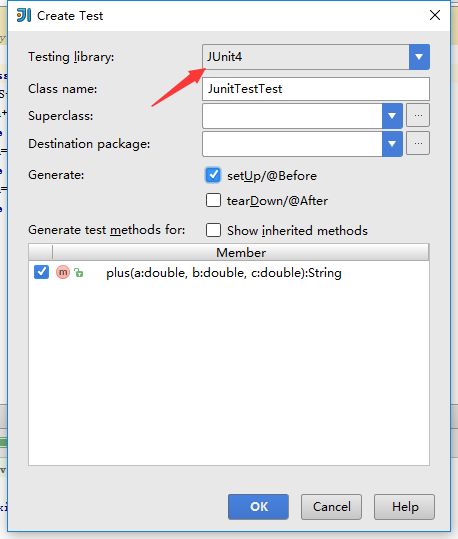
然后在src中创建要测试的类,选中类名,按ctrl+shift+T,点击create new test

进入测试创建界面,如下图选择箭头所指的junit4确定就创建了测试类
接下来就可以进行测试啦!
测试:
用来进行测试的代码:
public class JunitTest {
    public String plus(double a,double b,double c){
        if(a+b<=c||b+c<=a||a+c<=b)return"This is not a trangle";
        else
        if(a==b&&a==c)return"This is an equilateral";
        else
        if(a==b||a==c||b==c)return "This is an isosceles";
        else return "This is a scalene";
    }
}
测试代码:
import org.junit.Before;
import org.junit.Test;

import static org.junit.Assert.*;

/**
 * Created by ltp on 2016/3/17.
 */
public class JunitTestTest {
    private  JunitTest junT;
    @Before
    public void setUp() throws Exception {
             junT = new JunitTest();
    }
    @Test
    public void testPlus() throws Exception {
        assertEquals("This is not a trangle",junT.plus(22,3,4));
        assertEquals("This is an equilateral",junT.plus(3,3,3));
        assertEquals("This is an isosceles",junT.plus(3,3,4));
        assertEquals("This is a scalene",junT.plus(5,3,4));

    }
}
点击右上的edit configurations配置运行环境

然后就可以运行测试啦!
测试结果:

这就是junit在intellj idea中得安装及使用方法。