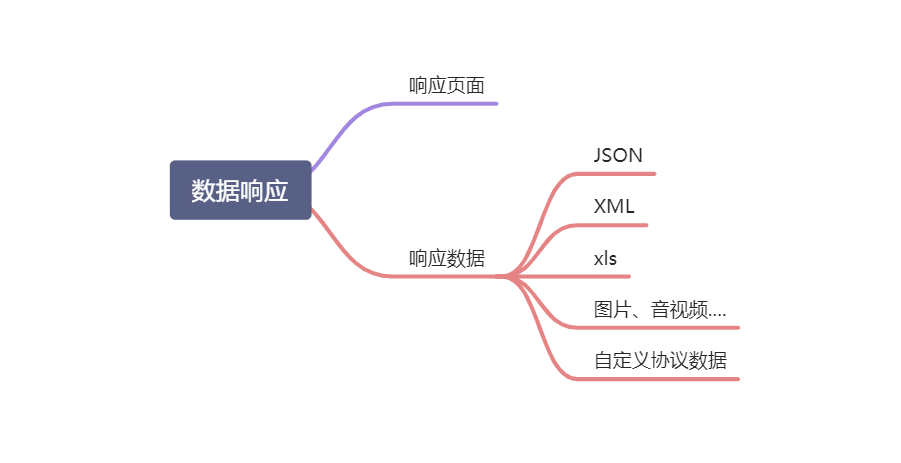
4、数据响应与内容协商
1、响应JSON
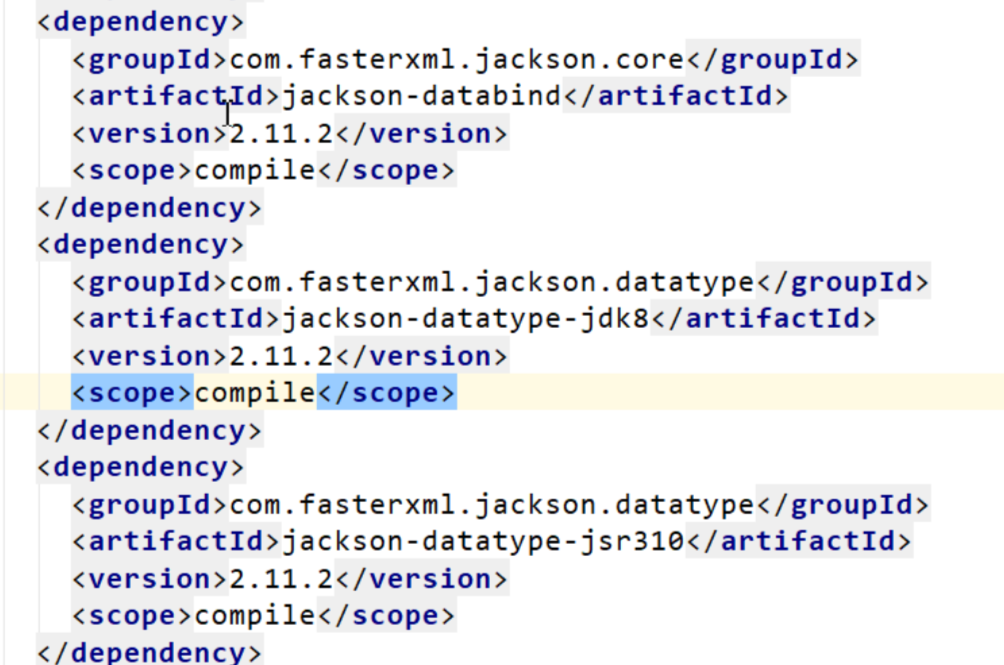
1.1、jackson.jar+@ResponseBody
        <dependency>
            <groupId>org.springframework.boot</groupId>
            <artifactId>spring-boot-starter-web</artifactId>
        </dependency>
<!--web场景自动引入了json场景-->
    <dependency>
      <groupId>org.springframework.boot</groupId>
      <artifactId>spring-boot-starter-json</artifactId>
      <version>2.3.4.RELEASE</version>
      <scope>compile</scope>
    </dependency>
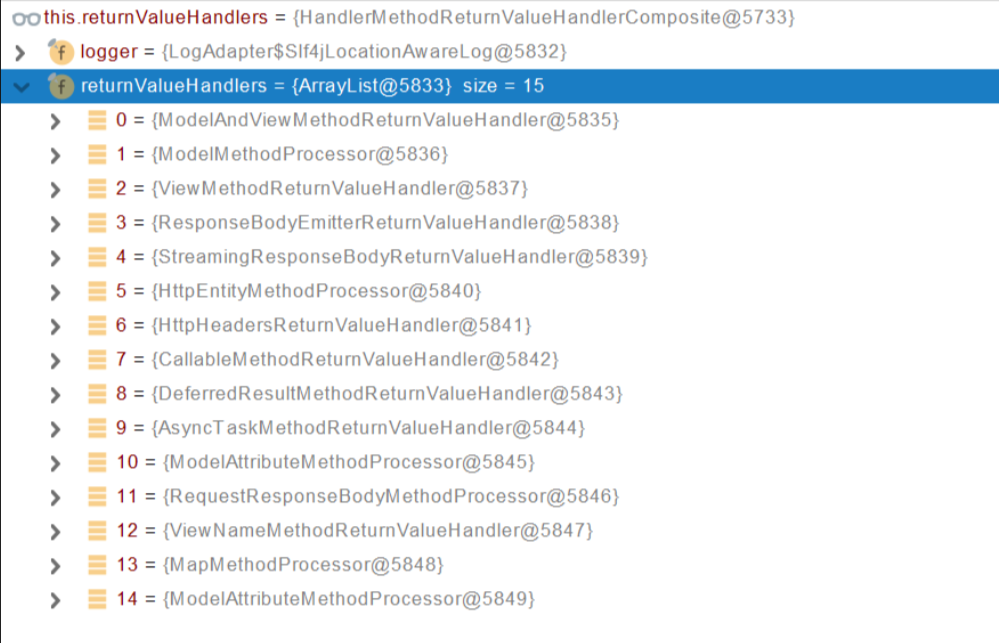
1、返回值解析器
//ServletInvocableHandlerMethod
            try {
			this.returnValueHandlers.handleReturnValue(
					returnValue, getReturnValueType(returnValue), mavContainer, webRequest);
		}
        //HandlerMethodReturnValueHandlerComposite
	@Override
	public void handleReturnValue(@Nullable Object returnValue, MethodParameter returnType,
			ModelAndViewContainer mavContainer, NativeWebRequest webRequest) throws Exception {
                //选择对应的返回值处理器
		HandlerMethodReturnValueHandler handler = selectHandler(returnValue, returnType);
		if (handler == null) {
			throw new IllegalArgumentException("Unknown return value type: " + returnType.getParameterType().getName());
		}
                //处理返回结果
		handler.handleReturnValue(returnValue, returnType, mavContainer, webRequest);
	}
//RequestResponseBodyMethodProcessor
@Override
	public void handleReturnValue(@Nullable Object returnValue, MethodParameter returnType,
			ModelAndViewContainer mavContainer, NativeWebRequest webRequest)
			throws IOException, HttpMediaTypeNotAcceptableException, HttpMessageNotWritableException {

		mavContainer.setRequestHandled(true);
		ServletServerHttpRequest inputMessage = createInputMessage(webRequest);
		ServletServerHttpResponse outputMessage = createOutputMessage(webRequest);

		// Try even with null return value. ResponseBodyAdvice could get involved.
        // 使用消息转换器进行写出操作
		writeWithMessageConverters(returnValue, returnType, inputMessage, outputMessage);
	}
protected <T> void writeWithMessageConverters(@Nullable T value, MethodParameter returnType,

			ServletServerHttpRequest inputMessage, ServletServerHttpResponse outputMessage)
			throws IOException, HttpMediaTypeNotAcceptableException, HttpMessageNotWritableException {

		Object body;
		Class<?> valueType;
		Type targetType;

		if (value instanceof CharSequence) {
			body = value.toString();
			valueType = String.class;
			targetType = String.class;
		}
		else {
			body = value;
			valueType = getReturnValueType(body, returnType);
			targetType = GenericTypeResolver.resolveType(getGenericType(returnType), returnType.getContainingClass());
		}
                  //判断资源类型是不是源类型,是不是流数据
		if (isResourceType(value, returnType)) {
			outputMessage.getHeaders().set(HttpHeaders.ACCEPT_RANGES, "bytes");
			if (value != null && inputMessage.getHeaders().getFirst(HttpHeaders.RANGE) != null &&
					outputMessage.getServletResponse().getStatus() == 200) {
				Resource resource = (Resource) value;
				try {
					List<HttpRange> httpRanges = inputMessage.getHeaders().getRange();
					outputMessage.getServletResponse().setStatus(HttpStatus.PARTIAL_CONTENT.value());
					body = HttpRange.toResourceRegions(httpRanges, resource);
					valueType = body.getClass();
					targetType = RESOURCE_REGION_LIST_TYPE;
				}
				catch (IllegalArgumentException ex) {
					outputMessage.getHeaders().set(HttpHeaders.CONTENT_RANGE, "bytes */" + resource.contentLength());
					outputMessage.getServletResponse().setStatus(HttpStatus.REQUESTED_RANGE_NOT_SATISFIABLE.value());
				}
			}
		}
                  //媒体类型,牵涉到内容协商,浏览器通过请求头中Accept告诉服务器能接收什么样的内容类型
		MediaType selectedMediaType = null;
		MediaType contentType = outputMessage.getHeaders().getContentType();
		boolean isContentTypePreset = contentType != null && contentType.isConcrete();
		if (isContentTypePreset) {
			if (logger.isDebugEnabled()) {
				logger.debug("Found 'Content-Type:" + contentType + "' in response");
			}
			selectedMediaType = contentType;
		}
		else {
			HttpServletRequest request = inputMessage.getServletRequest();
                        //服务器能接收的内容类型
			List<MediaType> acceptableTypes = getAcceptableMediaTypes(request);
                        //服务能生产的响应的内容类型
			List<MediaType> producibleTypes = getProducibleMediaTypes(request, valueType, targetType);

			if (body != null && producibleTypes.isEmpty()) {
				throw new HttpMessageNotWritableException(
						"No converter found for return value of type: " + valueType);
			}
			List<MediaType> mediaTypesToUse = new ArrayList<>();
			for (MediaType requestedType : acceptableTypes) {
				for (MediaType producibleType : producibleTypes) {
					if (requestedType.isCompatibleWith(producibleType)) {
                                                //匹配到真正需要使用的内容类型
						mediaTypesToUse.add(getMostSpecificMediaType(requestedType, producibleType));
					}
				}
			}
			if (mediaTypesToUse.isEmpty()) {
				if (body != null) {
					throw new HttpMediaTypeNotAcceptableException(producibleTypes);
				}
				if (logger.isDebugEnabled()) {
					logger.debug("No match for " + acceptableTypes + ", supported: " + producibleTypes);
				}
				return;
			}

			MediaType.sortBySpecificityAndQuality(mediaTypesToUse);

			for (MediaType mediaType : mediaTypesToUse) {
				if (mediaType.isConcrete()) {
					selectedMediaType = mediaType;
					break;
				}
				else if (mediaType.isPresentIn(ALL_APPLICATION_MEDIA_TYPES)) {
					selectedMediaType = MediaType.APPLICATION_OCTET_STREAM;
					break;
				}
			}

			if (logger.isDebugEnabled()) {
				logger.debug("Using '" + selectedMediaType + "', given " +
						acceptableTypes + " and supported " + producibleTypes);
			}
		}

		if (selectedMediaType != null) {
			selectedMediaType = selectedMediaType.removeQualityValue();
                            //循环配置到对应的messageConverters
			for (HttpMessageConverter<?> converter : this.messageConverters) {
				GenericHttpMessageConverter genericConverter = (converter instanceof GenericHttpMessageConverter ?
						(GenericHttpMessageConverter<?>) converter : null);
				if (genericConverter != null ?
						((GenericHttpMessageConverter) converter).canWrite(targetType, valueType, selectedMediaType) :
						converter.canWrite(valueType, selectedMediaType)) {
					body = getAdvice().beforeBodyWrite(body, returnType, selectedMediaType,
							(Class<? extends HttpMessageConverter<?>>) converter.getClass(),
							inputMessage, outputMessage);
					if (body != null) {
						Object theBody = body;
						LogFormatUtils.traceDebug(logger, traceOn ->
								"Writing [" + LogFormatUtils.formatValue(theBody, !traceOn) + "]");
						addContentDispositionHeader(inputMessage, outputMessage);
						if (genericConverter != null) {
							genericConverter.write(body, targetType, selectedMediaType, outputMessage);
						}
						else {
							((HttpMessageConverter) converter).write(body, selectedMediaType, outputMessage);
						}
					}
					else {
						if (logger.isDebugEnabled()) {
							logger.debug("Nothing to write: null body");
						}
					}
					return;
				}
			}
		}

		if (body != null) {
			Set<MediaType> producibleMediaTypes =
					(Set<MediaType>) inputMessage.getServletRequest()
							.getAttribute(HandlerMapping.PRODUCIBLE_MEDIA_TYPES_ATTRIBUTE);

			if (isContentTypePreset || !CollectionUtils.isEmpty(producibleMediaTypes)) {
				throw new HttpMessageNotWritableException(
						"No converter for [" + valueType + "] with preset Content-Type '" + contentType + "'");
			}
			throw new HttpMediaTypeNotAcceptableException(this.allSupportedMediaTypes);
		}
	}
2、返回值解析器原理

- 返回值处理器判断是否支持这种类型返回值 supportsReturnType
- 返回值处理器调用 handleReturnValue 进行处理
- RequestResponseBodyMethodProcessor 可以处理返回值标了@ResponseBody 注解的。
- 利用 MessageConverters 进行处理 将数据写为json
- 内容协商(浏览器默认会以请求头的方式告诉服务器他能接受什么样的内容类型)
- 服务器最终根据自己自身的能力,决定服务器能生产出什么样内容类型的数据,
- SpringMVC会挨个遍历所有容器底层的 HttpMessageConverter ,看谁能处理?
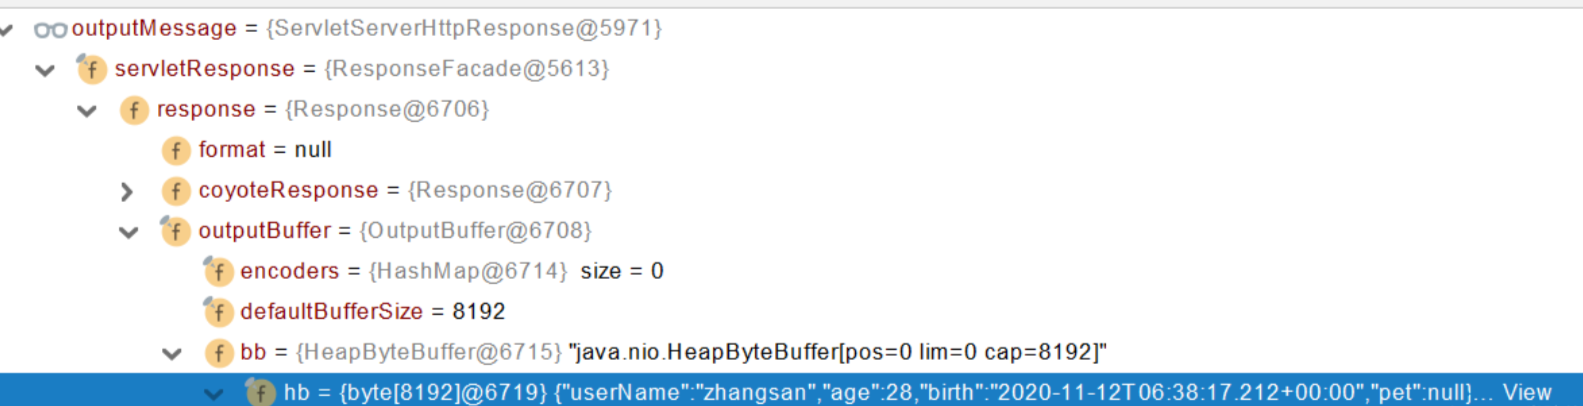
- 得到MappingJackson2HttpMessageConverter可以将对象写为json
- 利用MappingJackson2HttpMessageConverter将对象转为json再写出去。

- 利用 MessageConverters 进行处理 将数据写为json
1.2、SpringMVC到底支持哪些返回值
ModelAndView
Model
View
ResponseEntity
ResponseBodyEmitter
StreamingResponseBody
HttpEntity
HttpHeaders
Callable
DeferredResult
ListenableFuture
CompletionStage
WebAsyncTask
有 @ModelAttribute 且为对象类型的
@ResponseBody 注解 ---> RequestResponseBodyMethodProcessor;
1.3、HTTPMessageConverter原理(RequestResponseBodyMethodProcessor)
1、MessageConverter规范
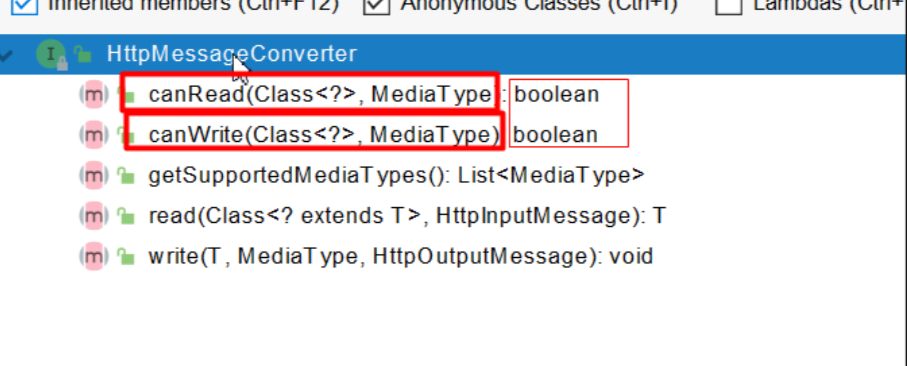
HttpMessageConverter: 看是否支持将 此 Class类型的对象,转为MediaType类型的数据。
例子:Person对象转为JSON。或者 JSON转为Person
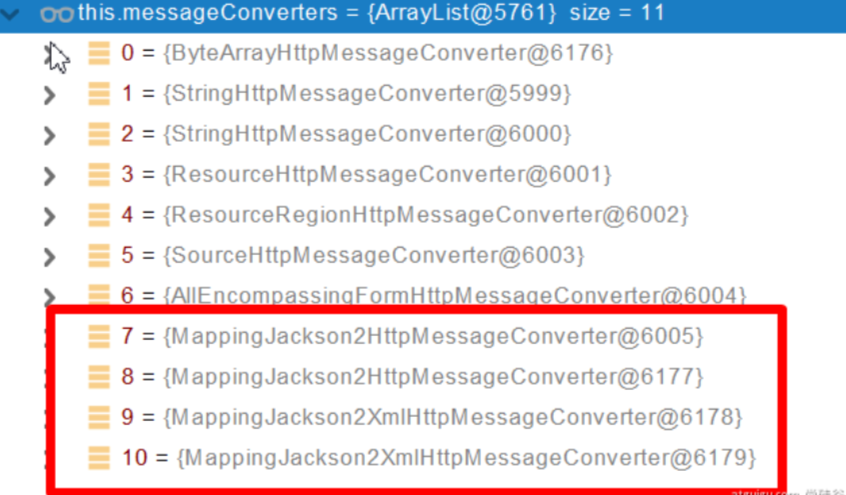
2、默认的MessageConverter
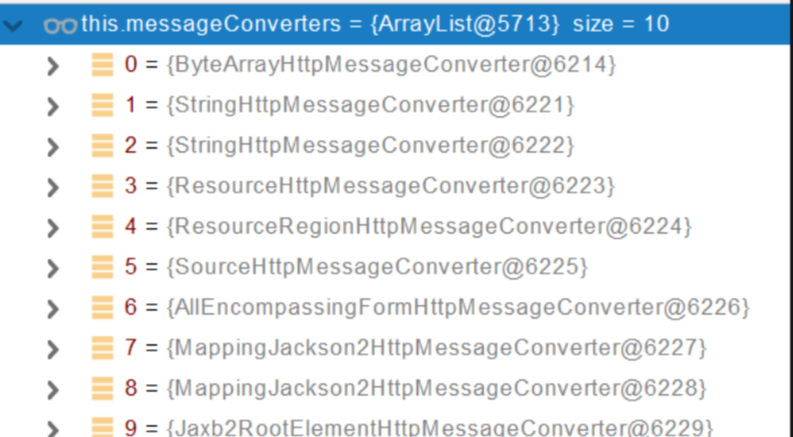
0 - 只支持Byte类型的
1 - String
2 - String
3 - Resource
4 - ResourceRegion
5 - DOMSource.class SAXSource.class) StAXSource.class StreamSource.class Source.class
6 - MultiValueMap
7 - true
8 - true
9 - 支持注解方式xml处理的。
最终 MappingJackson2HttpMessageConverter 把对象转为JSON(利用底层的jackson的objectMapper转换的)
2、内容协商
根据客户端接收能力不同,返回不同媒体类型的数据。
1、引入xml依赖
 <dependency>
            <groupId>com.fasterxml.jackson.dataformat</groupId>
            <artifactId>jackson-dataformat-xml</artifactId>
</dependency>
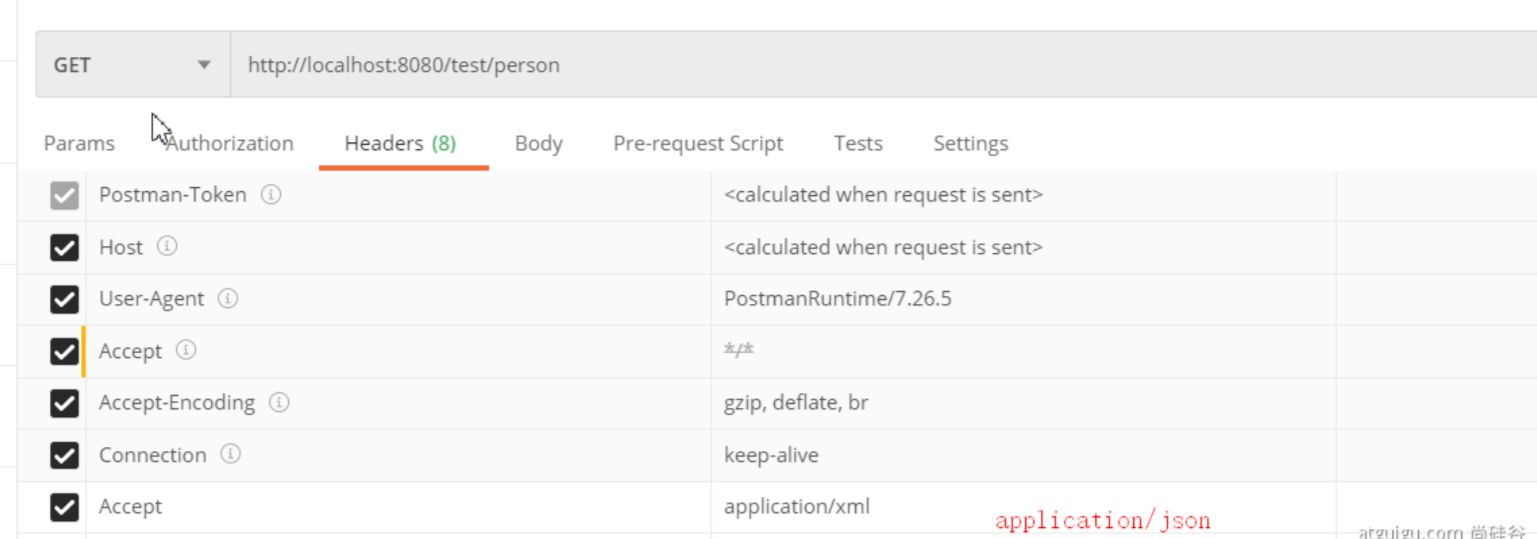
2、postman分别测试返回json和xml
只需要改变请求头中Accept字段。Http协议中规定的,告诉服务器本客户端可以接收的数据类型。
3、开启浏览器参数方式内容协商功能
为了方便内容协商,开启基于请求参数的内容协商功能。
spring:
    contentnegotiation:
      favor-parameter: true  #开启请求参数内容协商模式
发请求: http://localhost:8080/test/person?format=json
http://localhost:8080/test/person?format=xml
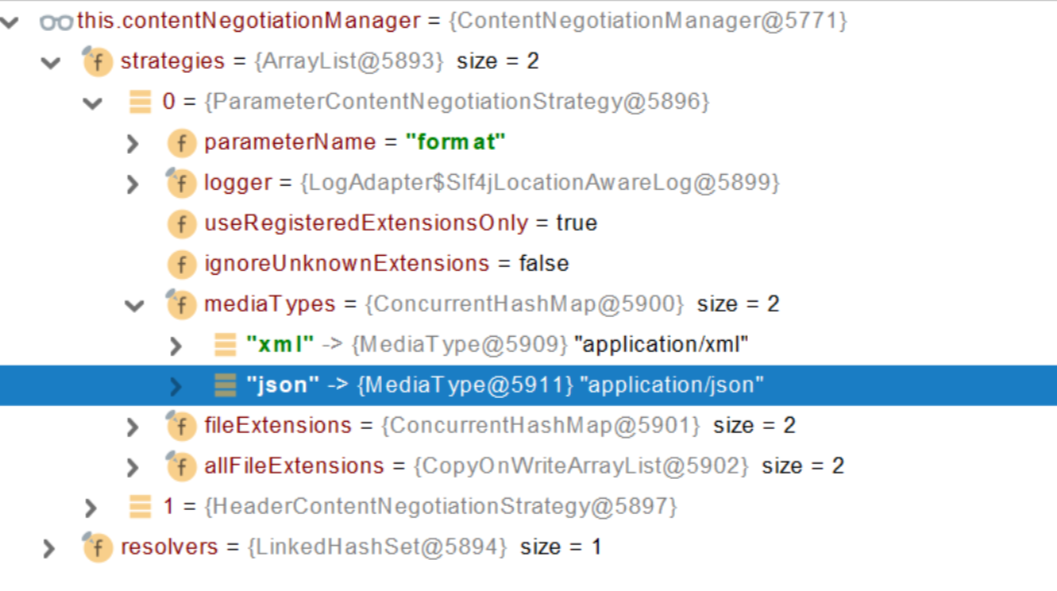
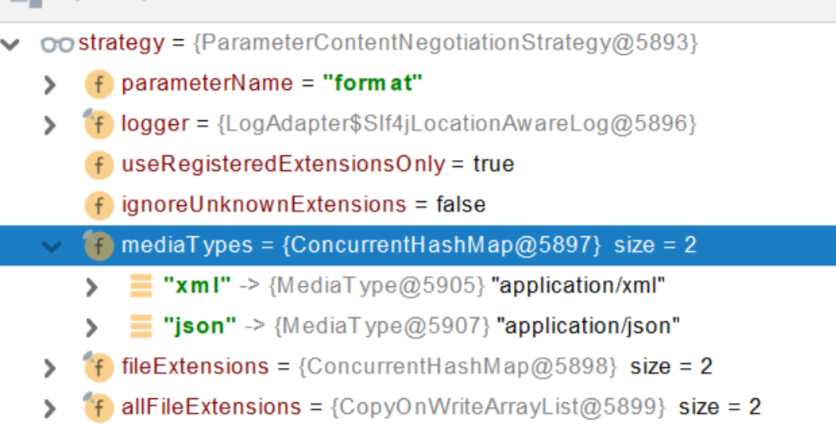
确定客户端接收什么样的内容类型;
1、Parameter策略优先确定是要返回json数据(获取请求头中的format的值)

2、最终进行内容协商返回给客户端json即可。
4、内容协商原理
- 1、判断当前响应头中是否已经有确定的媒体类型。MediaType
- 2、获取客户端(PostMan、浏览器)支持接收的内容类型。(获取客户端Accept请求头字段)【application/xml】
- contentNegotiationManager 内容协商管理器 默认使用基于请求头的策略

- HeaderContentNegotiationStrategy 确定客户端可以接收的内容类型

- 3、遍历循环所有当前系统的 MessageConverter,看谁支持操作这个对象(Person)
- 4、找到支持操作Person的converter,把converter支持的媒体类型统计出来。
- 5、客户端需要【application/xml】。服务端能力【10种、json、xml】

- 6、进行内容协商的最佳匹配媒体类型
- 7、用 支持 将对象转为 最佳匹配媒体类型 的converter。调用它进行转化 。
导入了jackson处理xml的包,xml的converter就会自动进来
WebMvcConfigurationSupport
jackson2XmlPresent = ClassUtils.isPresent("com.fasterxml.jackson.dataformat.xml.XmlMapper", classLoader);

if (jackson2XmlPresent) {
			Jackson2ObjectMapperBuilder builder = Jackson2ObjectMapperBuilder.xml();
			if (this.applicationContext != null) {
				builder.applicationContext(this.applicationContext);
			}
			messageConverters.add(new MappingJackson2XmlHttpMessageConverter(builder.build()));
		}
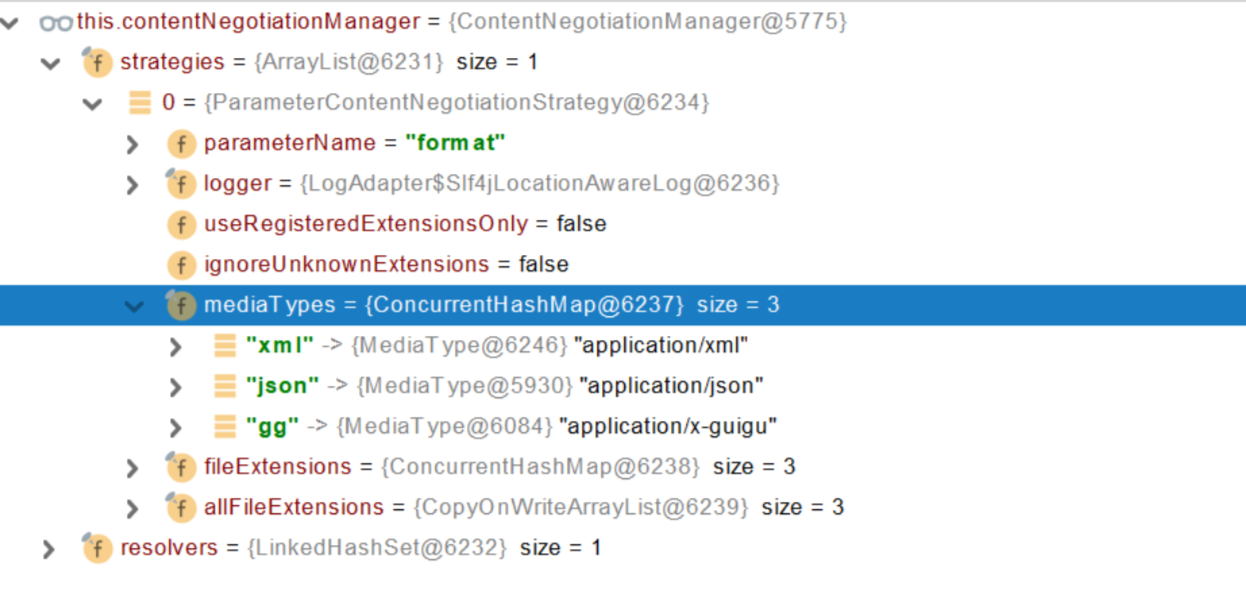
5、自定义 MessageConverter
实现多协议数据兼容。json、xml、x-guigu
0、@ResponseBody 响应数据出去 调用 RequestResponseBodyMethodProcessor 处理
1、Processor 处理方法返回值。通过 MessageConverter 处理
2、所有 MessageConverter 合起来可以支持各种媒体类型数据的操作(读、写)
3、内容协商找到最终的 messageConverter;
SpringMVC的什么功能。一个入口给容器中添加一个 WebMvcConfigurer
 @Bean
    public WebMvcConfigurer webMvcConfigurer(){
        return new WebMvcConfigurer() {

            @Override
            public void extendMessageConverters(List<HttpMessageConverter<?>> converters) {

            }
        }
    }
有可能我们添加的自定义的功能会覆盖默认很多功能,导致一些默认的功能失效。
5、视图解析与模板引擎
视图解析:SpringBoot默认不支持 JSP,需要引入第三方模板引擎技术实现页面渲染。
1、视图解析
1、视图解析原理流程
- 目标方法处理的过程中,所有数据都会被放在 ModelAndViewContainer 里面。包括数据和视图地址
- 方法的参数是一个自定义类型对象(从请求参数中确定的),把他重新放在 ModelAndViewContainer
- 任何目标方法执行完成以后都会返回 ModelAndView(数据和视图地址)。
- processDispatchResult 处理派发结果(页面改如何响应)
- 1、render(mv, request, response); 进行页面渲染逻辑
- 1、根据方法的String返回值得到 View 对象【定义了页面的渲染逻辑】
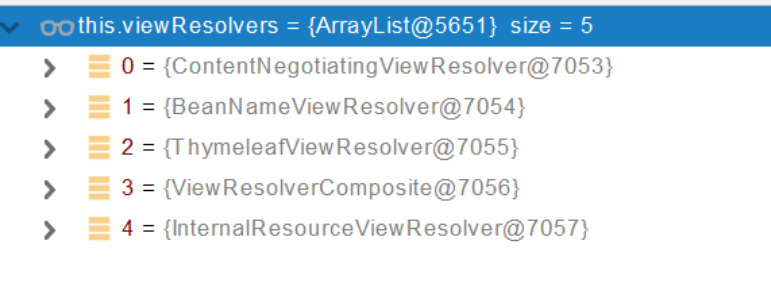
- 1、所有的视图解析器尝试是否能根据当前返回值得到View对象
- 2、得到了 redirect:/main.html --> Thymeleaf new RedirectView()
- 3、ContentNegotiationViewResolver 里面包含了下面所有的视图解析器,内部还是利用下面所有视图解析器得到视图对象。
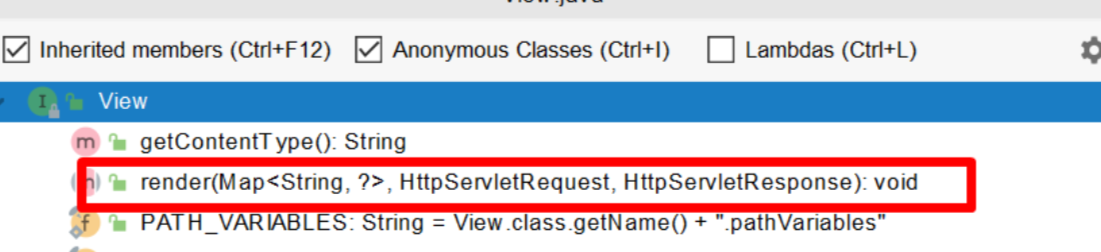
- 4、view.render(mv.getModelInternal(), request, response); 视图对象调用自定义的render进行页面渲染工作
- RedirectView 如何渲染【重定向到一个页面】
- 1、获取目标url地址
- 2、response.sendRedirect(encodedURL);
- 1、根据方法的String返回值得到 View 对象【定义了页面的渲染逻辑】
- 1、render(mv, request, response); 进行页面渲染逻辑
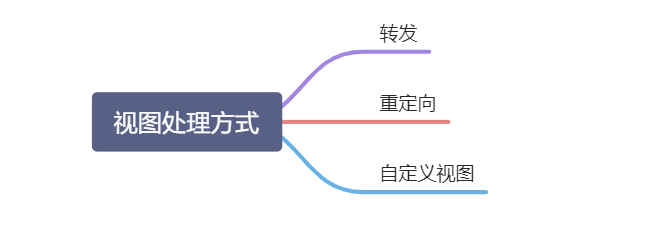
视图解析:
* 返回值以 forward: 开始: new InternalResourceView(forwardUrl); --> 转发request.getRequestDispatcher(path).forward(request, response);
* 返回值以 redirect: 开始: new RedirectView() --》 render就是重定向
* 返回值是普通字符串: new ThymeleafView()--->

2、模板引擎-Thymeleaf
1、thymeleaf简介
Thymeleaf is a modern server-side Java template engine for both web and standalone environments, capable of processing HTML, XML, JavaScript, CSS and even plain text.
现代化、服务端Java模板引擎
2、基本语法
1、表达式
2、字面量
文本值: 'one text' , 'Another one!' ,…数字: 0 , 34 , 3.0 , 12.3 ,…布尔值: true , false
空值: null
变量: one,two,.... 变量不能有空格
3、文本操作
字符串拼接: +
变量替换: |The name is ${name}|
4、数学运算
运算符: + , - , * , / , %
5、布尔运算
运算符: and , or
一元运算: ! , not
6、比较运算
比较: > , < , >= , <= ( gt , lt , ge , le )等式: == , != ( eq , ne )
7、条件运算
If-then: (if) ? (then)
If-then-else: (if) ? (then) : (else)
Default: (value) ?: (defaultvalue)
8、特殊操作
无操作: _
3、设置属性值-th:attr
设置单个值
<form action="subscribe.html" th:attr="action=@{/subscribe}">
  <fieldset>
    <input type="text" name="email" />
    <input type="submit" value="Subscribe!" th:attr="value=#{subscribe.submit}"/>
  </fieldset>
</form>
设置多个值
<img src="../../images/gtvglogo.png" th:attr="src=@{/images/gtvglogo.png},title=#{logo},alt=#{logo}" />
以上两个的代替写法 th:xxxx
<input type="submit" value="Subscribe!" th:value="#{subscribe.submit}"/>
<form action="subscribe.html" th:action="@{/subscribe}">
所有h5兼容的标签写法
https://www.thymeleaf.org/doc/tutorials/3.0/usingthymeleaf.html#setting-value-to-specific-attributes
4、迭代
<tr th:each="prod : ${prods}">
        <td th:text="${prod.name}">Onions</td>
        <td th:text="${prod.price}">2.41</td>
        <td th:text="${prod.inStock}? #{true} : #{false}">yes</td>
</tr>
<tr th:each="prod,iterStat : ${prods}" th:class="${iterStat.odd}? 'odd'">
  <td th:text="${prod.name}">Onions</td>
  <td th:text="${prod.price}">2.41</td>
  <td th:text="${prod.inStock}? #{true} : #{false}">yes</td>
</tr>
5、条件运算
<a href="comments.html"
th:href="@{/product/comments(prodId=${prod.id})}"
th:if="${not #lists.isEmpty(prod.comments)}">view</a>
<div th:switch="${user.role}">
  <p th:case="'admin'">User is an administrator</p>
  <p th:case="#{roles.manager}">User is a manager</p>
  <p th:case="*">User is some other thing</p>
</div>
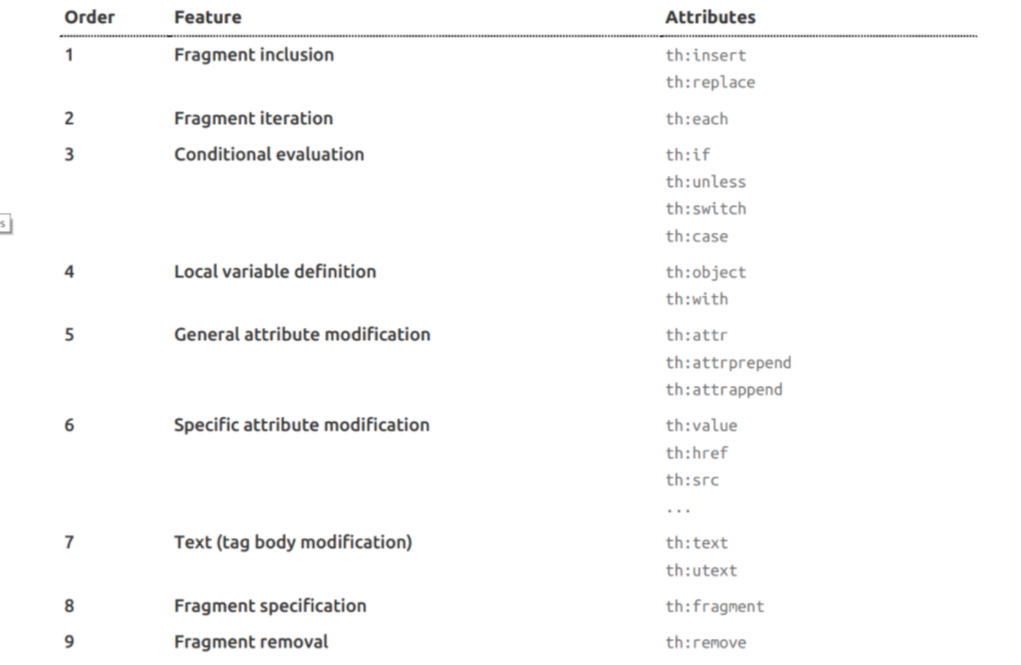
6、属性优先级
3、thymeleaf使用
1、引入Starter
        <dependency>
            <groupId>org.springframework.boot</groupId>
            <artifactId>spring-boot-starter-thymeleaf</artifactId>
        </dependency>
2、自动配置好了thymeleaf
@Configuration(proxyBeanMethods = false)
@EnableConfigurationProperties(ThymeleafProperties.class)
@ConditionalOnClass({ TemplateMode.class, SpringTemplateEngine.class })
@AutoConfigureAfter({ WebMvcAutoConfiguration.class, WebFluxAutoConfiguration.class })
public class ThymeleafAutoConfiguration { }
自动配好的策略
- 1、所有thymeleaf的配置值都在 ThymeleafProperties
- 2、配置好了 SpringTemplateEngine
- 3、配好了 ThymeleafViewResolver
- 4、我们只需要直接开发页面
	public static final String DEFAULT_PREFIX = "classpath:/templates/";

	public static final String DEFAULT_SUFFIX = ".html";  //xxx.html
3、页面开发
<!DOCTYPE html>
<html lang="en" xmlns:th="http://www.thymeleaf.org">
<head>
    <meta charset="UTF-8">
    <title>Title</title>
</head>
<body>
<h1 th:text="${msg}">哈哈</h1>
<h2>
    <a href="www.atguigu.com" th:href="${link}">去百度</a>  <br/>
    <a href="www.atguigu.com" th:href="@{link}">去百度2</a>
</h2>
</body>
</html>
4、构建后台管理系统
1、项目创建
thymeleaf、web-starter、devtools、lombok
2、静态资源处理
自动配置好,我们只需要把所有静态资源放到 static 文件夹下
3、路径构建
th:action="@{/login}"
4、模板抽取
th:insert/replace/include
5、页面跳转
    @PostMapping("/login")
    public String main(User user, HttpSession session, Model model){

        if(StringUtils.hasLength(user.getUserName()) && "123456".equals(user.getPassword())){
            //把登陆成功的用户保存起来
            session.setAttribute("loginUser",user);
            //登录成功重定向到main.html;  重定向防止表单重复提交
            return "redirect:/main.html";
        }else {
            model.addAttribute("msg","账号密码错误");
            //回到登录页面
            return "login";
        }

    }
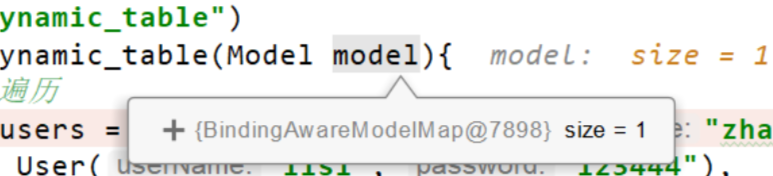
6、数据渲染
    @GetMapping("/dynamic_table")
    public String dynamic_table(Model model){
        //表格内容的遍历
        List<User> users = Arrays.asList(new User("zhangsan", "123456"),
                new User("lisi", "123444"),
                new User("haha", "aaaaa"),
                new User("hehe ", "aaddd"));
        model.addAttribute("users",users);

        return "table/dynamic_table";
    }
        <table class="display table table-bordered" id="hidden-table-info">
        <thead>
        <tr>
            <th>#</th>
            <th>用户名</th>
            <th>密码</th>
        </tr>
        </thead>
        <tbody>
        <tr class="gradeX" th:each="user,stats:${users}">
            <td th:text="${stats.count}">Trident</td>
            <td th:text="${user.userName}">Internet</td>
            <td >[[${user.password}]]</td>
        </tr>
        </tbody>
        </table>
6、拦截器
1、HandlerInterceptor 接口
/**
 * 登录检查
 * 1、配置好拦截器要拦截哪些请求
 * 2、把这些配置放在容器中
 */
@Slf4j
public class LoginInterceptor implements HandlerInterceptor {

    /**
     * 目标方法执行之前
     * @param request
     * @param response
     * @param handler
     * @return
     * @throws Exception
     */
    @Override
    public boolean preHandle(HttpServletRequest request, HttpServletResponse response, Object handler) throws Exception {

        String requestURI = request.getRequestURI();
        log.info("preHandle拦截的请求路径是{}",requestURI);

        //登录检查逻辑
        HttpSession session = request.getSession();

        Object loginUser = session.getAttribute("loginUser");

        if(loginUser != null){
            //放行
            return true;
        }

        //拦截住。未登录。跳转到登录页
        request.setAttribute("msg","请先登录");
//        re.sendRedirect("/");
        request.getRequestDispatcher("/").forward(request,response);
        return false;
    }

    /**
     * 目标方法执行完成以后
     * @param request
     * @param response
     * @param handler
     * @param modelAndView
     * @throws Exception
     */
    @Override
    public void postHandle(HttpServletRequest request, HttpServletResponse response, Object handler, ModelAndView modelAndView) throws Exception {
        log.info("postHandle执行{}",modelAndView);
    }

    /**
     * 页面渲染以后
     * @param request
     * @param response
     * @param handler
     * @param ex
     * @throws Exception
     */
    @Override
    public void afterCompletion(HttpServletRequest request, HttpServletResponse response, Object handler, Exception ex) throws Exception {
        log.info("afterCompletion执行异常{}",ex);
    }
}
2、配置拦截器
/**
 * 1、编写一个拦截器实现HandlerInterceptor接口
 * 2、拦截器注册到容器中(实现WebMvcConfigurer的addInterceptors)
 * 3、指定拦截规则【如果是拦截所有,静态资源也会被拦截】
 */
@Configuration
public class AdminWebConfig implements WebMvcConfigurer {

    @Override
    public void addInterceptors(InterceptorRegistry registry) {
        registry.addInterceptor(new LoginInterceptor())
                .addPathPatterns("/**")  //所有请求都被拦截包括静态资源
                .excludePathPatterns("/","/login","/css/**","/fonts/**","/images/**","/js/**"); //放行的请求
    }
}
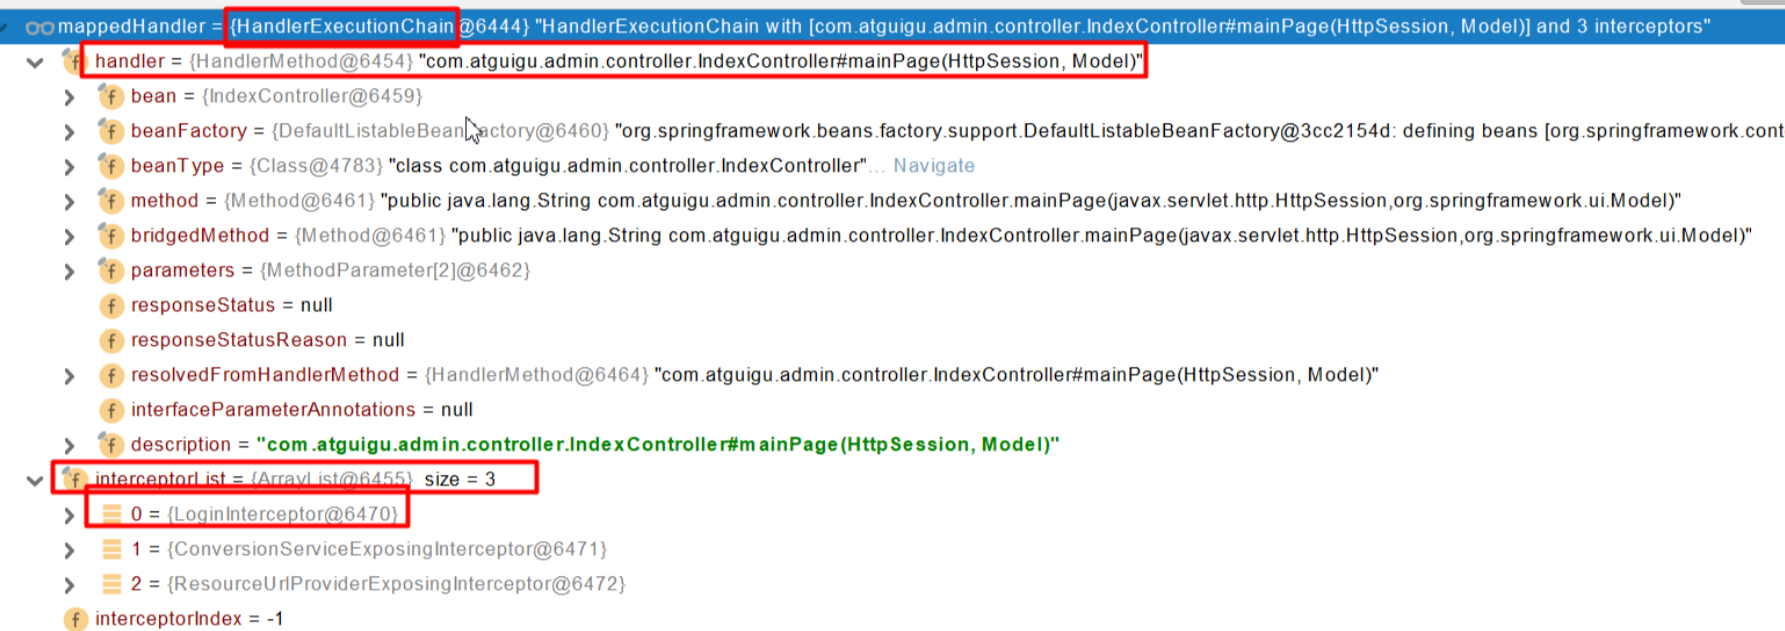
3、拦截器原理
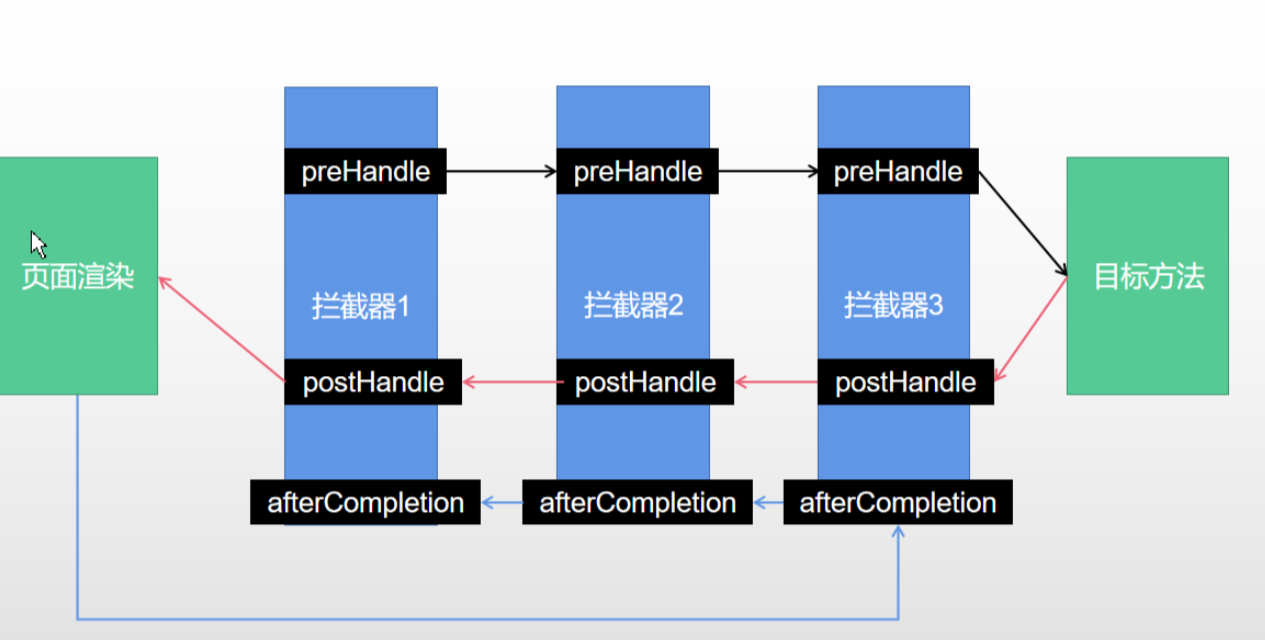
- 1、根据当前请求,找到HandlerExecutionChain【可以处理请求的handler以及handler的所有 拦截器】
- 2、先来顺序执行 所有拦截器的 preHandle方法
- 1、如果当前拦截器prehandler返回为true。则执行下一个拦截器的preHandle
- 2、如果当前拦截器返回为false。直接 倒序执行所有已经执行了的拦截器的 afterCompletion;
- 3、如果任何一个拦截器返回false。直接跳出不执行目标方法
- 4、所有拦截器都返回True。执行目标方法
- 5、倒序执行所有拦截器的postHandle方法。
- 6、前面的步骤有任何异常都会直接倒序触发 afterCompletion
- 7、页面成功渲染完成以后,也会倒序触发 afterCompletion
7、文件上传
1、页面表单
<form method="post" action="/upload" enctype="multipart/form-data">
    <input type="file" name="file"><br>
    <input type="submit" value="提交">
</form>
2、文件上传代码
    /**
     * MultipartFile 自动封装上传过来的文件
     * @param email
     * @param username
     * @param headerImg
     * @param photos
     * @return
     */
    @PostMapping("/upload")
    public String upload(@RequestParam("email") String email,
                         @RequestParam("username") String username,
                         @RequestPart("headerImg") MultipartFile headerImg,
                         @RequestPart("photos") MultipartFile[] photos) throws IOException {

        log.info("上传的信息:email={},username={},headerImg={},photos={}",
                email,username,headerImg.getSize(),photos.length);

        if(!headerImg.isEmpty()){
            //保存到文件服务器,OSS服务器
            String originalFilename = headerImg.getOriginalFilename();
            headerImg.transferTo(new File("H:\cache\"+originalFilename));
        }

        if(photos.length > 0){
            for (MultipartFile photo : photos) {
                if(!photo.isEmpty()){
                    String originalFilename = photo.getOriginalFilename();
                    photo.transferTo(new File("H:\cache\"+originalFilename));
                }
            }
        }


        return "main";
    }
3、自动配置原理
文件上传自动配置类-MultipartAutoConfiguration-MultipartProperties
- 自动配置好了 StandardServletMultipartResolver 【文件上传解析器】
- 原理步骤
- 1、请求进来使用文件上传解析器判断(isMultipart)并封装(resolveMultipart,返回MultipartHttpServletRequest)文件上传请求
- 2、参数解析器来解析请求中的文件内容封装成MultipartFile
- 3、将request中文件信息封装为一个Map;MultiValueMap<String, MultipartFile> FileCopyUtils。实现文件流的拷贝
    @PostMapping("/upload")
    public String upload(@RequestParam("email") String email,
                         @RequestParam("username") String username,
                         @RequestPart("headerImg") MultipartFile headerImg,
                         @RequestPart("photos") MultipartFile[] photos)

8、异常处理
1、错误处理
1、默认规则
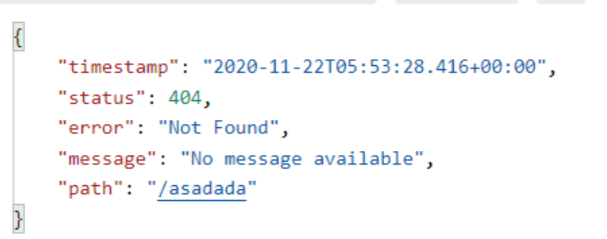
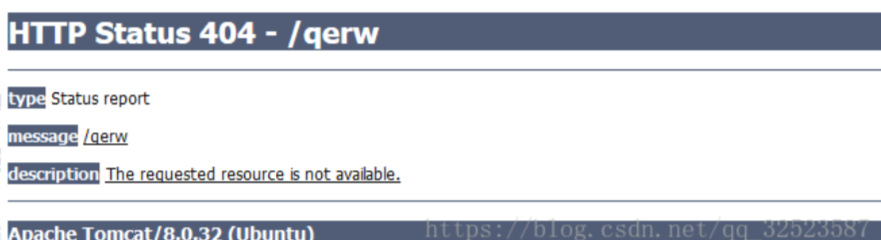
- 默认情况下,Spring Boot提供/error处理所有错误的映射
- 对于机器客户端,它将生成JSON响应,其中包含错误,HTTP状态和异常消息的详细信息。对于浏览器客户端,响应一个“ whitelabel”错误视图,以HTML格式呈现相同的数据

- 要对其进行自定义,添加View解析为error
- 要完全替换默认行为,可以实现 ErrorController 并注册该类型的Bean定义,或添加ErrorAttributes类型的组件以使用现有机制但替换其内容。
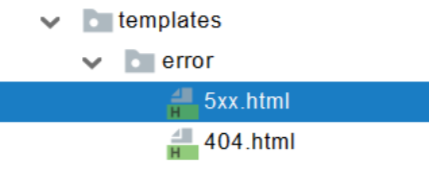
- error/下的4xx,5xx页面会被自动解析;
2、定制错误处理逻辑
- 自定义错误页
- error/404.html error/5xx.html;有精确的错误状态码页面就匹配精确,没有就找 4xx.html;如果都没有就触发白页
- @ControllerAdvice+@ExceptionHandler处理全局异常;底层是 ExceptionHandlerExceptionResolver 支持的
- @ResponseStatus+自定义异常 ;底层是 ResponseStatusExceptionResolver ,把responsestatus注解的信息底层调用 response.sendError(statusCode, resolvedReason);tomcat发送的/error
- Spring底层的异常,如 参数类型转换异常;DefaultHandlerExceptionResolver 处理框架底层的异常。
- response.sendError(HttpServletResponse.SC_BAD_REQUEST, ex.getMessage());
- 自定义实现 HandlerExceptionResolver 处理异常;可以作为默认的全局异常处理规则
- ErrorViewResolver 实现自定义处理异常;
- response.sendError 。error请求就会转给controller
- 你的异常没有任何人能处理。tomcat底层 response.sendError。error请求就会转给controller
- basicErrorController 要去的页面地址是 ErrorViewResolver ;
3、异常处理自动配置原理
- ErrorMvcAutoConfiguration 自动配置异常处理规则
-
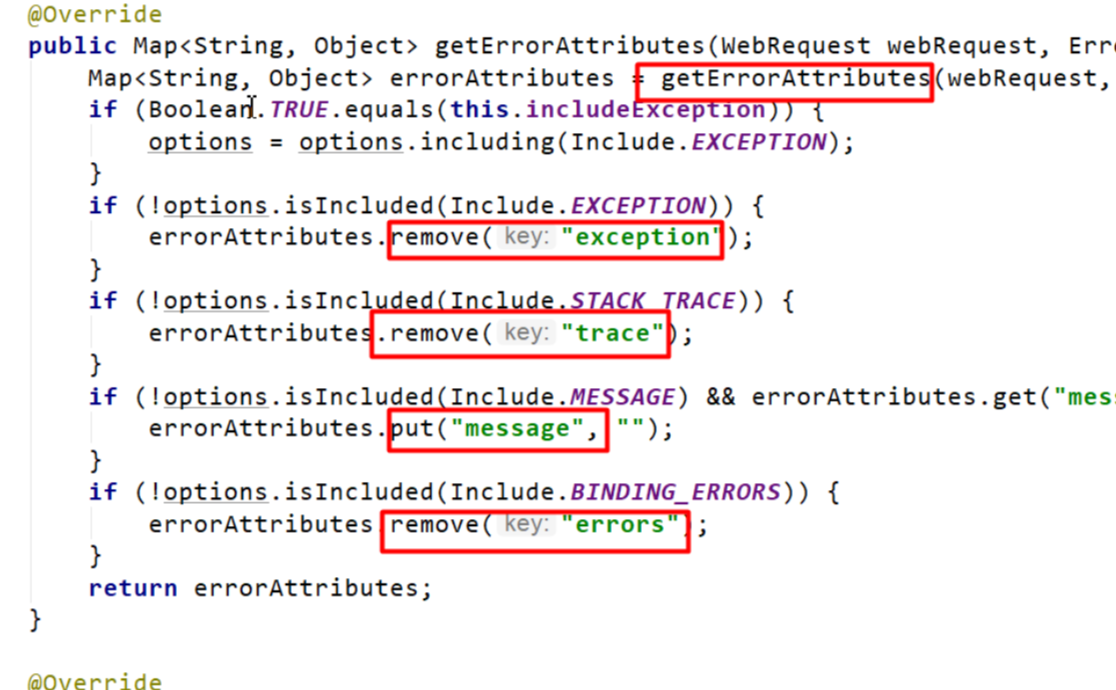
容器中的组件:类型:DefaultErrorAttributes -> id:errorAttributes
- public class DefaultErrorAttributes implements ErrorAttributes, HandlerExceptionResolver
- DefaultErrorAttributes:定义错误页面中可以包含哪些数据。

-
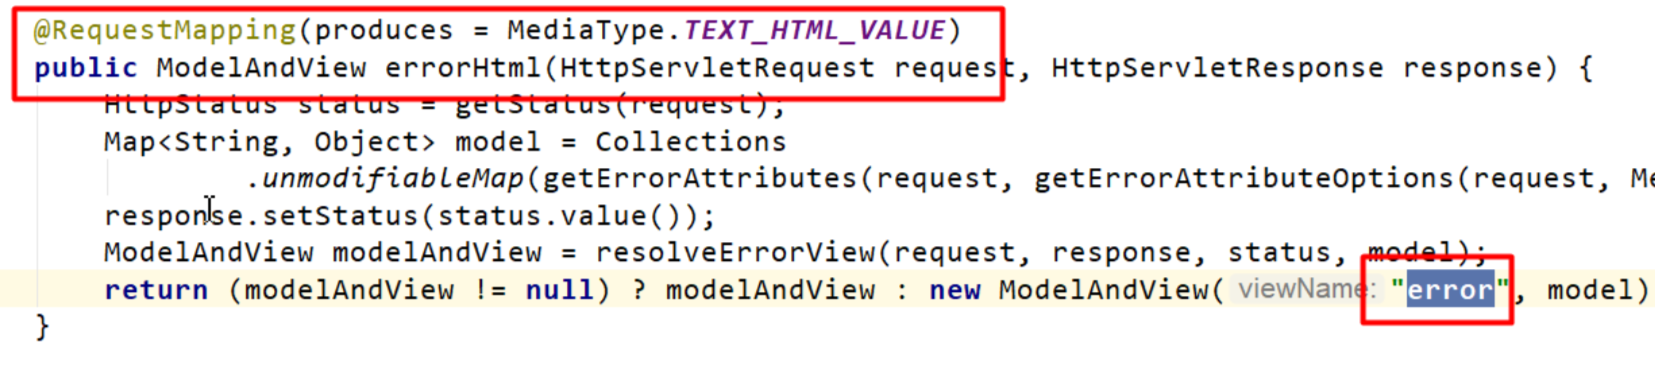
容器中的组件:类型:BasicErrorController --> id:basicErrorController(json+白页 适配响应)
- 处理默认 /error 路径的请求;页面响应 new ModelAndView("error", model);
- 容器中有组件 View->id是error;(响应默认错误页)
- 容器中放组件 BeanNameViewResolver(视图解析器);按照返回的视图名作为组件的id去容器中找View对象。
-
容器中的组件:类型:DefaultErrorViewResolver -> id:conventionErrorViewResolver
- 如果发生错误,会以HTTP的状态码 作为视图页地址(viewName),找到真正的页面
- error/404、5xx.html
如果想要返回页面;就会找error视图【StaticView】。(默认是一个白页)

-
4、异常处理步骤流程
- 1、执行目标方法,目标方法运行期间有任何异常都会被catch、而且标志当前请求结束;并且用 dispatchException
- 2、进入视图解析流程(页面渲染?)
processDispatchResult(processedRequest, response, mappedHandler, mv, dispatchException); - 3、mv = processHandlerException;处理handler发生的异常,处理完成返回ModelAndView;
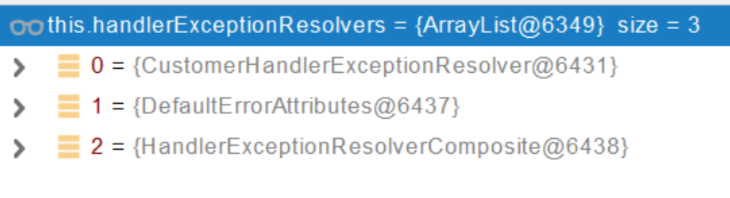
- 1、遍历所有的 handlerExceptionResolvers,看谁能处理当前异常【HandlerExceptionResolver处理器异常解析器】

- 2、系统默认的 异常解析器;
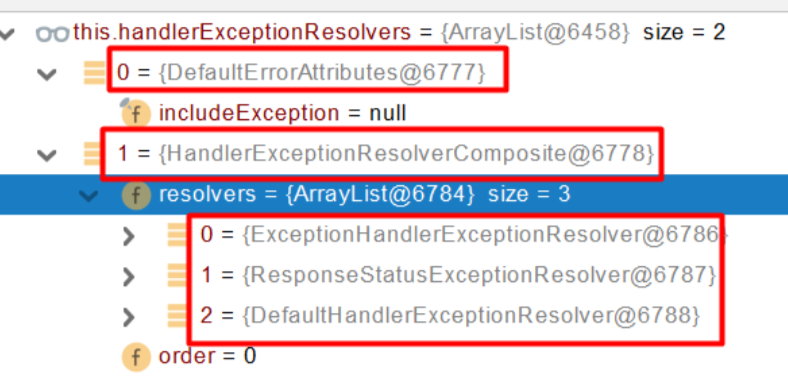
- 1、DefaultErrorAttributes先来处理异常。把异常信息保存到rrequest域,并且返回null;
- 2、默认没有任何人能处理异常,所以异常会被抛出
- 1、如果没有任何人能处理最终底层就会发送 /error 请求。会被底层的BasicErrorController处理
- 2、解析错误视图;遍历所有的 ErrorViewResolver 看谁能解析。

- 3、默认的 DefaultErrorViewResolver ,作用是把响应状态码作为错误页的地址,error/500.html
- 4、模板引擎最终响应这个页面 error/500.html