一、简介
Spring Boot Admin 从功能上可分为服务端和客户端,服务端就是Spring Boot Admin应用,客户端就是微服务应用。
二、服务端(Spring Boot Admin应用)配置步骤
主要分三步:
- 依赖包引入
- 配置文件修改
- 启动类添加注解
2.1 依赖包引入
<dependency>
<groupId>org.springframework.cloud</groupId>
<artifactId>spring-cloud-starter-netflix-eureka-client</artifactId>
</dependency>
<dependency>
<groupId>org.springframework.boot</groupId>
<artifactId>spring-boot-starter-actuator</artifactId>
</dependency>
<dependency>
<groupId>de.codecentric</groupId>
<artifactId>spring-boot-admin-starter-server</artifactId>
</dependency>
<dependency>
<groupId>org.springframework.boot</groupId>
<artifactId>spring-boot-starter-web</artifactId>
</dependency>
<dependency>
<groupId>org.springframework.boot</groupId>
<artifactId>spring-boot-starter-security</artifactId>
</dependency>
<dependency>
<groupId>org.jolokia</groupId>
<artifactId>jolokia-core</artifactId>
</dependency>
<dependency>
<groupId>org.springframework.boot</groupId>
<artifactId>spring-boot-starter-test</artifactId>
<scope>test</scope>
</dependency>
2.2:修改配置文件application.yml(文字版见最底部)
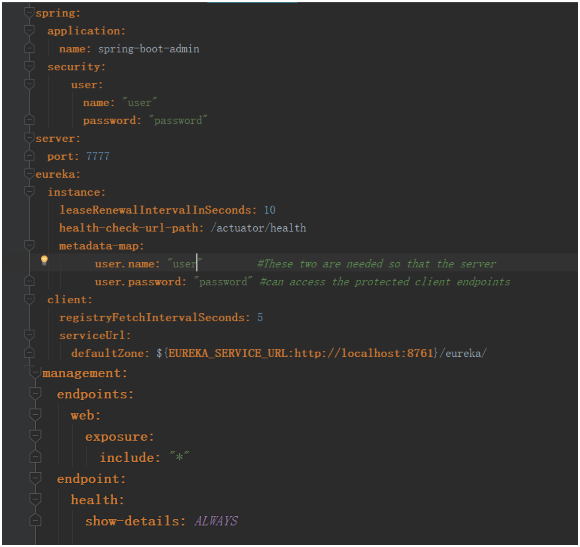
spring:
application:
name:spring-boot-admin
security:
user:
name:"user"
password:"password"
server:
port:7777
eureka:
instance:
leaseRenewalIntervalInSeconds:10
health-check-url-path:/actuator/health
metadata-map:
user.name:"user"#Thesetwoareneededsothattheserver
user.password:"password"#canaccesstheprotectedclientendpoints
client:
registryFetchIntervalSeconds:5
serviceUrl:
defaultZone:${EUREKA_SERVICE_URL:http://localhost:8761}/eureka/
management:
endpoints:
web:
exposure:
include:"*"
endpoint:
health:
show-details:ALWAYS
2.3 修改Application.java启动类
添加注解
@Configuration
@EnableAutoConfiguration
@EnableAdminServer
@EnableEurekaClient
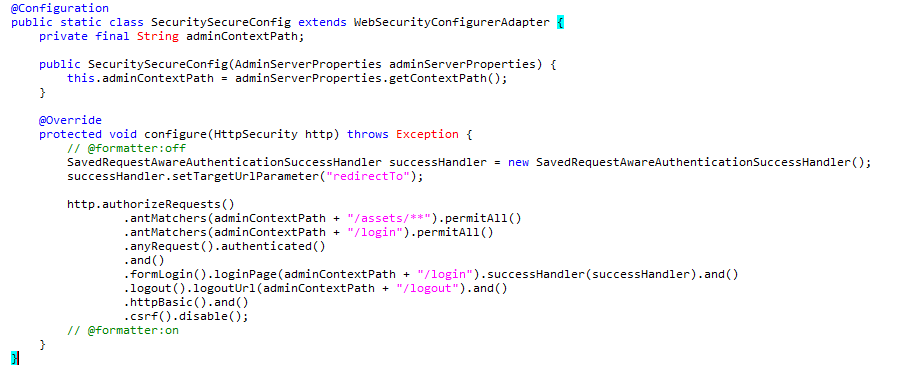
同时重写SecuritySecureConfig方法,
配置是 Spring Boot Admin 官方给的配置,是对 url 进行安全认证等配置,照着配置即可。
配置成功后,访问http://localhost:7777,出现如下界面,既是配置成功。
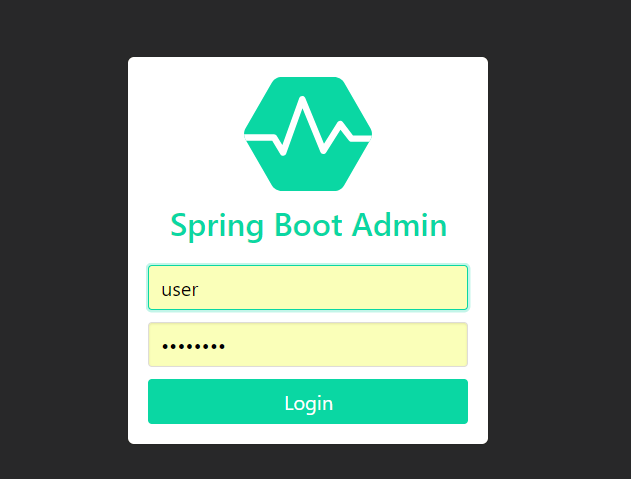
输入配置的用户名密码,比如user password,登录成功出现各服务状态界面