主要使用了 qrcode 与 html2canvas 实现
实现思路
先下载依赖 qrcode 与 html2canvas
npm install qrcode --save-dev    //引入生成二维码插件
npm install html2canvas --save
// 建议下载我这个版本  高版本   部分手机不能显示图片,算是一个坑
"html2canvas": "^1.0.0-rc.4",
在需要使用的界面引入
import QRCode from "qrcode";
import html2canvas from "html2canvas";
然后绘制生成海报的dom 元素
一般就是样式绘制出来以后就给一个固定定位(position: fixed;) 设置(bottom: -100%;)把内容隐藏在底部
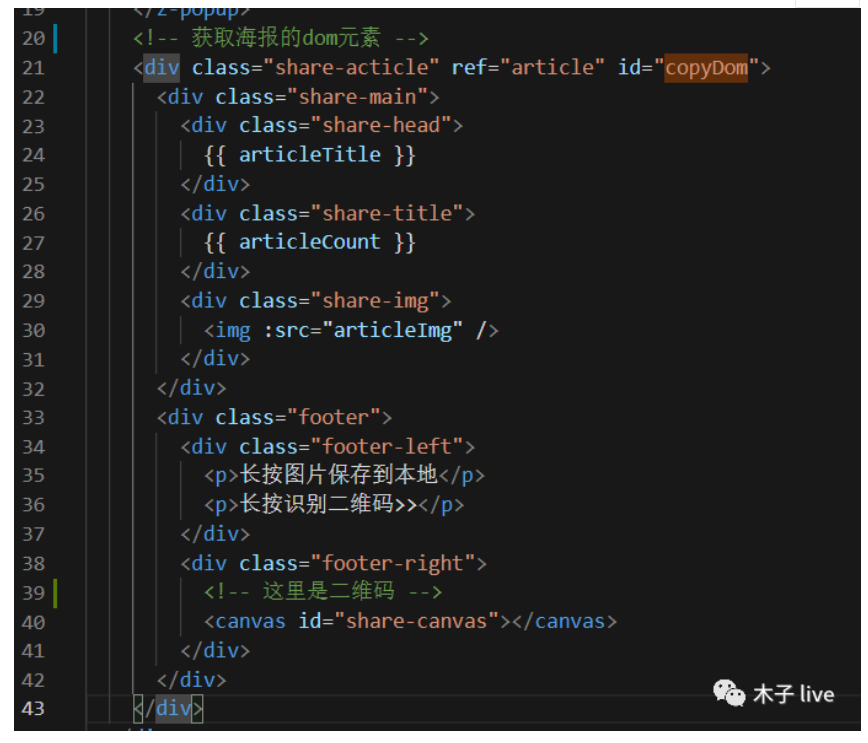
先绘制图片二维码
通过 QRCode.toCanvas这个方法就能实现
   qrcode() {
    //  找到绘制二维码的canvas元素
    // this.pageUrl 是自己定义的二维码内容
      QRCode.toCanvas(document.getElementById("share-canvas"), this.pageUrl, {
        margin: 1,
      });
    },
使用html2canvas 生产海报
  showShareHandles() {
      this.$Indicator.open("生成图片中");
      // 获取自定义海拔的dom  元素
      var copyDom = document.getElementById("copyDom");
      var width = copyDom.width;
      var height = copyDom.height;
      // 定义canvas对象
      let canvas = document.createElement("canvas");
      var scale = 6; // 放大图片6倍
      canvas.width = width * scale;
      canvas.height = height * scale;
      //  设置图片为2d
      canvas.getContext("2d").scale(scale, scale);

      // 调用html2canvas 生成海报的方法  这样写是为了兼容部分手机不能显示
      //  this.$refs.article  就是定义的海报dom元素
      // useCORS: true   设置图片可以跨域
      // canvas.toDataURL()方法会生成一个  图片url 可以直接拿来用
      (window.html2canvas || html2canvas)(this.$refs.article, {
        useCORS: true,
        logging: false,
      }).then((canvas) => {
        this.imgUri = canvas
          .toDataURL("image/png")
          .replace("image/png", "image/octet-stream");
        html2canvas(this.$refs.article, {
          useCORS: true,
          logging: false,
        }).then((canvas) => {
          this.imgUri = canvas
            .toDataURL("image/png")
            .replace("image/png", "image/octet-stream"); // 获取生成的图片的url
          this.lives = true;
          this.$Indicator.close();
        });
      });
    },