VScode编译C++主要有多种种方法,本文针对第一种方式:配置 launch.json 和 tasks.json 文件。
在安装完vscode,下载相应的插件后,编写C++程序并进行编译。在编译之前首先需要配置vscode的两个文件,分别为: launch.json 和 tasks.json 。
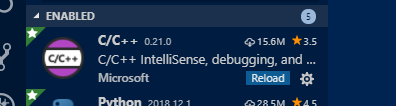
1、下载编辑C++ 的相应插件
下载编辑C++ 的相应插件,C/C++,如下图第一个插件
建立文件夹 test ,并在vscode中选择打开此文件夹 (vscode必须打开 .cpp文件所在的文件夹才能进编译,而不能只是打开一个 .cpp的单文件进行编译。)。在vscode中点击1处建立C01文件夹;在C01目录下,再点击2处,建立 .cpp 文件。目录结构如下图:

2、配置 launch.json 文件
(1)、打开01.cpp文件,按F5,在出现的命令提示栏上选择 C++(GDB/LLDB),

(2)、 然后在出现的launch.json模板上进行修改,主要修改2个地方。分别为下图的3处,为运行编译程序的路径;4处为添加的在启动运行程序之前,要进行先编译,与下一个文件 tasks.json 相对应。launch.json文件用于运行编译的程序。

快捷配置通道:
经过以上一波操作后肯定已经生成了相应的 launch.json 和 tasks.json 文件。
将lanch.json文件配置如下:
{
    // Use IntelliSense to learn about possible attributes.
    // Hover to view descriptions of existing attributes.
    // For more information, visit: https://go.microsoft.com/fwlink/?linkid=830387
    "version": "0.2.0",
    "configurations": [
        {
            "name": "(gdb) Launch",
            "type": "cppdbg",
            "request": "launch",
            "program": "${fileDirname}/${fileBasenameNoExtension}.out",
            "args": [],
            "stopAtEntry": false,
            "cwd": "${workspaceFolder}",
            "environment": [],
            "externalConsole": true,
            "MIMode": "gdb",
            "preLaunchTask": "build",
            "setupCommands": [
                {
                    "description": "Enable pretty-printing for gdb",
                    "text": "-enable-pretty-printing",
                    "ignoreFailures": true
                }
            ]
        }
    ]
}
将tasks.json文件配置如下:
{
    // See https://go.microsoft.com/fwlink/?LinkId=733558
    // for the documentation about the tasks.json format
    "version": "2.0.0",
    "tasks": [
        {
            "label": "build",
            "type": "shell",
            "command": "g++",
            "args": [
                "-g",
                "${file}",
                "-o",
                "${fileDirname}/${fileBasenameNoExtension}.out"
            ],
            "group": {
                "kind": "build",
                "isDefault": true
            }
        }
    ],
    "presentation": {
        "echo": true,
        "reveal": "always",
        "focus": false,
        //"panel": "shared",
        //"showReuseMessage": true,
        //"clear": false
    }
}
3、回到 01.cpp 文件,按F5即可编译运行该程序,结果如下所示:
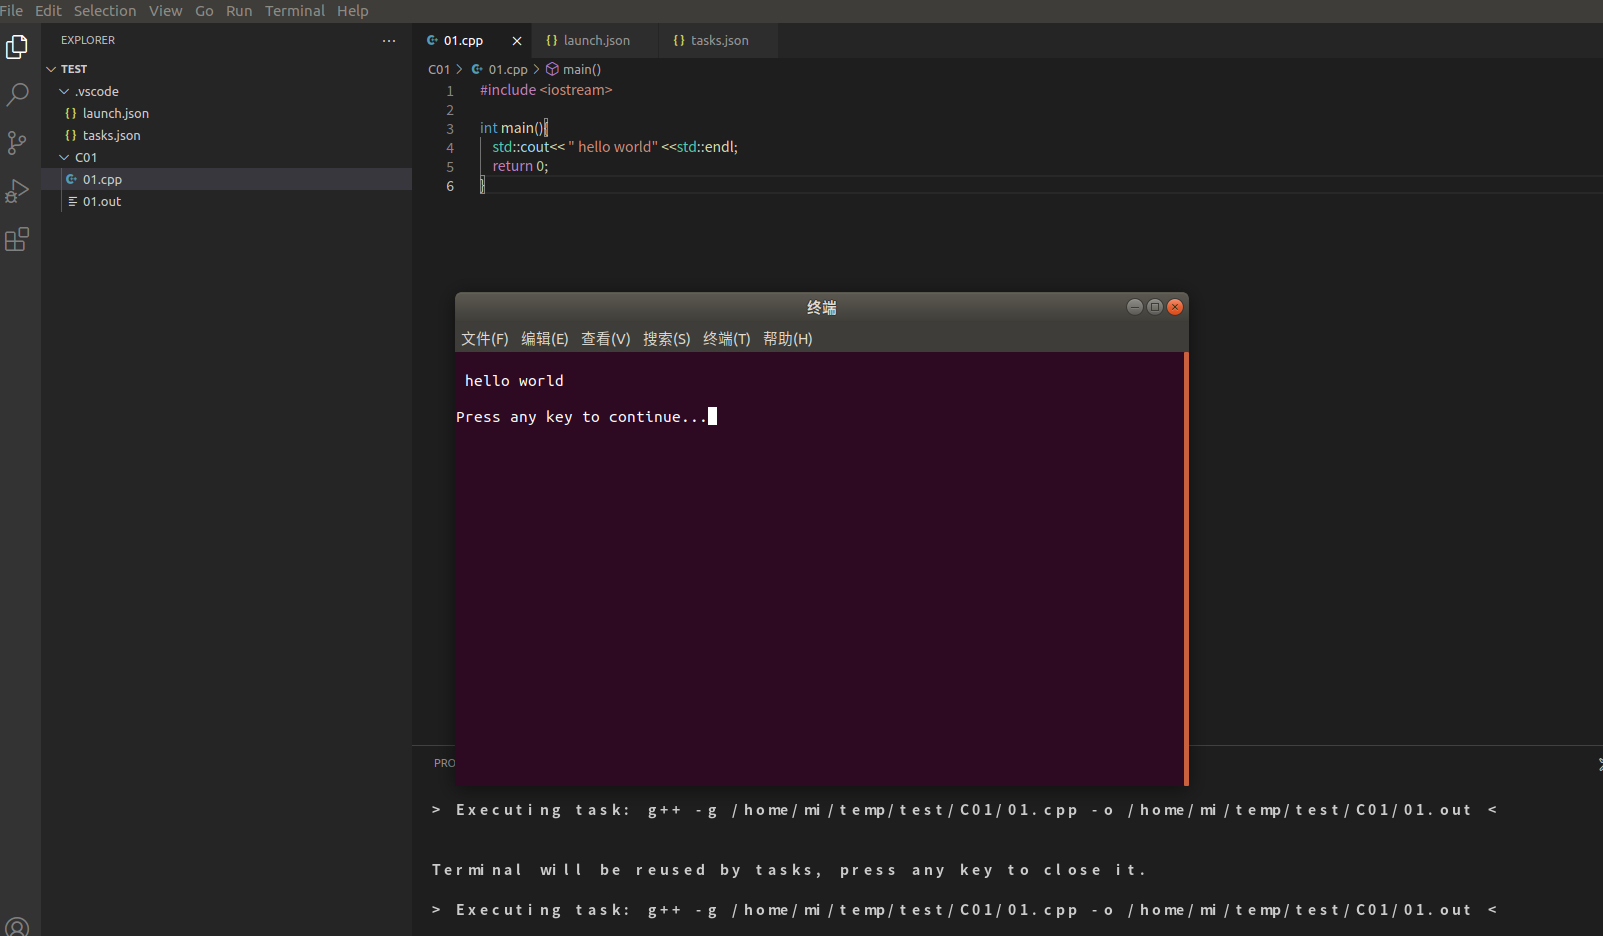
配置完成。
其他方式可参考:https://blog.csdn.net/Jeffxu_lib/article/details/86632400