spring boot jpa逆向生成表 简单实例:
第一步:pom文件:
<?xml version="1.0" encoding="UTF-8"?>
<project xmlns="http://maven.apache.org/POM/4.0.0" xmlns:xsi="http://www.w3.org/2001/XMLSchema-instance"
    xsi:schemaLocation="http://maven.apache.org/POM/4.0.0 http://maven.apache.org/xsd/maven-4.0.0.xsd">
    <modelVersion>4.0.0</modelVersion>

    <groupId>com.payease</groupId>
    <artifactId>girl</artifactId>
    <version>0.0.1-SNAPSHOT</version>
    <packaging>jar</packaging>

    <name>girl</name>
    <description>Demo project for Spring Boot</description>

    <parent>
        <groupId>org.springframework.boot</groupId>
        <artifactId>spring-boot-starter-parent</artifactId>
        <version>1.5.8.RELEASE</version>
        <relativePath/> <!-- lookup parent from repository -->
    </parent>

    <properties>
        <project.build.sourceEncoding>UTF-8</project.build.sourceEncoding>
        <project.reporting.outputEncoding>UTF-8</project.reporting.outputEncoding>
        <java.version>1.8</java.version>
    </properties>

    <dependencies>
        <dependency>
            <groupId>org.springframework.boot</groupId>
            <artifactId>spring-boot-starter-web</artifactId>
        </dependency>

        <dependency>
            <groupId>org.springframework.boot</groupId>
            <artifactId>spring-boot-starter-test</artifactId>
            <scope>test</scope>
        </dependency>
        <!-- 模版引擎 -->
        <dependency>
            <groupId>org.springframework.boot</groupId>
            <artifactId>spring-boot-starter-thymeleaf</artifactId>
        </dependency>

        <!-- spring data jpa -->
        <dependency>
            <groupId>org.springframework.boot</groupId>
            <artifactId>spring-boot-starter-data-jpa</artifactId>
        </dependency>

        <!-- mysql 组件 -->
        <dependency>
            <groupId>mysql</groupId>
            <artifactId>mysql-connector-java</artifactId>
        </dependency>
        <dependency>
            <groupId>javax.persistence</groupId>
            <artifactId>persistence-api</artifactId>
            <version>1.0</version>
        </dependency>
        <dependency>

            <groupId>org.springframework.boot</groupId>

            <artifactId>spring-boot-configuration-processor</artifactId>

            <optional>true</optional>

        </dependency>

    </dependencies>

    <build>
        <plugins>
            <plugin>
                <groupId>org.springframework.boot</groupId>
                <artifactId>spring-boot-maven-plugin</artifactId>
            </plugin>
        </plugins>
    </build>


</project>
第二步:配置文件application.yml。
spring:
 profiles:
   active: dev
 datasource:
   driver-class-name: com.mysql.jdbc.Driver
   url: jdbc:mysql://127.0.0.1:3306/dbgirl
   username: root
   password: 1234
 jpa:
   hibernate:
     ddl-auto: update
   show-sql: true
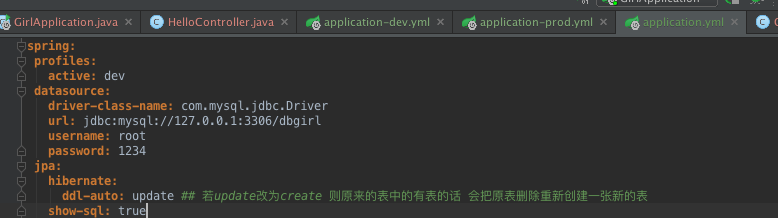
update第一次运行会创建表 若原来有表且有数据会保留原来的数据
第三步:配置问件application-dev.yml
server:
  port: 8080
girl:
  cupSize: B
  age: 18
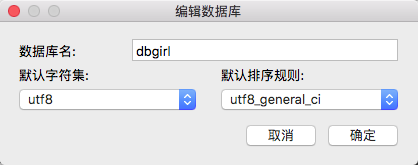
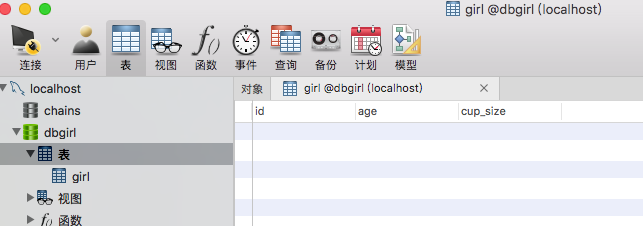
第四步:创建数据库(navigate)
第五步:创建实体类
package com.payease.entity;

import javax.persistence.Entity;
import javax.persistence.GeneratedValue;
import javax.persistence.Id;

/**
 * Created by liuxiaoming on 2017/11/6.
 */
@Entity
public class Girl {
    public int getId() {
        return id;
    }

    public void setId(int id) {
        this.id = id;
    }

    public String getCupSize() {
        return cupSize;
    }

    public void setCupSize(String cupSize) {
        this.cupSize = cupSize;
    }

    public int getAge() {
        return age;
    }

    public void setAge(int age) {
        this.age = age;
    }

    @Id
    @GeneratedValue

    private int id;
    private String cupSize;
    private int age;


}
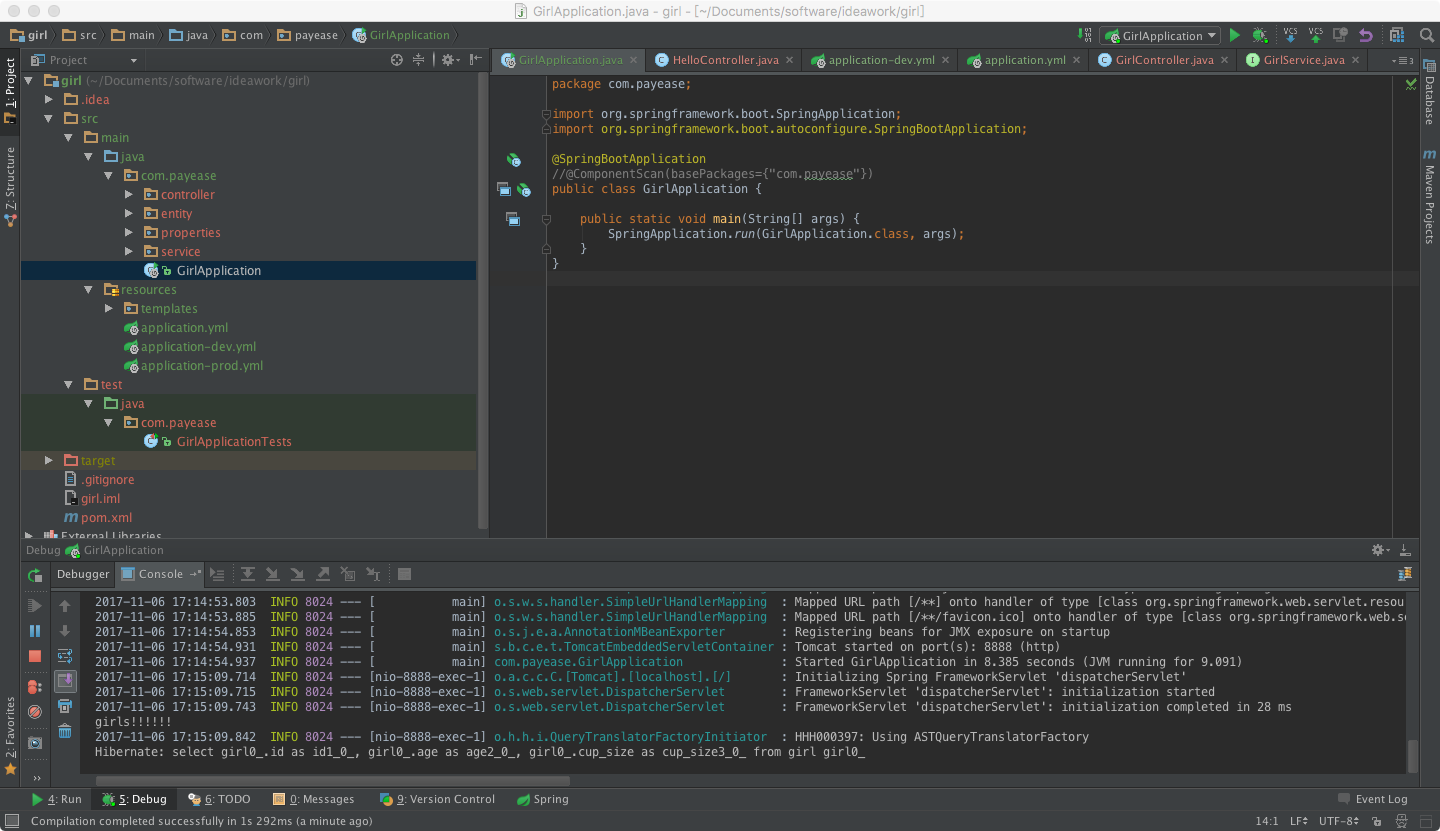
第六步:创建启动文件 并 启动项目
package com.payease;

import org.springframework.boot.SpringApplication;
import org.springframework.boot.autoconfigure.SpringBootApplication;
import org.springframework.context.annotation.ComponentScan;

@SpringBootApplication
//@ComponentScan(basePackages={"com.payease.entity"})
public class GirlApplication {

    public static void main(String[] args) {
        SpringApplication.run(GirlApplication.class, args);
    }
}
根据所创建的表实现简单的增删改查功能:

实现第一个接口:
第一步:编写service
package com.payease.service;

import com.payease.entity.Girl;
import org.springframework.data.jpa.repository.JpaRepository;
import org.springframework.stereotype.Repository;

/**
 * Created by liuxiaoming on 2017/11/6.
 */
@Repository
public interface GirlService extends JpaRepository<Girl,Integer>{
}
第二步:编写controller
package com.payease.controller;

import com.payease.entity.Girl;
import com.payease.service.GirlService;
import org.springframework.beans.factory.annotation.Autowired;
import org.springframework.web.bind.annotation.GetMapping;
import org.springframework.web.bind.annotation.RestController;

import java.util.List;

/**
 * Created by liuxiaoming on 2017/11/1.
 */
@RestController
//@RequestMapping("/hello")
public class GirlController {

   @Autowired
   private GirlService girlService;

    @GetMapping("/girls")
    public List<Girl> girls(){
        return girlService.findAll();
    }
}
第三步:启动项目: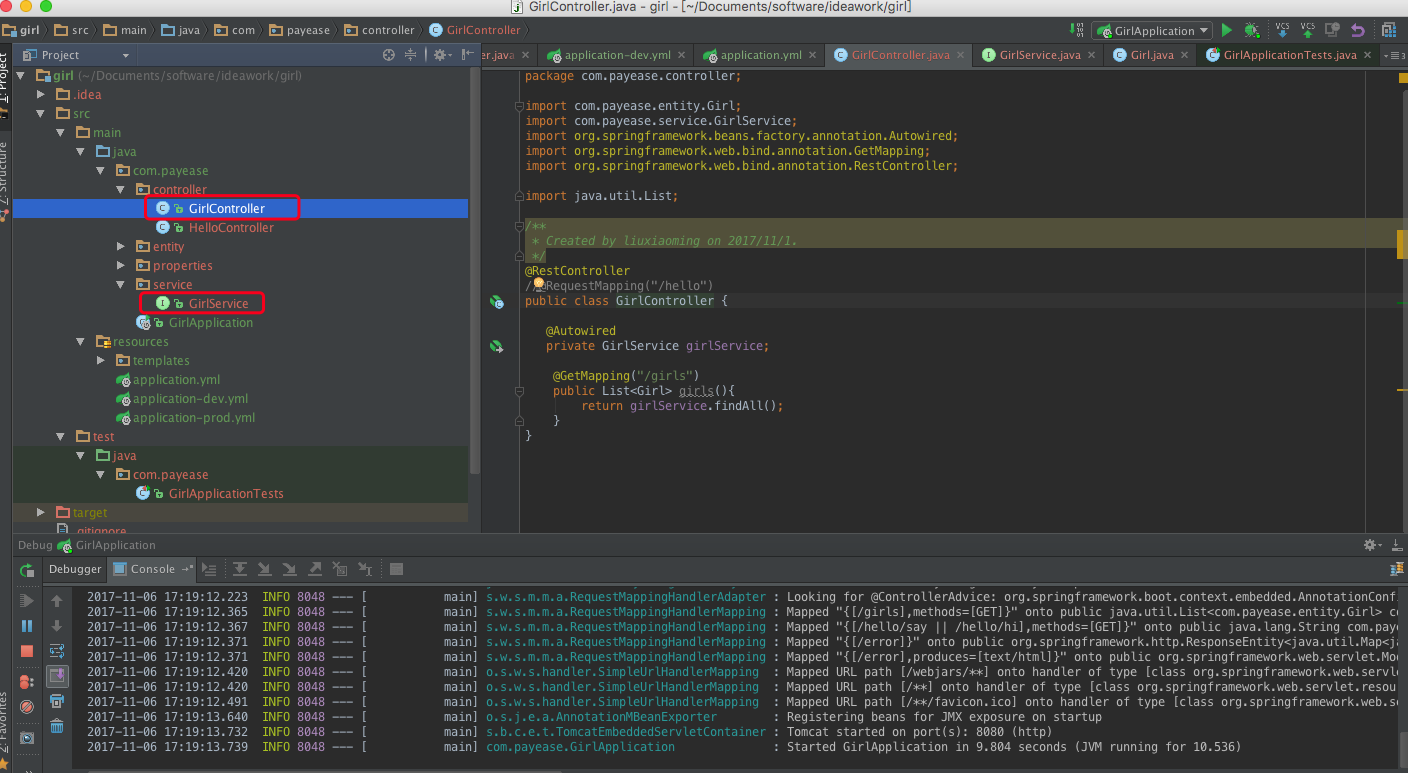
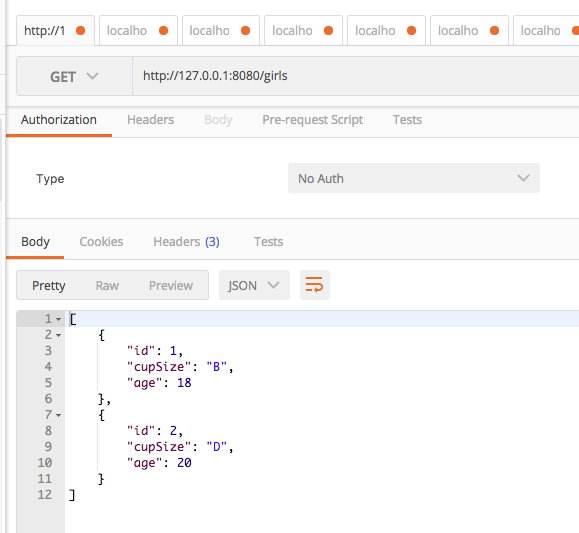
第四步:postman提交
其他接口:
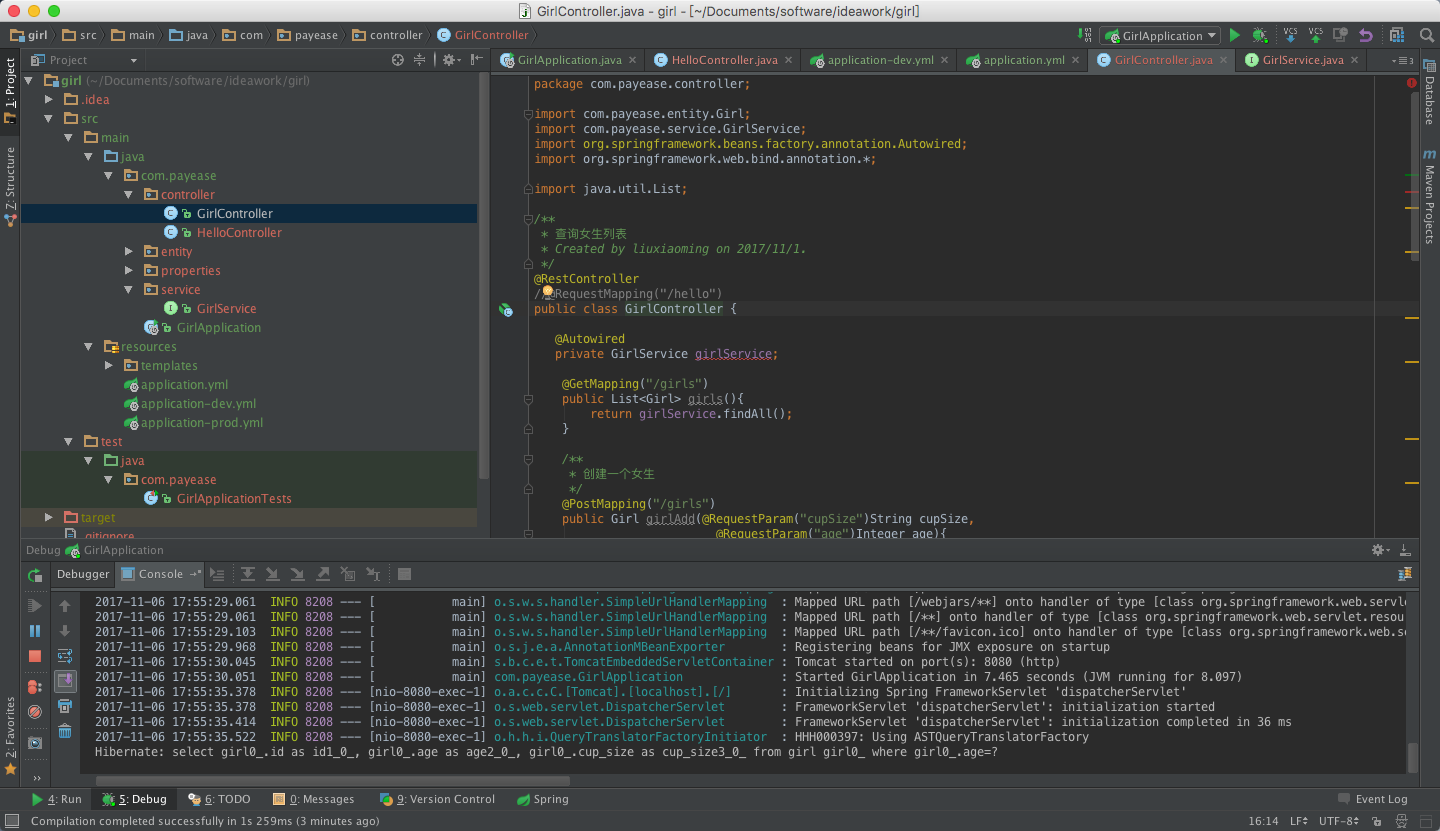
第一步controller:
package com.payease.controller;

import com.payease.entity.Girl;
import com.payease.service.GirlService;
import org.springframework.beans.factory.annotation.Autowired;
import org.springframework.web.bind.annotation.*;

import java.util.List;

/**
 * 查询女生列表
 * Created by liuxiaoming on 2017/11/1.
 */
@RestController
//@RequestMapping("/hello")
public class GirlController {

   @Autowired
   private GirlService girlService;

    @GetMapping("/girls")
    public List<Girl> girls(){
        return girlService.findAll();
    }

    /**
     * 创建一个女生
     */
    @PostMapping("/girls")
    public Girl girlAdd(@RequestParam("cupSize")String cupSize,
                          @RequestParam("age")Integer age){
        Girl girl = new Girl();
        girl.setCupSize(cupSize);
        girl.setAge(age);
        return girlService.save(girl);
    }

    /**
     * 通过ID查询一个女生
     */
    @PostMapping("/girls/{id}")
    public Girl getgirl(@PathVariable("id")Integer id){
        return girlService.findOne(id);
    }

    /**
     * 通过ID更新一个女生
     */
    @PutMapping("/girls/{id}")
    public Girl girlUpdate  (@PathVariable("id")Integer id,
                             @RequestParam("cupSize") String cupSize,
                             @RequestParam("age") Integer age){
        Girl girl = new Girl();
        girl.setId(id);
        girl.setCupSize(cupSize);
        girl.setAge(age);
        return girlService.save(girl);
    }

    /**
     * 通过ID删除一个女生
     */
    @DeleteMapping("/girls/{id}")
    public void girlDelete(@PathVariable("id")Integer id){
         girlService.delete(id);
    }

    /**
     * 通过年龄查询女生列表
     */
    @GetMapping("/girls/age/{age}")
    public List<Girl> girlListByAge(@PathVariable("age")Integer age){
        return girlService.findByAge(age);
    }
}
第二步:扩展方法service:
package com.payease.service;

import com.payease.entity.Girl;
import org.springframework.data.jpa.repository.JpaRepository;

import java.util.List;

/**
 * Created by liuxiaoming on 2017/11/6.
 */
public interface GirlService extends JpaRepository<Girl,Integer>{

    //条件查询: 通过年龄来查询
    public List<Girl> findByAge(Integer age);
}
第三步:项目启动 postman提交:
数据库的sql文件:
/*
 Navicat Premium Data Transfer

 Source Server         : localhost
 Source Server Type    : MySQL
 Source Server Version : 50718
 Source Host           : localhost
 Source Database       : dbgirl

 Target Server Type    : MySQL
 Target Server Version : 50718
 File Encoding         : utf-8

 Date: 11/07/2017 09:45:34 AM
*/

SET NAMES utf8mb4;
SET FOREIGN_KEY_CHECKS = 0;

-- ----------------------------
--  Table structure for `girl`
-- ----------------------------
DROP TABLE IF EXISTS `girl`;
CREATE TABLE `girl` (
  `id` int(11) NOT NULL AUTO_INCREMENT,
  `age` int(11) NOT NULL,
  `cup_size` varchar(255) DEFAULT NULL,
  PRIMARY KEY (`id`)
) ENGINE=InnoDB AUTO_INCREMENT=4 DEFAULT CHARSET=utf8;

-- ----------------------------
--  Records of `girl`
-- ----------------------------
BEGIN;
INSERT INTO `girl` VALUES ('1', '18', 'B'), ('2', '20', 'D'), ('3', '20', 'F');
COMMIT;

SET FOREIGN_KEY_CHECKS = 1;
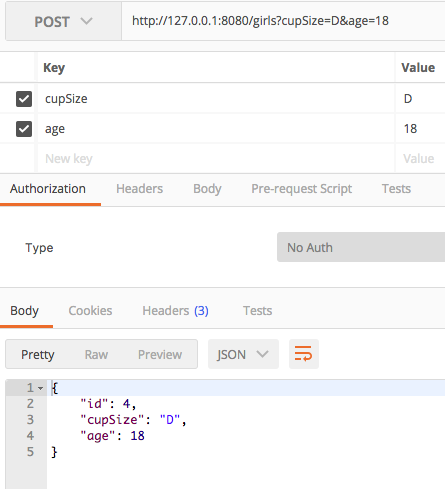
postman提交:
创建一个女生:http://127.0.0.1:8080/girls
通过ID查询一个女生:http://127.0.0.1:8080/girls/1

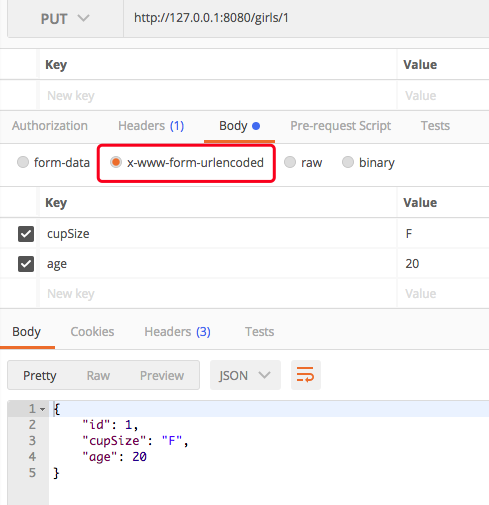
通过ID更新一个女生:http://127.0.0.1:8080/girls/1
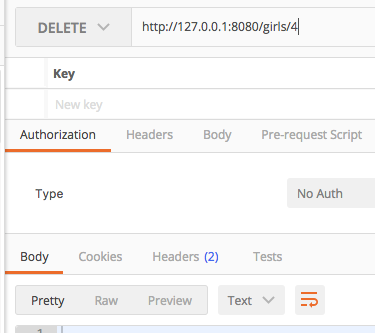
通过ID删除一个女生:http://127.0.0.1:8080/girls/4
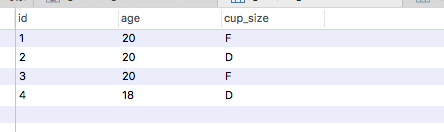
数据库原数据:
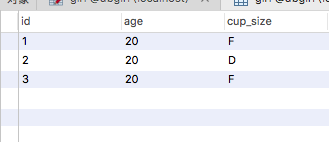
调用方法后的数据:
根据年龄来查询女生列表:http://127.0.0.1:8080/girls/age/20
