一、什么是jQuery? http://jquery.cuishifeng.cn/
类似Python里面的模块
是js的一个库/插件/工具
二、JS和jQuery的关系
- jQuery就是JS写的
- JS是基础,jQuery是工具
三、为什么要用jQuery?
短小、精悍,写起来简单,省事儿,开发效率高,兼容性好
四、jQuery介绍
    - 版本
        - 1.x
            兼容IE8及8以前版本
        - 3.x
            兼容最新浏览器
    - .min.xx
        压缩的
        生产环境用
    -  没有压缩的
        开发用
五、如何使用jQuery?
    - 1. 导入 <script src="jquery-3.2.1.js"></script>      对比python: import re
    - 2. jQuery.xxxxx  --> $('')      $等于jQuery     对比python:  re.xxxx
   注意:要先导入jQuery ,再导入js  ,因为bootstrap里的js内引用了jQuery的方
六、jQuery知识点: http://jquery.cuishifeng.cn/
jQuery知识点:

    - HTML:裸体的人
    - CSS :穿上衣服
    - JS  :动起来

        给GDP戴上绿帽子

        让八级哥和GDP比长短

        找到比翔哥还短的人

        在全班找不仅短还细的人


       总结:找到谁, 然后让谁做什么

         找到标签,修改标签
1. 找 - 用jQuery找到目的标签
- 选择器           语法规则:$("xxx")

          基本选择器:

            - ID选择器                   $("#id的值")
            - 类选择器(class)          $(".class的值")
            - 标签选择器(html标签)       $("标签的名字")
            - 所有标签                   $("*")

            - 组合选择器             $("xx,xxx")


          层级选择器

            - 从一个标签的子子孙孙去找   $("父亲 子子孙孙")
            - 从一个标签的儿子里面找     $("父亲>儿子标签")
            - 找紧挨着的标签             $("标签+下面紧挨着的那个标签")
            - 找后面所有同级的           $("翔哥~女人")

-jQuery对象:
            - 用jQuery选择器查出来的就是jQuery对象
            - jQuery对象,他就可以使用jQuery方法,不能使用DOM的方法

            - DOM对象和jQuery对象转换:
                - $(".c1")[0] --> DOM对象
                - $(DOM对象)  --> jQuery对象

- 常用的筛选器
            - 写在引号里面的

                $(" :first")     第一个
                $(" :not('')")   非
                $(" :eq()")     索引等于
                $(" :gt()")     大于等于索引
                $(" :last")     最后一个

                内容

                $(" :has('')")    有

                可见性
                $(" :hidden)     隐藏的

                属性

                input[type='password']  --> 类型是password的input标签

                表单
                :input
                :text
                :password
                :checkbox
                :radio
                :submit
                :button
                :image
                :file

                表单对象属性
                :enable     可以用的标签
                :disable    不可以选的标签
                :checked    选中的标签
                :selected   下拉框选中的标签

            - 写在引号外面当方法用的

              过滤
                $("").first()
                $("").last()
                $("").eq()
                $("").hasClass()

              查找
                .children()
                .find()
                .next()
                .nextAll()
                .nextUntil()   不包含括号内的标签

                .parent()
                .parents()
                .parentsUntil()    不包含括号内的标签

                .prev()
                .prevAll()
                .prevUntil()

                .siblings()
2.属性操作
    一 、属性
            如果你的选择器选出了多个对象,那么默认只会返回第一个的属性

            1.    .attr(x)
                    - 一个参数 获取属性的值
                 .attr(x,y)
                    - 两个参数 设置属性的值
                    - 应用练习1  点击加载图片


<!DOCTYPE html>
<html lang="en">
<head>
    <meta charset="UTF-8">
    <title>点击加载图片</title>
    <style>
        img{
            height: 600px;
             800px;
        }
    </style>
</head>
<body>

<img src="xxx.png" alt="美女" data-src="Bootstrap_i1.png">

<script src="jquery-3.2.1.js"></script>
<script>
    $("img").on("click", function () {
        var imgPath = $(this).attr("data-src");
        $(this).attr("src", imgPath)
    })

</script>
</body>
</html>
- 应用场景2  从数据库中取数据时,往往id都是不连续的,那么我们在表格中存数据的时候
                                就把数据库中的id存到表格下的tr标签中方便到数据库中取数据,并且不与表格中的id冲突,方便以后到数据库中找数据
                             存:tr.attr("data-id",111)
                             取:tr.attr("data-id")

                  .removeAttr(name)
                    - 删除属性

            2.    .prop(x)    一个值是获取   属性的返回值是布尔类型

                  .prop(x,y)  两个值是设置

                  .removeProp(name)
                      - 删除属性

                   - 例子
                       全选、反选、取消的例子
                       - 循环
                       each
                           - $.each(数组/对象, function(i, v){})
                               - i 是数组/对象的 索引
                               - v 是数组/对象的 值

                           - $("jQuery数组对象").each(function(){})
<!DOCTYPE html>
<html lang="en">
<head>
    <meta charset="UTF-8">
    <title>全选反选取消</title>

    <link rel="stylesheet" href="bootstrap-3.3.7/css/bootstrap.min.css">
</head>
<body>

<div class="container">
    <div class="row">
        <div class="panel panel-default">
            <div class="panel-heading">
                <button id="all" class="btn-btn-default">全选</button>
                <button id="cancel" class="btn-btn-default">取消</button>
                <button id="reverse" class="btn-btn-default">反选</button>
            </div>
            <div class="panel-body">
                <table class="table table-bordered">
                    <thead>
                    <tr>
                        <th>#</th>
                        <th>First Name</th>
                        <th>Last Name</th>
                        <th>Username</th>
                    </tr>
                    </thead>
                    <tbody>
                    <tr>
                        <th scope="row"><input type="checkbox"></th>
                        <td>Mark</td>
                        <td>Otto</td>
                        <td>@mdo</td>
                    </tr>
                    <tr>
                        <th scope="row"><input type="checkbox"></th>
                        <td>Jacob</td>
                        <td>Thornton</td>
                        <td>@fat</td>
                    </tr>
                    <tr>
                        <th scope="row"><input type="checkbox"></th>
                        <td>Larry</td>
                        <td>the Bird</td>
                        <td>@twitter</td>
                    </tr>
                    </tbody>
                </table>
            </div>
        </div>
    </div>
</div>
<script src="jquery-3.2.1.js"></script>
<script>
// 全选
$("#all").on("click", function () {
    // 统一的操作
$(":checkbox").prop("checked", true);
})

    //取消
    $("#cancel").on("click", function () {
        $(":checkbox").prop("checked", false);
    })


//    // 反选
    $("#reverse").on("click", function () {
        // 取出所有的checkbox
        var checkboxEles = $(":checkbox");

//         要循环checkbox
        // 选中的就取消
        // 没选中的就选中
        checkboxEles.each(function () {
            var thisCheckbox = $(this);  // 在教室里走的那个人
            var isChecked = thisCheckbox.prop("checked");  // 是否选中

//            方法一:判断的方式
            if (isChecked){
                // 取消选中
                thisCheckbox.prop("checked", false);
            }else {
                // 选中
                thisCheckbox.prop("checked", true);
            }

//            // 方法二:直接取反的方式
//            thisCheckbox.prop("checked", !isChecked);

        })
    })


</script>

</body>
</html>
   二、 css类
      addClass()
      removeClass()

      toggleClass(class|fn[,sw])  切换,有就去掉,没有就加上
<!DOCTYPE html>
<html lang="en">
<head>
    <meta charset="UTF-8">
    <title>示例一</title>
    <style>
        .c11 {
            height: 100px;
             100px;
            border-radius: 50%;
            border: 1px solid #cccccc;
            display: inline-block;
        }

        .c12 {
            background-color: yellow;
        }
    </style>
</head>
<body>

<div class="c11"></div>

<button id="switch" class="btn btn-default">开关</button>
<script src="jquery-3.2.1.js"></script>
<script>

//jQuery绑定事件
    $("#switch").on("click", function () {
        // 找灯泡
        $(".c11").toggleClass("c12");
    })

</script>
</body>

</html>
三、文档处理
     没有参数就是获取对应的值,有参数就是设置对应的值

      html()  获取标签

            加 html标签
            .html("<span>老师,我好饿。</span>")
            注意:添加新标签之后原标签会消失

        text()  获取文本

                加文本
                        .text("老师,我好饿。")
                注意:标签内的所有文本/标签 都会改变成设置的文本

        val()
            - input
                    - 获取的是输入的内容
                    - 有参数就是设置对应的值

            - checkbox
                    - 获取的是value值   (如果你的选择器选出了多个对象,那么默认只会返回第一个的属性)
                    - 有参数就是设置对应的值

            - select
                    - 单选 就是获取值
                    - 多选 得到的是一个数组,设置的时候也要是数组
3. CSS 操作
CSS
.css()
- .css("color") -> 获取color css值
- .css("color", "#ff0000") -> 设置值
- .css({"color": "#cccccc", "border": "1px solid #ff0000"}) -> 设置多个值
- .css(["color", "border"]) -> 获取多个值
位置
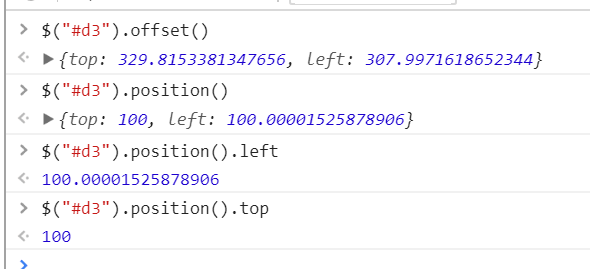
.offset()
- 获取相对位置
- 比较的对象是 html(可视窗口)
.position()
- 获取相对已经定位的父标签的位置
- 比较的是最近的那个做过定位的祖先标签

.scrollTop()
- 例子:页面返回顶部 ,也可以给一个很大的标签(有滚动效果的标签)使用
<!DOCTYPE html>
<html>
<head lang="en">
    <meta charset="UTF-8">
    <title></title>
    <style>
        #b1{
            position: fixed;
            right: 15px;
            bottom: 15px;
        }
        .hide{
            display: none;
        }
    </style>
</head>
<body>
<div class="c1" GDP="111">戴帽子1</div>
<div class="c1" GDP="111">戴帽子2</div>
<div class="c1" GDP="111">戴帽子3</div>
<div class="c1" GDP="111">戴帽子4</div>
<div class="c1" GDP="111">戴帽子5</div>
<div class="c1" GDP="111">戴帽子6</div>
<div class="c1" GDP="111">戴帽子7</div>
<div class="c1" GDP="111">戴帽子8</div>
<div class="c1" GDP="111">戴帽子9</div>
<div class="c1" GDP="111">戴帽子10</div>
<div class="c1" GDP="111">戴帽子11</div>
<div class="c1" GDP="111">戴帽子12</div>
<div class="c1" GDP="111">戴帽子13</div>
<div class="c1" GDP="111">戴帽子14</div>
<div class="c1" GDP="111">戴帽子15</div>
<div class="c1" GDP="111">戴帽子16</div>
<div class="c1" GDP="111">戴帽子17</div>
<div class="c1" GDP="111">戴帽子18</div>
<div class="c1" GDP="111">戴帽子19</div>
<div class="c1" GDP="111">戴帽子20</div>
<div class="c1" GDP="111">戴帽子21</div>
<div class="c1" GDP="111">戴帽子22</div>
<div class="c1" GDP="111">戴帽子23</div>
<div class="c1" GDP="111">戴帽子24</div>
<div class="c1" GDP="111">戴帽子25</div>
<div class="c1" GDP="111">戴帽子26</div>
<div class="c1" GDP="111">戴帽子27</div>
<div class="c1" GDP="111">戴帽子28</div>
<div class="c1" GDP="111">戴帽子29</div>
<div class="c1" GDP="111">戴帽子30</div>
<div class="c1" GDP="111">戴帽子31</div>
<div class="c1" GDP="111">戴帽子32</div>
<div class="c1" GDP="111">戴帽子33</div>
<div class="c1" GDP="111">戴帽子34</div>
<div class="c1" GDP="111">戴帽子35</div>
<div class="c1" GDP="111">戴帽子36</div>
<div class="c1" GDP="111">戴帽子37</div>
<div class="c1" GDP="111">戴帽子38</div>
<div class="c1" GDP="111">戴帽子39</div>
<div class="c1" GDP="111">戴帽子40</div>
<div class="c1" GDP="111">戴帽子41</div>
<div class="c1" GDP="111">戴帽子42</div>
<div class="c1" GDP="111">戴帽子43</div>
<div class="c1" GDP="111">戴帽子44</div>
<div class="c1" GDP="111">戴帽子45</div>
<div class="c1" GDP="111">戴帽子46</div>
<div class="c1" GDP="111">戴帽子47</div>
<div class="c1" GDP="111">戴帽子48</div>
<div class="c1" GDP="111">戴帽子49</div>
<div class="c1" GDP="111">戴帽子50</div>
<div class="c1" GDP="111">戴帽子51</div>
<div class="c1" GDP="111">戴帽子52</div>
<div class="c1" GDP="111">戴帽子53</div>
<div class="c1" GDP="111">戴帽子54</div>
<div class="c1" GDP="111">戴帽子55</div>
<div class="c1" GDP="111">戴帽子56</div>
<div class="c1" GDP="111">戴帽子57</div>
<div class="c1" GDP="111">戴帽子58</div>
<div class="c1" GDP="111">戴帽子59</div>
<div class="c1" GDP="111">戴帽子60</div>
<div class="c1" GDP="111">戴帽子61</div>
<div class="c1" GDP="111">戴帽子62</div>
<div class="c1" GDP="111">戴帽子63</div>
<div class="c1" GDP="111">戴帽子64</div>
<div class="c1" GDP="111">戴帽子65</div>
<div class="c1" GDP="111">戴帽子66</div>
<div class="c1" GDP="111">戴帽子67</div>
<div class="c1" GDP="111">戴帽子68</div>
<div class="c1" GDP="111">戴帽子69</div>
<div class="c1" GDP="111">戴帽子70</div>
<div class="c1" GDP="111">戴帽子71</div>
<div class="c1" GDP="111">戴帽子72</div>
<div class="c1" GDP="111">戴帽子73</div>
<div class="c1" GDP="111">戴帽子74</div>
<div class="c1" GDP="111">戴帽子75</div>
<div class="c1" GDP="111">戴帽子76</div>
<div class="c1" GDP="111">戴帽子77</div>
<div class="c1" GDP="111">戴帽子78</div>
<div class="c1" GDP="111">戴帽子79</div>
<div class="c1" GDP="111">戴帽子80</div>
<div class="c1" GDP="111">戴帽子81</div>
<div class="c1" GDP="111">戴帽子82</div>
<div class="c1" GDP="111">戴帽子83</div>
<div class="c1" GDP="111">戴帽子84</div>
<div class="c1" GDP="111">戴帽子85</div>
<div class="c1" GDP="111">戴帽子86</div>
<div class="c1" GDP="111">戴帽子87</div>
<div class="c1" GDP="111">戴帽子88</div>
<div class="c1" GDP="111">戴帽子89</div>
<div class="c1" GDP="111">戴帽子90</div>
<div class="c1" GDP="111">戴帽子91</div>
<div class="c1" GDP="111">戴帽子92</div>
<div class="c1" GDP="111">戴帽子93</div>
<div class="c1" GDP="111">戴帽子94</div>
<div class="c1" GDP="111">戴帽子95</div>
<div class="c1" GDP="111">戴帽子96</div>
<div class="c1" GDP="111">戴帽子97</div>
<div class="c1" GDP="111">戴帽子98</div>
<div class="c1" GDP="111">戴帽子99</div>
<div class="c1" GDP="111">戴帽子100</div>
<button id="b1" class="hide">dianwo</button>
<script src="jquery-3.2.1.js"></script>
<script src="bootstrap-3.3.7/js/bootstrap.min.js"></script>
<script>
    $(window).scroll(function(){
        if ($(window).scrollTop()>100){     //如果屏幕滚动距离大于100
            $('#b1').removeClass('hide');
        }
        else{
            $('#b1').addClass('hide');
        }
        })
    $('#b1').on('click',function(){
                $(window).scrollTop(0);    //屏幕滚动到 最顶

    })
</script>
</body>
</html>
.scrollLeft()
尺寸
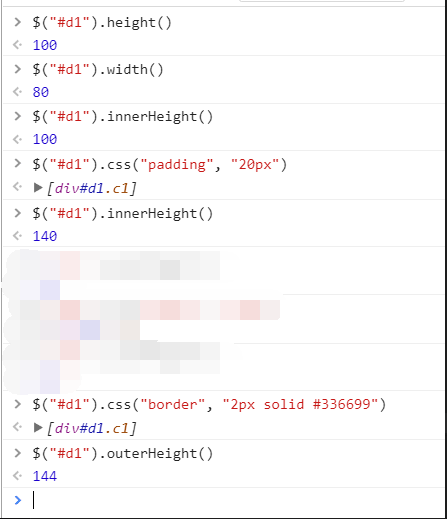
height()
- 元素的高度
width()
innerHeight()
- 带padding的高度
innerWidth()
outerHeight()
- 在innerHeight的基础上再加border的高度
outerWidth()
4.文档操作
内部插入 append() --> 往后加 appendTo() A.append(B) -> 把B添加到A的后面 A.appendTo(B) -> 把A添加到B的后面 prepend() --> 往前加 prependTo() A.prepend(B) -> 把B添加到A的前面 A.prependTo(B) -> 把A添加到B的前面
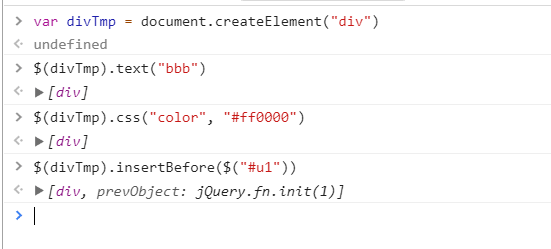
注意:111 是挪动 不是复制 外部插入 after() --> 往后加 insertAfter() A.after(B) --> 把B添加到A的后面 A.insertAfter(B) --> 把A添加到B的后面 before() --> 往前加 insertBefore() A.before(B) --> 把B添加到A的前面 A.insertBefore(B) --> 把A添加到B的前面


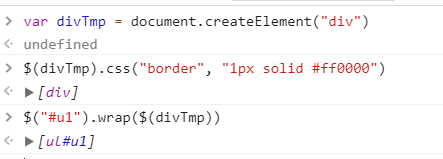
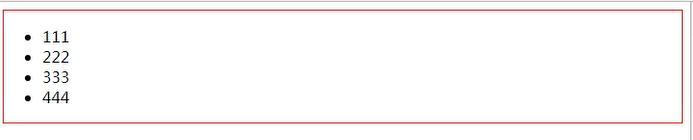
包裹
wrap()
A.wrap(B) --> B包A
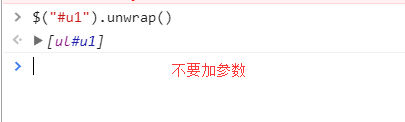
unwrap()
- 不要加参数
wrapAll()
wrapInner()

注意:

wrapAll()
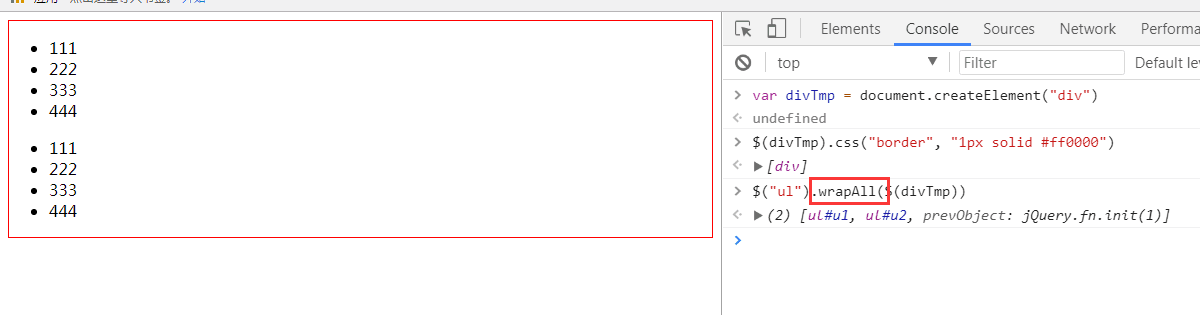
wrapInner()

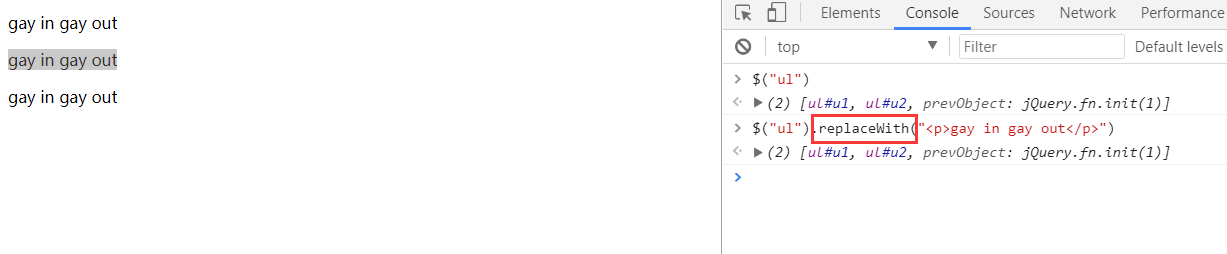
 替换
    replaceWith()
        A.replaceWith(B)  --> B替换A
    replaceAll()
        A.replaceAll(B)   --> A替换B

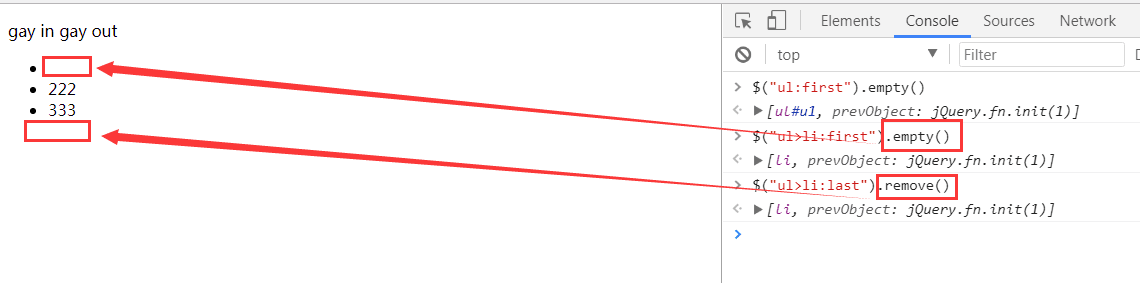
删除
empty()
- 清空 内部清空
remove([expr])
- 删除 整体都删除
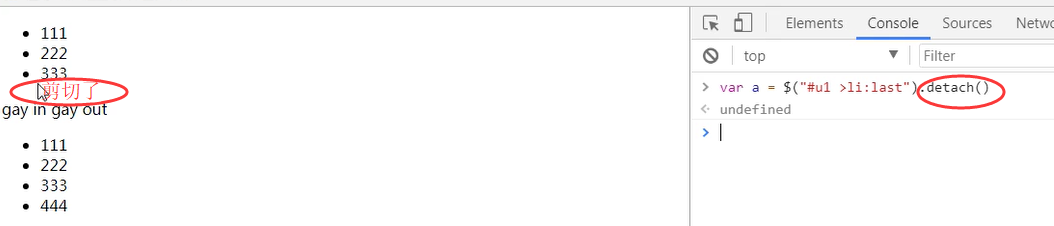
detach([expr])
- 剪切 多保存在变量中,方便再次使用

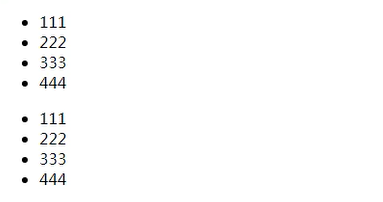
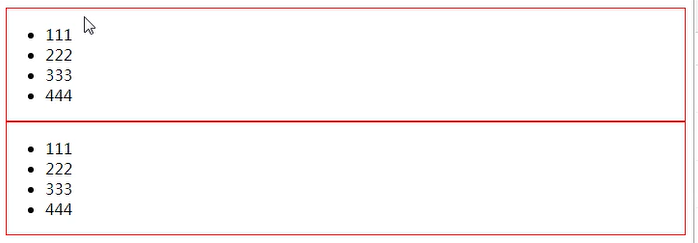
复制
clone([Even[,deepEven]])
<!DOCTYPE html>
<html lang="en">
<head>
    <meta charset="UTF-8">
    <title>克隆</title>
</head>
<body>
<button class="c1">一刀999</button>

<script src="jquery-3.2.1.js"></script>
<script>
    $(".c1").on("click", function () {
        $(this).clone(true).insertAfter($(this));   //.clone(true) 表示把标签的绑定的事件也克隆了
    })
</script>
</body>
</html>
5.事件
 1 事件处理

    之前绑定事件的方式:
        1. onclick=clickMe();  function clickMe() {}
        2. ele.onclick = function(){}
        3. ele.addEventListener("click", function(){})

    jQuery绑定事件的方式:
        1. $(ele).on("click", function(){})
        2. $("tbody").delegate(".btn-warning", "click", function(){})
            在$("tbody")内所有带有btn-warning类的标签,点击时就会执行函数内内容
        3. $("tbody").on("click",".btn-warning",function(){})  我们要用的事件委派


 2 常用事件
      blur() - 失去焦点

      focus()
          - 获取焦点
          - 搜索框例子

      change()
          - select

      click()
          - 点击

      dblclick()
          - 双击

      scroll()
          - 滚动

      submit()
          -提交


      补充:
          文档树加载完之后绑定事件(绝大部分情况下)
          $(document).ready(function(){
              // 绑定事件的代码
              ....
          })

          简写:
          $(function($){
              // 绑定事件的代码
              ....
          });
<!DOCTYPE html>
<html lang="en">
<head>
    <meta charset="UTF-8">
    <title>常用事件示例</title>
</head>
<body>

<input type="text" name="search" value="苹果手机" data-show="">
<button>搜索</button>

<select name="" id="s1">
    <option value="1">1</option>
    <option value="2">2</option>
    <option value="3">3</option>
    <option value="4">4</option>
    <option value="5">5</option>
</select>

<script src="jquery-3.2.1.js"></script>
<script>
    $(":input").focus(function () {
        var data = $(this).val();
        $(this).val("");
        $(this).attr("data-show", data);
    });

    $(":input").blur(function () {
        $(this).val($(this).attr("data-show"));
    });

    // change 通常用与select标签
    $("#s1").change(function () {
        console.log($(this).val());
    });
</script>
</body>
</html>
6.效果(动画)
基本
    show()
    hide()
    toggle()

滑动
    slideDown()
    slideUp()
    slideToggle()

淡入淡出
    fadeIn()
    fadeOut()

    fadeTo()
        - 淡出到0.66透明度
    fadeToggle()
        - .fadeToggle(3000, function () {
            alert("真没用3");
        });

自定义
animate(p,[s],[e],[fn])
    - css属性值都可以设置
    - 女朋友变小(漏气)
<!DOCTYPE html>
<html lang="en">
<head>
    <meta charset="UTF-8">
    <title>动画示例</title>

    <style>
        .hide {
            display: none;
        }
    </style>
</head>
<body>
<img src="http://www.iyi8.com/uploadfile/2017/0523/20170523114637271.jpg" alt="">

<button id="b1">召唤</button>
<button id="b2">淡出</button>
<button id="b3">淡入</button>
<button id="b4">淡出到0.66</button>
<button id="b5">淡入淡出</button>
<button id="b6">边框变大</button>
<script src="jquery-3.2.1.js"></script>
<script>
    $("#b1").on("click", function () {
//        $("img").show();
        $("img").toggle();

    })
    // 淡出
    $("#b2").on("click", function () {
        $("img").fadeOut("fast");
    })
    // 淡入
  $("#b3").on("click", function () {
      // 掌握了增加时间的方法
        $("img").fadeIn(3000, function () {
            alert("真没用");
        });
    })
    // 淡出到0.66透明度
  $("#b4").on("click", function () {
      // 掌握了新知识
        $("img").fadeTo(3000, 0.66, function () {
            alert("真没用2");
        });
    })
    // 淡入淡出
  $("#b5").on("click", function () {
        $("img").fadeToggle(3000, function () {
            alert("真没用3");
        });
    })
    // 动画-图片变小
  $("#b6").on("click", function () {
        $("img").animate({
             "100px",
            height: "60px"
        }, 3000, function () {
            // 这是回调函数
            alert(123);
        });
    })
</script>
</body>
</html>
7. jQuery扩展
    1.    $.extend({
            "GDP": function () {
                console.log("戴小红花");
            }
        });

        - 给jQuery添加扩展
        - $.GDP()


    2.    $.fn.extend({
            "BJG": function () {
                console.log("英语八级就是好!");
            }
        })

        - 给jQuery对象添加扩展
        - $(":input").BJG()
/**
 * Created by Administrator on 2017/10/17.
 */
//写在js文件内,从而在html中直接调用就可以了

(function (jq) {                   //匿名函数
   jq.extend({
        "GDP": function () {
            func1();
            console.log("戴小红花");
        },                              //扩展多个方法时,用 逗号 隔开
       "SGS": function () {
           console.log("三国杀真好玩,我都不听课");
       }
    });

    function func1() {             //在内部定义函数 是为了把函数变成私有的方法,在外部不能调用
        console.log("这是func1");
    }
})(jQuery);       //把jQuery 当作参数传进去 是为了避免 $被 赋值给其他的值
<!DOCTYPE html>
<html lang="en">
<head>
    <meta charset="UTF-8">
    <title>登录校验</title>
    <link rel="stylesheet" href="bootstrap-3.3.7/css/bootstrap.min.css">
    <style>
        .c1 {
            margin-top: 100px;
        }
    </style>
</head>
<body>
<div class="container">
    <div class="row">
        <div class="col-md-4 c1 col-md-offset-4">
            <form class="form-horizontal" id="login">
                <div class="form-group">
                    <label for="username" class="col-sm-2 control-label">Email</label>
                    <div class="col-sm-10">
                        <input type="text" class="form-control" id="username" placeholder="username" aria-describedby="helpBlock1" required="true">
                        <span id="helpBlock1" class="help-block"></span>
                    </div>

                </div>
                <div class="form-group">
                    <label for="inputPassword3" class="col-sm-2 control-label">密码</label>
                    <div class="col-sm-10">
                        <input type="password" class="form-control" id="inputPassword3" placeholder="Password" aria-describedby="helpBlock2">
                        <span id="helpBlock2" class="help-block"></span>
                    </div>
                </div>
                <div class="form-group">
                    <div class="col-sm-offset-2 col-sm-10">
                        <div class="checkbox">
                            <label>
                                <input type="checkbox"> Remember me
                            </label>
                        </div>
                    </div>
                </div>
                <div class="form-group">
                    <div class="col-sm-offset-2 col-sm-10">
                        <button type="submit" class="btn btn-default">Sign in</button>
                    </div>
                </div>
            </form>
        </div>
    </div>
</div>

<script src="jquery-3.2.1.js"></script>
<script src="bootstrap-3.3.7/js/bootstrap.min.js"></script>
<!--<script src="myValidate.js"></script>    myValidate.js 的引用-->
<script src="myValidate2.js"></script>          <!--myValidate2.js 的引用-->
<script>
    $(document).ready(function () {
        // 给jQuery扩展
        //$.myValidate("#login")              myValidate.js  的调用

        // 给jQuery对象扩展
        // $.fn.extend()
        $("#login").myValidate({"username": {"min-length": 6}});   // myValidate2.js的 调用
    })                                       //{"username": {"min-length": 6}}  是动态的校验规则
</script>
</body>
</html>
/**
 * Created by Administrator on 2017/10/17.
 */

(function (jq) {
    jq.extend({
        "myValidate": function (form) {
            var formObj = jq(form);

            formObj.find(":submit").on("click", function () {
                // 先清空状态
                formObj.find(".form-group").removeClass("has-error");
                formObj.find("span").text("");

                // each循环
                formObj.find("input").each(function () {
                    // 做判断
                    if (jq(this).val().length === 0) {
                        // 给他的爸爸加has-error
                        jq(this).parent().parent().addClass("has-error");
                        // 给span写内容
                        // 找到我这是什么input  --> 找到对应的label的文本内容
                        var name = jq(this).parent().prev().text();
                        jq(this).next().text(name + "不能为空");
                        return false;
                    }
                });
                return false;
            });
        }
    })

})(jQuery);
/**
 * Created by Administrator on 2017/10/17.
 */

(function (jq) {
    jq.fn.extend({
        "myValidate": function (arg) {
            // this --> .前面的那个jQuery对象
            var formObj = this;
            formObj.find(":submit").on("click", function () {
                // this --> 提交的submit按钮
                // 先清空状态
                formObj.find(".form-group").removeClass("has-error");
                formObj.find("span").text("");
                // each循环
                var flag = true;
                formObj.find("input[required='true']").each(function () {
                    // this --> input框
                    // 做判断
                    if (jq(this).val().length === 0) {
                        // 给他的爸爸加has-error
                        jq(this).parent().parent().addClass("has-error");
                        // 给span写内容
                        // 找到我这是什么input  --> 找到对应的label的文本内容
                        var name = jq(this).parent().prev().text();
                        jq(this).next().text(name + "不能为空");
                        flag = false;
                        return flag;
                    }

                    var inputID = jq(this).attr("id");
                    var minLength = arg[inputID]["min-length"];
                    if (minLength !== undefined) {
                        if (jq(this).val().length < minLength) {
                            console.log("长度太短");
                             // 给他的爸爸加has-error
                        jq(this).parent().parent().addClass("has-error");
                        // 给span写内容
                        // 找到我这是什么input  --> 找到对应的label的文本内容
                        var name = jq(this).parent().prev().text();
                        jq(this).next().text(name + "长度太短");
                            flag = false;
                            return flag;
                        }
                    }
                });
                return flag;
            })
        }
    })
})(jQuery);