处理模型数据之ModelAndView
ModelAndView 分为两部分:model和view。model负责参数,view就是视图,也就是页面。相当于统一了Model对象和View对象的功能。
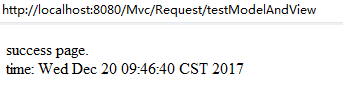
jsp文件中以 ${requestScope.time}的形式来接收在 modelAndView.addObject("time", new Date()); 中设置的参数。
web.xml
<?xml version="1.0" encoding="UTF-8"?>
<web-app version="3.0"
    xmlns="http://java.sun.com/xml/ns/javaee"
    xmlns:xsi="http://www.w3.org/2001/XMLSchema-instance"
    xsi:schemaLocation="http://java.sun.com/xml/ns/javaee
    http://java.sun.com/xml/ns/javaee/web-app_3_0.xsd">
  <display-name></display-name>


  <!--
          配置org.springframework.web.filer.HiddenHttpMethodFilter:可以把POST请求转为DELETE或POST请求
   -->
   <filter>
             <filter-name>HiddenHttpMethodFilter</filter-name>
               <filter-class>org.springframework.web.filter.HiddenHttpMethodFilter</filter-class>

   </filter>
   <filter-mapping>
               <filter-name>HiddenHttpMethodFilter</filter-name>
               <!-- 过滤所有请求 -->
               <url-pattern>/*</url-pattern>
   </filter-mapping>

   <!-- 配置DispatcherServlet -->

          <servlet>
              <servlet-name>springDispatcherServlet</servlet-name>
              <servlet-class>org.springframework.web.servlet.DispatcherServlet</servlet-class>
              <!-- 配置 DispatcherServlet的一个初始化参数:配置SpringMvc 配置文件的位置和名称-->
                   <init-param>
                      <param-name>contextConfigLocation</param-name>
                      <param-value>classpath:springmvc.xml</param-value>
              </init-param>
               <init-param>
                      <param-name>encoding</param-name>
                      <param-value>UTF-8</param-value>
              </init-param>
              <!-- 也可以不通过contextConfigLocation 来配置SpringMvc的配置文件,而使用默认的
                      默认的配置文件为:/WEB-INF/<servlet-name>-servlet.xml
                          /WEB-INF/springDispatcherServlet-servlet.xml
              -->

          <!-- 设置启动 -->
          <load-on-startup>1</load-on-startup>
          </servlet>

          <servlet-mapping>
          <!-- 请求处理 -->
              <servlet-name>springDispatcherServlet</servlet-name>
              <!-- /:应答所有请求 -->
              <url-pattern>/</url-pattern>
          </servlet-mapping>
  <welcome-file-list>
    <welcome-file>index.jsp</welcome-file>
  </welcome-file-list>
</web-app>
springmvc.xml
<?xml version="1.0" encoding="UTF-8"?>
<beans xmlns="http://www.springframework.org/schema/beans"

         xmlns:aop="http://www.springframework.org/schema/aop"

       xmlns:mvc="http://www.springframework.org/schema/mvc"

       xmlns:xsi="http://www.w3.org/2001/XMLSchema-instance"

       xmlns:context="http://www.springframework.org/schema/context"

       xmlns:p="http://www.springframework.org/schema/p"

  xsi:schemaLocation="

              http://www.springframework.org/schema/beans

                 http://www.springframework.org/schema/beans/spring-beans-4.0.xsd

              http://www.springframework.org/schema/mvc

              http://www.springframework.org/schema/tx/spring-mvc-4.0.xsd

               http://www.springframework.org/schema/context

               http://www.springframework.org/schema/context/spring-context-4.0.xsd

               http://www.springframework.org/schema/aop

             http://www.springframework.org/schema/aop/spring-aop-4.0.xsd">

             <!-- 配置自定义扫描包 -->
             <context:component-scan base-package="como.springmvc.handlers"></context:component-scan>
           <!-- 配置视图解析器:如何把handler方法返回值解析为实际的物理视图 -->

           <bean class="org.springframework.web.servlet.view.InternalResourceViewResolver">
           <!-- spring中加入jstl标签库 -->
           <property name="viewClass" value="org.springframework.web.servlet.view.JstlView"></property>
                       <!-- 前缀 -->
                       <property name="prefix" value="/WEB-INF/views/"></property>
                       <!-- 后缀 -->
                       <property name="suffix" value=".jsp"></property>
           </bean>
           </beans>
User.java
package com.springmvc.entity;

public class User {

                private Integer id;
                private String username;
                private String password;
                private String email;
                private int age;


                public User() {
                    super();
                }

                public User(Integer id,String username,String password,String email,int age) {
                    this.id=id;
                    this.username=username;
                    this.password=password;
                    this.email=email;
                    this.age=age;
                }

                public Integer getId() {
                    return id;
                }

                public void setId(Integer id) {
                    this.id = id;
                }

                public String getUsername() {
                    return username;
                }
                public void setUsername(String username) {
                    this.username = username;
                }
                public String getPassword() {
                    return password;
                }
                public void setPassword(String password) {
                    this.password = password;
                }
                public String getEmail() {
                    return email;
                }
                public void setEmail(String email) {
                    this.email = email;
                }
                public int getAge() {
                    return age;
                }
                public void setAge(int age) {
                    this.age = age;
                }

                @Override
                public String toString() {
                    return "User [id=" + id + ", username=" + username
                            + ", password=" + password + ", email=" + email
                            + ", age=" + age + "]";
                }

}
Request.java
package como.springmvc.handlers;

import java.util.Date;

import org.springframework.stereotype.Controller;
import org.springframework.web.bind.annotation.CookieValue;
import org.springframework.web.bind.annotation.RequestHeader;
import org.springframework.web.bind.annotation.RequestMapping;
import org.springframework.web.bind.annotation.RequestParam;
import org.springframework.web.servlet.ModelAndView;

@RequestMapping("/Request")
@Controller
public class Request {

    private static final String SUCCESS="success";
    /*目标方法的返回值可以是ModelAndView类型
                其中可以包含视图和模型信息*/@RequestMapping("/testModelAndView")
                public ModelAndView testModelAndView(){
                    String viewName=SUCCESS;
                    ModelAndView modelAndView = new ModelAndView(viewName);//指定页面名称为SUCCESS
                    //添加模型数据到ModelAndView中
                    modelAndView.addObject("time", new Date());//从结果对象中取出参数放入 ModelAndView 中
                    return modelAndView;
                }

}
处理模型数据之Map
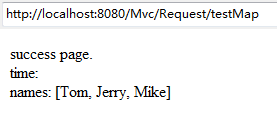
入参为org.springframework.ui.Model、org.springframework.ui.ModelMap 或 java.uti.Map 时,处理方法返回时,Map 中的数据会自动添加到模型中
                @RequestMapping("/testMap")
                public String testMap(Map<String,Object> map){
                map.put("names", Arrays.asList("Tom","Jerry","Mike"));
                    return SUCCESS;
                }
处理模型数据之@SessionAttributes
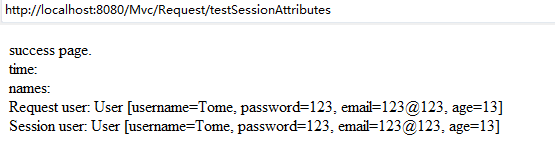
在多个请求之间共用某个模型属性数据
package como.springmvc.handlers;

import java.util.*;
import org.springframework.stereotype.Controller;
import org.springframework.web.bind.annotation.CookieValue;
import org.springframework.web.bind.annotation.RequestHeader;
import org.springframework.web.bind.annotation.RequestMapping;
import org.springframework.web.bind.annotation.RequestParam;
import org.springframework.web.bind.annotation.SessionAttributes;
import org.springframework.web.servlet.ModelAndView;

import com.springmvc.entity.User;

@SessionAttributes(value={"user"},types={String.class})//会把map中的属性放在请求域里面也会放在Session里面
//键:value={"user"} 值:types={String.class},类型为String
@RequestMapping("/Request")
@Controller
public class Request {

    private static final String SUCCESS="success";//该注解只能放在类上面,不能放在方法上面
                @RequestMapping("/testSessionAttributes")
                public String testSessionAttributes(Map<String,Object> map){
                    User user = new User("Tome","123","123@123",13);
                    map.put("user", user);

                    return SUCCESS;
                }

}
处理模型数据之@ModelAttribute
package como.springmvc.handlers;

import java.util.*;


import org.springframework.stereotype.Controller;
import org.springframework.web.bind.annotation.CookieValue;
import org.springframework.web.bind.annotation.ModelAttribute;
import org.springframework.web.bind.annotation.RequestHeader;
import org.springframework.web.bind.annotation.RequestMapping;
import org.springframework.web.bind.annotation.RequestParam;
import org.springframework.web.bind.annotation.SessionAttributes;
import org.springframework.web.servlet.ModelAndView;

import com.springmvc.entity.User;


@RequestMapping("/Request")
@Controller
public class Request {

    private static final String SUCCESS="success";


                @ModelAttribute
                public void getUser(@RequestParam(value="id",required=false) Integer id,
                        Map<String,Object> map){
                            if(id!=null){
                                //模拟从数据库获取数据
                                User user = new User(1,"tom","1234","123@456",14);
                                System.out.println("从数据库中获取一个对象:"+user);
                                map.put("user", user);
                            }
                }
                /*运行流程:
                1.执行@ModelAttribute注解修饰的方法:从数据库取出对象,把对象放入到Map中,
                键为user
                2.SpringMVC从Map中取出User对象,并把表单的请求参数赋给该User对象的对应属性。
                3.SpringMVC把上述对象传入目标方法的参数。
          在@ModelAttribute修饰的方法中,放入到Map时的键需要和目标方法入参类型的第一个字母
                 小写的字符串一致
                */
                @RequestMapping("/testModelAttribute")
                public String testModelAttribute(User user){
                    System.out.println("修改:"+user);

                    return SUCCESS;
                }


}
index.jsp
<%@ page language="java" import="java.util.*" pageEncoding="UTF-8"%>
<%
String path = request.getContextPath();
String basePath = request.getScheme()+"://"+request.getServerName()+":"+request.getServerPort()+path+"/";
%>

<!DOCTYPE HTML PUBLIC "-//W3C//DTD HTML 4.01 Transitional//EN">
<html>
  <head>
    <base href="<%=basePath%>">

  </head>

  <body>
  <a href="Request/testModelAndView">test ModelAndView</a>
     <br>
     <a href="Request/testMap">test Map</a>

     <br>
     <a href="Request/testSessionAttributes">test SessionAttributes</a>

     <br>
     <!-- 模拟修改操作 -->
     <form action="Request/testModelAttribute" method="post">
             <input type="hidden" name="id" value="1">
             username:<input type="text" name="username" value="tom"/>
             <br>
             email:<input type="text" name="email" value="145@163"/>
             <br>
             age:<input type="text" name="age" value="14"/>
             <input type="submit" value="submit"/>

     </form>


  </body>
</html>
success.jsp
<%@ page language="java" import="java.util.*" pageEncoding="UTF-8"  isErrorPage="true"%>
<%
String path = request.getContextPath();
String basePath = request.getScheme()+"://"+request.getServerName()+":"+request.getServerPort()+path+"/";
%>

<!DOCTYPE HTML PUBLIC "-//W3C//DTD HTML 4.01 Transitional//EN">
<html>
  <head>
    <base href="<%=basePath%>">

    <title>My JSP 'success.jsp' starting page</title>

  </head>

  <body> success page. <br>
   time: ${requestScope.time}
   <br>
   names: ${requestScope.names}
   <br>
   Request user: ${requestScope.user}
   <br>
  Session  user: ${sessionScope.user}
  </body>
</html>
运行截图:
由index.jsp页面跳转到success.jsp页面
为添加id
modelattribute: