链接:http://pan.baidu.com/s/1mhN1df6 密码:c6ch
2、创建一个项目
3、将下载下载的aar文件拷贝到libs文件夹中
4、在build.gradle里面的android下添加
repositories {flatDir {dirs 'libs'}}
5、build.gradle里面的dependencies下添加
zxing3.1 是aar文件的名字
compile(name: 'zxing3.1', ext: 'aar')6、创建你想要显示的布局文件
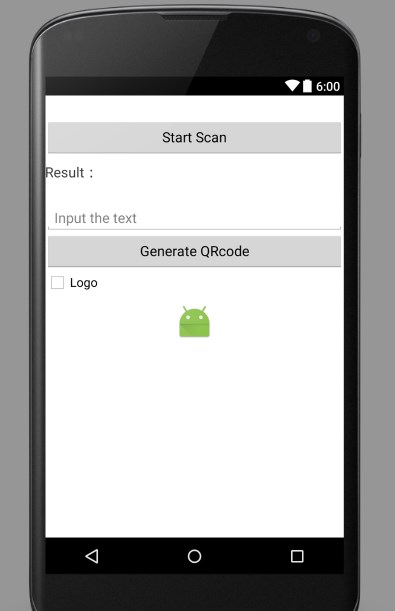
<?xml version="1.0" encoding="utf-8"?><LinearLayout xmlns:android="http://schemas.android.com/apk/res/android"android:layout_width="fill_parent"android:layout_height="fill_parent"android:background="@android:color/white"android:orientation="vertical"><Buttonandroid:id="@+id/btn_scan_barcode"android:layout_width="match_parent"android:layout_height="wrap_content"android:layout_marginTop="30dp"android:text="Start Scan"/><LinearLayoutandroid:layout_width="fill_parent"android:layout_height="wrap_content"android:layout_marginTop="10dp"android:orientation="horizontal"><TextViewandroid:layout_width="wrap_content"android:layout_height="wrap_content"android:text="Result:"android:textSize="18sp"/><TextViewandroid:id="@+id/tv_scan_result"android:layout_width="fill_parent"android:layout_height="wrap_content"android:textColor="@android:color/black"android:textSize="18sp"/></LinearLayout><EditTextandroid:id="@+id/et_qr_string"android:layout_width="fill_parent"android:layout_height="wrap_content"android:layout_marginTop="30dp"android:hint="Input the text"/><Buttonandroid:id="@+id/btn_add_qrcode"android:layout_width="fill_parent"android:layout_height="wrap_content"android:text="Generate QRcode"/><CheckBoxandroid:id="@+id/logo"android:layout_width="wrap_content"android:layout_height="wrap_content"android:text="Logo"/><ImageViewandroid:id="@+id/iv_qr_image"android:layout_width="wrap_content"android:layout_height="wrap_content"android:layout_gravity="center"android:layout_marginTop="10dp"android:background="@mipmap/ic_launcher"/></LinearLayout>布局效果图如下7、创建java文件编写具体逻辑
package lpc.com.zxingdemo;import android.app.Activity;import android.content.Intent;import android.graphics.Bitmap;import android.graphics.BitmapFactory;import android.os.Bundle;import android.view.View;import android.view.View.OnClickListener;import android.widget.Button;import android.widget.CheckBox;import android.widget.EditText;import android.widget.ImageView;import android.widget.TextView;import android.widget.Toast;import com.xys.libzxing.zxing.activity.CaptureActivity;import com.xys.libzxing.zxing.encoding.EncodingUtils;public class MainActivity extends Activity {private TextView resultTextView;private EditText qrStrEditText;private ImageView qrImgImageView;private CheckBox mCheckBox;@Overridepublic void onCreate(Bundle savedInstanceState) {super.onCreate(savedInstanceState);setContentView(R.layout.activity_main);resultTextView = (TextView) this.findViewById(R.id.tv_scan_result);qrStrEditText = (EditText) this.findViewById(R.id.et_qr_string);qrImgImageView = (ImageView) this.findViewById(R.id.iv_qr_image);mCheckBox = (CheckBox) findViewById(R.id.logo);Button scanBarCodeButton = (Button) this.findViewById(R.id.btn_scan_barcode);scanBarCodeButton.setOnClickListener(new OnClickListener() {@Overridepublic void onClick(View v) {//打开扫描界面扫描条形码或二维码Intent openCameraIntent = new Intent(MainActivity.this, CaptureActivity.class);startActivityForResult(openCameraIntent, 0);}});Button generateQRCodeButton = (Button) this.findViewById(R.id.btn_add_qrcode);generateQRCodeButton.setOnClickListener(new OnClickListener() {@Overridepublic void onClick(View v) {String contentString = qrStrEditText.getText().toString();if (!contentString.equals("")) {//根据字符串生成二维码图片并显示在界面上,第二个参数为图片的大小(350*350)Bitmap qrCodeBitmap = EncodingUtils.createQRCode(contentString, 350, 350,mCheckBox.isChecked() ?BitmapFactory.decodeResource(getResources(), R.mipmap.ic_launcher) :null);qrImgImageView.setImageBitmap(qrCodeBitmap);} else {Toast.makeText(MainActivity.this, "Text can not be empty", Toast.LENGTH_SHORT).show();}}});}@Overrideprotected void onActivityResult(int requestCode, int resultCode, Intent data) {super.onActivityResult(requestCode, resultCode, data);if (resultCode == RESULT_OK) {Bundle bundle = data.getExtras();String scanResult = bundle.getString("result");resultTextView.setText(scanResult);}}}8、最后实现的效果