FastBoot协议版本0.4
fastboot协议是一种通过USB连接与bootloaders通讯的机制。它被设计的非常容易实现,能够用于多种设备和运行Linux、Windows或者OSX的主机。
基本需求(Basic Requirements)

- 两个端点,一个输入端,一个输出端。
- 对于全速(full-speed)USB,最大包尺寸必须是64个字节;
对于高速(hign-speed)USB,最大包尺寸必须是512个字节。 - 协议完全是主机驱动(SSW注:相对于设备客户端而言),并且同步的。
这与多通道、双向、异步的ADB协议不同。
传输和组帧(Transport and Framing)
步骤1、主机发送命令(Command)。
一个命令是一个ASCII字符串,并且只能包含在不大于64个字节的单个包内。
步骤2、客户端(SSW注:设备)用一个单个的不大于64个字节的包响应。
响应包开头四个字节是“OKAY”、“FAIL”、“DATA”或者“INFO”。
响应包剩余的字节可以包含ASCII格式的说明性信息。
      a、INFO -> 剩余的60个字节包含说明信息(提供进度或者诊断信息)。
                 这些说明信息应该被显示,然后重复步骤2。
      b、FAIL -> 指示请求的命令失败。
                 剩余的60个字节可以提供一个文本形式的失败原因呈现给用户。交互停止。
      c、OKAY -> 指示请求的命令成功完成。跳转到步骤5。
      d、DATA -> 请求的命令已经为数据阶段做好准备。
                 一个数据响应包是12个字节长,组织形式为DATA00000000,
                 其中8位十六进制的数字表示所传输数据的总大小。
步骤3、数据阶段。
根据命令的不同,主机或者客户端将发送指定大小的数据。
比指定长度短的包总是可接受的,零长度的包将被忽略。
这个阶段会一直持续,直到客户端已经发送或接收了上面数据响应包中指定大小的字节数为止。
步骤4、客户端用一个单个的不大于64个字节的包响应。
      a、INFO -> 显示剩余的60个字节,然后返回到步骤4。
      b、FAIL -> 显示剩余的60个字节(如果有的话)作为失败原因,命令失败,停止交互。
      c、OKAY -> 成功。跳转到步骤5。
步骤5、命令执行成功。
结束交互。
示例会话(Example Session)
Host:主机 Client:客户端(设备)
Host: “getvar:version” 请求版本号
Client: “OKAY0.4” 返回版本为”0.4”
Host: “getvar:nonexistant” 请求未定义的变量
Client: “OKAY” 返回值为”“
Host: “download:00001234” 请求发送0x1234大小的字节数据
Client: “DATA00001234” 准备好接收数据
Host: < 0x1234 bytes > 发送数据
Client: “OKAY” 数据接收成功完成
Host: “flash:bootloader” 请求刷新数据到bootloader
Client: “INFOerasing flash” 指示状态/进度为“擦除flash”
“INFOwriting flash” 指示状态/进度为“写入flash”
“OKAY” 刷新成功完成
Host: “powerdown” 发送“关机”命令
Client: “FAILunknown command” 命令执行失败
命令参考(Command Reference)
- 命令参数以printf风格的转义序列表示。
- 命令是ASCII字符串,发送时不用引号(下面命令外使用引号仅仅为了在此文档中清楚的表达命令),
发送时也不以0字节结尾。
- 以小写字母开头的命令是为本规范保留的,OEM特定的命令不应该以小写字母开头,以防和规范的未来版本不兼容。
   "getvar:%s"         从bootloader读取配置或版本变量。
                       变量的值在OKAY响应的后面返回。
   "download:x"        写入数据到内存,供下面阐述的”boot“、”randisk“、”flash“等命令使用。
                       如果RAM有足够的空间,客户端将用”DATAx“回应;否则,将回应”FAIL“。
                       下载数据的大小会被记下来。
   "verify:x"          发送一个数字签名去验证下载的数据。
                       如果bootloader是”secure(安全的)“,那么签名验证是必须的;
                       如果bootloader不是”secure“,”flash“和”boot“命令会忽略签名验证。
   "flash:%s"          将之前下载的影像写入到指定的分区(如果可能的话)。
   "erase:%s"          擦除指定的分区(将分区全部写成0xFFs)。
   "boot"              之前下载的数据一个boot.img,应该按照boot.img的正常步骤被启动。
   "continue"          继续正常启动工作(如果可能的话)。
   "reboot"            重新启动设备。
   "reboot-bootloader" 重新启动进入bootloader。
                       对于升级bootloader之后,用新的bootloader去升级其他分区的升级过程,
                       这个命令是很有用的。
"powerdown" 设备关机。- 1
- 2
- 3
- 4
- 5
- 6
- 7
- 8
- 9
- 10
- 11
- 12
- 13
- 14
- 15
- 16
- 17
- 1
- 2
- 3
- 4
- 5
- 6
- 7
- 8
- 9
- 10
- 11
- 12
- 13
- 14
- 15
- 16
- 17
客户端变量(Client Variables)
命令”getvar:%s”用来读取客户端变量,客户端变量代表关于设备和运行于设备之上软件的各种信息。
当前已经定义的变量名称如下:
   version             FastBoot协议所支持的版本。
   version-bootloader  Bootloader的版本字符串。
   version-baseband    基带(Baseband)软件的版本字符串。
   product             产品名称。
   serialno            产品序列号。
secure 如果值是”yes“,说明这是一个安全的bootloader,在它安装或启动映像之前,需要一个签名。- 1
- 2
- 3
- 4
- 5
- 6
- 1
- 2
- 3
- 4
- 5
- 6
以小写字母开头的变量名被本规范保留,OEM特定的变量名不应该以小写字母开头。
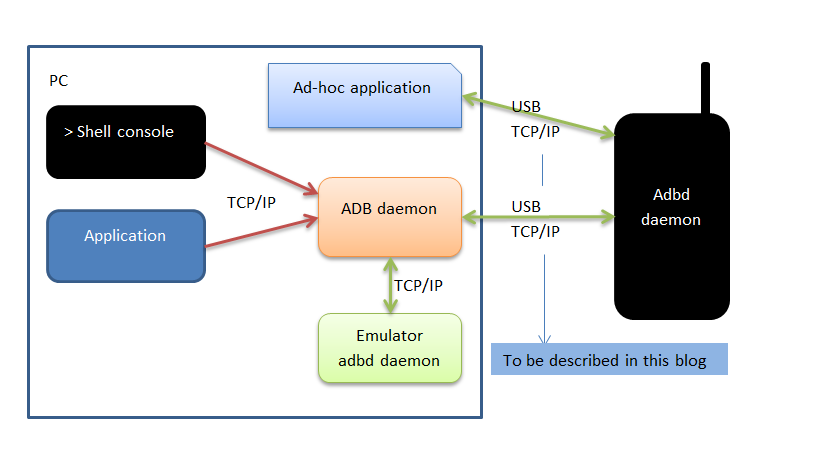
ADB (Android Debug Bridge)
ADB是Android系统的调试协议,所有android系统都支持它。
解析源码:
lk-refs-heads-masterappaboot下的rules.mk可知
OBJS +=
$(LOCAL_DIR)/aboot.o
$(LOCAL_DIR)/fastboot.o- 1
- 2
- 3
- 1
- 2
- 3
主要包含aboot.c 和 fastboot.c
在aboot.c 中
APP_START(aboot)
.init = aboot_init,
APP_END- 1
- 2
- 3
- 1
- 2
- 3
aboot_init的实现如下:
可知只要用户按下BACK按键就跳过boot_linux_from_flash,进入到fastboot.
void aboot_init(const struct app_descriptor *app)
{
if (keys_get_state(KEY_BACK) != 0)
goto fastboot;


boot_linux_from_flash();
dprintf(CRITICAL, "ERROR: Could not do normal boot. Reverting "
"to fastboot mode.
");


fastboot:
udc_init(&surf_udc_device);


fastboot_register("boot", cmd_boot);
fastboot_register("erase:", cmd_erase);
fastboot_register("flash:", cmd_flash);
fastboot_register("continue", cmd_continue);
fastboot_publish("product", "swordfish");
fastboot_publish("kernel", "lk");


fastboot_init((void*) SCRATCH_ADDR, 100 * 1024 * 1024);
udc_start();
}- 1
- 2
- 3
- 4
- 5
- 6
- 7
- 8
- 9
- 10
- 11
- 12
- 13
- 14
- 15
- 16
- 17
- 18
- 19
- 20
- 21
- 22
- 23
- 24
- 25
- 26
- 1
- 2
- 3
- 4
- 5
- 6
- 7
- 8
- 9
- 10
- 11
- 12
- 13
- 14
- 15
- 16
- 17
- 18
- 19
- 20
- 21
- 22
- 23
- 24
- 25
- 26
调用usb初始化,并注册fastboot的boot/erase/flash/continue/product/kernel等命令,并fastboot_init,新建thread来接受pc发过来的命令
int fastboot_init(void *base, unsigned size)
{
thread_t *thr;
dprintf(INFO, "fastboot_init()
");


download_base = base;
download_max = size;


event_init(&usb_online, 0, EVENT_FLAG_AUTOUNSIGNAL);
event_init(&txn_done, 0, EVENT_FLAG_AUTOUNSIGNAL);


in = udc_endpoint_alloc(UDC_TYPE_BULK_IN, 512);
if (!in)
goto fail_alloc_in;
out = udc_endpoint_alloc(UDC_TYPE_BULK_OUT, 512);
if (!out)
goto fail_alloc_out;


fastboot_endpoints[0] = in;
fastboot_endpoints[1] = out;


req = udc_request_alloc();
if (!req)
goto fail_alloc_req;


if (udc_register_gadget(&fastboot_gadget))
goto fail_udc_register;


fastboot_register("getvar:", cmd_getvar);
fastboot_register("download:", cmd_download);
fastboot_publish("version", "0.5");


thr = thread_create("fastboot", fastboot_handler, 0, DEFAULT_PRIORITY, 4096);
thread_resume(thr);
return 0;


fail_udc_register:
udc_request_free(req);
fail_alloc_req:
udc_endpoint_free(out);

fail_alloc_out:
udc_endpoint_free(in);
fail_alloc_in:
return -1;
}- 1
- 2
- 3
- 4
- 5
- 6
- 7
- 8
- 9
- 10
- 11
- 12
- 13
- 14
- 15
- 16
- 17
- 18
- 19
- 20
- 21
- 22
- 23
- 24
- 25
- 26
- 27
- 28
- 29
- 30
- 31
- 32
- 33
- 34
- 35
- 36
- 37
- 38
- 39
- 40
- 41
- 42
- 43
- 44
- 45
- 46
- 47
- 48
- 49
- 50
- 51
- 52
- 53
- 54
- 55
- 1
- 2
- 3
- 4
- 5
- 6
- 7
- 8
- 9
- 10
- 11
- 12
- 13
- 14
- 15
- 16
- 17
- 18
- 19
- 20
- 21
- 22
- 23
- 24
- 25
- 26
- 27
- 28
- 29
- 30
- 31
- 32
- 33
- 34
- 35
- 36
- 37
- 38
- 39
- 40
- 41
- 42
- 43
- 44
- 45
- 46
- 47
- 48
- 49
- 50
- 51
- 52
- 53
- 54
- 55
这个函数又注册getvar/download命令,并建立thread接受pc发过来的执行,thread的callback函数是fastboot_handler :
static int fastboot_handler(void *arg)
{
for (;;) {
event_wait(&usb_online);
fastboot_command_loop();
}
return 0;
}- 1
- 2
- 3
- 4
- 5
- 6
- 7
- 8
- 1
- 2
- 3
- 4
- 5
- 6
- 7
- 8
这个函数是循环,如果usb接收到命令,就调用fastboot_command_loop来解析命令并调用命令的执行函数
static void fastboot_command_loop(void)
{
struct fastboot_cmd *cmd;
int r;
dprintf(INFO,"fastboot: processing commands
");


again:
while (fastboot_state != STATE_ERROR) {
r = usb_read(buffer, 64);
if (r < 0) break;
buffer[r] = 0;
dprintf(INFO,"fastboot: %s
", buffer);


for (cmd = cmdlist; cmd; cmd = cmd->next) {
if (memcmp(buffer, cmd->prefix, cmd->prefix_len))
continue;
fastboot_state = STATE_COMMAND;
cmd->handle((const char*) buffer + cmd->prefix_len,
   (void*) download_base, download_size);
if (fastboot_state == STATE_COMMAND)
fastboot_fail("unknown reason");
goto again;
}


fastboot_fail("unknown command");

}
fastboot_state = STATE_OFFLINE;
dprintf(INFO,"fastboot: oops!
");
}- 1
- 2
- 3
- 4
- 5
- 6
- 7
- 8
- 9
- 10
- 11
- 12
- 13
- 14
- 15
- 16
- 17
- 18
- 19
- 20
- 21
- 22
- 23
- 24
- 25
- 26
- 27
- 28
- 29
- 30
- 31
- 32
- 33
- 1
- 2
- 3
- 4
- 5
- 6
- 7
- 8
- 9
- 10
- 11
- 12
- 13
- 14
- 15
- 16
- 17
- 18
- 19
- 20
- 21
- 22
- 23
- 24
- 25
- 26
- 27
- 28
- 29
- 30
- 31
- 32
- 33
所有的命令都在cmdlist 这个列表中,调用memcmp来比较pc发的命令和fastboot的命令是否相等,如果相等就调用handle处理,
也就是我们fastboot_register时候的第二个参数.
在fastboot中我们一般通过fastboot_register来注册命令
fastboot_register("erase:", cmd_erase);
我们来看看fastboot_register的实现
static struct fastboot_cmd *cmdlist;


void fastboot_register(const char *prefix,
      void (*handle)(const char *arg, void *data, unsigned sz))
{
struct fastboot_cmd *cmd;
cmd = malloc(sizeof(*cmd));
if (cmd) {
cmd->prefix = prefix;
cmd->prefix_len = strlen(prefix);
cmd->handle = handle;
cmd->next = cmdlist;
cmdlist = cmd;
}
}- 1
- 2
- 3
- 4
- 5
- 6
- 7
- 8
- 9
- 10
- 11
- 12
- 13
- 14
- 15
- 16
- 1
- 2
- 3
- 4
- 5
- 6
- 7
- 8
- 9
- 10
- 11
- 12
- 13
- 14
- 15
- 16
在fastboot.c 中定义一个fastboot_cmd类型的静态变量cmdlist,在调用fastboot_register 注册时会先通过
malloc 申请一个fastboot_cmd,然后分贝给prefix赋值命令的名称,如本例中的erase:,handle是收到命令后
要处理的函数,本例中赋值为cmd_erase。然后将这个新建的cmd加到cmdlist中
这样在fastboot 处理函数中fastboot_command_loop,会比较buffer中接收到的命令和cmdlist->prefix 相比较是否相等(if (memcmp(buffer, cmd->prefix, cmd->prefix_len))),
如果相等就调用handle函数。
cmd->handle((const char*) buffer + cmd->prefix_len,
(void*) download_base, download_size);- 1
- 2
- 1
- 2
我们会调用fastboot_publish 来注册常量,例如下例中定义version=0.5
fastboot_publish("version", "0.5");
我们看看fastboot_publish的实现,和上面讲的fastboot_register 类似,也是有一个常量的varlist,通过fastboot_publish
注册的常量都在这个varlist上.
static struct fastboot_var *varlist;


void fastboot_publish(const char *name, const char *value)
{
struct fastboot_var *var;
var = malloc(sizeof(*var));
if (var) {
var->name = name;
var->value = value;
var->next = varlist;
varlist = var;
}
}- 1
- 2
- 3
- 4
- 5
- 6
- 7
- 8
- 9
- 10
- 11
- 12
- 13
- 14
- 1
- 2
- 3
- 4
- 5
- 6
- 7
- 8
- 9
- 10
- 11
- 12
- 13
- 14
而我们又是通过 fastboot_register("getvar:", cmd_getvar);
来注册如果获取常量的
所以如果发过来的命令是getvar,就调用cmd_getva。
而cmd_getvar 就是将varlist中的所有产量通过fastboot_okay发送给pc,显示出来.
static void cmd_getvar(const char *arg, void *data, unsigned sz)
{
struct fastboot_var *var;


for (var = varlist; var; var = var->next) {
if (!strcmp(var->name, arg)) {
fastboot_okay(var->value);
return;
}
}
fastboot_okay("");
}- 1
- 2
- 3
- 4
- 5
- 6
- 7
- 8
- 9
- 10
- 11
- 12
- 13
- 1
- 2
- 3
- 4
- 5
- 6
- 7
- 8
- 9
- 10
- 11
- 12
- 13
fastboot init
lk-refs-heads-masterarcharmcrt0.s
_start:
    b reset
    b arm_undefined
    b arm_syscall
    b arm_prefetch_abort
    b arm_data_abort
    b arm_reserved
    b arm_irq
    b arm_fiq
    cmp r0, r1
    strlt r2, [r0], #4
    blt .L__bss_loop

    ......

bl kmain - 1
- 2
- 3
- 4
- 5
- 6
- 7
- 8
- 9
- 10
- 11
- 12
- 13
- 14
- 15
- 16
- 1
- 2
- 3
- 4
- 5
- 6
- 7
- 8
- 9
- 10
- 11
- 12
- 13
- 14
- 15
- 16
lk的第一行语句是从crt0.s 中的_start开始,在这个函数的最后会调用kmain 进入到c code的执行
void kmain(void)
{
   ....

// create a thread to complete system initialization
dprintf(SPEW, "creating bootstrap completion thread
");
thread_resume(thread_create("bootstrap2", &bootstrap2, NULL, DEFAULT_PRIORITY, DEFAULT_STACK_SIZE));


// enable interrupts
exit_critical_section();


// become the idle thread
thread_become_idle();
}- 1
- 2
- 3
- 4
- 5
- 6
- 7
- 8
- 9
- 10
- 11
- 12
- 13
- 14
- 15
- 16
- 1
- 2
- 3
- 4
- 5
- 6
- 7
- 8
- 9
- 10
- 11
- 12
- 13
- 14
- 15
- 16
在这个函数的最后会new 一个thread,回调函数是bootstrap2
static int bootstrap2(void *arg)
{
dprintf(SPEW, "calling apps_init()
");
apps_init();

....

return 0;
}- 1
- 2
- 3
- 4
- 5
- 6
- 7
- 8
- 9
- 1
- 2
- 3
- 4
- 5
- 6
- 7
- 8
- 9
这个函数最后会调用apps_init。在lk中所有的应该都是以app的形式出现的,其中每个app对应一个thread,就像前面讲过的fastboot,我们看看在apps_init中怎么给每个app一个thread来运行的
void apps_init(void)
{
const struct app_descriptor *app;

/* call all the init routines */
for (app = &__apps_start; app != &__apps_end; app++) {
    if (app->init)
    app->init(app);
}
/* start any that want to start on boot */
for (app = &__apps_start; app != &__apps_end; app++) {
    if (app->entry && (app->flags & APP_FLAG_DONT_START_ON_BOOT) == 0) {
start_app(app);
        }
    }
}- 1
- 2
- 3
- 4
- 5
- 6
- 7
- 8
- 9
- 10
- 11
- 12
- 13
- 14
- 15
- 16
- 1
- 2
- 3
- 4
- 5
- 6
- 7
- 8
- 9
- 10
- 11
- 12
- 13
- 14
- 15
- 16
这个函数会对放在__apps_start 和__apps_end的apps如果有init函数,就全部调用init:
APP_START(aboot)
.init = aboot_init,
APP_END- 1
- 2
- 3
- 1
- 2
- 3
以fastboot 为例,apps_init中的app->init=aboot_init。我们在aboot_init会为fastboot new一个thread来运行.
如果在__apps_start 和__apps_end的apps 有定义entry 且flags没有APP_FLAG_DONT_START_ON_BOOT
例如shell.c中
APP_START(shell)
.init = shell_init,
.entry = shell_entry,
APP_END- 1
- 2
- 3
- 4
- 1
- 2
- 3
- 4
的话,就在apps_init中就调用start_app
static void start_app(const struct app_descriptor *app)
{
printf("starting app %s
", app->name);


thread_resume(thread_create(app->name, &app_thread_entry, (void *)app, DEFAULT_PRIORITY, DEFAULT_STACK_SIZE));

}- 1
- 2
- 3
- 4
- 5
- 6
- 7
- 8
- 1
- 2
- 3
- 4
- 5
- 6
- 7
- 8
就会为这个apps new 一个thread,其回调函数是app_thread_entry
static int app_thread_entry(void *arg)
{
const struct app_descriptor *app = (const struct app_descriptor *)arg;


app->entry(app, NULL);


return 0;
}- 1
- 2
- 3
- 4
- 5
- 6
- 7
- 8
- 9
- 10
- 1
- 2
- 3
- 4
- 5
- 6
- 7
- 8
- 9
- 10
在app_thread_entry 中直接调用app->entry会运行在一个新的thread中,在shell.c中就是shell_entry会在一个new thread中运行.
lk thread
在lk中我们一般通过thread_create 来新建一个thread,但这个thread 是THREAD_SUSPENDED,必须要调用thread_resume才能开始运行
enum thread_state {
    THREAD_SUSPENDED = 0,
    THREAD_READY,
    THREAD_RUNNING,
    THREAD_BLOCKED,
    THREAD_SLEEPING,
    THREAD_DEATH,
};
thread_resume(thread_create(app->name, &app_thread_entry, (void *)app, DEFAULT_PRIORITY, DEFAULT_STACK_SIZE));- 1
- 2
- 3
- 4
- 5
- 6
- 7
- 8
- 9
- 1
- 2
- 3
- 4
- 5
- 6
- 7
- 8
- 9
我们来看看thread_create的实现
thread_t *thread_create(const char *name, thread_start_routine entry, void *arg, int priority, size_t stack_size)
{
thread_t *t;


t = malloc(sizeof(thread_t));
if (!t)
return NULL;


init_thread_struct(t, name);


t->entry = entry;
t->arg = arg;
t->priority = priority;
t->saved_critical_section_count = 1; /* we always start inside a critical section */
t->state = THREAD_SUSPENDED;
t->blocking_wait_queue = NULL;
t->wait_queue_block_ret = NO_ERROR;


/* create the stack */
t->stack = malloc(stack_size);
if (!t->stack) {
free(t);
return NULL;
}


t->stack_size = stack_size;


/* inheirit thread local storage from the parent */
int i;
for (i=0; i < MAX_TLS_ENTRY; i++)
t->tls[i] = current_thread->tls[i];


/* set up the initial stack frame */
arch_thread_initialize(t);


/* add it to the global thread list */
enter_critical_section();
list_add_head(&thread_list, &t->thread_list_node);
exit_critical_section();


return t;
}- 1
- 2
- 3
- 4
- 5
- 6
- 7
- 8
- 9
- 10
- 11
- 12
- 13
- 14
- 15
- 16
- 17
- 18
- 19
- 20
- 21
- 22
- 23
- 24
- 25
- 26
- 27
- 28
- 29
- 30
- 31
- 32
- 33
- 34
- 35
- 36
- 37
- 38
- 39
- 40
- 41
- 42
- 43
- 44
- 45
- 46
- 47
- 48
- 49
- 50
- 51
- 1
- 2
- 3
- 4
- 5
- 6
- 7
- 8
- 9
- 10
- 11
- 12
- 13
- 14
- 15
- 16
- 17
- 18
- 19
- 20
- 21
- 22
- 23
- 24
- 25
- 26
- 27
- 28
- 29
- 30
- 31
- 32
- 33
- 34
- 35
- 36
- 37
- 38
- 39
- 40
- 41
- 42
- 43
- 44
- 45
- 46
- 47
- 48
- 49
- 50
- 51
这个函数但大部分在做新thread_t结构体的初始化。在最后调用list_add_head将这个新建的thread加入到thread_list 中.
/* global thread list */
static struct list_node thread_list;
所有的thread 都是放在这个全局的thread_list 中
现在为止我们的thread 已经建好了,但是其状态是t->state = THREAD_SUSPENDED;我们需要调用thread_resume来让其运行
status_t thread_resume(thread_t *t)
{
#if THREAD_CHECKS
ASSERT(t->magic == THREAD_MAGIC);
ASSERT(t->state != THREAD_DEATH);
#endif


if (t->state == THREAD_READY || t->state == THREAD_RUNNING)
return ERR_NOT_SUSPENDED;


enter_critical_section();
t->state = THREAD_READY;
insert_in_run_queue_head(t);
thread_yield();
exit_critical_section();


return NO_ERROR;
}- 1
- 2
- 3
- 4
- 5
- 6
- 7
- 8
- 9
- 10
- 11
- 12
- 13
- 14
- 15
- 16
- 17
- 18
- 19
- 20
- 21
- 1
- 2
- 3
- 4
- 5
- 6
- 7
- 8
- 9
- 10
- 11
- 12
- 13
- 14
- 15
- 16
- 17
- 18
- 19
- 20
- 21
这个函数会先判断t->state 是不是THREAD_READY或者 THREAD_RUNNING,如果是的话就退出,说明出错了,由于我们是
新建一个thread,其状态是THREAD_SUSPENDED,所以继续往下走
将thread的状态设成THREAD_READY。
然后调用insert_in_run_queue_head插入到将要运行thread的list中
/* run queue manipulation */
static void insert_in_run_queue_head(thread_t *t)
{
#if THREAD_CHECKS
ASSERT(t->magic == THREAD_MAGIC);
ASSERT(t->state == THREAD_READY);
ASSERT(!list_in_list(&t->queue_node));
ASSERT(in_critical_section());
#endif


list_add_head(&run_queue[t->priority], &t->queue_node);
run_queue_bitmap |= (1<<t->priority);
}- 1
- 2
- 3
- 4
- 5
- 6
- 7
- 8
- 9
- 10
- 11
- 12
- 13
- 14
- 1
- 2
- 3
- 4
- 5
- 6
- 7
- 8
- 9
- 10
- 11
- 12
- 13
- 14
其中
static struct list_node run_queue[NUM_PRIORITIES];
 #define NUM_PRIORITIES 32
可以run_queue是一个数组,每个优先级对应数组中的一样。其中每一项又是一个list. thread_resume在把这个thread 放到run_queue后,继续调用thread_yield 来运行
void thread_yield(void)
{
#if THREAD_CHECKS
ASSERT(current_thread->magic == THREAD_MAGIC);
ASSERT(current_thread->state == THREAD_RUNNING);
#endif


enter_critical_section();


#if THREAD_STATS
thread_stats.yields++;
#endif


/* we are yielding the cpu, so stick ourselves into the tail of the run queue and reschedule */
current_thread->state = THREAD_READY;
current_thread->remaining_quantum = 0;
insert_in_run_queue_tail(current_thread);
thread_resched();


exit_critical_section();
}- 1
- 2
- 3
- 4
- 5
- 6
- 7
- 8
- 9
- 10
- 11
- 12
- 13
- 14
- 15
- 16
- 17
- 18
- 19
- 20
- 21
- 22
- 23
- 24
- 25
- 1
- 2
- 3
- 4
- 5
- 6
- 7
- 8
- 9
- 10
- 11
- 12
- 13
- 14
- 15
- 16
- 17
- 18
- 19
- 20
- 21
- 22
- 23
- 24
- 25
这个函数将当前正在运行的thread的状态设成THREAD_READY,然后调用insert_in_run_queue_tail将当前thread 插入到run_queue 的最后面然后调用thread_resched来进程thread 切换
void thread_resched(void)
{
    thread_t *oldthread;
    thread_t *newthread;


    oldthread = current_thread;


    int next_queue = HIGHEST_PRIORITY - __builtin_clz(run_queue_bitmap) - (32 - NUM_PRIORITIES);
    //dprintf(SPEW, "bitmap 0x%x, next %d
", run_queue_bitmap, next_queue);


    newthread = list_remove_head_type(&run_queue[next_queue], thread_t, queue_node);


    if (list_is_empty(&run_queue[next_queue]))
        run_queue_bitmap &= ~(1<<next_queue);


    newthread->state = THREAD_RUNNING;


    if (newthread == oldthread)
return;


/* set up quantum for the new thread if it was consumed */
if (newthread->remaining_quantum <= 0) {
    newthread->remaining_quantum = 5; // XXX make this smarter
}


/* do the switch */
    oldthread->saved_critical_section_count = critical_section_count;
    current_thread = newthread;
    critical_section_count = newthread->saved_critical_section_count;
    arch_context_switch(oldthread, newthread);
}
- 1
- 2
- 3
- 4
- 5
- 6
- 7
- 8
- 9
- 10
- 11
- 12
- 13
- 14
- 15
- 16
- 17
- 18
- 19
- 20
- 21
- 22
- 23
- 24
- 25
- 26
- 27
- 28
- 29
- 30
- 31
- 32
- 33
- 34
- 35
- 36
- 37
- 38
- 39
- 40
- 41
- 42
- 1
- 2
- 3
- 4
- 5
- 6
- 7
- 8
- 9
- 10
- 11
- 12
- 13
- 14
- 15
- 16
- 17
- 18
- 19
- 20
- 21
- 22
- 23
- 24
- 25
- 26
- 27
- 28
- 29
- 30
- 31
- 32
- 33
- 34
- 35
- 36
- 37
- 38
- 39
- 40
- 41
- 42
通过list_remove_head_type异常并返回在run_queu 头部的thread,由于这次切换的时候是找优先级高的thread的运行,因此如果当前还有比我们优先级高的thread,可能这次运行的不是我们前面
新建的thread
int next_queue = HIGHEST_PRIORITY - __builtin_clz(run_queue_bitmap) - (32 - NUM_PRIORITIES);
将这个thread的状态切换成newthread->state = THREAD_RUNNING
最后调用arch_context_switch来进行thread 切换
void arch_context_switch(thread_t *oldthread, thread_t *newthread)
{
// dprintf("arch_context_switch: old %p (%s), new %p (%s)
", oldthread, oldthread->name, newthread, newthread->name);
    arm_context_switch(&oldthread->arch.sp, newthread->arch.sp);
}- 1
- 2
- 3
- 4
- 5
- 1
- 2
- 3
- 4
- 5
由于当前cpu是arm,因此调用arm_context_switch来切换
/* context switch frame is as follows:
* ulr
* usp
* lr
* r11
* r10
* r9
* r8
* r7
* r6
* r5
* r4
*/
/* arm_context_switch(addr_t *old_sp, addr_t new_sp) */
FUNCTION(arm_context_switch)
/* save all the usual registers + user regs */
/* the spsr is saved and restored in the iframe by exceptions.S */
sub r3, sp, #(11*4)
/* can't use sp in user mode stm */
mov r12, lr
stmia r3, { r4-r11, r12, r13, r14 }^

/* save old sp */
str r3, [r0]


/* clear any exlusive locks that the old thread holds */
#if ARM_ISA_ARMV7
/* can clear it directly */
.word 0xf57ff01f // clrex
#elif ARM_ISA_ARMV6
/* have to do a fake strex to clear it */
ldr r0, =strex_spot
strex r3, r2, [r0]
#endif


/* load new regs */
ldmia r1, { r4-r11, r12, r13, r14 }^
mov lr, r12
/* restore lr */
add sp, r1, #(11*4)     /* restore sp */
bx lr- 1
- 2
- 3
- 4
- 5
- 6
- 7
- 8
- 9
- 10
- 11
- 12
- 13
- 14
- 15
- 16
- 17
- 18
- 19
- 20
- 21
- 22
- 23
- 24
- 25
- 26
- 27
- 28
- 29
- 30
- 31
- 32
- 33
- 34
- 35
- 36
- 37
- 38
- 39
- 40
- 41
- 42
- 43
- 1
- 2
- 3
- 4
- 5
- 6
- 7
- 8
- 9
- 10
- 11
- 12
- 13
- 14
- 15
- 16
- 17
- 18
- 19
- 20
- 21
- 22
- 23
- 24
- 25
- 26
- 27
- 28
- 29
- 30
- 31
- 32
- 33
- 34
- 35
- 36
- 37
- 38
- 39
- 40
- 41
- 42
- 43
其实现比较简单就是保存当前thread的寄存器,然后将新thread的寄存器从stack中load到寄存器中,并执行bx lr 跳到新thread来运行
lk的thread切换
lk是按照时间片来运行thread,每个thread 默认运行5个时钟中断,如果时间到了就在timer的中断中做thread 切换。下来我们看看具体的代码。
当我们通过thread_resume来让thread 运行时.会调用thread_yiled
void thread_yield(void)
{
    enter_critical_section();


/* we are yielding the cpu, so stick ourselves into the tail of the run queue and reschedule */
    current_thread->state = THREAD_READY;
    current_thread->remaining_quantum = 0;
    insert_in_run_queue_tail(current_thread);
    thread_resched();


    exit_critical_section();
}- 1
- 2
- 3
- 4
- 5
- 6
- 7
- 8
- 9
- 10
- 11
- 12
- 13
- 14
- 1
- 2
- 3
- 4
- 5
- 6
- 7
- 8
- 9
- 10
- 11
- 12
- 13
- 14
这个函数会将current_thread->remaining_quantum = 0;而remaining_quantum就是表示thread 可以运行的timer 中断的个数
继续看thread_resched
void thread_resched(void)
{
    thread_t *oldthread;
    thread_t *newthread;


/* set up quantum for the new thread if it was consumed */
if (newthread->remaining_quantum <= 0) {
    newthread->remaining_quantum = 5; // XXX make this smarter
}


}- 1
- 2
- 3
- 4
- 5
- 6
- 7
- 8
- 9
- 10
- 11
- 12
- 13
- 1
- 2
- 3
- 4
- 5
- 6
- 7
- 8
- 9
- 10
- 11
- 12
- 13
这个函数会将新thread的remaining_quantum 设定为5,也就是运行5个time 中断,如果一个timer中断是10ms的话,每个thread 就默认运行50ms
明白这点后我们看看怎么在时钟中断中切换thread
在arm_irq中断中会根据中断的返回值来决定是否进行thread切换
FUNCTION(arm_irq)

/* XXX only deals with interrupting supervisor mode */


/* call into higher level code */
mov r0, sp /* iframe */
bl platform_irq


/* reschedule if the handler returns nonzero */
cmp     r0, #0
blne thread_preempt- 1
- 2
- 3
- 4
- 5
- 6
- 7
- 8
- 9
- 10
- 11
- 12
- 13
- 1
- 2
- 3
- 4
- 5
- 6
- 7
- 8
- 9
- 10
- 11
- 12
- 13
先看看platform_irq的实现
enum handler_return platform_irq(struct arm_iframe *frame)
{
    ret = handler[num].func(handler[num].arg);
    return ret;
}- 1
- 2
- 3
- 4
- 5
- 1
- 2
- 3
- 4
- 5
会根据中断号,调用对应的函数而handler中的func是通过register_int_handler来注册的.
void register_int_handler(unsigned int vector, int_handler func, void *arg)
{
    if (vector >= NR_IRQS)
    return;


    enter_critical_section();
    handler[vector].func = func;
    handler[vector].arg = arg;
    exit_critical_section();
}- 1
- 2
- 3
- 4
- 5
- 6
- 7
- 8
- 9
- 10
- 11
- 1
- 2
- 3
- 4
- 5
- 6
- 7
- 8
- 9
- 10
- 11
看下面的函数handler是platform_tick,对应的timer中断号是INT_PIT
void platform_init_timer(void)
{
    register_int_handler(INT_PIT, &platform_tick, NULL);
}- 1
- 2
- 3
- 4
- 1
- 2
- 3
- 4
继续看platform_tick的实现
static enum handler_return platform_tick(void *arg)
{
    *REG(PIT_CLEAR_INT) = 1;
    if (t_callback) {
    return t_callback(arg, current_time());
    } else {
    return INT_NO_RESCHEDULE;
    }
}- 1
- 2
- 3
- 4
- 5
- 6
- 7
- 8
- 9
- 1
- 2
- 3
- 4
- 5
- 6
- 7
- 8
- 9
调用t_callback,通过下面的函数设定t_callback
status_t platform_set_periodic_timer(platform_timer_callback callback, void *arg, time_t interval)
{
enter_critical_section();

t_callback = callback;

return NO_ERROR;
}- 1
- 2
- 3
- 4
- 5
- 6
- 7
- 8
- 1
- 2
- 3
- 4
- 5
- 6
- 7
- 8
所以t_callback == timer_tick
void timer_init(void)
{
list_initialize(&timer_queue);


/* register for a periodic timer tick */
platform_set_periodic_timer(timer_tick, NULL, 10); /* 10ms */
}- 1
- 2
- 3
- 4
- 5
- 6
- 7
- 8
- 1
- 2
- 3
- 4
- 5
- 6
- 7
- 8
timer_tick中继续call thread_timer_tick来决定是否要进行thread 切换
static enum handler_return timer_tick(void *arg, time_t now)
{
    timer_t *timer;
    enum handler_return ret = INT_NO_RESCHEDULE;


#if THREAD_STATS
    thread_stats.timer_ints++;
#endif


    for (;;) {
/* let the scheduler have a shot to do quantum expiration, etc */
    if (thread_timer_tick() == INT_RESCHEDULE)
    ret = INT_RESCHEDULE;

    return INT_RESCHEDULE;
}- 1
- 2
- 3
- 4
- 5
- 6
- 7
- 8
- 9
- 10
- 11
- 12
- 13
- 14
- 15
- 16
- 17
- 18
- 1
- 2
- 3
- 4
- 5
- 6
- 7
- 8
- 9
- 10
- 11
- 12
- 13
- 14
- 15
- 16
- 17
- 18
而在thread_timer_tick就是简单的判定当前thread的时间片是否用完,如果用完就切换
enum handler_return thread_timer_tick(void)
{
    if (current_thread == idle_thread)
    return INT_NO_RESCHEDULE;

    current_thread->remaining_quantum--;
    if (current_thread->remaining_quantum <= 0)
    return INT_RESCHEDULE;
    else
    return INT_NO_RESCHEDULE;
}
- 1
- 2
- 3
- 4
- 5
- 6
- 7
- 8
- 9
- 10
- 11
- 12
- 1
- 2
- 3
- 4
- 5
- 6
- 7
- 8
- 9
- 10
- 11
- 12
如果返回INT_RESCHEDULE也就是不等于0 ,也就是要切换thread,则在arm_irq中继续调用thread_preempt进行thread 切换。
可以看到当前remaining_quantum 不等于0,就说明当前有更高优先级的thread抢占了当前的thread, 所以讲当前thread 插在run queue的前面等下一次运行。否则的话,就是当前thread时间片运行完,加到run queue的后面
void thread_preempt(void)
{
#if THREAD_CHECKS
    ASSERT(current_thread->magic == THREAD_MAGIC);
    ASSERT(current_thread->state == THREAD_RUNNING);
#endif

    enter_critical_section();

#if THREAD_STATS
    if (current_thread != idle_thread)
    thread_stats.preempts++; /* only track when a meaningful preempt happens */
#endif


/* we are being preempted, so we get to go back into the front of the run queue if we have quantum left */
    current_thread->state = THREAD_READY;
    if (current_thread->remaining_quantum > 0)
        insert_in_run_queue_head(current_thread);
    else
        insert_in_run_queue_tail(current_thread); /* if we're out of quantum, go to the tail of the queue */
    thread_resched();
    exit_critical_section();
} - 1
- 2
- 3
- 4
- 5
- 6
- 7
- 8
- 9
- 10
- 11
- 12
- 13
- 14
- 15
- 16
- 17
- 18
- 19
- 20
- 21
- 22
- 23
- 24
- 1
- 2
- 3
- 4
- 5
- 6
- 7
- 8
- 9
- 10
- 11
- 12
- 13
- 14
- 15
- 16
- 17
- 18
- 19
- 20
- 21
- 22
- 23
- 24
kl中的memory
在lk中通过我们一般通过malloc来申请内存
void *malloc(size_t size)
{
    return heap_alloc(size, 0);
}- 1
- 2
- 3
- 4
- 1
- 2
- 3
- 4
malloc 直接调用heap_alloc来申请。 lk_main函数中通过调用heap_init来初始由于malloc申请的heap
void heap_init(void)
{
    LTRACE_ENTRY;

// set the heap range
    theheap.base = (void *)HEAP_START;
    theheap.len = HEAP_LEN;

// initialize the free list
    list_initialize(&theheap.free_list);

// create an initial free chunk
                `heap_insert_free_chunk(heap_create_free_chunk(theheap.base, theheap.len));
}- 1
- 2
- 3
- 4
- 5
- 6
- 7
- 8
- 9
- 10
- 11
- 12
- 13
- 14
- 1
- 2
- 3
- 4
- 5
- 6
- 7
- 8
- 9
- 10
- 11
- 12
- 13
- 14
可以看到这个函数一开始就要设置heap 需要管理的memory的start 和 size
这两个宏定义如下:
#define HEAP_START ((unsigned long)&_end)
#define HEAP_LEN ((size_t)&_end_of_ram - (size_t)&_end)
_end和_end_of_ram 又是在下面的文件中定义的
system-onesegment.ld
__data_end = .;


/* unintialized data (in same segment as writable data) */
. = ALIGN(4);
__bss_start = .;
.bss : { *(.bss .bss.*) }

. = ALIGN(4);
_end = .;

. = %MEMBASE% + %MEMSIZE%;
_end_of_ram = .;- 1
- 2
- 3
- 4
- 5
- 6
- 7
- 8
- 9
- 10
- 11
- 12
- 13
- 14
- 15
- 1
- 2
- 3
- 4
- 5
- 6
- 7
- 8
- 9
- 10
- 11
- 12
- 13
- 14
- 15
可以看到需要用户自己定义MEMBASE 和MEMSIZE变量
我们继续看heap_init会调用下面的函数初始free list
// initialize the free list
list_initialize(&theheap.free_list);
可见这个时候free list是空的
static inline void list_initialize(struct list_node *list)
{
    list->prev = list->next = list;
}
继续看是如何插入chunk的
// create an initial free chunk
    heap_insert_free_chunk(heap_create_free_chunk(theheap.base, theheap.len));
其中heap_create_free_chunk 的实现如下,
struct free_heap_chunk *heap_create_free_chunk(void *ptr, size_t len)
{
    DEBUG_ASSERT((len % sizeof(void *)) == 0); /*size must be aligned on pointer boundary*/

    struct free_heap_chunk *chunk = (struct free_heap_chunk *)ptr;
chunk->len = len;

    return chunk;
}- 1
- 2
- 3
- 4
- 5
- 6
- 7
- 8
- 9
- 1
- 2
- 3
- 4
- 5
- 6
- 7
- 8
- 9
可知lk中是用chunk 来管理memory的,刚开始的时候只有一个很大的chunk heap_insert_free_chunk的实现如下:
static struct free_heap_chunk *heap_insert_free_chunk(struct free_heap_chunk *chunk)
{
#if DEBUGLEVEL > INFO
    vaddr_t chunk_end = (vaddr_t)chunk + chunk->len;
#endif

// dprintf("%s: chunk ptr %p, size 0x%lx, chunk_end 0x%x
", __FUNCTION__, chunk, chunk->len, chunk_end);

    struct free_heap_chunk *next_chunk;
    struct free_heap_chunk *last_chunk;

// walk through the list, finding the node to insert before
    list_for_every_entry(&theheap.free_list, next_chunk, struct free_heap_chunk, node) {
    if (chunk < next_chunk) {
        DEBUG_ASSERT(chunk_end <= (vaddr_t)next_chunk);

        list_add_before(&next_chunk->node, &chunk->node);
        goto try_merge;
    }
}


// walked off the end of the list, add it at the tail
    list_add_tail(&theheap.free_list, &chunk->node);


// try to merge with the previous chunk
try_merge:
    last_chunk = list_prev_type(&theheap.free_list, &chunk->node, struct free_heap_chunk, node);
    if (last_chunk) {
        if ((vaddr_t)last_chunk + last_chunk->len == (vaddr_t)chunk) {
// easy, just extend the previous chunk
        last_chunk->len += chunk->len;

// remove ourself from the list
    list_delete(&chunk->node);

// set the chunk pointer to the newly extended chunk, in case
// it needs to merge with the next chunk below
    chunk = last_chunk;
}
}

// try to merge with the next chunk
    if (next_chunk) {
        if ((vaddr_t)chunk + chunk->len == (vaddr_t)next_chunk) {
// extend our chunk
        chunk->len += next_chunk->len;


// remove them from the list
        list_delete(&next_chunk->node);
    }
}

    return chunk;
}- 1
- 2
- 3
- 4
- 5
- 6
- 7
- 8
- 9
- 10
- 11
- 12
- 13
- 14
- 15
- 16
- 17
- 18
- 19
- 20
- 21
- 22
- 23
- 24
- 25
- 26
- 27
- 28
- 29
- 30
- 31
- 32
- 33
- 34
- 35
- 36
- 37
- 38
- 39
- 40
- 41
- 42
- 43
- 44
- 45
- 46
- 47
- 48
- 49
- 50
- 51
- 52
- 53
- 54
- 55
- 56
- 57
- 1
- 2
- 3
- 4
- 5
- 6
- 7
- 8
- 9
- 10
- 11
- 12
- 13
- 14
- 15
- 16
- 17
- 18
- 19
- 20
- 21
- 22
- 23
- 24
- 25
- 26
- 27
- 28
- 29
- 30
- 31
- 32
- 33
- 34
- 35
- 36
- 37
- 38
- 39
- 40
- 41
- 42
- 43
- 44
- 45
- 46
- 47
- 48
- 49
- 50
- 51
- 52
- 53
- 54
- 55
- 56
- 57
这个函数首先会根据chunk的地址,来将chunk插入到free list的位置中,这里也可以知道free list 中的chunk 是按地址排序的这个函数后面的部分会试图对已存在的chunk进行合并,类似kernel中的buddy system前面讲过malloc 直接调用heap_alloc来申请内存
void *heap_alloc(size_t size, unsigned int alignment)
{
    void *ptr;
    LTRACEF("size %zd, align %d
", size, alignment);

// alignment must be power of 2
    if (alignment & (alignment - 1))
        return NULL;


/*we always put a size field + base pointer + magic in front of the allocation*/
    size += sizeof(struct alloc_struct_begin);

/*make sure we allocate at least the size of a struct       free_heap_chunk so that when we free it, we can create a struct free_heap_chunk struct and stick it*/
// in the spot
    if (size < sizeof(struct free_heap_chunk))
        size = sizeof(struct free_heap_chunk);

// round up size to a multiple of native pointer size
    size = ROUNDUP(size, sizeof(void *));

// deal with nonzero alignments
    if (alignment > 0) {
        if (alignment < 16)
        alignment = 16;

// add alignment for worst case fit
        size += alignment;
}

// critical section
    enter_critical_section();

// walk through the list
    ptr = NULL;
    struct free_heap_chunk *chunk;
    list_for_every_entry(&theheap.free_list, chunk, struct free_heap_chunk, node) {
        DEBUG_ASSERT((chunk->len % sizeof(void *)) == 0); // len should always be a multiple of pointer size

// is it big enough to service our allocation?
    if (chunk->len >= size) {
    ptr = chunk;
// remove it from the list
    struct list_node *next_node = list_next(&theheap.free_list, &chunk->node);
    list_delete(&chunk->node);

    if (chunk->len > size + sizeof(struct free_heap_chunk)) {
/*here's enough space in this chunk to create a new one after the allocation*/
        struct free_heap_chunk *newchunk = heap_create_free_chunk((uint8_t *)ptr + size, chunk->len - size);


// truncate this chunk
    chunk->len -= chunk->len - size;


// add the new one where chunk used to be
    if (next_node)
        list_add_before(next_node, &newchunk->node);
    else
    list_add_tail(&theheap.free_list, &newchunk->node);
}

/*he allocated size is actually the length of this chunk, not   the size requested*/
    DEBUG_ASSERT(chunk->len >= size);
    size = chunk->len;

    ptr = (void *)((addr_t)ptr + sizeof(struct alloc_struct_begin));

// align the output if requested
    if (alignment > 0) {
        ptr = (void *)ROUNDUP((addr_t)ptr, alignment);
}

    struct alloc_struct_begin *as = (struct alloc_struct_begin *)ptr;
    as--;
    as->magic = HEAP_MAGIC;
    as->ptr = (void *)chunk;
    as->size = size;

    break;
    }
}
LTRACEF("returning ptr %p
", ptr);

// heap_dump();
    exit_critical_section();
    return ptr;
}
- 1
- 2
- 3
- 4
- 5
- 6
- 7
- 8
- 9
- 10
- 11
- 12
- 13
- 14
- 15
- 16
- 17
- 18
- 19
- 20
- 21
- 22
- 23
- 24
- 25
- 26
- 27
- 28
- 29
- 30
- 31
- 32
- 33
- 34
- 35
- 36
- 37
- 38
- 39
- 40
- 41
- 42
- 43
- 44
- 45
- 46
- 47
- 48
- 49
- 50
- 51
- 52
- 53
- 54
- 55
- 56
- 57
- 58
- 59
- 60
- 61
- 62
- 63
- 64
- 65
- 66
- 67
- 68
- 69
- 70
- 71
- 72
- 73
- 74
- 75
- 76
- 77
- 78
- 79
- 80
- 81
- 82
- 83
- 84
- 85
- 86
- 87
- 88
- 89
这个函数前一部分size,例如需要在size基础上加上alloc_struct_begin的size,用于管理chunk size 要至少4byte对其等后办法通过list_for_every_entry遍历free list 找到size满足用户申请的size后,将chunk的起始地址返回用户。
LK是什么
LK 是 Little Kernel 它是 appsbl (Applications ARM Boot Loader)流程代码 ,little kernel 是小内核小操作系统。
LK 代码 在 bootable/bootloadler/lk 目录下
| LK目录 | 代码结构 |
|---|---|
| +app | // 应用相关 |
| +arch | // arm 体系 |
| +dev | // 设备相关 |
| +include | // 头文件 |
| +kernel | // lk系统相关 |
| +platform | // 相关驱动 |
| +projiect | // makefile文件 |
| +scripts | // Jtag 脚本 |
| +target | // 具体板子相关 |
LK 流程分析
在 bootable/bootloadler/lk/arch/arm/ssystem-onesegment.ld 连接文件中 ENTRY(_start)指定 LK 从_start函数开始,_start在 lk/arch/crt0.S中 。crt0.S 主要做一些基本的 CPU 的初始化再通过bl kmain;跳转到 C 代码中。
kmain 在 lk/kernel/main.c 中
kmain()
kmain 主要做两件事:
1、本身 lk 这个系统模块的初始化;
2、boot 的启动初始化动作。
kmain 源码分析:
         void kmain()
      {
       1.初始化进程(lk 中的简单进程)相关结构体。
         thread_init_early();
       2.做一些如 关闭 cache,使能 mmu 的 arm 相关工作。
        arch_early_init();
       3.相关平台的早期初始化
        platform_early_init();
       4.现在就一个函数跳转,初始化UART(板子相关)
        target_early_init();
       5.构造函数相关初始化
        call_constructors();
       6.lk系统相关的堆栈初始化
        heap_init();
       7.简短的初始化定时器对象
        thread_init();
       8.lk系统控制器初始化(相关事件初始化)
        dpc_init();
       9.初始化lk中的定时器
        timer_init();
       10.新建线程入口函数 bootstrap2 用于boot 工作(重点)
       thread_resume(thread_create("bootstrap2", &bootstrap2, NULL, DEFAULT_PRIORITY, DEFAULT_STACK_SIZE));
     }
以上与 boot 启动初始化相关函数是arch_early_init、 platform_early_init 、bootstrap2,这些是启动的重点,我们下面慢慢来看。
arch_early_init()
     体系架构相关的初始化我们一般用的 ARM 体系
     1.关闭cache
     arch_disable_cache(UCACHE);
     2.设置向量基地址(中断相关)
     set_vector_base(MEMBASE);
     3.初始化MMU
     arm_mmu_init();
     4.初始化MMU映射__平台相关
     platform_init_mmu_mappings();
     5.开启cache
     arch_enable_cache(UCACHE)
     6.使能 cp10 和 cp11
     __asm__ volatile("mrc    p15, 0, %0, c1, c0, 2" : "=r" (val));
     val |= (3<<22)|(3<<20);
     __asm__ volatile("mcr    p15, 0, %0, c1, c0, 2" :: "r" (val));

    7.设置使能 fpexc 位 (中断相关)
    __asm__ volatile("mrc  p10, 7, %0, c8, c0, 0" : "=r" (val));
    val |= (1<<30);
    __asm__ volatile("mcr  p10, 7, %0, c8, c0, 0" :: "r" (val));
    8.使能循环计数寄存器
    __asm__ volatile("mrc    p15, 0, %0, c9, c12, 0" : "=r" (en));
    en &= ~(1<<3); /*循环计算每个周期*/
    en |= 1;
    __asm__ volatile("mcr    p15, 0, %0, c9, c12, 0" :: "r" (en));
   9.使能循环计数器
   en = (1<<31);
   __asm__ volatile("mcr    p15, 0, %0, c9, c12, 1" :: "r" (en));
platform_early_init()
平台相关初始化不同平台不同的初始化下面是msm7x30
    1.初始化中断
   platform_init_interrupts();
    2.初始化定时器
    platform_init_timer();
bootstrap2 bootstrap2 在kmain的末尾以线程方式开启。主要分三步:platform_init、target_init、apps_init。
    1.platform_init
           platform_init 中主要是函数 acpu_clock_init。
           在 acpu_clock_init 对 arm11 进行系统时钟设置,超频
    2.target_init
          针对硬件平台进行设置。主要对 arm9 和 arm11 的分区表进行整合,初始化flash和读取FLASH信息
    3.apps_init
         apps_init 是关键,对 LK 中所谓 app 初始化并运行起来,而 aboot_init 就将在这里开始被运行,Android Linux 内核的加载工作就在 aboot_init 中完成的 。
aboot_init
    1.设置NAND/ EMMC读取信息页面大小
    if (target_is_emmc_boot())
    {
              page_size = 2048;
              page_mask = page_size - 1;
    }
   else
   {
             page_size = flash_page_size();
             page_mask = page_size - 1;
    }
  2.读取按键信息,判断是正常开机,还是进入 fastboot ,还是进入recovery 模式
   。。。。。。。。。
  通过一系列的 if (keys_get_state() == XXX) 判断
   。。。。。。。。。
  3.从 nand 中加载 内核
  boot_linux_from_flash();

  partition_dump();
  sz = target_get_max_flash_size();
  fastboot_init(target_get_scratch_address(), sz);
  udc_start(); // 开始 USB 协议
boot_linux_from_flash
主要是内核的加载过程,我们的 boot.img 包含:kernel 头、kernel、ramdisk、second stage(可以没有)。
       1.读取boot 头部
       flash_read(p, offset, raw_header, 2048)
       offset += 2048;
       2.读取 内核
       memcmp(hdr->magic, BOOT_MAGIC, BOOT_MAGIC_SIZE)
       n = (hdr->kernel_size + (FLASH_PAGE_SIZE - 1)) & (~(FLASH_PAGE_SIZE - 1));
       flash_read(p, offset, (void*) hdr->kernel_addr, n)
       offset += n;
       3.读取 ramdisk
       n = (hdr->ramdisk_size + (FLASH_PAGE_SIZE - 1)) & (~(FLASH_PAGE_SIZE - 1));
       flash_read(p, offset, (void*) hdr->ramdisk_addr, n)
       offset += n;
        4.启动内核,
            boot_linux();//在boot_linux 中entry(0,machtype,tags);从kernel加载在内核中的地址开始运行了。
到这里LK的启动过程就结束了。
http://blog.csdn.net/viewsky11/article/details/53334219