配置
实践中用到的版本
- "vue":"^2.6.12"
- "vue-router":"^3.5.2"
创建项目
vue create learnrouter创建vue项目,可以选择自定义创建,我这里选择的是默认vue2项目npm install vue-router@^3.5.2下载,版本3.x的都行
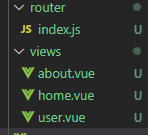
创建相关目录
- src/views——大组件,界面切换
- src/router——路由配置
开搞
1. 先写路由配置
在router目录下创建index.js
//导入模块
import Vue from 'vue';
import VueRouter from 'vue-router';
import Home from "@/views/home";
import About from "@/views/about";
import User from "@/views/user";
//注册路由组件
 Vue.use(VueRouter);
 //编写路由规则
const routes = [
    {
        path:"/",
        name:'Home',
        component:Home
    },
    {
        path:"/about",
        name:'About',
        component:About
    },
    {
        path:"/user",
        name:'User',
        component:User
    }
]
//创建路由
const router = new VueRouter({
    mode:'history',
    routes
})
//导出
export default router;
path属性是路径,须带"/",component的值就是要切换的组件,要先导入。
创建路由时,可以选择路由模式mode,一共有三种模式:history、hash、abstract.
常用的是history和hash,区别可见该文章——
哈希路由(hash模式)和历史路由(history模式)的区别
源码:
  var VueRouter = function VueRouter (options) {
    if ( options === void 0 ) options = {};
    this.app = null;
    this.apps = [];
    this.options = options;
    this.beforeHooks = [];
    this.resolveHooks = [];
    this.afterHooks = [];
    this.matcher = createMatcher(options.routes || [], this);
    var mode = options.mode || 'hash';
    this.fallback =
      mode === 'history' && !supportsPushState && options.fallback !== false;
    if (this.fallback) {
      mode = 'hash';
    }
    if (!inBrowser) {
      mode = 'abstract';
    }
    this.mode = mode;
    switch (mode) {
      case 'history':
        this.history = new HTML5History(this, options.base);
        break
      case 'hash':
        this.history = new HashHistory(this, options.base, this.fallback);
        break
      case 'abstract':
        this.history = new AbstractHistory(this, options.base);
        break
      default:
        {
          assert(false, ("invalid mode: " + mode));
        }
    }
  };
2. 创建和挂载根实例。
记得要通过 router 配置参数注入路由,从而让整个应用都有路由功能
main.js
import Vue from 'vue'
import App from './App.vue'
import router from './router'
Vue.config.productionTip = false
new Vue({
  render: h => h(App),
  router
}).$mount('#app')
3. 使用组件
app.vue
    <!-- 使用 router-link 组件来导航. -->
    <!-- 通过传入 `to` 属性指定链接. -->
    <!-- <router-link> 默认会被渲染成一个 `<a>` 标签 -->
  <div id="app">
    <div class="nav">
      <router-link to="/">首页</router-link> |
      <router-link to="/about">关于</router-link> |
      <router-link to="/user">个人中心</router-link>
    </div>
    <hr width="100%"/>

  <!-- 路由出口 -->
  <!-- 路由匹配到的组件将渲染在这里 -->
      <router-view/>
  </div>
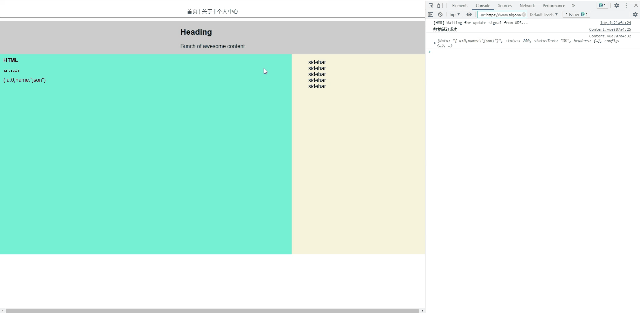
效果
前面依次点击“首页”,“关于”和“个人中心”,后面连续点击回退(我的鼠标功能键)