1 背景
当Prometheus自带的exporter无法满足实际需求时,需要我们自定义开发采集器,本篇文章主要介绍通过python开发自定义的exporter
2 环境准备
本文介绍的采集器用python语言编写,利用docker部署
-
python版本
版本要求为3.x,本文脚本例子python为3.8
-
python依赖包
# prometheus所需依赖包 from prometheus_client import Gauge, start_http_server, Counter from prometheus_client.core import CollectorRegistry import prometheus_client # api接口所需依赖包 import uvicorn from fastapi import FastAPI from fastapi.responses import PlainTextResponse -
docker版本
20.10.8
3 采集器开发部署
3.1 exporter开发
定义Prometheus的metrics,这里主要介绍最常用的两种metrics
-
Gauge
第一种是最常用的metrics——Gauge,Gauge可任意赋值,代表是当前采集的值
example_G = Gauge("this is a metric name", "this is a metric describe", ["label1", "label2", "label3"], registry=REGISTRY) # 指标名称,描述,标签名称
-
Counter
第二种Counter是一直累计增加的计数器,不能减少。一般用来记录访问总次数等
example_C = Gauge("this is a metric name", "this is a metric describe", ["label1", "label2", "label3"], registry=REGISTRY) # 指标名称,描述,标签名称
本文例子exporter文件名为test_exporter.py,具体脚本例子如下:
#!/usr/bin/python3
# coding:utf-8
from prometheus_client import Gauge, start_http_server, Counter
from prometheus_client.core import CollectorRegistry
import prometheus_client
import uvicorn
from fastapi import FastAPI
from fastapi.responses import PlainTextResponse

# 定义api对象
app = FastAPI()

# 设置接口访问路径/metrics
# @app语法糖需要放在最终入口函数
@app.get('/metrics', response_class=PlainTextResponse)
def get_data():
    '''
    该函数为最终函数入口(采集数据函数),该例子模拟采集到数据标签label1、label2和label3,数据data1
    '''
    # 定义client_python里提供的prometheus Gauge数据类型
    REGISTRY = CollectorRegistry(auto_describe=False)
    example_G = Gauge("this_is_a_metric_name", "this is a metric describe", ["label1", "label2", "label3"], registry=REGISTRY)

    label1 = '111'
    label2 = '222'
    label3 = '333'
    data1 = '444'
    # 调用Gauge数据类型,把采集的数据放入到设定的example_G
    example_G.labels(label1,label2,label3).set(data1)
    # return需放在函数下最外层,否则返回的数据有缺失
    return prometheus_client.generate_latest(REGISTRY)

# 用uvicorn调用接口,启用端口为9330
if __name__ == "__main__":
    uvicorn.run(app, host="0.0.0.0", port=9330, log_level="info")
在终端执行pip freeze > requirements.txt生成依赖包清单
fastapi==0.68.1
prometheus-client==0.11.0
uvicorn==0.15.0
3.2 docker部署
把写好的脚本用docker打包
在./test目录创建一个app目录存放脚本test_exporter.py
把生成的requirements.txt放到./test目录下
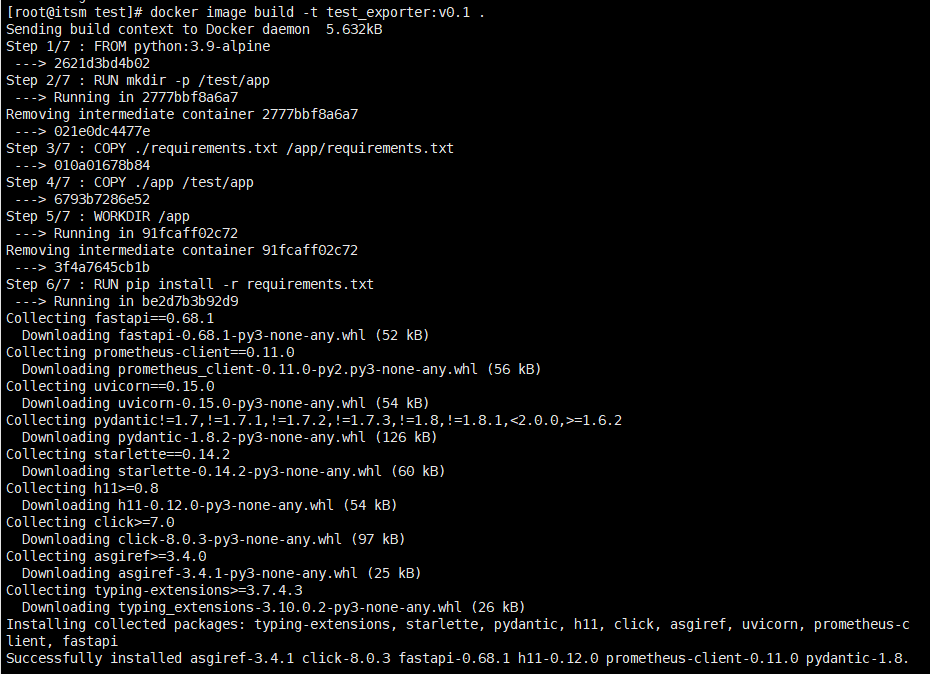
在./test目录编写Dockerfile
FROM python:3.9-alpine

RUN mkdir -p /test/app
COPY ./requirements.txt /app/requirements.txt
COPY ./app /test/app

WORKDIR /app
RUN pip install -r requirements.txt

CMD ["python", "/test/app/test_exporter.py"]
创建镜像 docker image build -t test_exporter:v0.1 .
创建后可通过 docker images 查看生成的docker镜像
运行exporter docker run -it -d --name test_exporter -p 9330:9330 test_exporter:v0.1
运行后可以通过 docker ps 查看容器启动情况,docker logs (容器ID) 查看容器日志

采集器启用后可以通过调用接口查看采集数据 http://localhost:9330/metrics

4 配置采集任务
修改prometheus.yml配置文件,添加采集任务(添加后需要重启Prometheus)
scrape_configs:
  - job_name: "test_exporter"
    scrape_interval: 30s  # 采集频率为30s抓取一次
    static_configs:
    - targets:  # 配置采集任务
      - 127.0.0.1:9330

在Prometheus官方Graph中通过采集metric名查看采集数据

原创声明
本文原创自作者:liu_kx,转载请注明原文链接