FTP:(File Transfer Protocal)文件传输协议
vsftp:(very secure ftp daemon) 非常安全的FTP守护进程。
FTP:是一种在互联网中进行文件传输的协议。
FTP协议: 服务器/客户端模式
20端口用于数据传输,21端口接受客户端的命令
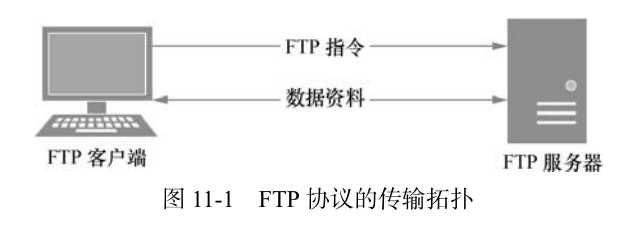
FTP服务器:按照FTP协议在互联网中提供文件存储和访问服务的主机。
FTP客户端:向服务器发送连接请求,以建立数据传输链路的主机。
以下实验中PC1作为服务器,PC2作为客户端。
1、 在PC1服务器端安装vsftp服务
[root@PC1 ~]# yum install vsftpd
Loaded plugins: langpacks, product-id, subscription-manager
This system is not registered to Red Hat Subscription Management. You can use subscription-manager to register.
rhel7                                                    | 4.1 kB     00:00
Resolving Dependencies
--> Running transaction check
---> Package vsftpd.x86_64 0:3.0.2-9.el7 will be installed
--> Finished Dependency Resolution

Dependencies Resolved

================================================================================
 Package          Arch             Version                Repository       Size
================================================================================
Installing:
 vsftpd           x86_64           3.0.2-9.el7            rhel7           166 k

Transaction Summary
================================================================================
Install  1 Package

Total download size: 166 k
Installed size: 343 k
Is this ok [y/d/N]: y
Downloading packages:
Running transaction check
Running transaction test
Transaction test succeeded
Running transaction
  Installing : vsftpd-3.0.2-9.el7.x86_64                                    1/1
rhel7/productid                                          | 1.6 kB     00:00
  Verifying  : vsftpd-3.0.2-9.el7.x86_64                                    1/1

Installed:
  vsftpd.x86_64 0:3.0.2-9.el7

Complete!
2、iptables防火墙默认禁止了FTP传输协议的端口号,在服务器端PC1清空防火墙策略并保存
[root@PC1 ~]# iptables -F
[root@PC1 ~]# service iptables save
iptables: Saving firewall rules to /etc/sysconfig/iptables:[  OK  ]
3、在PC1主机中精简vsftpd服务的配置文件
[root@PC1 ~]# cd /etc/vsftpd/
[root@PC1 vsftpd]# ls
ftpusers  user_list  vsftpd.conf  vsftpd_conf_migrate.sh
[root@PC1 vsftpd]# cp vsftpd.conf vsftpd.conf.bak
[root@PC1 vsftpd]# grep -v "#" vsftpd.conf > a && mv a vsftpd.conf
mv: overwrite ‘vsftpd.conf’? y
[root@PC1 vsftpd]# cat vsftpd.conf
anonymous_enable=YES
local_enable=YES
write_enable=YES
local_umask=022
dirmessage_enable=YES
xferlog_enable=YES
connect_from_port_20=YES
xferlog_std_format=YES
listen=NO
listen_ipv6=YES
pam_service_name=vsftpd
userlist_enable=YES
tcp_wrappers=YES
4、vsftpd服务程序的三种工作模式
匿名开放模式:无需密码,最不安全
本地用户模式:需要密码,较安全
虚拟用户模式:需要虚拟账户,最安全
5、在PC2客户端安装vsftpd服务的客户端工具ftp
[root@PC2 network-scripts]# yum install ftp
Loaded plugins: langpacks, product-id, subscription-manager
This system is not registered to Red Hat Subscription Management. You can use subscription-manager to register.
Resolving Dependencies
--> Running transaction check
---> Package ftp.x86_64 0:0.17-66.el7 will be installed
--> Finished Dependency Resolution

Dependencies Resolved

================================================================================
 Package        Arch              Version                Repository        Size
================================================================================
Installing:
 ftp            x86_64            0.17-66.el7            rhel7             61 k

Transaction Summary
================================================================================
Install  1 Package

Total download size: 61 k
Installed size: 96 k
Is this ok [y/d/N]: y
Downloading packages:
Running transaction check
Running transaction test
Transaction test succeeded
Running transaction
  Installing : ftp-0.17-66.el7.x86_64                                       1/1
rhel7/productid                                          | 1.6 kB     00:00
  Verifying  : ftp-0.17-66.el7.x86_64                                       1/1

Installed:
  ftp.x86_64 0:0.17-66.el7

Complete!
6、在PC1服务器端修改vsftp服务的配置文件
[root@PC1 vsftpd]# vim /etc/vsftpd/vsftpd.conf
anonymous_enable=YES  ## 允许匿名访问模式
anon_umask=022        ## 匿名用户上传文件的umask值
anon_upload_enable=YES ## 允许匿名用户上传文件
anon_mkdir_write_enable=YES  ## 允许匿名用户创建目录
anon_other_write_enable=YES  ## 允许匿名用户修改目录名称或删除目录
local_enable=YES
write_enable=YES
local_umask=022
dirmessage_enable=YES
xferlog_enable=YES
connect_from_port_20=YES
xferlog_std_format=YES
listen=NO
listen_ipv6=YES

pam_service_name=vsftpd
userlist_enable=YES
tcp_wrappers=YES
7、在PC1服务器端主机中重启vsftpd服务、设为开启自启
[root@PC1 vsftpd]# systemctl restart vsftpd
[root@PC1 vsftpd]# systemctl enable vsftpd
ln -s '/usr/lib/systemd/system/vsftpd.service' '/etc/systemd/system/multi-user.target.wants/vsftpd.service'
8、在PC2客户端使用匿名主机模式远程连接FTP服务器
[root@PC2 network-scripts]# ftp 192.168.10.10
Connected to 192.168.10.10 (192.168.10.10).
220 (vsFTPd 3.0.2)
Name (192.168.10.10:root): anonymous  ## 统一账户anonymous
331 Please specify the password.
Password:   ## 直接回车即可
230 Login successful.
Remote system type is UNIX.
Using binary mode to transfer files.
ftp> cd pub
250 Directory successfully changed.
ftp> mkdir files    ## 创建目录失败
550 Create directory operation failed.
9、在PC1服务器端查看与ftp服务相关的SElinux域策略有哪些
[root@PC1 /]# getsebool -a | grep ftp
ftp_home_dir --> off
ftpd_anon_write --> off
ftpd_connect_all_unreserved --> off
ftpd_connect_db --> off
ftpd_full_access --> off
ftpd_use_cifs --> off
ftpd_use_fusefs --> off
ftpd_use_nfs --> off
ftpd_use_passive_mode --> off
httpd_can_connect_ftp --> off
httpd_enable_ftp_server --> off
sftpd_anon_write --> off
sftpd_enable_homedirs --> off
sftpd_full_access --> off
sftpd_write_ssh_home --> off
tftp_anon_write --> off
tftp_home_dir --> off
10、在PC1服务器端开启 ftpd_full_access
[root@PC1 /]# setsebool -P ftpd_full_access=on    ## -P 表示永久生效
[root@PC1 /]# getsebool -a | grep ftp
ftp_home_dir --> off
ftpd_anon_write --> off
ftpd_connect_all_unreserved --> off
ftpd_connect_db --> off
ftpd_full_access --> on
ftpd_use_cifs --> off
ftpd_use_fusefs --> off
ftpd_use_nfs --> off
ftpd_use_passive_mode --> off
httpd_can_connect_ftp --> off
httpd_enable_ftp_server --> off
sftpd_anon_write --> off
sftpd_enable_homedirs --> off
sftpd_full_access --> off
sftpd_write_ssh_home --> off
tftp_anon_write --> off
tftp_home_dir --> off
11、 在PC2客户端测试能否创建目录
[root@PC2 network-scripts]# ftp 192.168.10.10
Connected to 192.168.10.10 (192.168.10.10).
220 (vsFTPd 3.0.2)
Name (192.168.10.10:root): anonymous
331 Please specify the password.
Password:
230 Login successful.
Remote system type is UNIX.
Using binary mode to transfer files.
ftp> cd pub
250 Directory successfully changed.
ftp> mkdir files
550 Create directory operation failed.
ftp>
12、在PC2服务器端修改/var/ftp/pub 目录权限
[root@PC1 /]# ll -d /var/ftp/pub/
drwxr-xr-x. 2 root root 6 Mar  7  2014 /var/ftp/pub/
[root@PC1 /]# chown -R ftp /var/ftp/pub/
[root@PC1 /]# ll -d /var/ftp/pub/
drwxr-xr-x. 2 ftp root 6 Mar  7  2014 /var/ftp/pub/
13、在PC2客户端继续测试能否创建目录
[root@PC2 network-scripts]# ftp 192.168.10.10
Connected to 192.168.10.10 (192.168.10.10).
220 (vsFTPd 3.0.2)
Name (192.168.10.10:root): anonymous
331 Please specify the password.
Password:
230 Login successful.
Remote system type is UNIX.
Using binary mode to transfer files.
ftp> cd pub
250 Directory successfully changed.
ftp> mkdir files
257 "/pub/files" created
ftp>
14、在PC1主机中创建测试文件 /var/ftp/pub/test.file, 在PC2客户机中传输至本地
[root@PC1 pub]# echo "helloword" > test.file   ## 在PC1服务器主机中创建测试文件
[root@PC1 pub]# ls
test.file
[root@PC1 pub]# pwd
/var/ftp/pub
[root@PC2 test]# pwd
/home/test
[root@PC2 test]# ls  ## 当前为空目录
[root@PC2 test]# ftp 192.168.10.10   ## 利用ftp远程登录 PC1服务器
Connected to 192.168.10.10 (192.168.10.10).
220 (vsFTPd 3.0.2)
Name (192.168.10.10:root): anonymous
331 Please specify the password.
Password:
230 Login successful.
Remote system type is UNIX.
Using binary mode to transfer files.
ftp> cd pub
250 Directory successfully changed.
ftp> ls
227 Entering Passive Mode (192,168,10,10,251,78).
150 Here comes the directory listing.
-rw-r--r--    1 0        0              10 Dec 13 17:12 test.file
226 Directory send OK.
ftp> pwd
257 "/pub"
ftp> get test.file xx.file   ## 从PC1服务器端传输文件到本地(或者mget)
local: xx.file remote: test.file
227 Entering Passive Mode (192,168,10,10,218,59).
150 Opening BINARY mode data connection for test.file (10 bytes).
226 Transfer complete.
10 bytes received in 2e-05 secs (500.00 Kbytes/sec)
ftp> exit
221 Goodbye.
[root@PC2 test]# ls
xx.file
[root@PC2 test]# cat xx.file
helloword
15、在PC2客户机端创建测试文件,传输至PC2服务器端
[root@PC1 pub]# ls   ## 空目录
[root@PC1 pub]# pwd
/var/ftp/pub
[root@PC2 test]# seq 5 > aaa.txt  ## 创建测试文件
[root@PC2 test]# ls
aaa.txt
[root@PC2 test]# ftp 192.168.10.10
Connected to 192.168.10.10 (192.168.10.10).
220 (vsFTPd 3.0.2)
Name (192.168.10.10:root): anonymous
331 Please specify the password.
Password:
230 Login successful.
Remote system type is UNIX.
Using binary mode to transfer files.
ftp> cd pub
250 Directory successfully changed.
ftp> ls
227 Entering Passive Mode (192,168,10,10,183,167).
150 Here comes the directory listing.
226 Directory send OK.
ftp> pwd
257 "/pub"
ftp> put aaa.txt bbb.txt   ## 从PC2客户端传输至PC1服务器端  (或者mput)
local: aaa.txt remote: bbb.txt
227 Entering Passive Mode (192,168,10,10,108,109).
150 Ok to send data.
226 Transfer complete.
10 bytes sent in 3.8e-05 secs (263.16 Kbytes/sec)
ftp> ls
227 Entering Passive Mode (192,168,10,10,217,46).
150 Here comes the directory listing.
-rw-r--r--    1 14       50             10 Dec 13 17:25 bbb.txt
226 Directory send OK.
ftp>
[root@PC1 pub]# ls   ## 在PC1服务器端进行验证
bbb.txt
[root@PC1 pub]# cat bbb.txt
1
2
3
4
5
[root@PC1 pub]# pwd
/var/ftp/pub
以上实验部署了匿名用户模式的vsftpd服务,实现了客户机PC2向服务器PC1传输文件、实现了从PC1服务器端向PC2客户机端传输文件的功能。
16、在服务器端修改vsftpd服务的配置文件,观察还能否匿名登录
[root@PC1 vsftpd]# pwd
/etc/vsftpd
[root@PC1 vsftpd]# vim vsftpd.conf
anonymous_enable=NO   ## 此处改为NO
anon_umask=022
anon_upload_enable=YES
anon_mkdir_write_enable=YES
anon_other_write_enable=YES
local_enable=YES
write_enable=YES
local_umask=022
dirmessage_enable=YES
xferlog_enable=YES
connect_from_port_20=YES
xferlog_std_format=YES
listen=NO
listen_ipv6=YES

pam_service_name=vsftpd
userlist_enable=YES
tcp_wrappers=YES
[root@PC1 vsftpd]# systemctl restart vsftpd  ## 重启服务
[root@PC1 vsftpd]# systemctl status vsftpd | head -n 5
vsftpd.service - Vsftpd ftp daemon
   Loaded: loaded (/usr/lib/systemd/system/vsftpd.service; enabled)
   Active: active (running) since Mon 2020-12-14 01:39:06 CST; 8s ago
  Process: 34040 ExecStart=/usr/sbin/vsftpd /etc/vsftpd/vsftpd.conf (code=exited, status=0/SUCCESS)
 Main PID: 34041 (vsftpd)
[root@PC2 test]# ftp 192.168.10.10
Connected to 192.168.10.10 (192.168.10.10).
220 (vsFTPd 3.0.2)
Name (192.168.10.10:root): anonymous
331 Please specify the password.
Password:
530 Login incorrect.
Login failed.
ftp>
##  以上说明客户端已经不能匿名登录了