一,准备工作
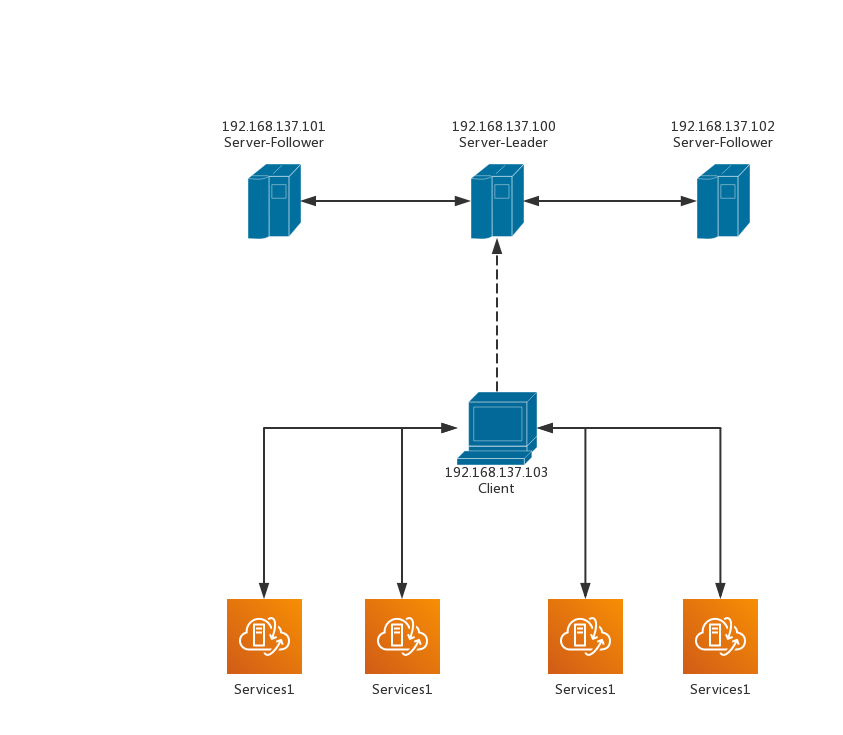
准备四台centos服务器,三台用于consul server 高可用集群,一台用于consul client作服务注册及健康检查。架构如下图所示
二,在四台服务器上安装consul
1,安装unzip 工具:yum install -y zip unzip
2,查看centos版本。uname -m,从https://www.consul.io/downloads.html获取下载地址
3,下载consul:wget https://releases.hashicorp.com/consul/1.6.2/consul_1.6.2_freebsd_amd64.zip
4,解压 :unzip consul_1.6.2_freebsd_amd64.zip
5,移动解压出来的文件到/etc/usr/bin:mv consul /etc/usr/bin
6,运行consul指令验证安装是否成功
三,配置consul
在四台服务器上分别在/tmp目录创建名为consul_config.json的文件,内容如下
服务端1配置文件
{
    "bootstrap_expect": 1,
    "datacenter": "kingsun_consul",
    "data_dir": "/tmp/consul",
    "node_name": "kingsun_consul_server_1",
    "server": true,
    "client_addr": "0.0.0.0",
    "ui": true,
    "bind_addr": "192.168.137.100",
    "acl_datacenter": "kingsun_consul",
    "acl": {
        "enabled": true,
        "default_policy": "allow",
        "enable_token_persistence": true,
        "tokens": {
            "master": "8dc1eb67-1f5f-4e10-ad9d-5e58b047647c"
        }
    }
}
服务端2配置文件
{
    "datacenter": "kingsun_consul",
    "data_dir": "/tmp/consul",
    "node_name": "kingsun_consul_server_2",
    "server": true,
    "client_addr": "0.0.0.0",
    "ui": true,
    "bind_addr": "192.168.137.101",
    "start_join":["192.168.137.100","192.168.137.101","192.168.137.102"],
    "retry_join":["192.168.137.100","192.168.137.101","192.168.137.102"],
    "acl_datacenter": "kingsun_consul",
    "acl": {
        "enabled": true,
        "default_policy": "allow",
        "enable_token_persistence": true,
        "tokens": {
            "master": "8dc1eb67-1f5f-4e10-ad9d-5e58b047647c"
        }
    }
}
服务端3配置文件
{
    "datacenter": "kingsun_consul",
    "data_dir": "/tmp/consul",
    "node_name": "kingsun_consul_server_3",
    "server": true,
    "client_addr": "0.0.0.0",
    "ui": true,
    "bind_addr": "192.168.137.102",
    "start_join":["192.168.137.100","192.168.137.101","192.168.137.102"],
    "retry_join":["192.168.137.100","192.168.137.101","192.168.137.102"],
    "acl_datacenter": "kingsun_consul",
    "acl": {
        "enabled": true,
        "default_policy": "allow",
        "enable_token_persistence": true,
        "tokens": {
            "master": "8dc1eb67-1f5f-4e10-ad9d-5e58b047647c"
        }
    }
}
客户端配置文件
{
    "datacenter": "kingsun_consul",
    "data_dir": "/tmp/consul",
    "node_name": "kingsun_consul_client_1",
    "server": false,
    "client_addr": "0.0.0.0",
    "ui": true,
    "bind_addr": "192.168.137.103",
    "start_join":["192.168.137.100","192.168.137.101","192.168.137.102"],
    "retry_join":["192.168.137.100","192.168.137.101","192.168.137.102"],
    "acl_datacenter": "kingsun_consul"
}
启动consul:在四服务器分别运行指令:consul agent -config-file /tmp/consul.config.json

可以看到已经有4个节点。
四,配置acl
1,创建一个agent token
先创建一个policy,可以用api也可以用ui界面

用这个policy创建一个token
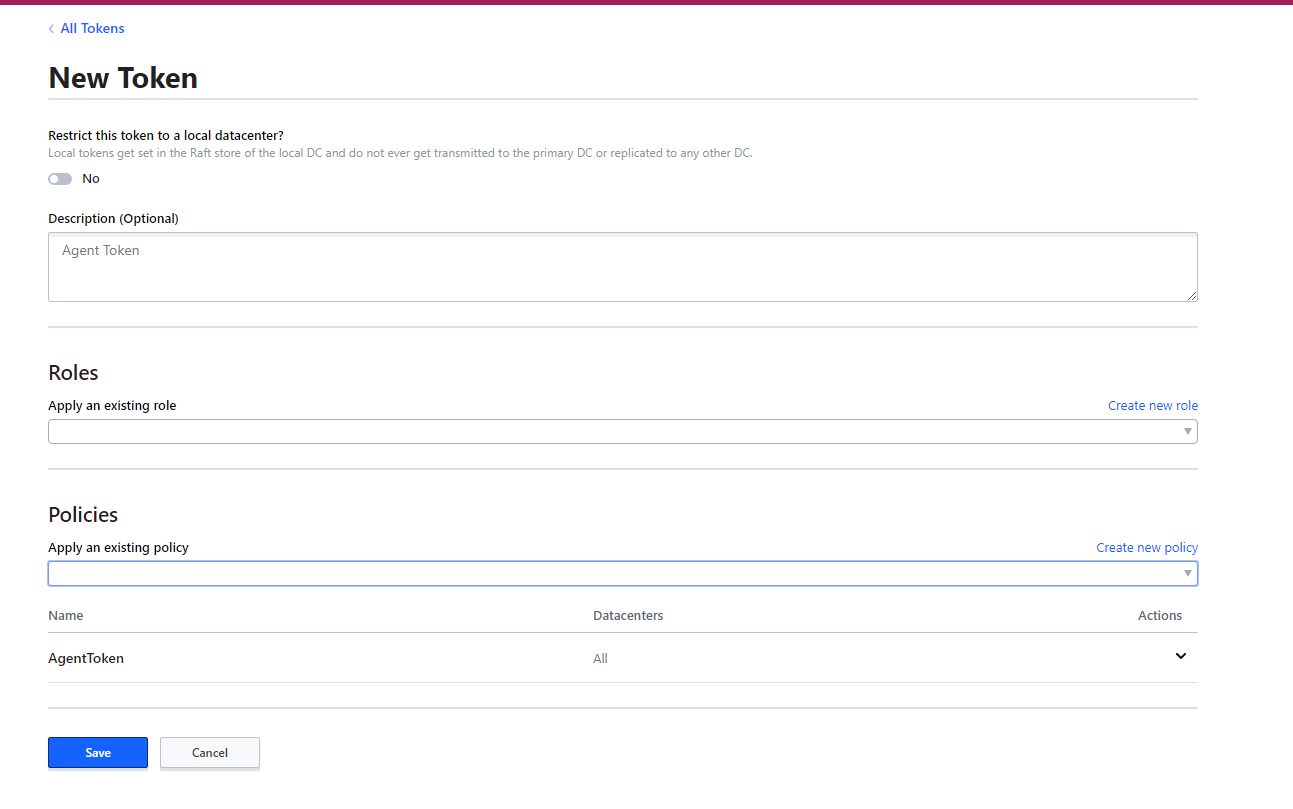
查看token值 ,可以用api也可以用ui界面

修改服务配置文件,将"default_policy"值改为"deny","tokens"节点新增"agent"值
    "acl": {
        "enabled": true,
        "default_policy": "deny",
        "enable_token_persistence": true,
        "tokens": {
            "master": "8dc1eb67-1f5f-4e10-ad9d-5e58b047647c",
            "agent":"920dfd67-88c1-f82c-ef34-c1d39d72bee0"
        }
修改客户端配置文件,新增acl配置
"acl":{
        "tokens":{
        "agent":"920dfd67-88c1-f82c-ef34-c1d39d72bee0"
        }
    }
重新启动consul,加载新的配置文件。
四,添加服务注册token
没配置ACL之前默认策略为allow,可以任意进行服务注册,配置acl后,可以添加一个用于服务注册的token,某个服务要注册到consul,必须带上这个token。
先添加一个策略,可以用api也可以用ui界面
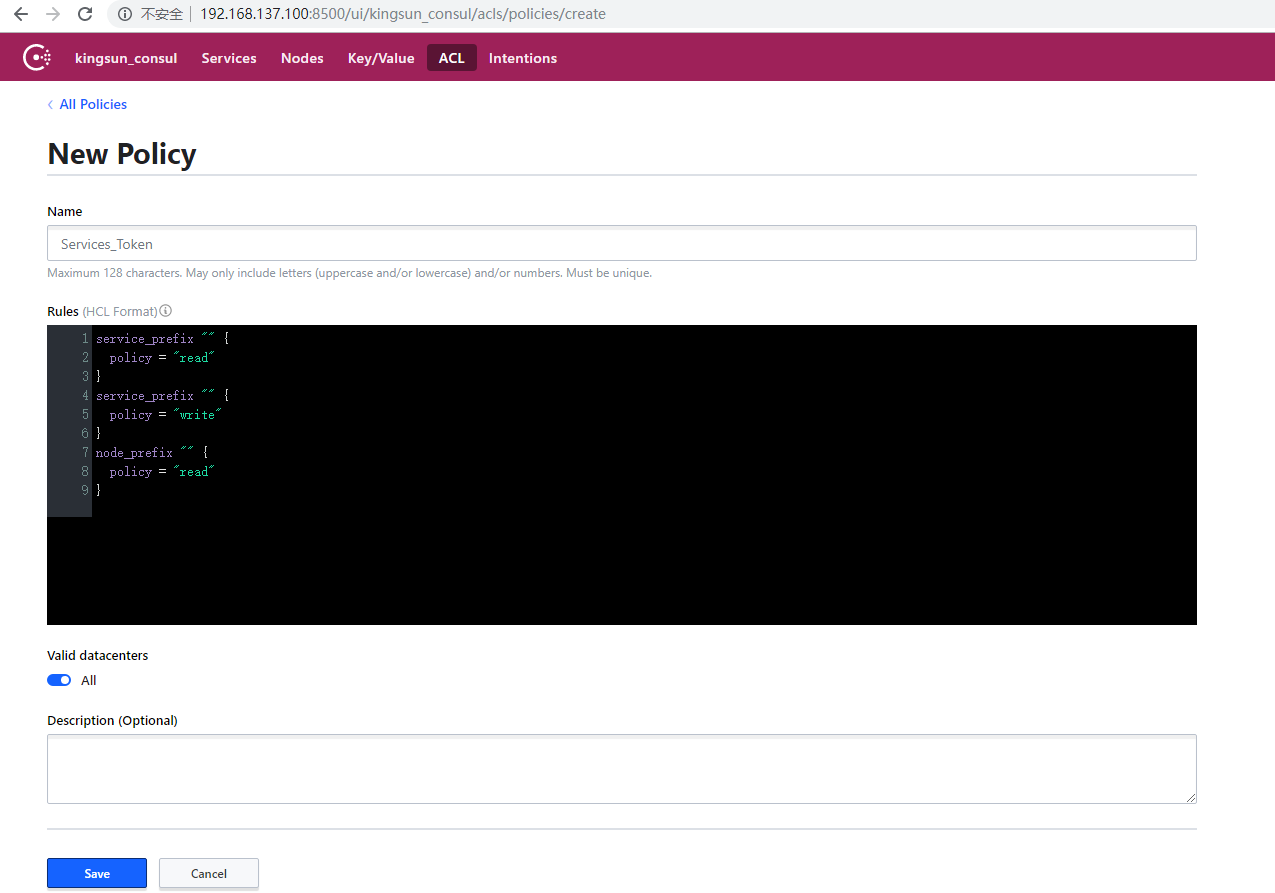
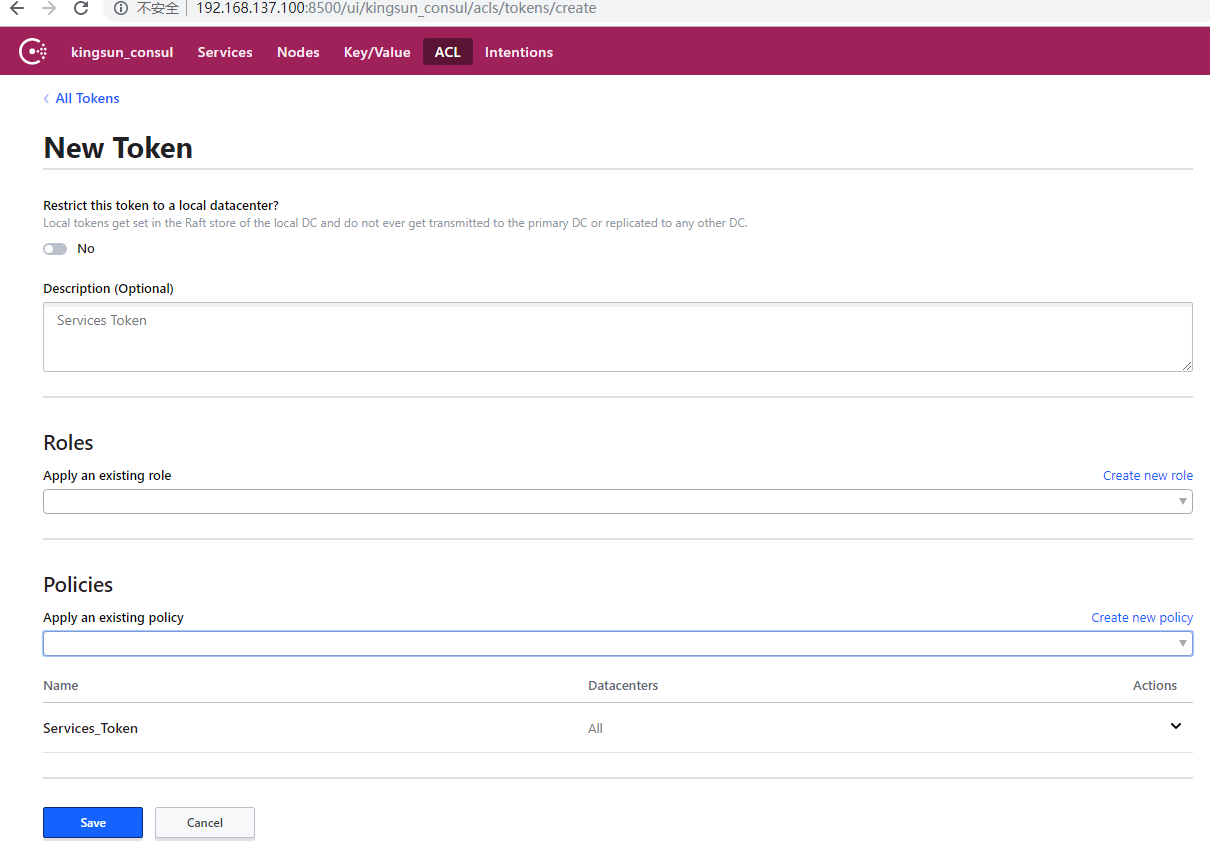
再用这个策略创建一个token,可以用api也可以用ui界面
查看token值

四,服务注册
添加一个用于健康检查的Api
 [Route("api/[controller]")]
    [ApiController]
    public class HealthController : ControllerBase
    {
        [HttpGet]
        public IActionResult Get() => Ok("ok");
    }
新建一个asp.net core程序,添加consul nuget包,修改appsetting.json
{
  "Service": {
    "Name": "KingSun.SensorService",//注册到consul时所用服务名
    "Port": "5001"//该服务访问端口
  },
  "Consul": {
    "IP": "192.168.137.103",//consul client地址
    "Port": "8500",//consul 端口
    "Token": "ca5c9d3b-9ba7-36e5-d2af-3a6f5cd2f09c" //所用token
  },
  "Logging": {
    "LogLevel": {
      "Default": "Warning"
    }
  },
  "AllowedHosts": "*"
}
添加一个扩写类对 IApplicationBuilder进行扩写
public class ServiceEntity
    {
        public string IP { get; set; }
        public int Port { get; set; }
        public string ServiceName { get; set; }
        public string ConsulIP { get; set; }
        public int ConsulPort { get; set; }
        public string Token { get;set; }
    }
    public static class ConsulExtensions
    {
        public static IApplicationBuilder RegisterConsul(this IApplicationBuilder app, IApplicationLifetime lifetime, ServiceEntity serviceEntity)
        {
            using (var consulClient = new ConsulClient((x) => {
                x.Address = new Uri($"http://{serviceEntity.ConsulIP}:{serviceEntity.ConsulPort}");
                x.Token = serviceEntity.Token;
            }
            ))
            {
                var httpCheck = new AgentServiceCheck()
                {
                    DeregisterCriticalServiceAfter = TimeSpan.FromSeconds(5),//服务启动多久后注册
                    Interval = TimeSpan.FromSeconds(10),//健康检查时间间隔,或者称为心跳间隔
                    HTTP = $"http://{serviceEntity.IP}:{serviceEntity.Port}/api/health",//健康检查地址
                    Timeout = TimeSpan.FromSeconds(5)
                };
                // Register service with consul
                var registration = new AgentServiceRegistration()
                {
                    Checks = new[] { httpCheck },
                    ID = Guid.NewGuid().ToString(),
                    Name = serviceEntity.ServiceName,
                    Address = serviceEntity.IP,
                    Port = serviceEntity.Port,
                    Tags = new[] { $"urlprefix-/{serviceEntity.ServiceName}" },
                };
                consulClient.Agent.ServiceRegister(registration).Wait();
                lifetime.ApplicationStopping.Register(() =>
                {
                    consulClient.Agent.ServiceDeregister(registration.ID).Wait();//服务停止时取消注册
                });
                return app;

            };
        }
    }
在startup.Configure中进行服务注册
ServiceEntity serviceEntity = new ServiceEntity
            {
                IP = "192.168.1.142",
                Port = Convert.ToInt32(Configuration["Service:Port"]),
                ServiceName = Configuration["Service:Name"],
                ConsulIP = Configuration["Consul:IP"],
                ConsulPort = Convert.ToInt32(Configuration["Consul:Port"]),
                Token = Configuration["Consul:Token"]
            };
            app.RegisterConsul(lifetime, serviceEntity);
启动项目,指定urls:dotnet KingSun.SensorService.Web.dll --urls="http://192.168.1.142:5001"
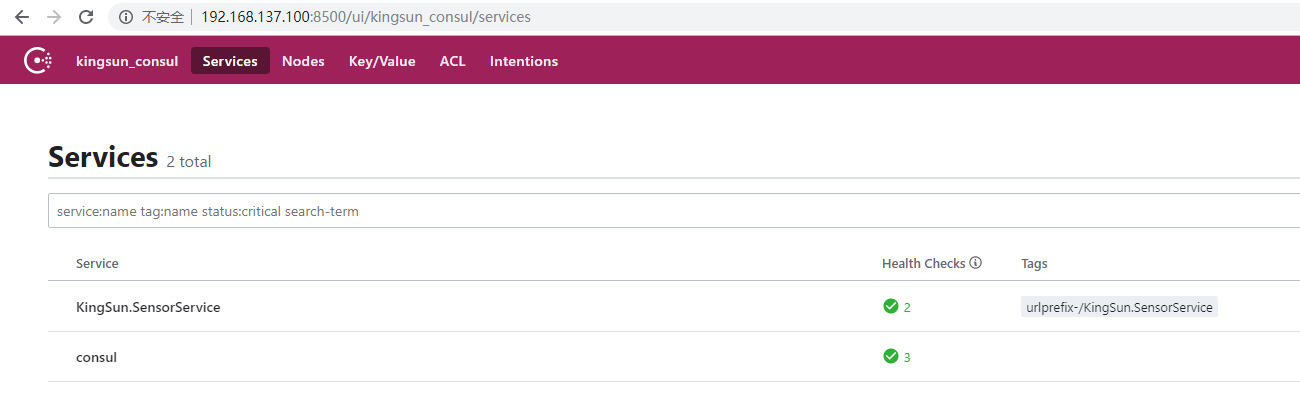
打开consul管理界面看到服务已经注册上