首先补充:
randn()函数用来产生正态分布的随机数或矩阵
conj()函数用来求负数的共轭:如果Z是一个复数组,那么conj(Z) = real(Z) - i*imag(Z)其中real(Z),imag(Z)分别代表Z的实部和虚部
1.首先看一下频谱分析下,频谱图像展现的特征:
x = sin(2*pi*50*t)的原图和频谱图:
代码:


 1 clear;
 2 clc;
 3 t = 0:0.001:0.25;
 4 x = sin(2*pi*50*t);
 5 %x = 2*sin(2*pi*50*t+pi);
 6 %x = sin(2*pi*50*t) + 2*sin(2*pi*140*t);
 7 %x = sin(100*pi*t)+cos(280*pi*t);
 8 figure(1);
 9 plot(t,x);
10 xlabel('t'); ylabel('f(t)');
11 y = x;
12 Y = fft(y,256);
13 Pyy = Y.*conj(Y)/256;   %计算Y的模的长度
14 f = 1000/256*(0:127);
15 figure(2);
16 plot(f,Pyy(1:128));
17 title('Power spectral density');
18 xlabel('Frequency (Hz)');
结果图为:
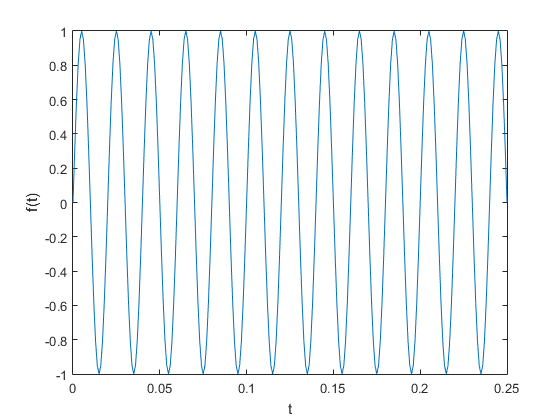
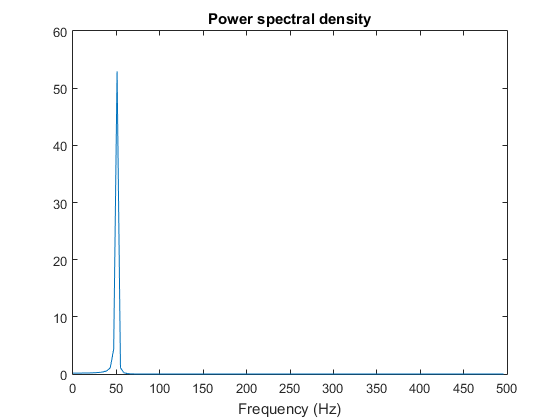
频谱图中,峰值是正好是原函数的周期的频率。 变下初始相位呢?
x = 2*sin(2*pi*50*t+pi);
代码:
 1 clear;
 2 clc;
 3 t = 0:0.001:0.25;
 4 %x = sin(2*pi*50*t);
 5 x = 2*sin(2*pi*50*t+pi);
 6 %x = sin(2*pi*50*t) + 2*sin(2*pi*140*t);
 7 %x = sin(100*pi*t)+cos(280*pi*t);
 8 figure(1);
 9 plot(t,x);
10 xlabel('t'); ylabel('f(t)');
11 y = x;
12 Y = fft(y,256);
13 Pyy = Y.*conj(Y)/256;   %计算Y的模的长度
14 f = 1000/256*(0:127);
15 figure(2);
16 plot(f,Pyy(1:128));
17 title('Power spectral density');
18 xlabel('Frequency (Hz)');
结果图为:


仍然满足那个结论。那么组合一下呢?
x = sin(2*pi*50*t) + 2*sin(2*pi*140*t);
代码:
 1 clear;
 2 clc;
 3 t = 0:0.001:0.25;
 4 %x = sin(2*pi*50*t);
 5 %x = 2*sin(2*pi*50*t+pi);
 6 x = sin(2*pi*50*t) + 2*sin(2*pi*140*t);
 7 %x = sin(100*pi*t)+cos(280*pi*t);
 8 figure(1);
 9 plot(t,x);
10 xlabel('t'); ylabel('f(t)');
11 y = x;
12 Y = fft(y,256);
13 Pyy = Y.*conj(Y)/256;   %计算Y的模的长度
14 f = 1000/256*(0:127);
15 figure(2);
16 plot(f,Pyy(1:128));
17 title('Power spectral density');
18 xlabel('Frequency (Hz)');
结果图为:


频谱图中竟然把50Hz和140Hz都显示出来哎,unbelievable!.不行,再试试,换成cos试试?
x = sin(100*pi*t)+cos(280*pi*t);
代码:
 1 clear;
 2 clc;
 3 t = 0:0.001:0.25;
 4 %x = sin(2*pi*50*t);
 5 %x = 2*sin(2*pi*50*t+pi);
 6 %x = sin(2*pi*50*t) + 2*sin(2*pi*140*t);
 7 x = sin(100*pi*t)+cos(280*pi*t);
 8 figure(1);
 9 plot(t,x);
10 xlabel('t'); ylabel('f(t)');
11 y = x;
12 Y = fft(y,256);
13 Pyy = Y.*conj(Y)/256;   %计算Y的模的长度
14 f = 1000/256*(0:127);
15 figure(2);
16 plot(f,Pyy(1:128));
17 title('Power spectral density');
18 xlabel('Frequency (Hz)');
结果图为:


也是如此。这下终于可以放心了。原来频谱图是这个作用~。
(2)还是有点不放心。如果加上噪声呢,还能识别出来么?
先测试下噪声:
 1 clear;
 2 clc;
 3 t = 0:0.001:0.25;
 4 figure(1);
 5 y = 2*randn(size(t));
 6 plot(t,y);
 7 xlabel('t');ylabel('y');
 8 Y = fft(y,256);
 9 Pyy = Y.*conj(Y)/256;   %计算Y的模的长度
10 f = 1000/256*(0:127);
11 figure(2);
12 plot(f,Pyy(1:128));
13 title('Power spectral density');
14 xlabel('Frequency (Hz)');
结果图为:


杂乱无章。。。再测一次试试:


还是杂乱无章,峰值也没有个确定的值。确定为噪声无疑了。
好,那么现在就用你加到上面的正弦函数图像上去!
代码:
 1 clear;
 2 clc;
 3 t = 0:0.001:0.25;
 4 x = sin(100*pi*t)+cos(280*pi*t);
 5 figure(1);
 6 plot(t,x);
 7 xlabel('t'); ylabel('f(t)');
 8 y = x + 2*randn(size(t));
 9 figure(2);
10 plot(t,y);
11 xlabel('t');ylabel('y(t)');
12 Y = fft(y,256);
13 Pyy = Y.*conj(Y)/256;   %计算Y的模的长度
14 f = 1000/256*(0:127);
15 figure(3);
16 plot(f,Pyy(1:128));
17 title('Power spectral density');
18 xlabel('Frequency (Hz)');
结果图为:比较下两图可以知道,由于受到噪声干扰。图像几乎很难分辨出信号图像。


频谱分析图这里,竟然有两个突出的峰值:

仔细观察,竟然就是50Hz和140Hz。这下好了,合成的信号用频谱分析竟然可以清楚的找到原来的正弦信号~。
咳咳,总结:经过傅里叶变换之后,频谱图的确能够帮助我们分析信号的成分,便于对信号进行处理。