首先需要下载安装d3.js : yarn add d3
然后在组建中引入 : import * as d3 from 'd3'
然后定义一个方法,在componentDidMount()这个钩子函数中调用即可。
然后如何绘制一个矢量图 :
1 render() {
2         return (
3             <div id="drawSVG" ></div>
4         );
5     }
先定义一个id为drawSVG的div标签。然后写一个方法,来在这个div中绘制矢量图。
 1   oneMethod() { //定义一个方法
 2         var width = 400;    //定义svg的宽度
 3         var height = 400;   //定义svg的高度
 4         var svg = d3.select("#drawSVG") //选择容器
 5             .append('svg')  //将svg放入容器里面
 6             .attr("width", width)   //设置svg的宽度
 7             .attr("height", height) //设置svg的高度
 8             .style("background-color", "red")    //设置svg的背景颜色
 9             .style("border-radius", "50%")   //设置svg的圆角
10
11
12         svg.append("circle")    //在<svg>中添加<circle>标签
13             .attr("cx", "200px")    //设置圆形的x坐标
14             .attr("cy", "200px")    //设置圆形的y坐标
15             .attr("r", "100px")     //设置圆形的半径
16             .attr("fill", "yellow")     //设置圆形的填充色
17     }
然后在componentDidMount()中调用。
1  componentDidMount() {
2         this.oneMethod()
3     }
最后来看看会显示出什么样的矢量图行呢。。。

全部代码 :
 1 import React, { Component } from 'react';
 2 import * as d3 from 'd3';
 3 class Demo extends Component {
 4     constructor(props) {
 5         super(props);
 6         this.state = {}
 7     }
 8
 9     componentDidMount() {
10         this.oneMethod()
11     }
12
13     oneMethod() {   //定义一个方法
14         var width = 400;    //定义svg的宽度
15         var height = 400;   //定义svg的高度
16         var svg = d3.select("#drawSVG") //选择容器
17             .append('svg')  //将svg放入容器里面
18             .attr("width", width)   //设置svg的宽度
19             .attr("height", height) //设置svg的高度
20             .style("background-color", "red")    //设置svg的背景颜色
21             .style("border-radius", "50%")   //设置svg的圆角
22
23
24         svg.append("circle")    //在<svg>中添加<circle>标签
25             .attr("cx", "200px")    //设置圆形的x坐标
26             .attr("cy", "200px")    //设置圆形的y坐标
27             .attr("r", "100px")     //设置圆形的半径
28             .attr("fill", "yellow")     //设置圆形的填充色
29     }
30
31
32
33
34
35     render() {
36         return (
37             <div id="drawSVG" ></div>
38         );
39     }
40 }
41
42 export default Demo;
什么是选择集 :
d3.select和d3.selectAll返回的对象称为选择集(selection), 添加、删除、设定网页中的元素, 都得使用选择集.
详解select与selectAll:
1  selsect : 返回匹配选择器的第一个元素
2             d3.select("body")   //选择body元素
3             d3.select("#drawSVG") //选择id为drawSVG的元素
4             d3.select(".xxx")   //选择class为xxx的第一个元素
5
6  selectAll: 返回匹配选择器的所有元素
7             d3.selectAll("p")  //选择所有的p元素
8             d3.selectAll(".xxx")  //选择class为xxx的所有元素
9             d3.selectAll("ul li")  //选择ul中所有的li元素
查看选择集的状态有三个函数 :
1 查看选择集的状态,有三个函数 :
2             selection.empty() : 如果选择集为空,则返回true。如果不为空,返回false;
3             selection.node()  : 返回第一个非空元素,如果选择集为空,返回null;
4             selection.size()  : 返回选择集中的元素个数;
举例子 :
 1 render() {
 2         return (
 3             <div id="drawSVG" >
 4                 <p>窗前明月光</p>
 5                 <p>疑是地上霜</p>
 6                 <p>举头望明月</p>
 7                 <p>低头思故乡</p>
 8             </div>
 9         );
10     }
1  oneMethodAgain(){
2         var paragraphs = d3.selectAll("p")
3         console.log(paragraphs.empty())   //false
4         console.log(paragraphs.node())    //<p>窗前明月光</p>
5         console.log(paragraphs.size())    //4
6     }
以上就是查看选择集的状态。
对于选择集如何添加、插入和删除元素 :
1  对于选择集 , 添加、插入和删除元素  :
2                 selection.append(name) :
3                     在选择集的末尾添加一个元素,name为元素名称。
4                 selection.insert(name,[,before]) :
5                     在选择集中的指定元素之前插入一个元素,name是被插入的元素名称,before是css选择器名称。
6                 selection.remove() :
7                     删除选择集中的元素。
举例子 :
 1  render() {
 2         return (
 3             <div id="drawSVG" >
 4                 <p>窗前明月光</p>
 5                 <p>疑是地上霜</p>
 6                 <p id="plane" >举头望明月</p>
 7                 <p>低头思故乡</p>
 8             </div>
 9         );
10     }
还是这些内容来举例 。
1 oneMethodAgains() {
2 var body = d3.select("#drawSVG")
3
4
5 //在id为drawSVG的div中的最末尾添加一个p元素
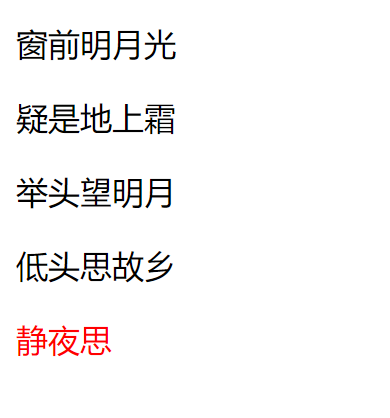
6 body.append("p")
7 .text("静夜思")//内容
8 .style("color", "red")//字体颜色
9
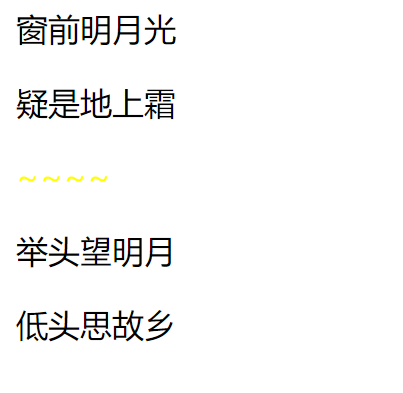
10 //在id为plane的p元素前添加一个p元素
11 body.insert("p", "#plane")
12 .text("~~~~") //内容
13 .style("color", "yellow") //字体颜色
14
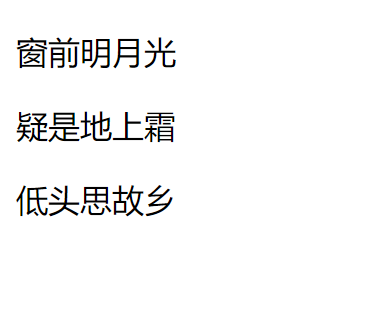
15 //删除id为plane的元素
16 var plane = d3.select("#plane")
17
18 plane.remove()
19
20 }
显示效果分别为 :
如何设定和获取属性 :
 1 设定和获取属性 :
 2                 selection.attr(name[,value]) :
 3                     设置或获取选择集的属性,name是属性名称,value是属性值。如果省略value,则返回当前的属性值。
 4                 selection.classed(name[,value]) :
 5                     设定或获取选择集的css类,name是类名,value是一个布尔值。表示是否开启。
 6                     d3.select("p")
 7                         .classed("xxx",true) //开启xxx类
 8                         .classed("sss",false) //不开启sss类
 9                 selection.style(name[,value[,priority]]) :
10                     设定或获取选择集的样式,name是样式名,value是样式值;
11                 selection.property(name[,value]) :
12                     设定或获取选择集的属性,name是属性名,value是属性值。如果省略value,则返回属性名。
13                     有部分属性不能用attr()设定和获取,最经典的是文本输入框的value属性,此属性不会再标签中显示。
14                 selection.text([value]) :
15                     设定或获取选择集的文本内容,如果省略value,则返回当前的文本内容。文本内容相当于DOM的innerText,不包括元素内部的标签。
16                 selection.html([value]) :
17                     设定或获取选择集的内部HTML内容,相当于DOM的innerHTML。包括元素内部的标签。
这里就不给大家举例子了,大家有时间可以自己试一下。
希望可以帮到大家~ 谢谢。