1. 什么是过滤器
- Servlet 是用来处理请求的, 过滤器是用来拦截请求的.
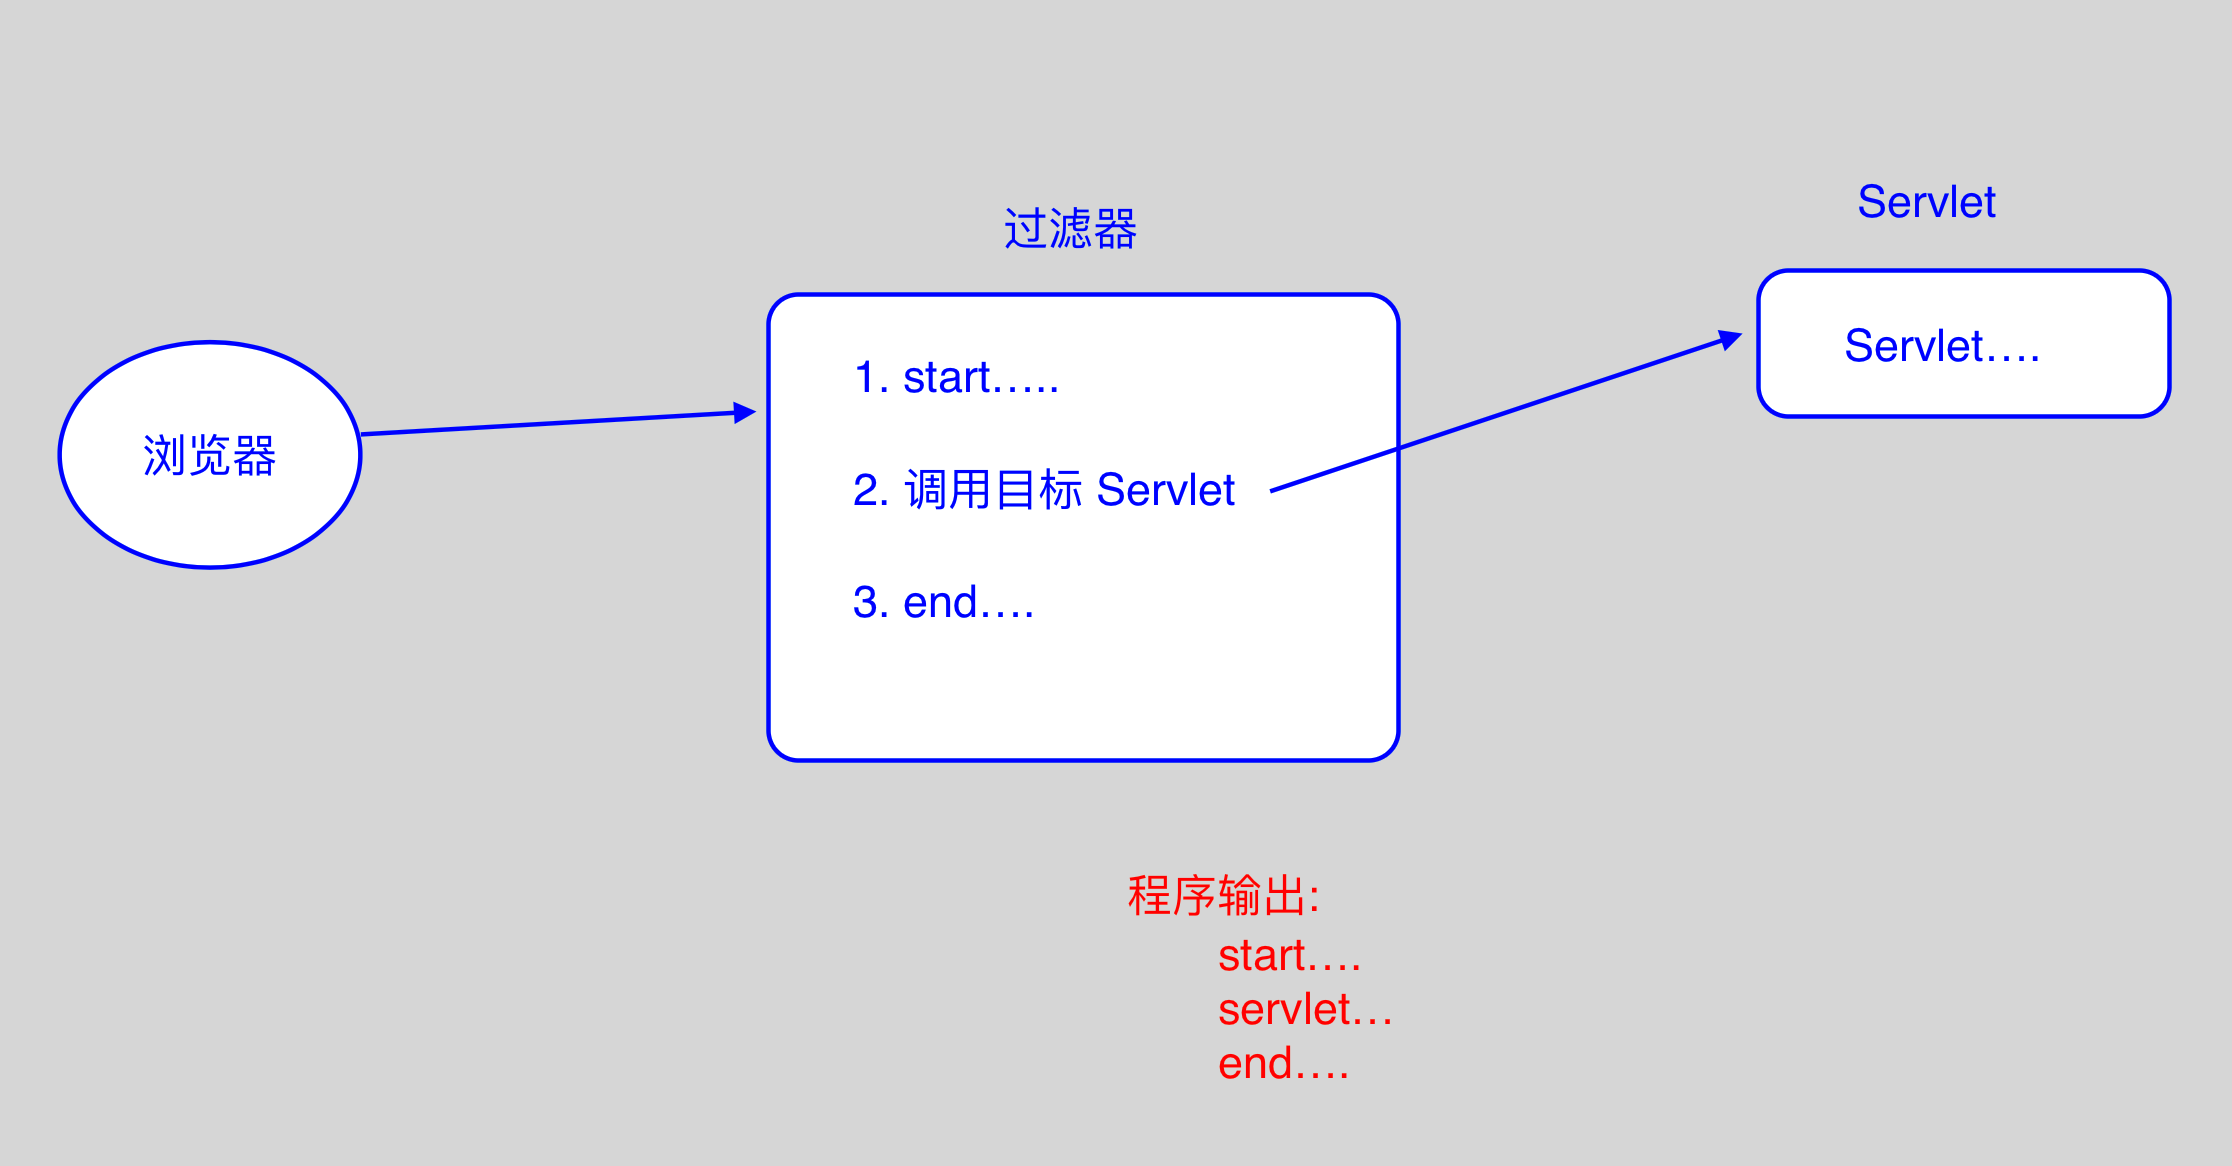
- 当用户请求某个 Servlet 时,会先执行部署在这个请求上的 Filter, 而 Filter 决定是否调用 Servlet.
当执行 Servlet 代码完成后, 还会执行 Filter 后面的代码!! - 它会在一组资源(jsp, servlet, css, html 等等)的前面执行.
- Filter 是单例的!!
2. 编写过滤器
2.1 步骤
- 写一个类实现 Filter 接口;
- 在 web.xml 中进行配置.
2.2 filter 接口的三个方法
void init(FilterConfig)- 创建之后,马上执行, Filter 会在服务器启动时创建!
void destroy()- 销毁之前执行. 在服务器关闭时,销毁!
void doFilter(ServletRequest, ServletResponse, FilterChain)- 每次过滤时,都会执行.
2.3 web.xml 中的配置
<filter>
    <filter-name>xxx</filter-name>
    <filter-class>cn.itcast.web.filter.AFilter</filter-class>
</filter>
<filter-mapping>
    <filter-name>xxx</filter-name>
    <url-pattern>/*</url-pattern>
</filter-mapping>
2.4 Filter 相关的类型
-
FilterConfig, 与 ServletConfig 相似
- 获取初始化参数:
getInitParameter(); - 获取过滤器名称:
getFilterName(); - 获取 application:
getServletContext(); (较常用) - 获取所有初始化参数的名称:
Enumeration getInitParameterNames();
- 获取初始化参数:
-
FilterChain
- doFilter(ServletRequest, ServletResponse), 表示放行!
相当于调用了目标 Servlet 的 service() 方法.
- doFilter(ServletRequest, ServletResponse), 表示放行!
2.5 多过滤器
- FilterChain 的 doFilter() 方法: 执行目标资源, 或是执行下一个过滤器!
// 如果访问 AServlet, 需要经过AFilter 和 BFilter 两个过滤器,
    AFilter#start...
    BFilter#start...
    AServlet...
    BFilter#end...
    AFilter#end...
3. 过滤器的四种拦截方式
- 拦截请求(默认拦截方式)
- 拦截转发
- 拦截包含
- 拦截错误
// <filter-mapping> 进行配置 <dispatcher> 元素

    <filter>
        <filter-name>AFilter</filter-name>
        <filter-class>cn.itcast.web.filter.AFilter</filter-class>
    </filter>
    <filter-mapping>
        <filter-name>AFilter</filter-name>
        <url-pattern>/AServlet</url-pattern>
        <dispatcher>REQUEST</dispatcher> // 拦截请求
        <dispatcher>FORWARD</dispatcher> // 拦截转发
        <dispatcher>INCLUDE</dispatcher>  // 拦截包含
        <dispatcher>ERROR</dispatcher>  // 拦截错误
    </filter-mapping>
4. 多个过滤器的执行顺序
- <filter-mapping> 的配置顺序决定了过滤器的执行顺序!!
5. 过滤器的应用场景
- 执行目标资源之前做预处理工作, 例如设置编码,这种通常都会放行, 只是在目标资源执行之前做一些准备工作;
- 通过条件判断是否放行, 例如校验当前用户是否已经登录, 或者用户 IP 是否已经被禁用;
- 在目标资源执行后, 做一些后续的特殊处理工作, 例如对目标资源输出的数据进行处理;
// 示例一: 分 IP 统计访问次数
    /*
     * 分析:
     *    1. 使用 Map<String, Integer> 来装载统计的数据;
     *    2. 使用 ServletContextListener, 在服务器启动时完成创建;
     *    3. Map 保存到 ServletContext 中;
     *       因为 Map 需要在 Filter 中用来保存数据,
     *       而页面需要打印 Map 中的数据.
     */

     // AListener
     public class AListener implements SerlvetContextListener {

        // 在服务器启动时, 创建Map, 保存到 ServletContext中
        public void contextInitialized(SerlvetContextEvent sce){

            Map<String, Integer> map = new LinkedHashMap<String,Integer>();

            // 得到 ServletContext
            ServletContext application = sce.getServletContext();

            // 把 map 保存到 application 中
            application.setAttribute("map",map);
        }

        public void contextDestroyed(ServletContextEvent sce){

        }
    }

    // AFilter

    public class AFilter implements Filter{
        private FilterConfig config;

        public void destory(){

        }

        public void init(FilterConfig config) throws ServletException{
            // 赋值
            this.config = config;
        }

        public void doFilter(ServletRequest request, ServletResponse response,
                FilterChain chain) throws IOException, ServletException{

                // 得到 application 中的 map
                ServletContext app = config.getServletContext();

                Map<String,Integer> map = (Map<String,Integer>)app.getAttribute("map");

                // 从 request 域中得到 ip 地址
                String ip = request.getRemoteAddr();

                // 查看 map 中是否存在这个 ip 对应的访问次数, 如果存在, 把次数加 1 再保存回去
                // 如果不存在这个 ip, 那么设置这个 ip 的访问次数为 1

                if(map.containsKey(ip)){

                    int cnt = map.get(ip);
                    map.put(ip,cnt+1);

                }else{
                    map.put(ip,1);
                }

                // 把 map 放回到 application 中
                app.setAttribute("map",map);

                // 放行
                chain.doFilter(request,response);
            }
    }

// 示例二: 解决全站字符乱码(POST 和 GET 中文乱码问题)

    // index.jsp
    <body>
        <h1>主页</h1>

        <%-- POST 请求 --%>
        <form action="<c:url value='/AServlet'/>" method="post">
            用户名:<input type="text" name="username" value="张三"/><br/>
            <input type="submit" value="登录"/>
        </form>

        <%--  GET 请求, tomcat 8.0 以上版本,没有乱码问题 --%>
        <a href="<c:url value='/AServlet?username=李四'"/>点击这里</a>
    </body>

    // EncodingFilter

        // 处理 POST 请求编码问题
        request.setCharacterEncoding("utf-8");

        // 处理 GET 请求编码问题
        // 需要调包 request:
        //       写一个 request 的装饰类
        //       在放行时,使用我们自己的 request

        if(req.getMethod().equals("GET")){
            HttpServletRequest req = (HttpServletRequest)request;

            EncodingRequest er = new EncodingRequest(req);

            chain.doFilter(er,response);
        }else if(req.getMethod().equals("POST")){
            chain.doFilter(request,response);
        }


    // EncodingRequest 类, 即 request 的装饰类
    // 装饰 request 的 getParameter(String name) 方法
    public class EncodingRequest implements HttpServletRequest{

        private HttpServletRequest request;

        // 有参构造方法(是你,还有你)
        public EncodingRequest(HttpServletRequest request){
            this.request = request;
        }

        // 增强 request 的方法
        public String getParameter(String name){
            String value = request.getParameter(name);

            // 处理编码问题
            try{
                value = new String(value.getBytes("iso-8859-1"),"utf-8");
            }catch(Exception e){
                throw new RuntimeException(e);
            }
            return value;
        }

        // 复写 request 其他方法 (一切拜托你)
        ....
    }

    // EncodingRequest 类的升级版
    // EncodingRequest 类继承 HttpServletRequestWrapper 类即可
    // HttpServletRequestWrapper 实现了 HttpServletRequest 中的所有方法

    public class EncodingRequest extends HttpServletRequestWrapper{
        private HttpServletRequest req;

        // 构造方法
        public EncodingRequest(HttpServletRequest request){
            // 将 request 参数传递给父类 HtttpServletRequestWrapper
            super(request);
            this.req = request;
        }

        // 需要增强的方法
        public String getParameter(String name){
            String value = req.getParameter(name);
            try{
                value = new String(value.getBytes("iso-8859-1"),"utf-8");
            }catch(UnsupportedEncodingException e){
                throw new RuntimeException(e);
            }
            return value;
        }
    }
参考资料: