Create your first pipeline
Azure Pipelines | Azure DevOps Server 2020 | Azure DevOps Server 2019 | TFS 2018 | TFS 2017
This is a step-by-step guide to using Azure Pipelines to build a GitHub repository.
Prerequisites - Azure DevOps
-
A GitHub account, where you can create a repository. If you don't have one, you can create one for free.
-
An Azure DevOps organization. If you don't have one, you can create one for free. (An Azure DevOps organization is different from your GitHub organization. Give them the same name if you want alignment between them.)
If your team already has one, then make sure you're an administrator of the Azure DevOps project that you want to use.
Note
If you want to create a new pipeline by copying another pipeline, see Clone or import a pipeline.
Create your first pipeline
Get the .NET Core sample code
To get started, fork the following repository into your GitHub account.
https://github.com/MicrosoftDocs/pipelines-dotnet-core
Create your first .NET Core pipeline
-
Sign in to your Azure DevOps organization and navigate to your project.
-
Go to Pipelines, and then select New Pipeline.
-
Walk through the steps of the wizard by first selecting GitHub as the location of your source code.
-
You might be redirected to GitHub to sign in. If so, enter your GitHub credentials.
-
When the list of repositories appears, select your repository.
-
You might be redirected to GitHub to install the Azure Pipelines app. If so, select Approve & install.
When the Configure tab appears, select ASP.NET Core.
-
When your new pipeline appears, take a look at the YAML to see what it does. When you're ready, select Save and run.
-
You're prompted to commit a new azure-pipelines.yml file to your repository. After you're happy with the message, select Save and run again.
If you want to watch your pipeline in action, select the build job.
You just created and ran a pipeline that we automatically created for you, because your code appeared to be a good match for the ASP.NET Core template.
You now have a working YAML pipeline (
azure-pipelines.yml) in your repository that's ready for you to customize! -
When you're ready to make changes to your pipeline, select it in the Pipelines page, and then Edit the
azure-pipelines.ymlfile.
Learn more about working with .NET Core in your pipeline.
Add a status badge to your repository
Many developers like to show that they're keeping their code quality high by displaying a status badge in their repo.

To copy the status badge to your clipboard:
-
In Azure Pipelines, go to the Pipelines page to view the list of pipelines. Select the pipeline you created in the previous section.
-
In the context menu for the pipeline, select Status badge.
-
Copy the sample Markdown from the status badge panel.
Now with the badge Markdown in your clipboard, take the following steps in GitHub:
-
Go to the list of files and select
Readme.md. Select the pencil icon to edit. -
Paste the status badge Markdown at the beginning of the file.
-
Commit the change to the
masterbranch. -
Notice that the status badge appears in the description of your repository.
To configure anonymous access to badges for private projects:
-
Navigate to Project Settings
-
Open the Settings tab under Pipelines
-
Toggle the Disable anonymous access to badges slider under General
Note
Even in a private project, anonymous badge access is enabled by default. With anonymous badge access enabled, users outside your organization might be able to query information such as project names, branch names, job names, and build status through the badge status API.
Because you just changed the Readme.md file in this repository, Azure Pipelines automatically builds your code, according to the configuration in the azure-pipelines.yml file at the root of your repository. Back in Azure Pipelines, observe that a new run appears. Each time you make an edit, Azure Pipelines starts a new run.
Manage your pipeline with Azure CLI
You can manage the pipelines in your organization using these az pipelines commands:
- az pipelines run: Run an existing pipeline
- az pipelines update: Update an existing pipeline
- az pipelines show: Show the details of an existing pipeline
These commands require either the name or ID of the pipeline you want to manage. You can get the ID of a pipeline using the az pipelines list command.
Run a pipeline
You can queue (run) an existing pipeline with the az pipelines run command. To get started, see Get started with Azure DevOps CLI.
az pipelines run [--branch]
                 [--commit-id]
                 [--folder-path]
                 [--id]
                 [--name]
                 [--open]
                 [--org]
                 [--project]
                 [--variables]
Parameters
- branch: Name of the branch on which the pipeline run is to be queued, for example, refs/heads/main.
- commit-id: Commit-id on which the pipeline run is to be queued.
- folder-path: Folder path of pipeline. Default is root level folder.
- id: Required if name is not supplied. ID of the pipeline to queue.
- name: Required if ID is not supplied, but ignored if ID is supplied. Name of the pipeline to queue.
- open: Open the pipeline results page in your web browser.
- org: Azure DevOps organization URL. You can configure the default organization using
az devops configure -d organization=ORG_URL. Required if not configured as default or picked up usinggit config. Example:--org https://dev.azure.com/MyOrganizationName/. - project: Name or ID of the project. You can configure the default project using
az devops configure -d project=NAME_OR_ID. Required if not configured as default or picked up usinggit config. - variables: Space separated "name=value" pairs for the variables you would like to set.
Example
The following command runs the pipeline named myGithubname.pipelines-java in the branch pipeline and shows the result in table format.
az pipelines run --name myGithubname.pipelines-java --branch pipeline --output table

Run ID    Number      Status      Result    Pipeline ID    Pipeline Name                Source Branch    Queued Time               Reason
--------  ----------  ----------  --------  -------------  ---------------------------  ---------------  --------------------------  --------
123       20200123.2  notStarted            12             myGithubname.pipelines-java  pipeline           2020-01-23 11:55:56.633450  manual
Update a pipeline
You can update an existing pipeline with the az pipelines update command. To get started, see Get started with Azure DevOps CLI.
az pipelines update [--branch]
                    [--description]
                    [--id]
                    [--name]
                    [--new-folder-path]
                    [--new-name]
                    [--org]
                    [--project]
                    [--queue-id]
                    [--yaml-path]
Parameters
- branch: Name of the branch on which the pipeline run is to be configured, for example, refs/heads/main.
- description: New description for the pipeline.
- id: Required if name is not supplied. ID of the pipeline to update.
- name: Required if ID is not supplied. Name of the pipeline to update.
- new-folder-path: New full path of the folder to which the pipeline is moved, for example, user1/production_pipelines.
- new-name: New updated name of the pipeline.
- org: Azure DevOps organization URL. You can configure the default organization using
az devops configure -d organization=ORG_URL. Required if not configured as default or picked up usinggit config. Example:--org https://dev.azure.com/MyOrganizationName/. - project: Name or ID of the project. You can configure the default project using
az devops configure -d project=NAME_OR_ID. Required if not configured as default or picked up usinggit config. - queue-id: Queue ID of the agent pool where the pipeline needs to run.
- yaml-path: Path of the pipeline's yaml file in the repo.
Example
The following command updates the pipeline with the ID of 12 with a new name and description and shows the result in table format.
az pipelines update --id 12 --description "rename pipeline" --new-name updatedname.pipelines-java --output table

ID    Name                        Status    Default Queue
----  --------------------------  --------  ------------------
12    updatedname.pipelines-java  enabled   Hosted Ubuntu 1604
Show pipeline
You can view the details of an existing pipeline with the az pipelines show command. To get started, see Get started with Azure DevOps CLI.
az pipelines show [--folder-path]
                  [--id]
                  [--name]
                  [--open]
                  [--org]
                  [--project]
Parameters
- folder-path: Folder path of pipeline. Default is root level folder.
- id: Required if name is not supplied. ID of the pipeline to show details.
- name: Required if name is not supplied, but ignored if ID is supplied. Name of the pipeline to show details.
- open: Open the pipeline summary page in your web browser.
- org: Azure DevOps organization URL. You can configure the default organization using
az devops configure -d organization=ORG_URL. Required if not configured as default or picked up usinggit config. Example:--org https://dev.azure.com/MyOrganizationName/. - project: Name or ID of the project. You can configure the default project using
az devops configure -d project=NAME_OR_ID. Required if not configured as default or picked up usinggit config.
Example
The following command shows the details of the pipeline with the ID of 12 and returns the result in table format.
az pipelines show --id 12 --output table

ID    Name                        Status    Default Queue
----  --------------------------  --------  ------------------
12    updatedname.pipelines-java  enabled   Hosted Ubuntu 1604
Next steps
You've just learned how to create your first Azure Pipeline. Learn more about configuring pipelines in the language of your choice:
Or, you can proceed to customize the pipeline you just created.
To run your pipeline in a container, see Container jobs.
For details about building GitHub repositories, see Build GitHub repositories.
To learn what else you can do in YAML pipelines, see YAML schema reference.
Clean up
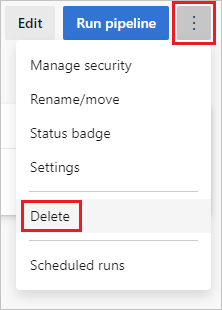
If you created any test pipelines, they are easy to delete when you are done with them.
To delete a pipeline, navigate to the summary page for that pipeline, and choose Delete from the ... menu at the top-right of the page. Type the name of the pipeline to confirm, and choose Delete.