Make model-driven app grids (lists) editable using the Editable Grid custom control
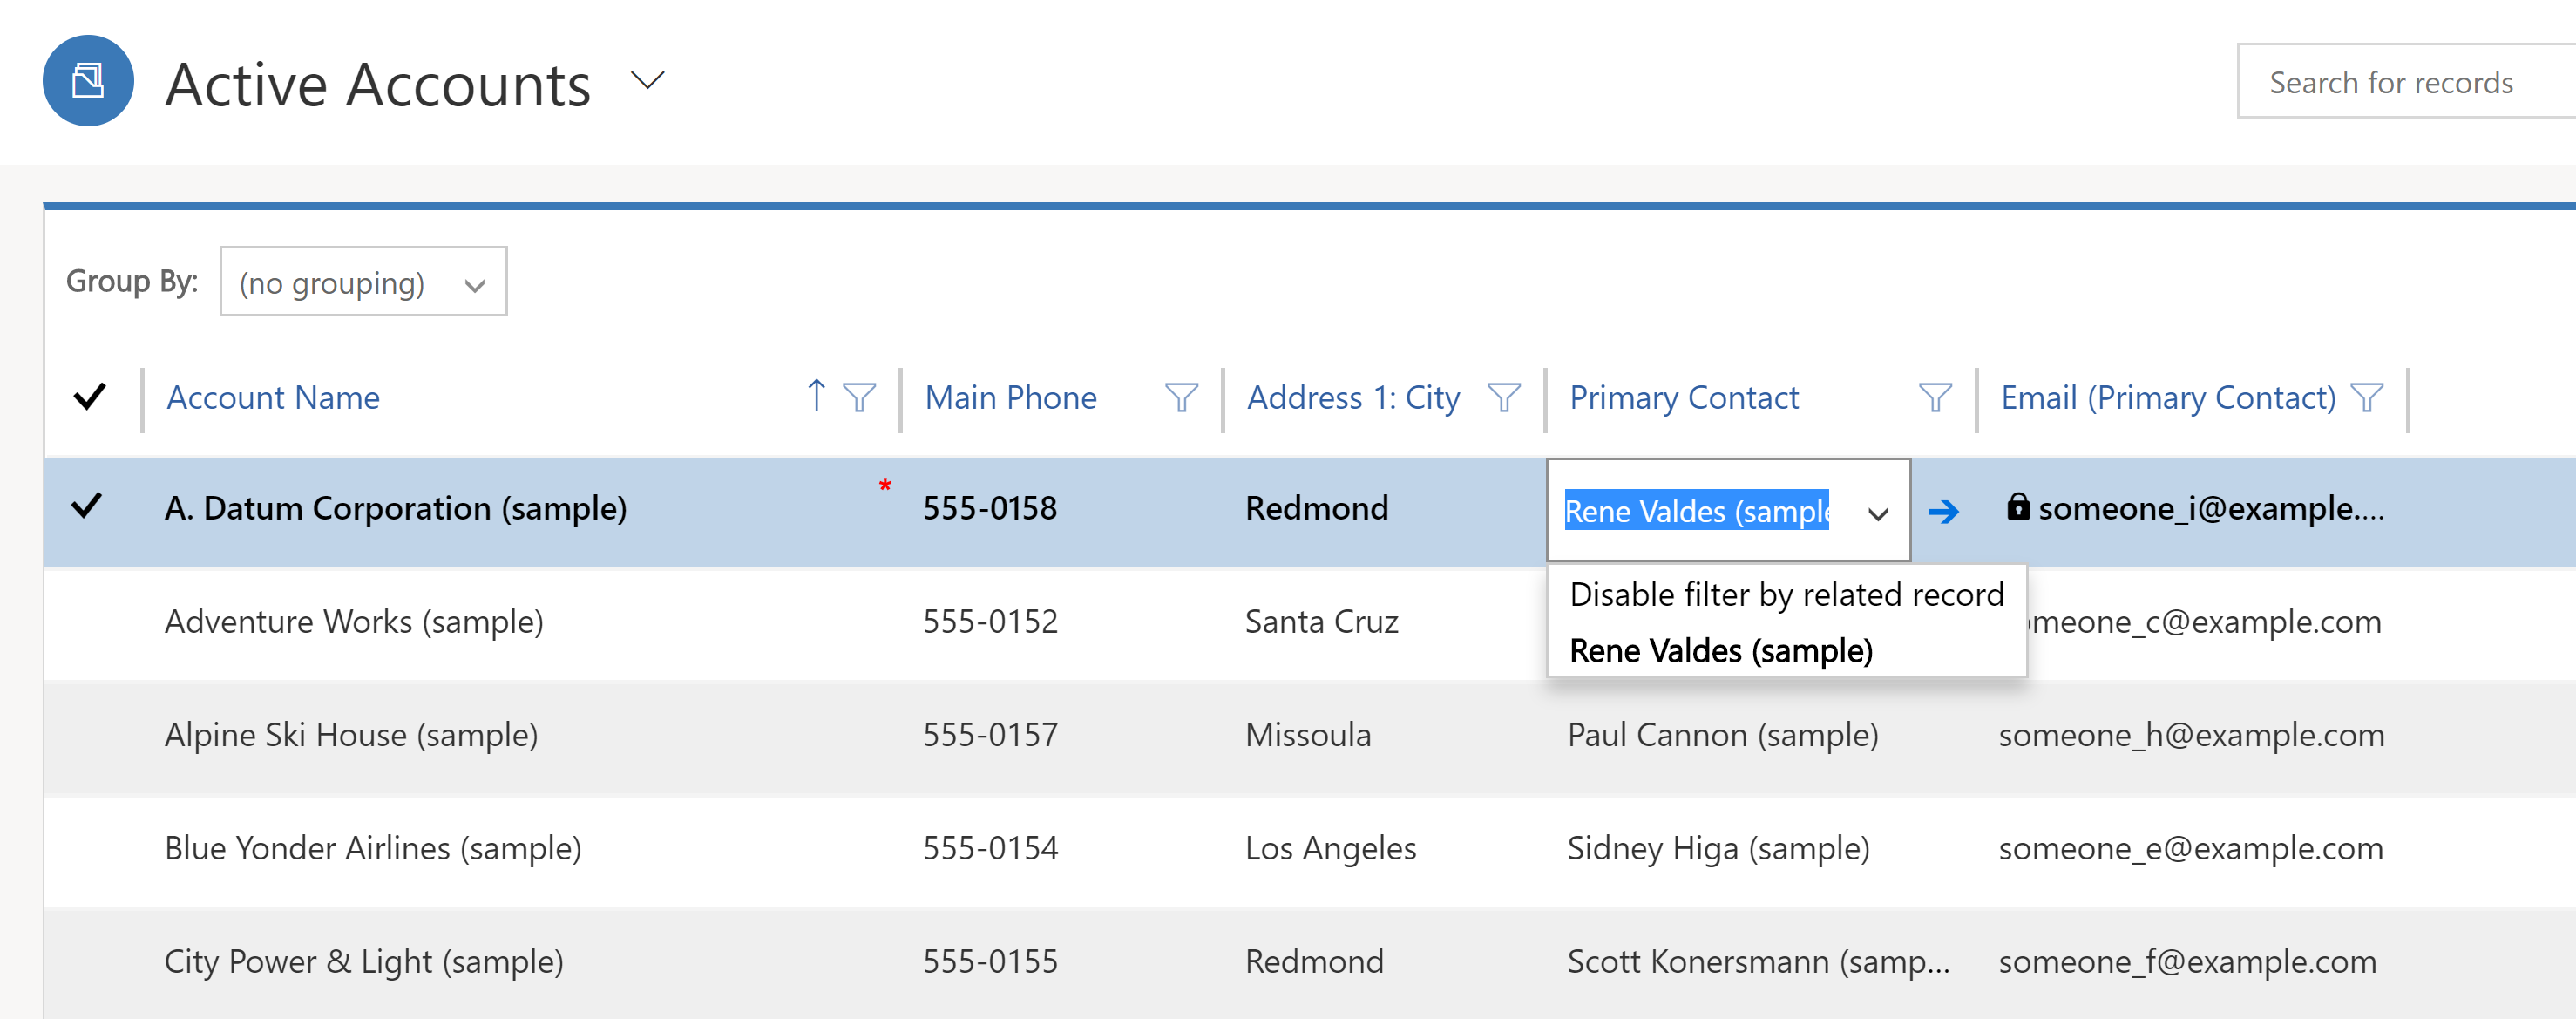
In previous releases of Dynamics CRM, users couldn't enter data directly in grids (sometimes called lists) or sub-grids on forms. They had to select the record in the grid to open a form, edit the data, and then save, which required multiple steps. With editable grids, users can do rich in-line editing directly from views and sub-grids whether they're using a web app, tablet, or phone.

When editable grids are enabled through the Editable Grids custom control, users can edit most types of fields, including basic Lookup fields and option sets.
Editable grids support:
-
In-line editing of records at the entity or sub-grid level (includes custom entities)
-
System views and personal views
-
Web and mobile clients
-
Navigation with a keyboard or mouse
-
Grouping and sorting (you can group by/sort records on the client-side by any column in the current view)
-
Filtering
-
Moving and resizing columns
-
Pagination
-
Saving changes from one session to another for grouping, sorting, filtering, pagination, and moving and resizing columns
-
Lookup configuration
-
Calculated fields and rollup fields
-
Business rules (Show error message, Set field value, Set business required, Set default value, Lock or unlock field)
-
JavaScript events
-
Enabling or disabling of cells based on security role
-
Users can continue to use search and charts, and can access the action bar as with read-only grids
Make main grids editable
-
Open solution explorer.
-
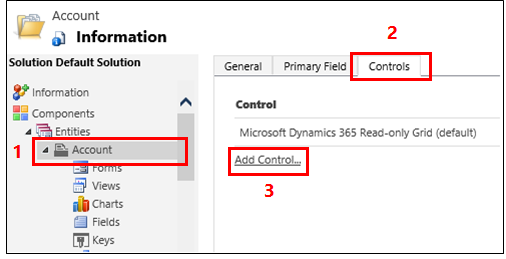
In the Entities list, open the appropriate entity, select the Controls tab, and then select Add Control.

-
In the Add Control dialog box, select Editable Grid, and then select Add.
-
In the Editable Grid row that's added, select the form factor(s) you want to apply the grid to. This makes the editable grid control the default control for the selected form factor(s).

Note
At runtime, users can toggle between editable grids and read-only grids.
-
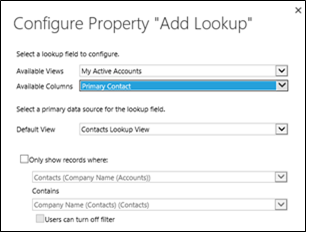
To add a lookup, in the Editable Grid option group, select Add Lookup, and then in the Configure Property "Add Lookup" dialog box:
-
In the Available Views list, select the view to add the lookup to (for example, select My Active Accounts).
-
In the Available Columns list, select the lookup column to add (for example, select Primary Contact).
-
In the Default View list, select the data source for the lookup field.
-
If you want to limit the records displayed, select the Only show records where check box, and then select your criteria from the list, and then select OK.

-
-
If you have a nested grid, select the pencil button for Nested grid view, and then select the entity and view for the nested grid. For the Nested grid parent ID select the relationship for the entities. For example, the ParentAccountID field connects the Account and Contact entities.
Note
Nested grids are only available for phones and tablets, not the web.
-
If you don't want to allow the user to group data by any column in the view (you want to save space, for example), in the Group by Column row, select the pencil button, and then in the Configure Property "Group by Column" dialog box, select Disabled, and then select OK.
Tip
This is mostly useful for sub-grids on forms.
-
If you want to add JavaScript events, select the Events tab, and then select the appropriate entities, fields, and events. More information: Developer Documentation: Use editable grids

-
To save your work, select Save on the action bar.
-
When you're ready to make changes available to your team, select Publish on the action bar.
-
To test your changes, go to the view you specified in step 5, and then make some in-line editing changes.
Make a sub-grid on a form editable
Note
- To save an editable grid change within a sub-grid, the user must explicitly save before navigating out of the form.
- If you are using legacy forms (versions prior to Dynamics CRM 2016) and enable an editable grid on a sub-grid, the editable sub-grid will not be rendered. System administrators can turn off legacy forms in system settings, if needed.
-
Open solution explorer.
-
Open the form that contains the sub-grid.
-
Select the appropriate control, and then select Change Properties on the ribbon.
-
In the Set Properties dialog box, select Controls, select Add Control, and then follow the same steps listed above.