Introducing instant flows
There are many repetitive tasks that we all wish we could run with just a tap of a button. For example, you may need to quickly email your team to remind them to join the daily team sync, or you may want to start a new Visual Studio Codespaces build of your code base after you've been notified that there are no more checkins planned for the day. Instant flows allow you to accomplish these and many other tasks simply by tapping a button on your mobile device.

Note
You can create instant flows either from your mobile device or from Power Automate.
Why create buttons?
Create buttons so that you can easily run repetitive tasks from any place, at anytime via your mobile device. Running buttons saves you time and, since the tasks they perform are automated, there will be less errors than if you manually did them.
Create a button
Prerequisites
- Access to Power Automate.
- An account with permissions to use the connectors to create your button. For example, you will need a Dropbox account in order to create a button that accesses Dropbox.
From the portal
In this walk-through, let's create a button that starts a Visual Studio Codespaces build and sends notifications to let you know when the build starts:
-
Sign in to Power Automate.
-
Select Create from the left side of the screen.
-
Select Instant flow.
-
Give your flow a name in the Flow name > Manually trigger a flow > Create.
-
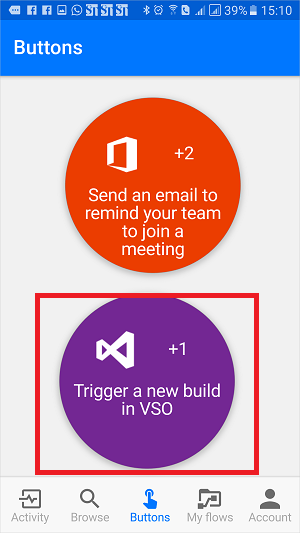
Select the Trigger a new build in VSO template from the list of templates.

-
Select the Use this template button on the Trigger a new build in VSO page.

-
If you aren't signed in, you'll be prompted to do so at this point:

-
After you've signed into Flow, you'll be prompted to sign into the connectors used in the template you've selected. In this example, in step 2 above we selected the Trigger a new build in VSO template, so we have to sign into VSO (and any other connectors you are working with), if you're not already signed in:

-
Select the Accept button if you agree to authorize Power Automate to access your VSO account.

Note You'll need to authorize each connector similarly. The designer should appear like this when you are ready to move on to the next step. Select the Continue button to move on:
-
You are now ready to configure the properties for the build you wish to start:

-
Select or enter the Account name, Project name, Build definition Id, Source branch and optionally, Parameters, in the Queue a new build card:

-
Next, configure the properties of the push notification on the Send a push notification card. By default, this push notification is configured to send an HTML link to a Web page that displays the status of the build:

-
Select the Create flow button to save your instant flow:

-
You should see this success message within a few moments:

Congratulations, you've created a instant flow! You can now run this instant flow anytime, any place, from the Buttonstab in the Flow app. Simply press the "button" and it will run! The Power Automate mobile app is available for Android, iOS, or Windows Phone.
From your mobile device
Note
While this walk-through displays screens from an Android device, the screens and experience on an iOS device are similar.
In the app:
- Select the Browse tab and scroll to the Button category.

- Select the See all link. This displays all ready-to-go button templates.

- Select the Send an email to remind your team to join a meeting template

- Select the USE THIS TEMPLATE link, at the bottom of the page.

- You'll need to sign into all services that this template uses:

- Select the Next link after you've signed in to all services.

- Select the Create link. Here you can also review the flow and make any changes you require to personalize the email, for example.

- After a few moments, the instant flow is created. Select SEE MY FLOW:

- View all your flows on the My flows tab

Congratulations, you've created a instant flow! You can now run this instant flow anytime, any place, from the Buttonstab in the Flow app. Simply press the "button" and it will run! The Flow app is currently available on Android and iOS mobile devices.

Trigger an instant flow
Now that you've created a instant flow, it's time to run it. Since you can only run instant flows from the Flow app, be sure you've installed Flow on your Android or iOS mobile device.
- Now, launch the flow app, tap the Buttons tab that's located at the bottom of the page, and tap the button that represents the instant flow you wish to trigger:
- See the progress while the flow runs:

- Finally, the page updates, indicating that the instant flow has completed:

That's all there is to running a flow.
You should now receive the push notification, indicating that the email has been sent.
Monitor your instant flow runs
You can monitor instant flows from the Activity tab of the flow app:
[!TIP ]Tap any activity to drill into the results of the run to learn about the run.

Manage instant flows
You have full control of your instant flows so you can enable/disable, edit or delete a button anytime, any place. From the mobile app or from the flow portal, select My flows to get started managing your flows.
On the My flows tab of the Flow app:
-
Select the flow you wish to manage:

-
You can tap any of these options, based on what you'd like to accomplish:

Tap Delete flow to delete a flow.
Warning
All run history is deleted when you delete a flow.

Tap Update after you are done editing a instant flow, to save your changes:

Tap Run history to see the results of all runs of a particular instant flow:

If you disable a flow, it will no longer be available on the Buttons tab:
