1、Solid是什么?
Solid(中文文档)是一个令人兴奋的新项目,由万维网发明者 Tim Berners-Lee 爵士在麻省理工学院启动。 该项目旨在从根本上改变 Web 应用程序的中心化趋势, 它将真正地让数据所有权属于用户,并改善隐私问题。
①真正的数据所有权
用户可以自由选择数据存储的地方以及谁可以访问数据,Solid 通过将数据与应用程序分离达到了这一效果。
②模块化设计
由于用户产生的数据与应用程序是分离的,所以用户能够避免互联网服务提供商随意锁定、删除数据,从而在各个应用之间无缝切换而且不会丢失任何数据或社交关系。
③数据重复利用
开发者在创建新应用或改进现有应用时,可以重用现有的数据,其中有些数据可能是由其他程序创建的(但要得到用户的许可才能使用)。
2、在阿里云CentOS Linux上部署Solid服务器
前提必备:阿里云服务器、已备案域名
2.1:安装Certbot
yum install -y epel-release
yum install -y certbot
查看cerbot是否安装成功以及安装版本
certbot --version
certbot 1.11.0
2.2:使用Certbot安装SSL证书
certbot certonly --preferred-challenges dns --manual -d *.cncaq.com --server https://acme-v02.api.letsencrypt.org/directory
参数说明:
- --preferred-challenges dns: 认证方式选择DNS, 泛域名支持DNS
- --manual: 手动模式, 这里为了简单就使用手动认证了, 下面会说自动模式的使用.
- -d *.cncaq.com: 就是你自己申请匹配的泛域名了
- --server https://acme-v02.api.letsencrypt.org/directory: 泛域名证书是新功能, 如果要使用就得加上这个参数
运行会显示【有YES/No选项都输入y】:
-------------------------------------------------------------------------------
NOTE: The IP of this machine will be publicly logged as having requested this
certificate. If you're running certbot in manual mode on a machine that is not
your server, please ensure you're okay with that.

Are you OK with your IP being logged?
-------------------------------------------------------------------------------
(Y)es/(N)o: y
直到出现以下界面先暂停在Liunx机上操作:
-------------------------------------------------------------------------------
Please deploy a DNS TXT record under the name
_acme-challenge.cncaq.com with the following value:

W2Z_PT1RQX8usavprZ1ly43Je2ayst3ShIBxpgicdEA

Before continuing, verify the record is deployed.
-------------------------------------------------------------------------------
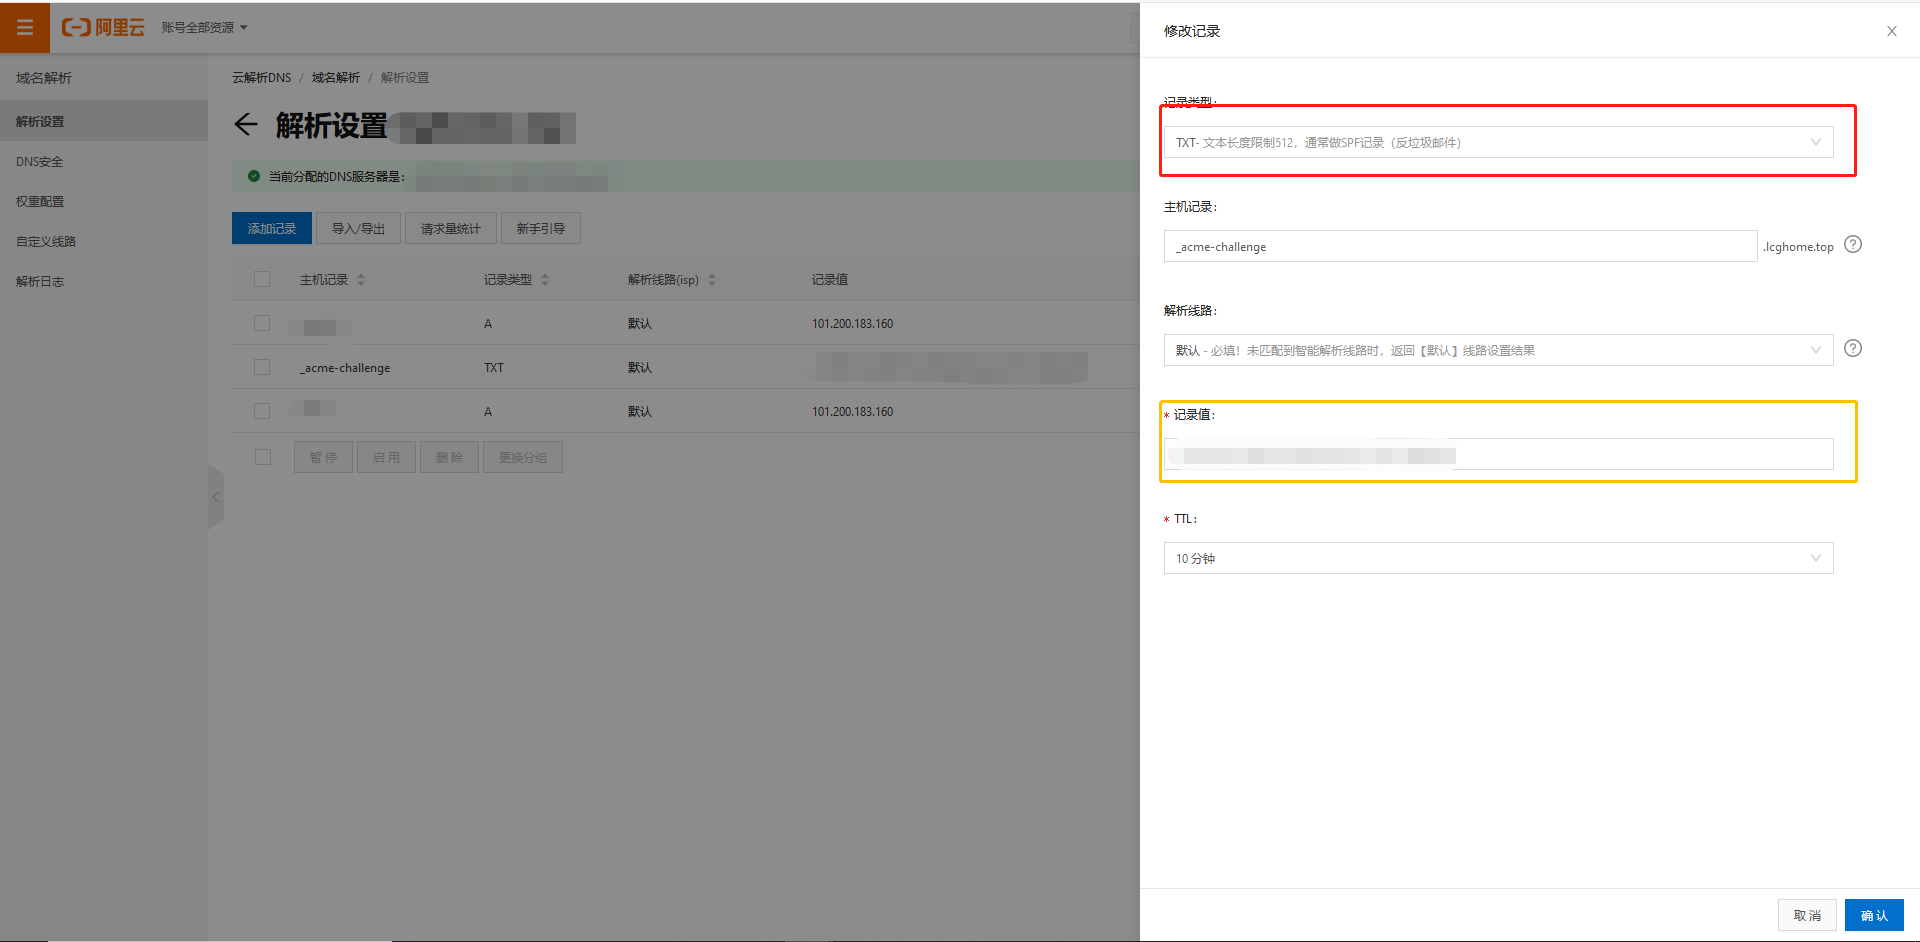
打开阿里云控制台进入【云解析DNS】->【解析设置】->【添加记录】:将记录类型选为TXT类型;将主机记录写为:_acme-challenge【固定的】;将色部位标记的字符串复制填入记录值;点击确定
设置完以后回到云服务操作界面按下Enter建,成功了就会显示以下界面:
Waiting for verification...
Cleaning up challenges

IMPORTANT NOTES:
 - Congratulations! Your certificate and chain have been saved at:
   /etc/letsencrypt/live/cncaq.com/fullchain.pem
   Your key file has been saved at:
   /etc/letsencrypt/live/cncaq.com/privkey.pem
   Your cert will expire on 2020-07-16. To obtain a new or tweaked
   version of this certificate in the future, simply run certbot
   again. To non-interactively renew *all* of your certificates, run
   "certbot renew"
 - If you like Certbot, please consider supporting our work by:

   Donating to ISRG / Let's Encrypt:   https://letsencrypt.org/donate
   Donating to EFF:                    https://eff.org/donate-le
至此SSL证书安装成功。
3、安装运行SoLiD Server
全局下载安装solid-server
npm install -g solid-server
找一个合适的位置创建给Solld初始化的文件夹【位置和文件夹命名随意】,在该文件下运行命令:
solid init
初始化时会要求你提供很多信息,大致入下面这样:
? Path to the folder you want to serve. Default is /var/www/your.host.example.org/data      【文件夹路径不是写死,是根据个人自己创建的文件路径,一般就是当前命令运行路径,所以可以什么都不该直接Enter就行】
? SSL port to run on. Default is 8443 443                                                   【固定:433】
? SoLiD server uri (with protocol, hostname and port) https://your.host.example.org         【https://your.host.example.org格式固定,必须有https://为开头,根据个人网址设定,例如我设置的地址为:www.LCGbuff.com,就写成:https://www.LCGbuff.com】
? Enable WebID authentication Yes                                                           【Yes】
? Serve SoLiD on URL path /                                                                 【默认,按Enter】
? Path to the config directory (for example: /etc/solid-server) /var/www/your.host.example.org/config   【默认,按Enter】
? Path to the config file (for example: ./config.json) /var/www/your.host.example.org/config.json       【默认,按Enter】
? Path to the server metadata db directory (for users/apps etc) /var/www/your.host.example.org/.db      【默认,按Enter】
? Path to the SSL private key in PEM format /etc/letsencrypt/live/your.host.example.org/privkey.pem     【输入:/etc/letsencrypt/live/your.host.example.org/privkey.pem 】
? Path to the SSL certificate key in PEM format /etc/letsencrypt/live/your.host.example.org/fullchain.pem 【输入:/etc/letsencrypt/live/your.host.example.org/fullchain.pem】
? Enable multi-user mode No
? Do you want to have a CORS proxy endpoint? Yes
? Serve the CORS proxy on this path /proxy
? Do you want to set up an email service? No
config created on /root/config.json
以上操作完了之后就已经安装完成solid-server,然后就可以正式启动 SoLiD 了:
solid start
之后根据设定好的地址就可以访问个人Solid服务器,进入后可以进行注册登录定制个人信息。