环境介绍
| 系统/安装的软件 | IP |
| red hat 8 /nginx | 192.168.100.20 |
|
red hat 8 /mysql |
192.168.100.30 |
| red hat 8 /php | 192.168.100.40 |
准备工作
给三台机器准备yum,这一步三台机器都做
//搭建yum的脚本
[root@RedHat ~]# cat yum.sh
#!/bin/bash
    curl -o /etc/yum.repos.d/CentOS-Base.repo https://mirrors.aliyun.com/repo/Centos-8.repo
    sed -i -e '/mirrors.cloud.aliyuncs.com/d' -e '/mirrors.aliyuncs.com/d' /etc/yum.repos.d/CentOS-Base.repo
    sed -i 's#$releasever#8#g' /etc/yum.repos.d/CentOS-Base.repo
    yum install -y https://mirrors.aliyun.com/epel/epel-release-latest-8.noarch.rpm
    sed -i 's|^#baseurl=https://download.fedoraproject.org/pub|baseurl=https://mirrors.aliyun.com|' /etc/yum.repos.d/epel*
yum clean all && yum makecache

//执行脚本
[root@RedHat ~]# bash yum.sh
关闭防火墙和selinux(三台机器都要做)
# systemctl disable --now firewalld
# setenforce 0
# vim /etc/selinux/config
SELINUX=disabled
搭建nginx(此操作在第一台机上做"192.168.100.20")
//安装需要的一些工具
# yum -y install pcre-devel openssl openssl-devel gd-devel gcc gcc-c++ make
# yum -y groups mark install 'Development Tools'

//下载nginx
# cd /usr/src/
# wget http://nginx.org/download/nginx-1.20.0.tar.gz

//创建nginx用户
# useradd -r -M -s /sbin/nologin nginx

//创建日志存放目录
# mkdir -p /var/log/nginx
# chown -R nginx.nginx /var/log/nginx

//编译安装
[root@RedHat src]# ls
debug  kernels  nginx-1.20.0.tar.gz
[root@RedHat src]# tar xf nginx-1.20.0.tar.gz
[root@RedHat src]# cd nginx-1.20.0
[root@RedHat nginx-1.20.0]#./configure --prefix=/usr/local/nginx --user=nginx --group=nginx --with-debug --with-http_ssl_module --with-http_realip_module --with-http_image_filter_module --with-http_gunzip_module --with-http_gzip_static_module --with-http_stub_status_module --http-log-path=/var/log/nginx/access.log --error-log-path=/var/log/nginx/error.log
[root@RedHat nginx-1.20.0]# make && make install

//配置环境变量
[root@RedHat nginx-1.20.0]#  echo 'export PATH=/usr/local/nginx/sbin:$PATH' > /etc/profile.d/nginx.sh

[root@RedHat nginx-1.20.0]# . /etc/profile.d/nginx.sh

//启动nginx
[root@RedHat nginx-1.20.0]# nginx
[root@RedHat nginx-1.20.0]# ss -antl
State       Recv-Q       Send-Q              Local Address:Port             Peer Address:Port
LISTEN      0            128                       0.0.0.0:22                    0.0.0.0:*
LISTEN      0            128                       0.0.0.0:80                    0.0.0.0:*
LISTEN      0            128                          [::]:22                       [::]:*

//关闭防火墙和selinux
# systemctl disable --now firewalld
# [root@RedHat nginx-1.20.0]# vi /etc/selinux/config
...
SELINUX=disabled

# setenforce 0

//访问nginx
curl 192.168.100.20
<!DOCTYPE html>
<html>
<head>
<title>Welcome to nginx!</title>
.....
搭建mysql(此操作在第二台机上做"192.168.100.30")
//安装需要的一些软件包
yum -y install ncurses-devel openssl-devel openssl cmake mariadb-devel ncurses-compat-libs

//创建用户和组
# useradd  -r -M -s /sbin/nologin  mysql

//下载二进制格式mysql软件包
# wget https://downloads.mysql.com/archives/get/p/23/file/mysql-5.7.31-linux-glibc2.12-x86_64.tar.gz

//解压软件
[root@RedHat ~]# tar -xf mysql-5.7.31-linux-glibc2.12-x86_64.tar.gz -C /usr/local/
[root@RedHat ~]# ln -sv /usr/local/mysql-5.7.31-linux-glibc2.12-x86_64/  /usr/local/mysql
'/usr/local/mysql' -> '/usr/local/mysql-5.7.31-linux-glibc2.12-x86_64/'

//设置权限
[root@RedHat ~]# cd /usr/local/
[root@RedHat local]# chown -R mysql.mysql mysql*
[root@RedHat local]# ll
总用量 0
drwxr-xr-x. 2 root  root    6 8月  12 2018 bin
drwxr-xr-x. 2 root  root    6 8月  12 2018 etc
drwxr-xr-x. 2 root  root    6 8月  12 2018 games
drwxr-xr-x. 2 root  root    6 8月  12 2018 include
drwxr-xr-x. 2 root  root    6 8月  12 2018 lib
drwxr-xr-x. 2 root  root    6 8月  12 2018 lib64
drwxr-xr-x. 2 root  root    6 8月  12 2018 libexec
lrwxrwxrwx. 1 mysql mysql  47 5月  30 04:02 mysql -> /usr/local/mysql-5.7.31-linux-glibc2.12-x86_64/
drwxr-xr-x. 9 mysql mysql 129 6月   2 2020 mysql-5.7.31-linux-glibc2.12-x86_64
drwxr-xr-x. 2 root  root    6 8月  12 2018 sbin
drwxr-xr-x. 5 root  root   49 2月  20 00:31 share
drwxr-xr-x. 2 root  root    6 8月  12 2018 src

//添加环境变量
[root@RedHat local]# echo 'export PATH=/usr/local/mysql/bin:$PATH' > /etc/profile.d/myslq.sh
[root@RedHat local]# source /etc/profile.d/myslq.sh
[root@RedHat local]# echo $PATH
/usr/local/mysql
# mkdir -p /usr/include/mysql
[root@RedHat local]# ln -s /usr/local/mysql/include/  /usr/include/mysql

# vi /etc/man_db.conf
MANDATORY_MANPATH                       /usr/local/mysql/man //添加mysql的man文件

# vi /etc/ld.so.conf.d/mysql.conf
/usr/local/mysql/lib

# ldconfig

//创建数据存放目录
# mkdir  /mydata
# chown  -R mysql.mysql  /mydata/

//初始化数据库
[root@RedHat local]#  mysqld  --initialize  --user=mysql   --datadir=/mydata
2021-05-29T20:09:14.746260Z 0 [Warning] TIMESTAMP with implicit DEFAULT value is deprecated. Please use --explicit_defaults_for_timestamp server option (see documentation for more details).
2021-05-29T20:09:15.215728Z 0 [Warning] InnoDB: New log files created, LSN=45790
2021-05-29T20:09:15.258819Z 0 [Warning] InnoDB: Creating foreign key constraint system tables.
2021-05-29T20:09:15.322204Z 0 [Warning] No existing UUID has been found, so we assume that this is the first time that this server has been started. Generating a new UUID: bdf2d139-c0b9-11eb-8b3d-000c29810b38.
2021-05-29T20:09:15.323155Z 0 [Warning] Gtid table is not ready to be used. Table 'mysql.gtid_executed' cannot be opened.
2021-05-29T20:09:16.512799Z 0 [Warning] CA certificate ca.pem is self signed.
2021-05-29T20:09:16.794093Z 1 [Note] A temporary password is generated for root@localhost: lUZw+wJgA2qZ

//修改my.cnf配置文件
# vim /etc/my.cnf
//添加以下内容
[mysqld]
basedir = /usr/local/mysql
datadir = /mydata
socket = /tmp/mysql.sock
port = 3306
pid-file = /mydata/mysql.pid
user = mysql
skip-name-resolve

//配置服务启动脚本
# cd /usr/local/mysql/support-files/
# ls
magic  mysqld_multi.server  mysql-log-rotate  mysql.server
# cp mysql.server  /etc/init.d/mysqld

# vi /etc/init.d/mysqld
# If you change base dir, you must also change datadir. These may get
# overwritten by settings in the MySQL configuration files.
 ....

basedir=/usr/local/mysql      //写上路径
datadir=/mydata                 //写上路径

//启动mysql
[root@RedHat support-files]# service mysqld start
Starting MySQL.Logging to '/mydata/RedHat.err'.
 SUCCESS!
[root@RedHat support-files]# ss -antl
State       Recv-Q       Send-Q              Local Address:Port             Peer Address:Port
LISTEN      0            128                       0.0.0.0:22                    0.0.0.0:*
LISTEN      0            128                          [::]:22                       [::]:*
LISTEN      0            80                              *:3306                        *:*

//进入mysql 修改密码为123456
[root@RedHat support-files]# mysql -uroot -p'lUZw+wJgA2qZ'     //这里的密码是刚刚初始化得到的随机密码
mysql: [Warning] Using a password on the command line interface can be insecure.
Welcome to the MySQL monitor.  Commands end with ; or g.
Your MySQL connection id is 2
Server version: 5.7.31

Copyright (c) 2000, 2020, Oracle and/or its affiliates. All rights reserved.

Oracle is a registered trademark of Oracle Corporation and/or its
affiliates. Other names may be trademarks of their respective
owners.

Type 'help;' or 'h' for help. Type 'c' to clear the current input statement.

mysql> set password = password('123456')
    -> ;
Query OK, 0 rows affected, 1 warning (0.00 sec)

mysql> exit
Bye
搭建php(此操作在第三台机上做"192.168.100.40")
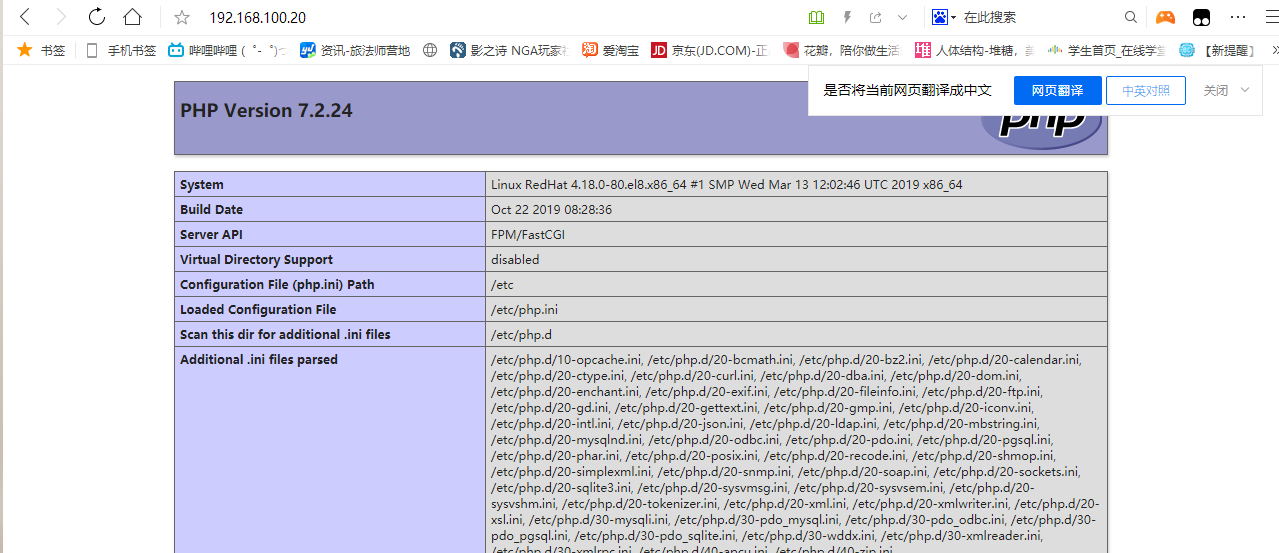
//搭建epel源,安装依赖包
# yum install -y https://mirrors.aliyun.com/epel/epel-release-latest-8.noarch.rpm

[root@RedHat ~]# sed -i 's|^#baseurl=https://download.fedoraproject.org/pub|baseurl=https://mirrors.aliyun.com|' /etc/yum.repos.d/epel*
[root@RedHat ~]# sed -i 's|^metalink|#metalink|' /etc/yum.repos.d/epel*
[root@RedHat ~]# yum -y install libxml2 libxml2-devel openssl openssl-devel bzip2 bzip2-devel libcurl libcurl-devel libicu-devel libjpeg libjpeg-devel libpng libpng-devel openldap-devel  pcre-devel freetype freetype-devel gmp gmp-devel libmcrypt libmcrypt-devel readline readline-devel libxslt libxslt-devel mhash mhash-devel php-mysqlnd

#  yum -y install php-*
[root@RedHat ~]# php -v
PHP 7.2.24 (cli) (built: Oct 22 2019 08:28:36) ( NTS )
Copyright (c) 1997-2018 The PHP Group
Zend Engine v3.2.0, Copyright (c) 1998-2018 Zend Technologies
    with Zend OPcache v7.2.24, Copyright (c) 1999-2018, by Zend Technologies

//修改配置文件
# vim /etc/php-fpm.d/www.conf
....
;listen = /run/php-fpm/www.sock  //注释这行
liten = 0.0.0.0:9000   //添加这行 (0.0.0.0代表任何地址)
...
listen.allowed_clients = 192.168.100.20  //修改成nginx的机器IP

//启动php
[root@RedHat ~]# systemctl start php-fpm
[root@RedHat ~]# ss -antl
State       Recv-Q       Send-Q              Local Address:Port             Peer Address:Port
LISTEN      0            128                       0.0.0.0:22                    0.0.0.0:*
LISTEN      0            128                       0.0.0.0:9000                  0.0.0.0:*
LISTEN      0            128                          [::]:22                       [::]:*

//创建测试页面
[root@RedHat ~]# cat /var/www/html/index.php
<?php
phpinfo();
?>
lnmp相关配置
//nginx的配置(此配置需要在第一台机器做"192.168.100.20")
[root@RedHat nginx]# vim /usr/local/nginx/conf/nginx.conf

location / {
            root   html;
            index  index.php index.html index.htm;     //添加index.php

location ~ .php$ {
            fastcgi_pass   192.168.100.40:9000;      //修改成监听php的那台机器的ip和端口
            fastcgi_index  index.php;
            fastcgi_param  SCRIPT_FILENAME  /var/www/html$fastcgi_script_name;      //把scripts修改成php跟网站目录
            include        fastcgi_params;
        }

//检查语法
[root@RedHat nginx]# nginx -t
nginx: the configuration file /usr/local/nginx/conf/nginx.conf syntax is ok
nginx: configuration file /usr/local/nginx/conf/nginx.conf test is successful

//创建测试页面
[root@RedHat nginx]# cat /usr/local/nginx/html/index.php
<?php
    phpinfo();
?>
//重载nginx配置
# nginx -s reload