监控环境
| 操作系统 | IP地址/端口 |
| redhat8 | 192.168.100.1:10050/10051/25 |
事先已经搭建好了zabbix环境,如有需要,请参考zabbix监控配置
如果你想要使用本地命令控制zabbix报警,你需要安装一个软件包,它由mailx提供
[root@zabbix ~]# dnf provides *bin/mail
Updating Subscription Management repositories.
Unable to read consumer identity
This system is not registered to Red Hat Subscription Management. You can use subscription-manager to register.
Last metadata expiration check: 6:14:43 ago on Mon 26 Apr 2021 10:04:46 AM CST.
mailx-12.5-29.el8.x86_64 : Enhanced implementation of the mailx command
Repo        : base
Matched from:
Other       : *bin/mail

#安装它
[root@zabbix ~]# dnf -y install mailx
同时你还需要安装一个包,它提供邮箱服务功能
[root@zabbix ~]# dnf provides *bin/sendmail
postfix-2:3.3.1-12.el8.x86_64 : Postfix Mail Transport Agent
Repo        : base
Matched from:
Other       : *bin/sendmail

[root@zabbix ~]# dnf -y install postfix
装完之后设置开机自启
[root@zabbix ~]# systemctl enable --now postfix
Created symlink /etc/systemd/system/multi-user.target.wants/postfix.service → /usr/lib/systemd/system/postfix.service.

#此时你会发现25号端口起来了
[root@zabbix ~]# ss -antl
State    Recv-Q   Send-Q     Local Address:Port      Peer Address:Port
LISTEN   0        128              0.0.0.0:10051          0.0.0.0:*
LISTEN   0        128              0.0.0.0:9000           0.0.0.0:*
LISTEN   0        128              0.0.0.0:22             0.0.0.0:*
LISTEN   0        100            127.0.0.1:25             0.0.0.0:*
LISTEN   0        128              0.0.0.0:10050          0.0.0.0:*
LISTEN   0        80                     *:3306                 *:*
LISTEN   0        128                    *:80                   *:*
LISTEN   0        128                 [::]:22                [::]:*
LISTEN   0        100                [::1]:25                [::]:*
假设我用我的QQ邮箱当作收件箱
#这里XXX代表你的邮箱地址,写你自己的就行了,可不要给别人疯狂发邮件哦
[root@zabbix ~]# echo "测试" | mail -s "20210426" XXX@qq.com

我的邮箱已经收到了我发送的测试邮件了
邮箱如果多次发送会被列入垃圾箱,所以你需要给它设置白名单

本地邮箱+脚本告警配置
本地邮箱告警脚本目录默认是/usr/local/share/zabbix/alertscripts
[root@zabbix ~]# vim /usr/local/etc/zabbix_server.conf
### Option: AlertScriptsPath
#       Full path to location of custom alert scripts.
#       Default depends on compilation options.
#       To see the default path run command "zabbix_server --help".
#
# Mandatory: no
# Default:
 AlertScriptsPath=/usr/local/share/zabbix/alertscripts  #取消注释,修改成绝对路径

//重启服务
[root@zabbix ~]# pkill zabbix
[root@zabbix ~]# zabbix_server
[root@zabbix ~]# zabbix_agentd

//写脚本
[root@zabbix ~]# cd /usr/local/share/zabbix/alertscripts/
[root@zabbix alertscripts]# cat sendmail.sh
#/bin/bash

MESSAGE=$(echo $2 | tr "
" "
")
SUBJECT=$(echo $3 | tr "
" "
")
MAILTO=$1

echo "$MESSAGE" | mail -s "$SUBJECT" $MAILTO

//给予脚本执行权限
[root@zabbix alertscripts]# chmod +x sendmail.sh

//测试(xxx为你邮箱地址)
[root@zabbix alertscripts]# su - zabbix -s /bin/bash
[zabbix@zabbix alertscripts]$ /usr/local/share/zabbix/
alertscripts/    externalscripts/
[zabbix@zabbix alertscripts]$ /usr/local/share/zabbix/alertscripts/sendmail.sh XXX@qq.com "test" "测试"
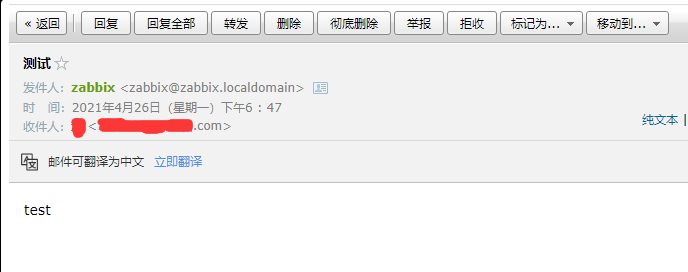
邮件已经收到了
本地邮箱脚本告警配置
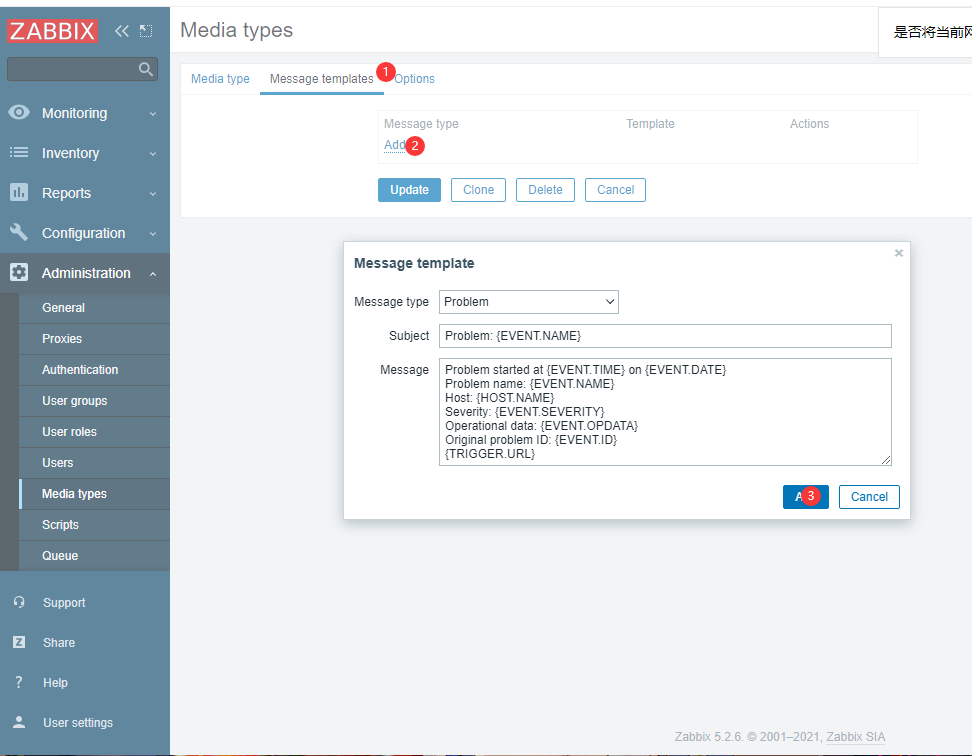
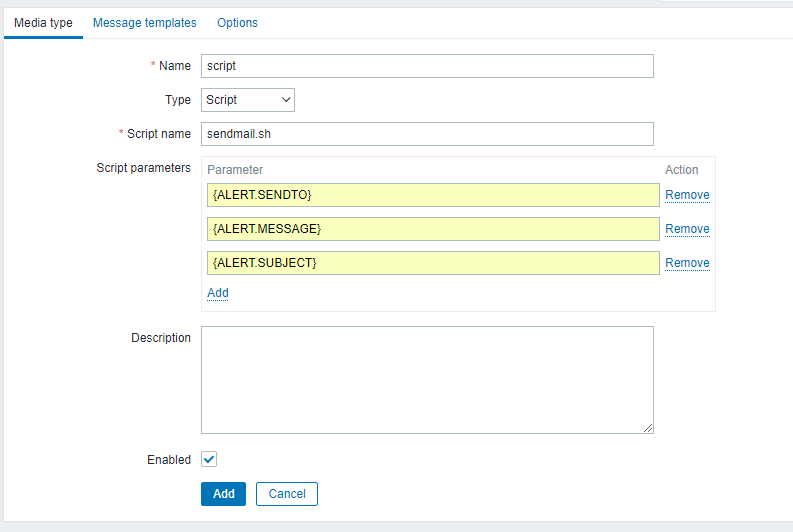
添加媒介
Administration --- Media types
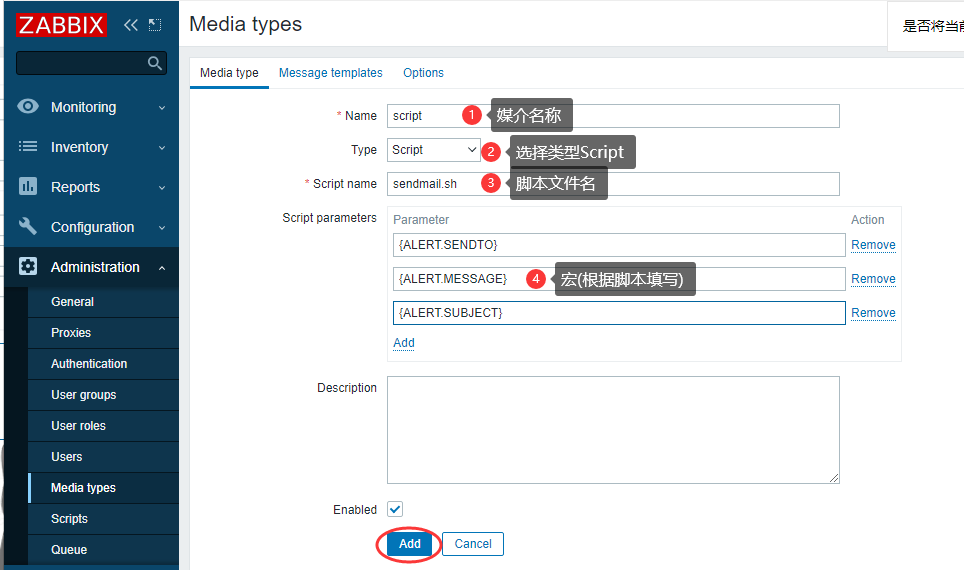
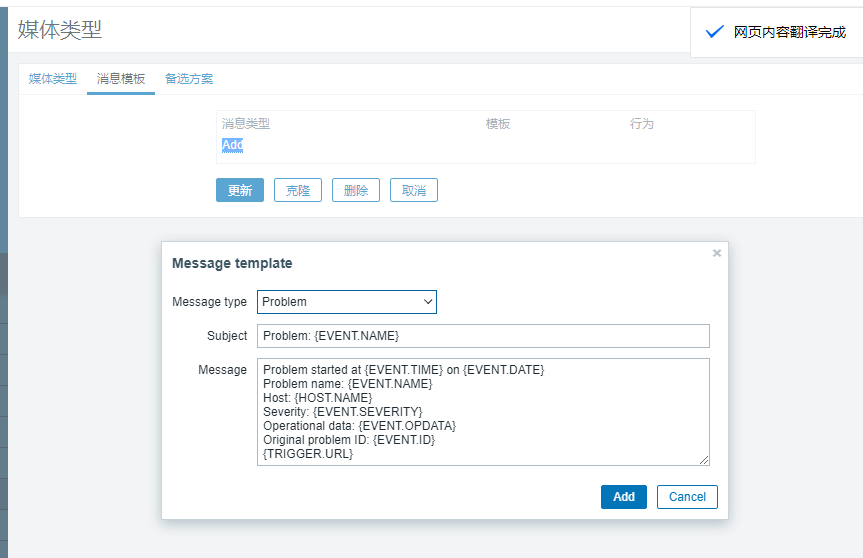
添加媒介信息
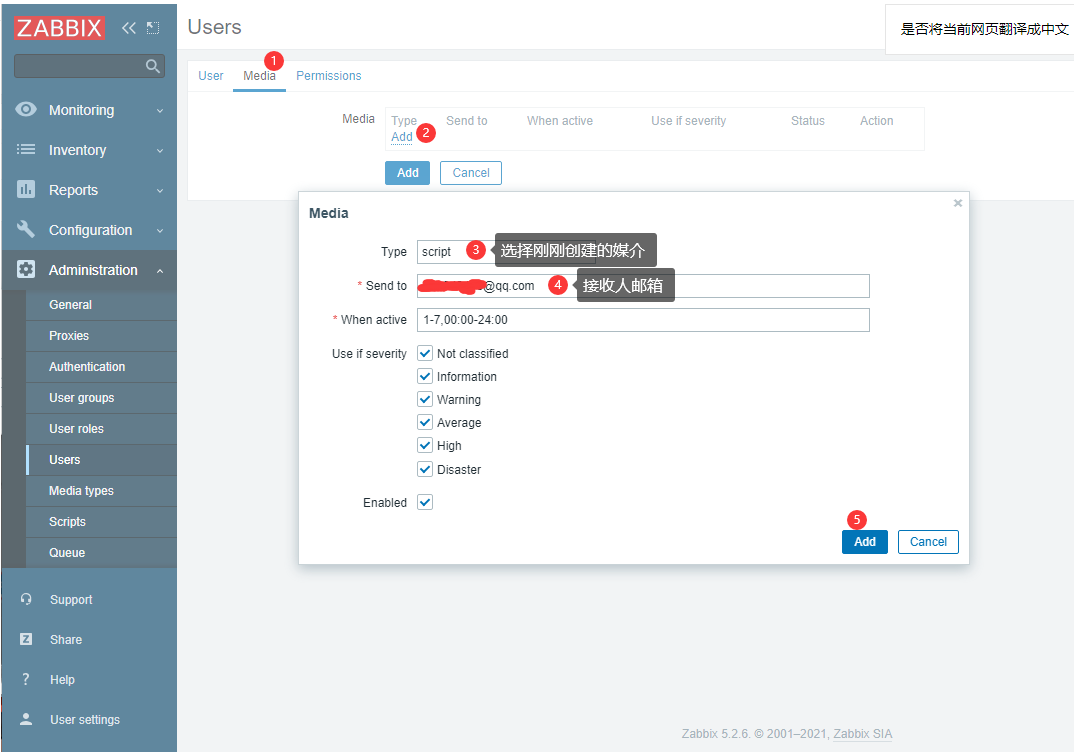
设置收件人
Administration --- Users --- Admin
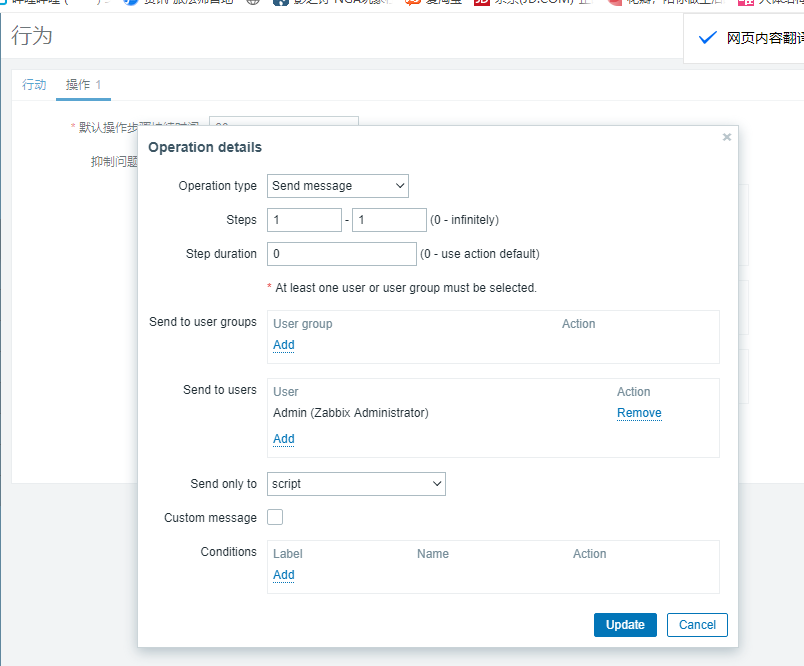
设置动作
Configuration --- Actions

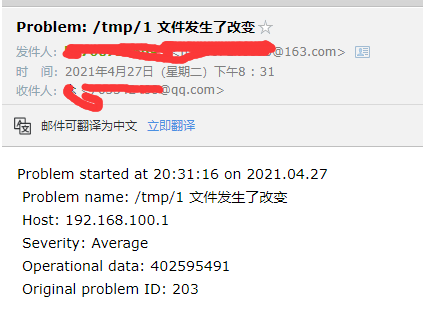
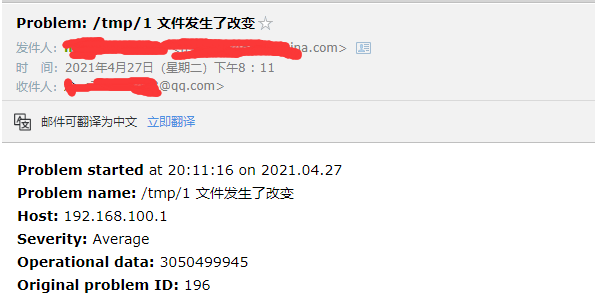
//触发警报
[root@zabbix ~]# echo "测试" >> /tmp/1
第三方邮箱网页告警+脚本告警配置
第三方邮箱网页告警
配置步骤请见:Zabbix配置
第三方邮箱网页告警脚本告警配置
配置mail.rc
SMTP的主要配置如下:
set smtp=smtps://smtp.xxx.com:465   # 这里填入smtp地址
set smtp-auth=login                 # 认证方式
set smtp-auth-user=user@xxx.com     # 这里输入邮箱账号
set smtp-auth-password=password     # 这里填入密码
set ssl-verify=ignore               # 忽略证书警告
set nss-config-dir=/etc/pki/nssdb   # 证书所在目录
set from=user@xxx.com               # 设置发信人邮箱和昵称
#set smtp-use-starttls=yes          # STARTTLS时使用
文件默认在/etc/mail.rc下
//配置mail.rc
[root@zabbix ~]# vim /etc/mail.rc
#在最后一行添加如下信息
set smtp=smtp.163.com
set smtp-auth=login
set smtp-auth-user=XXX@163.com
set smtp-auth-password=XXXXXXXXXXXXX        #这里为授权码
set from=XXX@163.com
第三方邮箱脚本告警配置
添加媒介
Administration --- Media types
设置收件人
Administration --- Users --- Admin

设置动作
Configuration --- Actions
触发触发器

验证