1.近期接触到java 爬虫,开源的爬虫框架有很多,其中WebMagic 是国产的,文档也是中文的,网上资料很多,便于学习,功能强大,可以在很短时间内实现一个简单的网络爬虫。具体可参考官网 http://webmagic.io/docs/zh/。今天参考官网和网上资料实现了抓取网页图片,并保存在本地简单入门实例,日后再做进一步深入探讨。在实现过程中参考了一些网上资料,主要是理解原理和工作方式。
2.分析网页结构。我们抓的是http://www.win4000.com/ 这个网站的图片,我们进到高清壁纸图库

找到要抓的图片,按F12进入调试模式
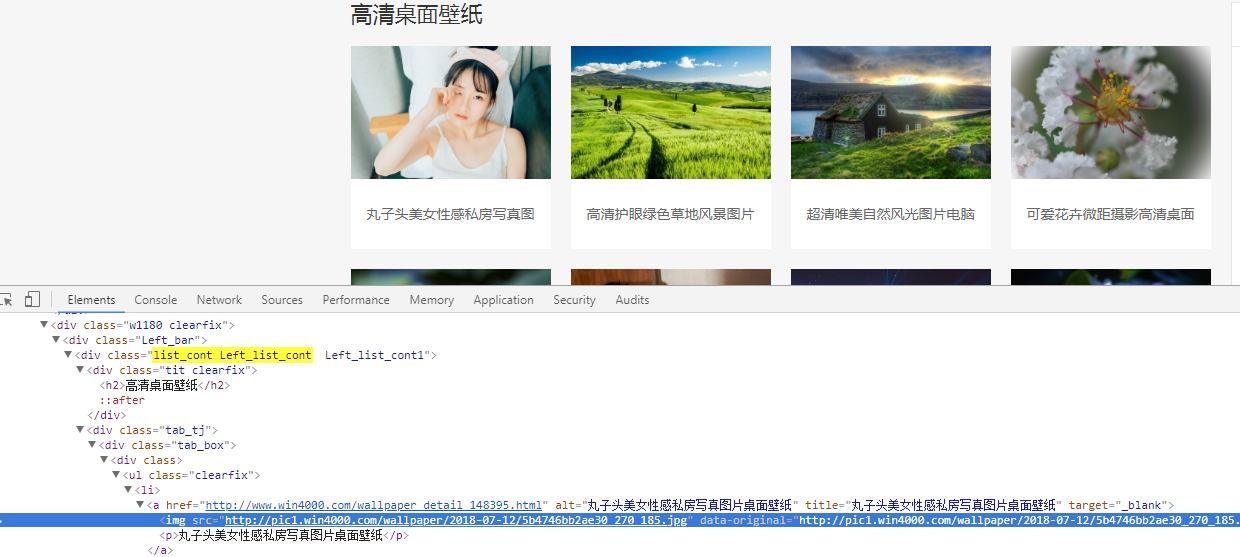
我们要抓的图片都在 class 为clearfix 的ui标签下的li标签内的a标签内,a标签的连接地址为图片的详情,计入详情页找到图片的具体地址和标题的地址
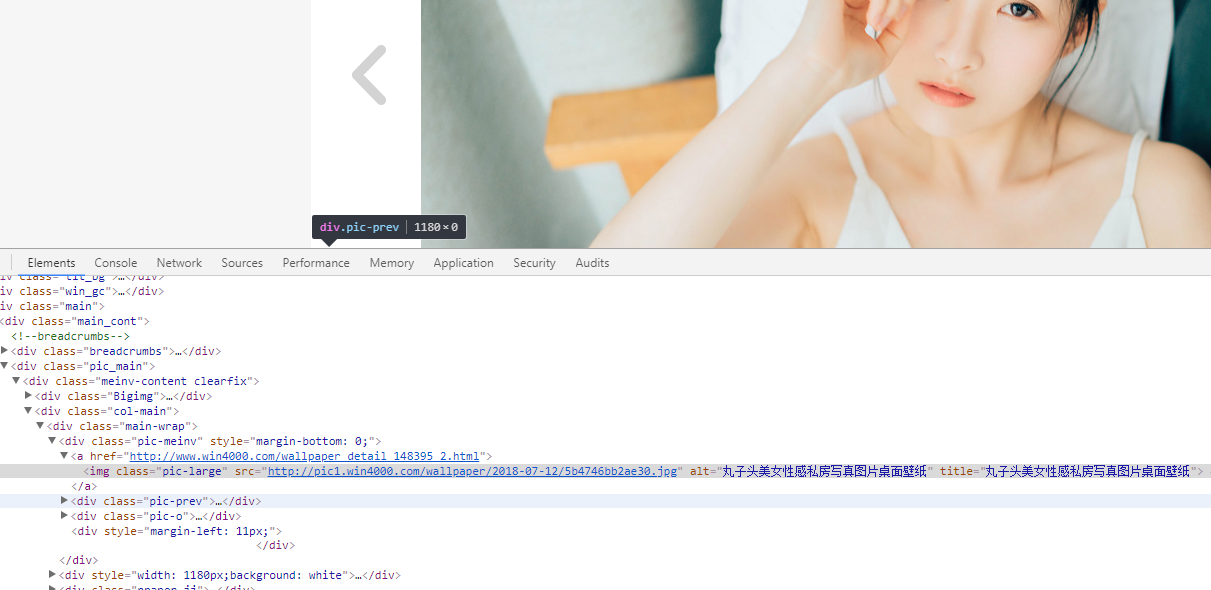

本次只是了解基本实现方式。具体筛选图片链接和标题请查看代码。可参考官网selecttable 和Jsoup章节。下面开始写代码实现。对于有翻页的情况,在第一页的时候获取最大页码,将所有的请求添加至请求队列,并重命名图片名称。下面的截图是原来的实现的时候放的,图片就不换了,效果是一样的,代码已经替换。
3.利用webMagic构建一个简单的网络爬虫很简单,首先添加webMagic依赖,主要是两个核心jar包
<dependency>
     <groupId>us.codecraft</groupId>
    <artifactId>webmagic-core</artifactId>
     <version>0.7.3</version>
</dependency>
<dependency>
    <groupId>us.codecraft</groupId>
    <artifactId>webmagic-extension</artifactId>
    <version>0.7.3</version>
</dependency>
其中webmagic核心部分,只包含爬虫基本模块和基本抽取器。webmagic的扩展模块,提供一些更方便的编写爬虫的工具。另外还有其他扩展模块,具体请查看百度百科介绍https://baike.baidu.com/item/WebMagic/22066484
<exclusions>
    <exclusion>
        <groupId>org.slf4j</groupId>
        <artifactId>slf4j-log4j12</artifactId>
    </exclusion>
</exclusions>
如果没有使用Maven,自行下载Jar包后添加至lib即可。
具体实现如下,实现PageProcessor即可。
public class myImageProcess implements PageProcessor{
//页面URL的正则表达式
//.是匹配所有的字符,//.表示只匹配一个,//.?同理
private static String REGEX_PAGE_URL = "http://www\.win4000\.com/zt/gaoqing_\w+.html";
//爬取的页数
public static int PAGE_SIZE = 6;
//下载张数
public static int INDEX_PHOTO =1;
public void process(Page page) {
List<String> SpidertURL = new ArrayList<String>();
for (int i = 2; i < PAGE_SIZE; i++){//添加到目标url中
SpidertURL.add("http://www.win4000.com/zt/gaoqing_" + i + ".html");
}
//添加url到请求中
page.addTargetRequests(SpidertURL);
//是图片列表页面
System.out.println(page.getUrl());
if (page.getUrl().regex(REGEX_PAGE_URL).match()) {
//获得所有详情页的连接
//page.getHtml().xpath("//a[@class="title"]").links().all();
List<String> detailURL = page.getHtml().xpath("//ul[@class='clearfix']/li/a").links().all();
int x = 1;
for (String str:detailURL){//输出所有连接
System.out.println(x+"----"+str);
x++;
}
page.addTargetRequests(detailURL);
} else {//详情页
String detailUrl = page.getUrl().toString();
System.out.println(detailUrl);
String picURL = page.getHtml().xpath("//div[@class='pic-meinv']/a").css("img", "src").toString();
System.out.println(picURL);
String currentIndex = page.getHtml().xpath("//div[@class='ptitle']/span/text()").toString();
String picname = page.getHtml().xpath("//div[@class='ptitle']/h1/text()").toString();
if(!"1".equals(currentIndex)){//如果不是第一页,则图片名称加上页码顺序
picname = picname+"_"+StringUtil.getURLIndex(detailUrl);
}
String allPic = page.getHtml().xpath("//div[@class='ptitle']/em/text()").toString();
if(allPic!= null && picURL != null && "1".equals(currentIndex)){
Integer pageindex = Integer.parseInt(allPic);
List<String>otherPic = new ArrayList<String>();
for(int i=2;i<=pageindex;i++){
otherPic.add(detailUrl.replaceAll(".html", "_"+i+".html"));
}
page.addTargetRequests(otherPic);
}
System.out.println(picname);
try {
/**
* String 图片地址
* String 图片名称
* String 保存路径
*/
if(picURL !=null){
DownloadUtil.download( picURL, picname + ".jpg", "E:\image3\");
System.out.println("第"+(INDEX_PHOTO++)+"张");
}
} catch (Exception e) {
e.printStackTrace();
}
}
}
public Site getSite() {
return Site.me();
}
public static void main(String [] args) throws JMException{
Date stdate = new Date();
System.out.println("开始时间:"+new SimpleDateFormat("yyyy-MM-dd HH:mm:ss").format(stdate));
Spider picSpider = Spider.create(new myImageProcess()).addUrl("http://www.win4000.com/zt/gaoqing_1.html")
.thread(5);
SpiderMonitor.instance().register(picSpider);
picSpider.start();
Date edDate = new Date();
System.out.println("结束时间:"+new SimpleDateFormat("yyyy-MM-dd HH:mm:ss").format(edDate));
System.out.println("共耗时"+(edDate.getTime()-stdate.getTime())/1000/60+"分钟");
}
}
直接运行即可执行上面的main方法。至于还能用来抓什么,可自行体会。
5.抓取结果。


继续学习,以后可以用来抓点好东西!!!!
暂时写到这里,后面继续完善。