vim /usr/local/tomcat/conf/server.xml #编辑配置文件
增加虚拟主机,编辑server.xml,在</Host>下面增加如下内容
<Host name="www.test.com" appBase="" unpackWARs= "true" autoDeploy="true" #这个地方的www.test.coom是域名
xmlValidation="false" xmlNamespaceAware="false">
<Context path="" docBase="/data/wwwroot/test.com/" debug="0" reloadable="true" crossContext="true"/> #这里的test.com是存放网站的路径
</Host>
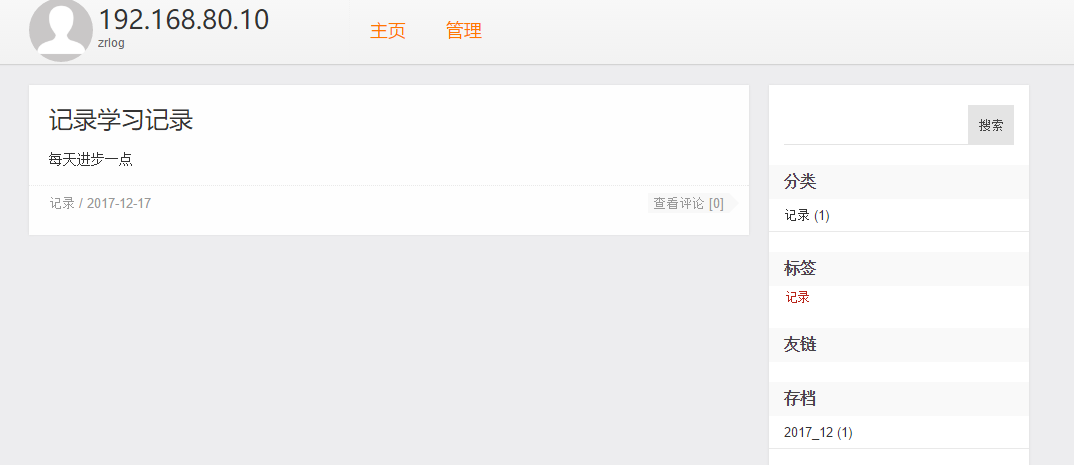
wget zrlog wget http://dl.zrlog.com/release/zrlog-1.7.1-baaecb9-release.war #下载博客包
cp zrlog-1.7.1-baaecb9-release.war /usr/local/tomcat/webapps/ #移动到tomcat的自动解压var的目录中

不需要做任何操作自动解压
[root@localhost webapps]# mv zrlog-1.7.1-baaecb9-release zrlog
[root@localhost webapps]# ls
docs examples host-manager manager ROOT zrlog zrlog-1.7.1-baaecb9-release.war 更改一下名字
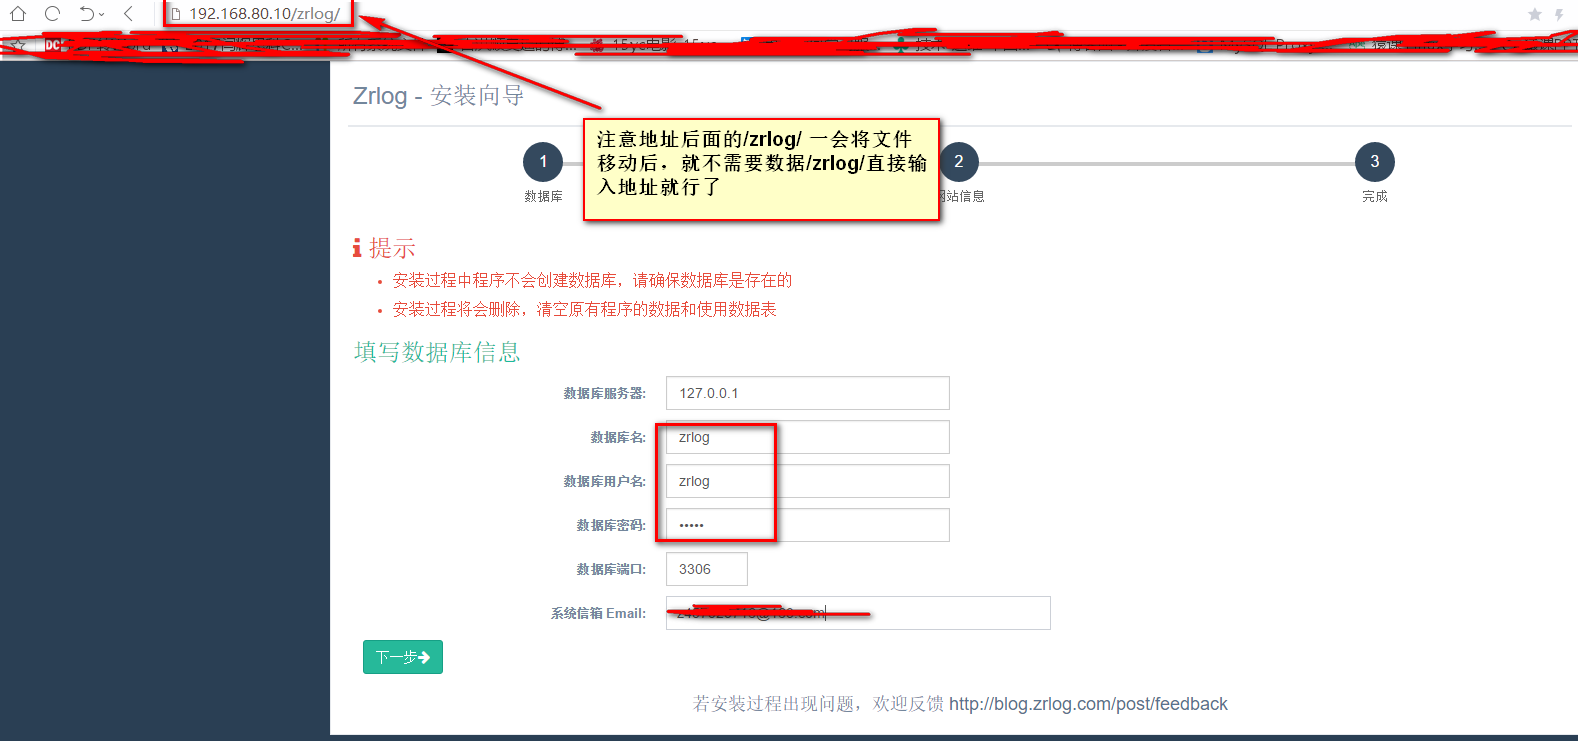
创建zrlog数据库和zrlog用户
/usr/local/mysql/bin/mysql -u root -p
Enter password: 进入数据库
mysql> create database zrlog;
mysql> grant all on zrlog.* to 'zrlog'@127.0.0.1 identified by 'zrlog';