1. 安装docker
详情请参见本人博客
2. 编译doris
详情请参见doris官网文档
3. 在编译好的doris output文件夹下编写两个Dockerfile
3.1 Dockerfile_fe
FROM centos:centos7.5.1804

RUN mkdir /home/palo/run/ -p

# copy jdk and palo binary
COPY jdk1.8.0_131/ /home/palo/run/jdk1.8.0_131/
COPY fe/ /home/palo/run/fe/

# set java home
ENV JAVA_HOME /home/palo/run/jdk1.8.0_131/

# set fe port: http/thrift/mysql/bdbje
EXPOSE 8030 9020 9030 9010

# fe log and meta-data
VOLUME ["/home/palo/run/fe/conf" i"/home/palo/run/fe/log" "/home/palo/run/fe/palo-meta"]

WORKDIR /home/palo/run/fe/

CMD ["/bin/sh","/home/palo/run/fe/bin/start_fe.sh"]
3.2 Dockerfile_be
Centos 7 be docker file
FROM centos:centos7.5.1804
#FROM ubuntu:18.04

RUN  mkdir -p /home/palo/run/

RUN yum -y update
 && yum install -y binutils-devel
 && yum -y clean all
 && rm -rf /var/cache/yum

# copy be
COPY be/ /home/palo/run/be/

# set be port: thrift/rpc/http/heartbeat
EXPOSE 9060 9070 8040 9050

# be log,conf and data
VOLUME ["/home/palo/run/be/conf", "/home/palo/run/be/log", "/home/palo/run/be/data/"]

WORKDIR /home/palo/run/be/
RUN ldd lib/palo_be

CMD ["/bin/sh","/home/palo/run/be/bin/start_be.sh"]
Ununtu 18.04 be docker file
FROM ubuntu:18.04

RUN  mkdir -p /home/palo/run/

RUN apt-get -y update
 && apt-get install -y libbinutils
 && apt-get -y clean all
 && rm -rf /var/cache/yum
#set the shell command from dash (which is the default shell application in ubuntu) to
#bash which doris start command used.
 && ln -sf /bin/bash /bin/sh

# copy be
COPY be/ /home/palo/run/be/

# set be port: thrift/rpc/http/heartbeat
EXPOSE 9060 9070 8040 9050

# fe log and meta-data
VOLUME ["/home/palo/run/be/conf", "/home/palo/run/be/log", "/home/palo/run/be/data/"]

WORKDIR /home/palo/run/be/
RUN ldd lib/palo_be

CMD ["/bin/sh","/home/palo/run/be/bin/start_be.sh"]
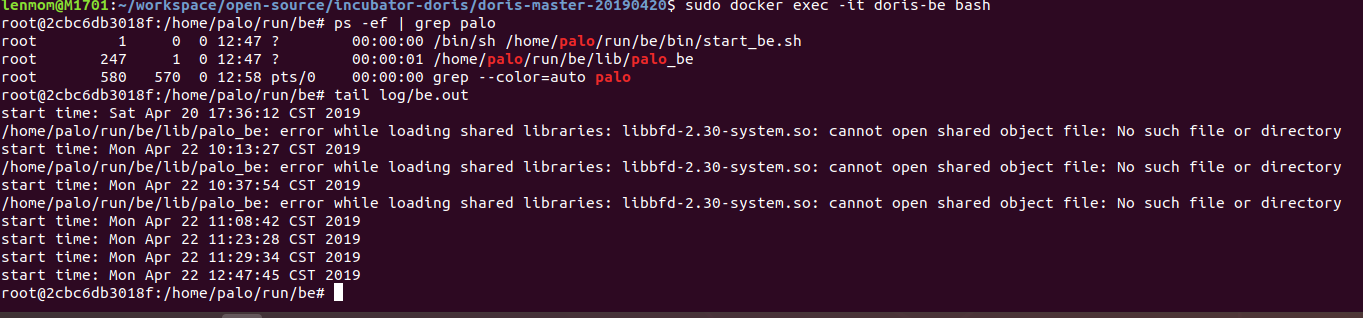
Note: if build the binary files of be using ubuntu 18.04, and build the docker image using centos, because the ubuntu glibc version 2.27 and the centos 7 glibc version is lower than this ( currently, the highest version is 2.17), and this would cause the be process
is unable to start with error message:
start time: Sat Apr 20 12:48:08 CST 2019
/home/palo/run/be/lib/palo_be: error while loading shared libraries: libbfd-2.30-system.so: cannot open shared object file: No such file or directory
so it's nassary to make sure the be build glic version is compatable with the target images os version. And this is why I used two docker file to build the be docker image.
In summery:
if you build the doris be in centos, it's better to build the docker images in based on centos; and vice, it you build the binary on ubuntu, it's better to build the docker image based on ubuntu. In order to make glibc version compatable.
4. 制作docker镜像
4.1 下载jdk1.8.0_131.tar.gz到 output文件夹下并解压,具体可以到oracle官网下载
文件准备完成后的目录结构为
[druid@doris output]$ ls -l
total 8
drwxr-xr-x 5 druid druid  40 Apr 11 11:34 apache_hdfs_broker
drwxr-xr-x 5 druid druid  40 Apr 11 11:21 be
-rw-rw-r-- 1 druid druid 326 Apr 11 13:16 Dockerfile_be
-rw-rw-r-- 1 druid druid 454 Apr 11 13:16 Dockerfile_fe
drwxr-xr-x 6 druid druid  55 Apr 11 11:21 fe
drwxr-xr-x 8 druid druid 255 Mar 15  2017 jdk1.8.0_131
4.2 制作fe镜像
[druid@palo output]$ sudo docker build -t lenmom/doris:fe-0.9.0 -f Dockerfile_fe  .
[sudo] password for druid:
Sending build context to Docker daemon  2.027GB
Step 1/8 : FROM centos:centos7.5.1804
 ---> cf49811e3cdb
Step 2/8 : RUN mkdir /home/palo/run/ -p
 ---> Using cache
 ---> ffe6e7a05650
Step 3/8 : COPY jdk1.8.0_131/ /home/palo/run/jdk1.8.0_131/
 ---> a0b9c437e9f7
Step 4/8 : COPY fe/ /home/palo/run/fe/
 ---> a7706aa9939b
Step 5/8 : ENV JAVA_HOME /home/palo/run/jdk1.8.0_131/
 ---> Running in bd436cb488d5
Removing intermediate container bd436cb488d5
 ---> 9e10bc76f4b5
Step 6/8 : EXPOSE 8030 9020 9030 9010
 ---> Running in de0d71ee1f27
Removing intermediate container de0d71ee1f27
 ---> 16600856447f
Step 7/8 : WORKDIR /home/palo/run/fe/
 ---> Running in 2cfe3e4bc04e
Removing intermediate container 2cfe3e4bc04e
 ---> fc999dfbc914
Step 8/8 : CMD "bin/start_fe.sh"
 ---> Running in fafb6d98095d
Removing intermediate container fafb6d98095d
 ---> 62efbd2bbea0
Successfully built 62efbd2bbea0
Successfully tagged doris:fe-0.9.0
4.3 制作be镜像
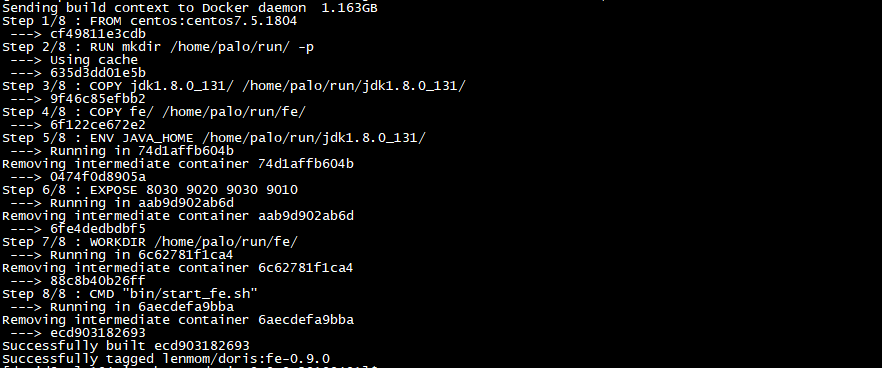
[druid@palo output]$ sudo docker build -t lenmom/doris:be-0.9.0 -f Dockerfile_be  .
Sending build context to Docker daemon  1.163GB
Step 1/7 : FROM centos:centos7.5.1804
 ---> cf49811e3cdb
Step 2/7 : RUN mkdir /home/palo/run/ -p
 ---> Running in 2ae7543e4f3a
Removing intermediate container 2ae7543e4f3a
 ---> 635d3dd01e5b
Step 3/7 : COPY be/ /home/palo/run/be/
 ---> 825e46597c07
Step 4/7 : EXPOSE 9060 9070 8040 9050
 ---> Running in 21e7742b6da5
Removing intermediate container 21e7742b6da5
 ---> c735c437a771
Step 5/7 : VOLUME ["/home/palo/run/be/conf", "/home/palo/run/be/log", "/home/palo/run/be/data/"]
 ---> Running in 456c4f54c79a
Removing intermediate container 456c4f54c79a
 ---> 392386745a0a
Step 6/7 : WORKDIR /home/palo/run/be/
 ---> Running in eac0b97ffdba
Removing intermediate container eac0b97ffdba
 ---> a488181610ba
Step 7/7 : CMD "bin/start_be.sh"
 ---> Running in 871bee0625c6
Removing intermediate container 871bee0625c6
 ---> cf8f3297619a
Successfully built cf8f3297619a
Successfully tagged lenmom/doris:be-0.9.0

4.4 查看镜像信息
[druid@palo output]$ sudo docker images
REPOSITORY          TAG                 IMAGE ID            CREATED             SIZE
lenmom/doris        fe-0.9.0            ecd903182693        2 minutes ago       649MB
lenmom/doris        be-0.9.0            cf8f3297619a        6 minutes ago       855MB
centos              centos7.5.1804      cf49811e3cdb        3 weeks ago         200MB

5. 导出镜像与上传镜像
5.1 导出镜像到本地
#命令格式:
#docker save -o 要保存的文件名  要保存的镜像
sudo docker save -o doris-fe-0.9.0-docker.img  lenmom/doris:fe-0.9.0   #导出fe镜像到本地,默认导出到当前目录,可以指定完整参数
sudo docker save -o doris-be-0.9.0-docker.img  lenmom/doris:be-0.9.0   #导出be镜像到本地,默认导出到当前目录,可以指定完整参数
导出后的结果看下图:

5.2 导入镜像
使用5.1中导出的镜像,可以在其他机器的部署环境中,使用load命令导入镜像,直接使用即可
#命令格式:
sudo docker load --input 文件
#或者
sudo docker load < 文件名
针对本例中的两个镜像文件,操作命令为:
sudo docker load --input  doris-be-0.9.0-docker.img #导入be镜像
sudo docker load --input  doris-fe-0.9.0-docker.img #导入fe镜像
5.3 上传镜像
命令格式为: docker push NAME[:TAG]
注意:如果为个人注册的docker hub账号,一定要在镜像名称前面加上自己的docker hub用户名,否则提交上传会失败,出现类似下面的错误
Error response from daemon: pull access denied for xxx, repository does not exist or may require 'docker login'
上传镜像前,需要使用自己的docker hub账号登陆,然后才可以上传镜像文件,下面来操作一个波次看看
5.1 登陆docker hub
输入sudo docker login,然后输入用户名,密码即可。
[druid@palo output]$ sudo docker login
Login with your Docker ID to push and pull images from Docker Hub. If you don't have a Docker ID, head over to https://hub.docker.com to create one.
Username: {YOUR-DOCKER-HUB-ID}
Password:
WARNING! Your password will be stored unencrypted in /root/.docker/config.json.
Configure a credential helper to remove this warning. See
https://docs.docker.com/engine/reference/commandline/login/#credentials-store

Login Succeeded

5.2 不带用户名的镜像上传会失败
修改lenmom/doris:be-0.9.0镜像名称为doris:be-0.9.0,即去掉签名的用户id,修改之前的镜像列表为

$sudo docker tag lenmom/doris:be-0.9.0 doris:be-0.9.0    #创建不带用户id的镜像别名
$sudo docker rmi lenmom/doris:be-0.9.0                   #删除带用户id的镜像
Untagged: lenmom/doris:be-0.9.0
$sudo docker images                                      #查看镜像列表,带用户id的be镜像应该消失了
REPOSITORY          TAG                 IMAGE ID            CREATED             SIZE
lenmom/doris        fe-0.9.0            ecd903182693        41 minutes ago      649MB
doris               be-0.9.0            cf8f3297619a        About an hour ago   855MB
centos              centos7.5.1804      cf49811e3cdb        3 weeks ago         200MB

现在上传该镜像,上传应该会失败
$sudo docker push  doris:be-0.9.0
Error response from daemon: pull access denied for doris, repository does not exist or may require 'docker login'
失败的原因是定位仓库的时候发现没有doris仓库,如果镜像带有用户id,那么默认的仓库是/id/tagname。
5.3 上传带用户id的镜像
[druid@palo194 output]$ sudo docker tag doris:be-0.9.0 lenmom/doris:0.9.0  #添加带用户id的镜像名称
[sudo] password for druid:
[druid@palo194 output]$ sudo docker rmi doris:be-0.9.0                     #删除不带用户id的镜像名称
Untagged: doris:be-0.9.0
[druid@palo194 output]$ sudo docker images                                 #查看镜像列表
REPOSITORY          TAG                 IMAGE ID            CREATED             SIZE
lenmom/doris        fe-0.9.0            ecd903182693        About an hour ago   649MB
lenmom/doris        be-0.9.0               cf8f3297619a        About an hour ago   855MB
centos              centos7.5.1804      cf49811e3cdb        3 weeks ago         200MB
[druid@palo194 output]$ sudo docker push lenmom/doris:be-0.9.0             #上传带用户id的镜像,上传成功
The push refers to repository [docker.io/lenmom/doris]
270d8b1169bb: Preparing
1d301fa1efc4: Preparing
4826cdadf1ef: Preparing
能够上传成功关键在docker.io/lenmom/doris,docker就是靠用户id来定位仓库地址的!!
6. 通过docker来使用制作好的镜像
6.1 启动fe容器
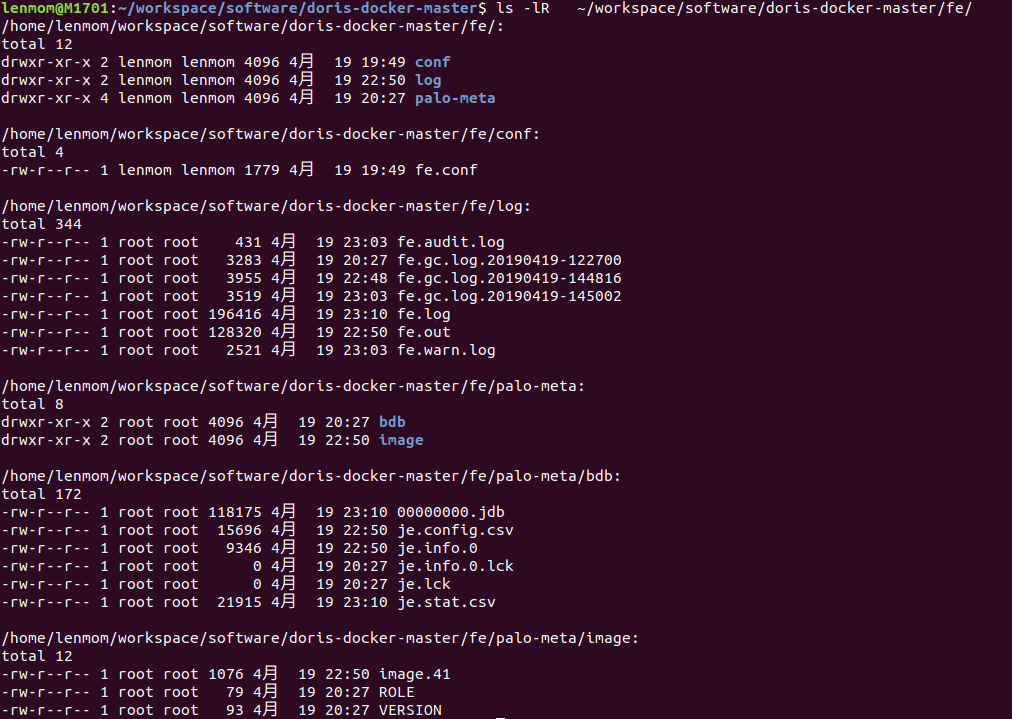
sudo docker run  --name doris-fe -p 9030:9030 -p 8030:8030 -p 9010:9010 -p 9020:9020
-v /home/lenmom/workspace/software/doris-docker-master/fe/log:/home/palo/run/fe/log
-v /home/lenmom/workspace/software/doris-docker-master/fe/palo-meta:/home/palo/run/fe/palo-meta
-v /home/lenmom/workspace/software/doris-docker-master/fe/conf:/home/palo/run/fe/conf/
--link doris-be
-v /etc/localtime:/etc/localtime:ro lenmom/doris:fe-0.9.0
Note: this create a docker container named doris-fe, after the start up ,we can see the results in the directory, and if we want to operate the be node to setup a cluster, we should start up the be node first, because to set up a cluster, the fe node need to know the be's ip address and vice not(because the fe would send the it's address to be during the hearbeat process. This is why we add the -link to container instance of doris-be!
and you can start a mysql container with a link to the doris-fe container just started to operate the fe instance.
sudo docker run -it --name mysql --link doris-fe mysql:5.7 /bin/bash
when the mysql container started, we can login the doris-fe in inside the mysql container:
root@d4df95bc2460:/# mysql -h doris-fe -P 9030 -uroot
Welcome to the MySQL monitor.  Commands end with ; or g.
Your MySQL connection id is 2
Server version: 5.1.0

Copyright (c) 2000, 2019, Oracle and/or its affiliates. All rights reserved.

Oracle is a registered trademark of Oracle Corporation and/or its
affiliates. Other names may be trademarks of their respective
owners.

Type 'help;' or 'h' for help. Type 'c' to clear the current input statement.

mysql> show databases;
+--------------------+
| Database           |
+--------------------+
| information_schema |
+--------------------+
1 row in set (0.03 sec)

mysql> clear
mysql> exit
Bye
root@d4df95bc2460:/# exit

6.2 启动be容器
sudo docker run  -d --name doris-be -p 9050:9050 -p 8040:8040 -p 9060:9060 -p 9070:9070
-v /home/lenmom/workspace/software/doris-docker-master/be/log:/home/palo/run/be/log
-v /home/lenmom/workspace/software/doris-docker-master/be/storage:/home/palo/run/be/data
-v /home/lenmom/workspace/software/doris-docker-master/be/conf:/home/palo/run/be/conf/
-v  /etc/localtime:/etc/localtime:ro
lenmom/doris:be-0.9.0
and if we can go into the doris-be container using command
sudo docker exec -it doris-be bash
after enter the container, we can see the be instance has been launched now.
6.3 set up cluster
sudo docker run -it --name mysql --link doris-fe mysql:5.7 /bin/bash
after the mysql instance started, we would enter the shell terminal, then login doris-fe using mysql-client
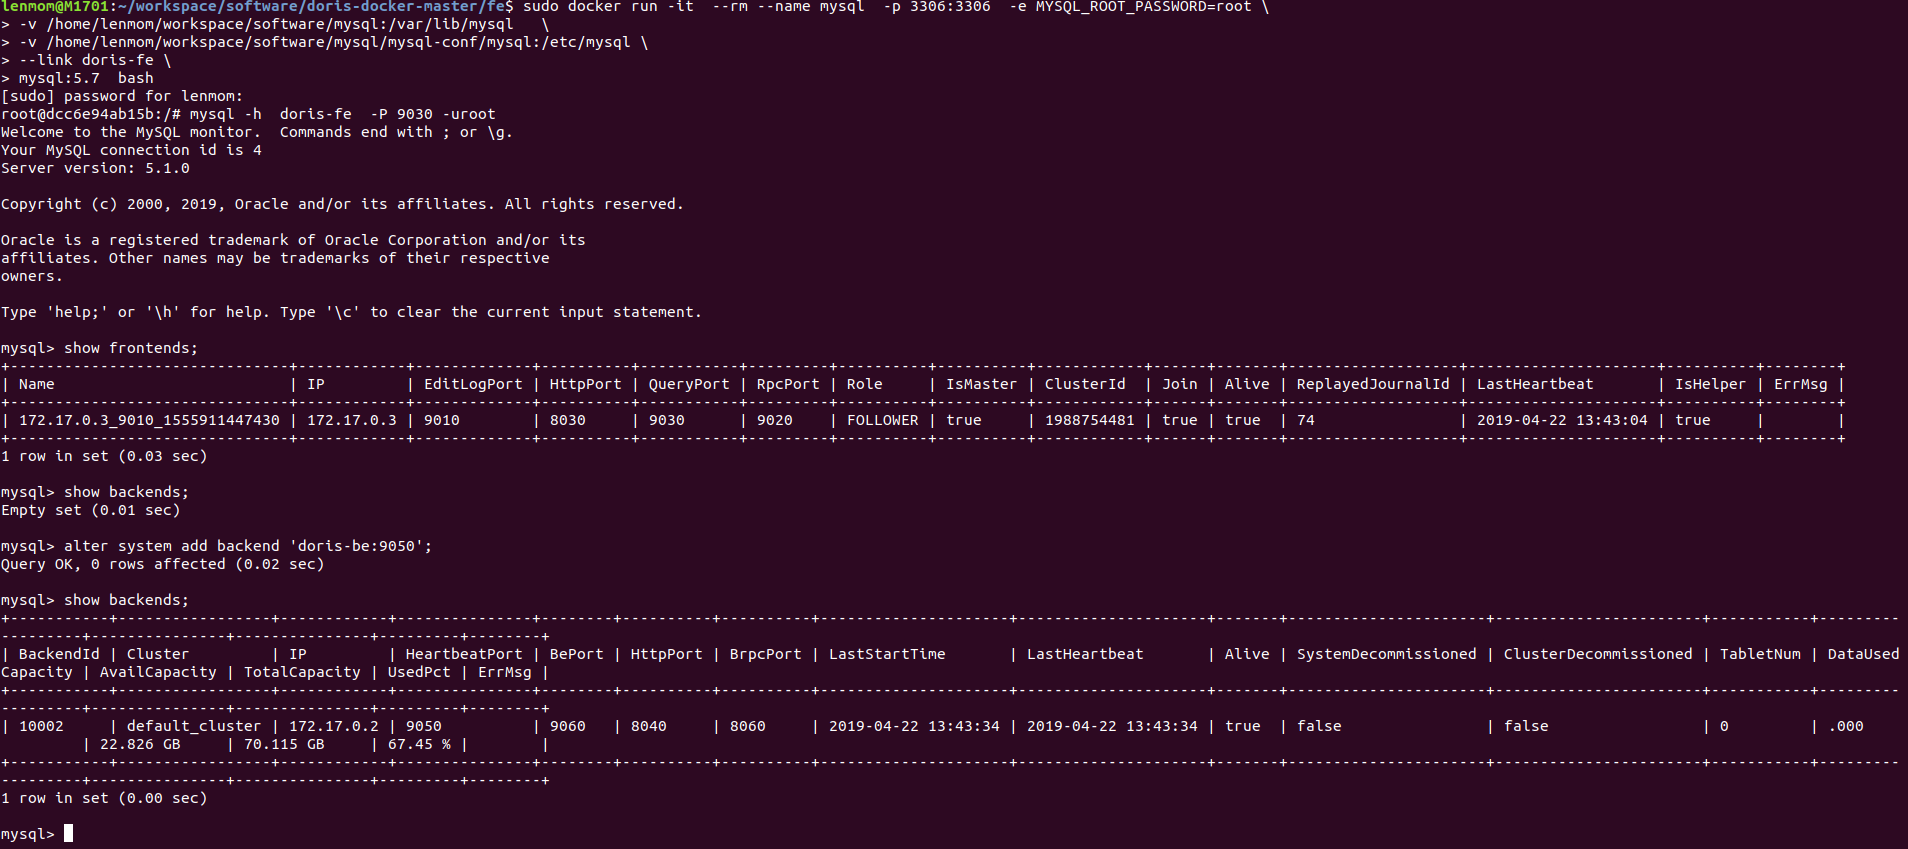
lenmom@M1701:~/workspace/software/doris-docker-master/fe$ sudo docker run -it  --rm --name mysql  -p 3306:3306  -e MYSQL_ROOT_PASSWORD=root
> -v /home/lenmom/workspace/software/mysql:/var/lib/mysql
> -v /home/lenmom/workspace/software/mysql/mysql-conf/mysql:/etc/mysql
> --link doris-fe
> mysql:5.7  bash
[sudo] password for lenmom:
root@dcc6e94ab15b:/# mysql -h  doris-fe  -P 9030 -uroot
Welcome to the MySQL monitor.  Commands end with ; or g.
Your MySQL connection id is 4
Server version: 5.1.0

Copyright (c) 2000, 2019, Oracle and/or its affiliates. All rights reserved.

Oracle is a registered trademark of Oracle Corporation and/or its
affiliates. Other names may be trademarks of their respective
owners.

Type 'help;' or 'h' for help. Type 'c' to clear the current input statement.

mysql> show frontends;
+-------------------------------+------------+-------------+----------+-----------+---------+----------+----------+------------+------+-------+-------------------+---------------------+----------+--------+
| Name                          | IP         | EditLogPort | HttpPort | QueryPort | RpcPort | Role     | IsMaster | ClusterId  | Join | Alive | ReplayedJournalId | LastHeartbeat       | IsHelper | ErrMsg |
+-------------------------------+------------+-------------+----------+-----------+---------+----------+----------+------------+------+-------+-------------------+---------------------+----------+--------+
| 172.17.0.3_9010_1555911447430 | 172.17.0.3 | 9010        | 8030     | 9030      | 9020    | FOLLOWER | true     | 1988754481 | true | true  | 74                | 2019-04-22 13:43:04 | true     |        |
+-------------------------------+------------+-------------+----------+-----------+---------+----------+----------+------------+------+-------+-------------------+---------------------+----------+--------+
1 row in set (0.03 sec)

mysql> show backends;
Empty set (0.01 sec)

mysql> alter system add backend 'doris-be:9050';
Query OK, 0 rows affected (0.02 sec)

mysql> show backends;
+-----------+-----------------+------------+---------------+--------+----------+----------+---------------------+---------------------+-------+----------------------+-----------------------+-----------+------------------+---------------+---------------+---------+--------+
| BackendId | Cluster         | IP         | HeartbeatPort | BePort | HttpPort | BrpcPort | LastStartTime       | LastHeartbeat       | Alive | SystemDecommissioned | ClusterDecommissioned | TabletNum | DataUsedCapacity | AvailCapacity | TotalCapacity | UsedPct | ErrMsg |
+-----------+-----------------+------------+---------------+--------+----------+----------+---------------------+---------------------+-------+----------------------+-----------------------+-----------+------------------+---------------+---------------+---------+--------+
| 10002     | default_cluster | 172.17.0.2 | 9050          | 9060   | 8040     | 8060     | 2019-04-22 13:43:34 | 2019-04-22 13:43:34 | true  | false                | false                 | 0         | .000             | 22.826 GB     | 70.115 GB     | 67.45 % |        |
+-----------+-----------------+------------+---------------+--------+----------+----------+---------------------+---------------------+-------+----------------------+-----------------------+-----------+------------------+---------------+---------------+---------+--------+
1 row in set (0.00 sec)

mysql>
Here, we have set up a cluster using the doris-fe and doris-be container instance which has just launched and you can can docker-compose or docker-swarm to set up more instacnes of nodes and setting up clusters based on docker.
Notes: if we want to login fe docker container in the host machine using mysql-client, we should make sure the mysql client is less than 8.*, or else ,we may get the error message when login 127.0.0.1 on the docker host via mysql-client.
mysql -h 127.0.0.1 -P 9030 -uroot -p
Enter password:
ERROR 1045 (28000): Access denied for user 'root' (using password: YES)
notes:
a). we can launch multiple be instance to set multiple be instance cluster using docker container.
b). Do make sure the host mahine's mysql-client version is less than 8.0* if we want to login the fe docker instance via mysql-client on the docker host machine.
c). The be docker instance should be launched before the fe docker instance, because when set up cluster via fe,the fe need to be aware of the existance of the be docker instacne.
d) when launch the fe docker instance, all the be docker instance should be linked by the fe docker instance.
Have fun with doris!