仅用于记录在分析netty源码的日志
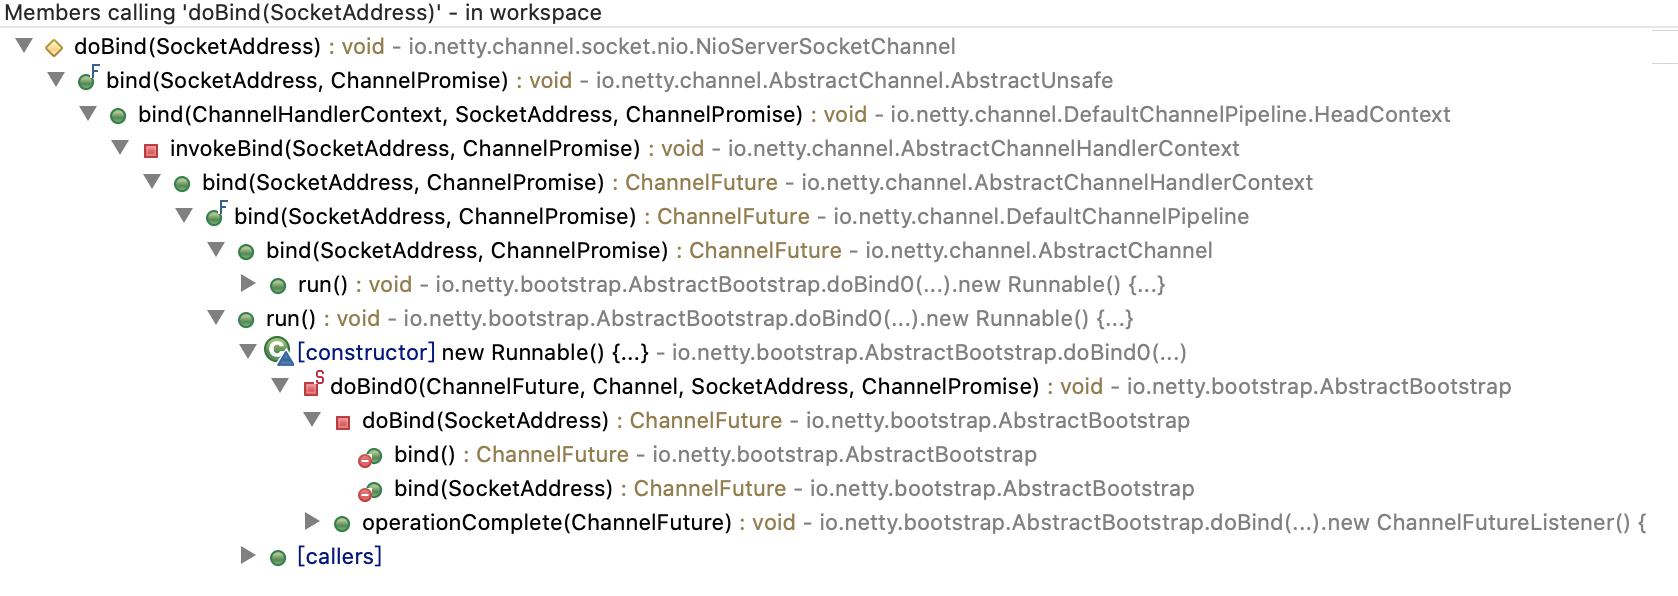
源码调用关系图
Netty Server示例
        EventLoopGroup boss = new NioEventLoopGroup(1);
        EventLoopGroup io = new NioEventLoopGroup();
        ServerBootstrap bootstrap = new ServerBootstrap();
        bootstrap.group(boss, io);
        bootstrap.channel(NioServerSocketChannel.class).childHandler(new ChannelInitializer<NioSocketChannel>() {
            @Override
            protected void initChannel(NioSocketChannel ch) throws Exception {

            }
        });
        bootstrap.bind(25001).sync().addListener(new ChannelFutureListener() {
            @Override
            public void operationComplete(ChannelFuture future) throws Exception {
                if (future.isSuccess()) {
                    System.out.println("启动成功");
                } else {
                    future.cause().printStackTrace();
                }
            }
        });
代码执行到bootstrap.bind(25001)时,netty内部的绑定端口如下:
AbstractBootstrap --> bind() --> doBind() --> doBind0()- NioServerSocketChannel的bind方法在父类AbstractChannel类,所以channel的调用关系:
AbstractChannel --> bind() DefaultChannelPipeline --> bind()AbstractChannelHandlerContext --> bind()HeadContext --> bind()AbstractChannel.AbstractUnsafe --> bind(),然后调用AbstractChannel --> doBind(),而他的实现类看下一步NioServerSocketChannel --> doBind()