前言
《DWR实现后台推送消息到Web页面》一文中已对DWR作了简介,并列出了集成步骤。本文中再一次使用到DWR,用以实现扫一扫登录功能。
业务场景
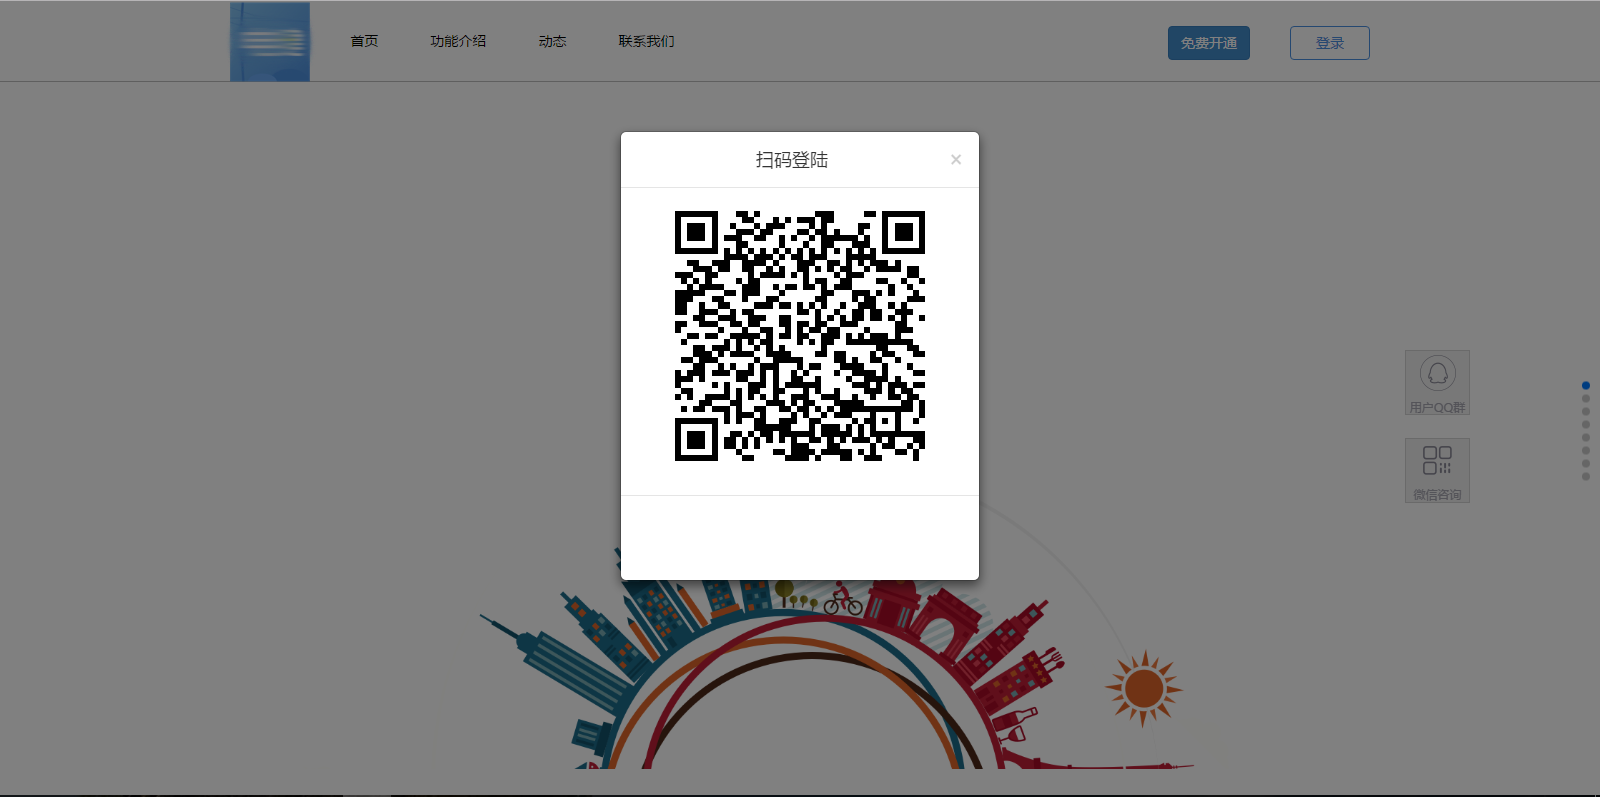
web端首页点击“登陆”按钮,弹出二维码,用户进入企业号应用后点击“扫一扫”按钮,扫描二维码后web端自动跳转到已登录界面。

主要技术
- DWR —— 后台调用前端JS实现comet技术
- 微信JSSDK —— 实现扫一扫功能
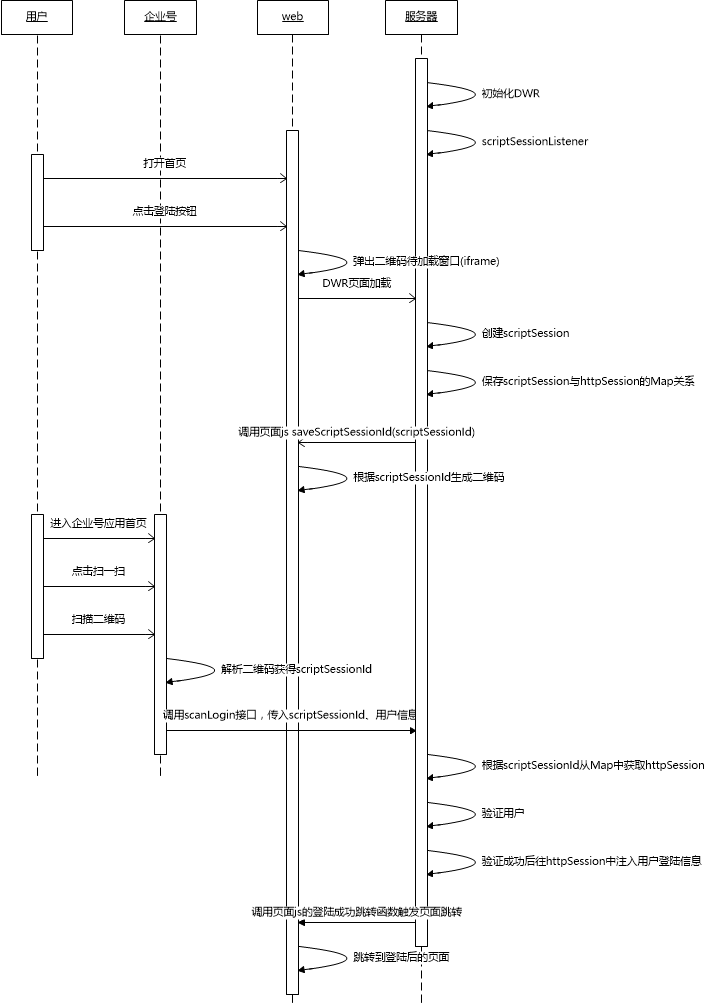
主要流程
备注
- 为了达到点击登陆按钮弹出二维码窗口时即刷新二维码,所以选择用iframe装载二维码;
- 为了控制指定浏览器跳转页面,所以后台必须要记录浏览器与服务器之间的httpSession实例;
- DWR自身不保存scriptSession和httpSession的关系,所以需要自己保存其对应关系;
实现步骤
1、导入jar包(若用maven则添加依赖关系)
地址: http://directwebremoting.org/dwr/downloads/index.html
2、编写ScriptSessionListener
public class DWRScriptSessionListener implements ScriptSessionListener {

    //维护一个Map key为ScriptSession的Id, value为HttpSession对象
    public static final Map<String, Map> httpMap = new HashMap<String, Map>();

    /**
     * ScriptSession创建事件
     */
    public void sessionCreated(ScriptSessionEvent event) {
      WebContext webContext = WebContextFactory.get();
      HttpSession httpSession = webContext.getSession();
      ScriptSession scriptSession = event.getSession();
      Map httpMapObj = new HashMap<>();
      httpMapObj.put("HttpSession", httpSession);
      httpMapObj.put("HttpServletRequest", webContext.getHttpServletRequest());
      httpMapObj.put("HttpServletResponse", webContext.getHttpServletResponse());
      httpMap.put(scriptSession.getId(), httpMapObj);
      System.out.println("httpSession: " + httpSession.getId() + " scriptSession: "
            + scriptSession.getId() + "is created!");

      //创建连接后触发前端保存ScriptSessionId
      DwrUtil t = new DwrUtil();
      List args = new ArrayList();
      args.add(scriptSession.getId());
      t.invokeJavascriptFunctionBySessionId(scriptSession.getId(), "saveScriptSessionId", args);
   }

    /**
     * ScriptSession销毁事件
     */
    public void sessionDestroyed(ScriptSessionEvent event) {
      ScriptSession scriptSession = event.getSession();
      Map httpMapObj = httpMap.remove(scriptSession.getId()); // 移除scriptSession
      HttpSession httpSession = (HttpSession)httpMapObj.get("HttpSession");
      // httpMap.remove(scriptSession.getId()); //移除scriptSession
      System. out.println( "httpSession: " + httpSession.getId() + " scriptSession: " + scriptSession.getId() + "is destroyed!");
    }
}
3、编写ScriptSessionManager
public class DWRScriptSessionManager extends DefaultScriptSessionManager {
   public DWRScriptSessionManager() {
      // 绑定一个ScriptSession增加销毁事件的监听器
      this.addScriptSessionListener(new DWRScriptSessionListener());
      System.out.println("bind DWRScriptSessionListener");
   }
}
4、在web.xml中增加ScriptSessionManager 的配置
<!-- DWR -->
<servlet>
    <servlet-name>dwr-invoker</servlet-name>
    <servlet-class>
        org.directwebremoting.servlet.DwrServlet
    </servlet-class>
    <init-param>
        <param-name>pollAndCometEnabled</param-name>
        <param-value>true</param-value>
    </init-param>
    <init-param>
         <param-name >org.directwebremoting.extend.ScriptSessionManager </param-name>
         <param-value >com.gzkit.service.dwr.DWRScriptSessionManager </param-value>
   </init-param>
</servlet>
<servlet-mapping>
    <servlet-name>dwr-invoker</servlet-name>
    <url-pattern>/dwr/*</url-pattern>
</servlet-mapping>
5、业务代码
/**
 * 扫一扫登录
 * @author:LiuZhuoJun
 * @Description: 如果登录成功则触发前端页面跳转,如果不成功则返回错误信息
 * @param account 用户账号
 * @param scriptSessionId
 * @return
 * @date:2016年11月4日
 */
@RequestMapping(value = "scanLogin")
@ResponseBody
public JkReturnJson scanLogin(String account, String scriptSessionId) {
   JkReturnJson jkReturnJson = new JkReturnJson();
   if(Utils.isBlank(account) || Utils.isBlank(scriptSessionId)){
      jkReturnJson.setStatusCode(ConstantsErrCode.JK_PARAM_ERR);
      jkReturnJson.setStatusMsg(ConstantsErrCode.JK_PARAM_ERR_MSG);
      jkReturnJson.setUserMsg("account、scriptSessionId字段为必需");
      return jkReturnJson;
   }
   /* 从httpMap中获取对应的httpSession */
   Map httpMapObj = DWRScriptSessionListener.httpMap.get(scriptSessionId);
   if(httpMapObj == null){
      jkReturnJson.setStatusCode(ConstantsErrCode.BUSSINESS_ERR);
      jkReturnJson.setStatusMsg("httpSession不存在");
      jkReturnJson.setUserMsg("二维码已失效,请刷新页面");
      return jkReturnJson;
   }
   HttpSession httpSession = (HttpSession)httpMapObj.get("HttpSession");
   HttpServletRequest httpServletRequest = (HttpServletRequest)httpMapObj.get("HttpServletRequest");

   /* 根据传入的account获取对应用户对象 */
   /* 此处代码省略 */

   /* 将用户对象设入httpSession中 */
   httpSession.setAttribute(ResourceUtil.LOCAL_CLINET_USER, user);

   /* 登录成功触发前端跳转页面 */
   DwrUtil t =  new DwrUtil();
   List args = new ArrayList();
   t.invokeJavascriptFunctionBySessionId(scriptSessionId,"loginSuccess",args);

   jkReturnJson.setUserMsg("登录成功");
   return jkReturnJson;
}
6、web首页
6.1 首页二维码iframe结构
<!-- 二维码模态框 --> <div class="modal fade" id="qrcodeModal" tabindex="-1" role="dialog" aria-labelledby="myModalLabel" aria-hidden="true"> <div class="modal-dialog" style="top: 100px; 360px" > <div class="modal-content" style=" 360px; height:450px"> <div class="modal-header"> <button type="button" class="close" data-dismiss="modal"><span aria-hidden="true">×</span><span class="sr-only">Close</span></button> <h4 class="modal-title text-center " id="myModalLabel">扫码登陆</h4> </div> <div class="modal-body"> <iframe id="qrcodeframe" width="100%" height="270px" frameborder="0"></iframe> <!-- <div class="center-block" style="250px;height:250px"></div> --> <!-- <img src="webpage/homePage/image/erweima.jpg" class="center-block" alt="Responsive image">--> </div> <div class="modal-footer"> <p class="text-center">请关注电建宝应用并使用"扫一扫"登陆电建宝管理后台</p> </div> </div> </div> </div>
6.2 二维码页面
注意要引入/dwr/engine.js和/dwr/util.js才能实现页面与后台的DWR连接。(js是动态生成的,无需导入js文件)
<body>
<div id="qrcode" style="margin: auto auto;  250px;"></div>
<script type='text/javascript' src='/dwr/engine.js'></script>
<script type='text/javascript' src='/dwr/util.js'></script>
<script type="text/javascript" src="/plug-in/mobile/third/qrcode/jquery.qrcode.min.js"></script>
<script type="text/javascript" src="/webpage/homePage/js/qrcode.js"></script>
</body>
6.3 二维码页面js
$(function(){
    initDwr();
    //设置每隔5分钟刷新二维码
    setInterval("reloadPage()",5*60*1000);
});

//初始化dwr
function initDwr(){
    dwr.engine.setActiveReverseAjax(true);
}

//保存scriptSessionId
function saveScriptSessionId(scriptSessionId){
   $("#qrcode").html("");
   $("#qrcode").qrcode({ 250,height: 250,text: scriptSessionId});
}

//登录成功操作
function loginSuccess(){
   window.parent.location.href = "/loginController.do?login";
}

//刷新页面
function reloadPage(){
   location.reload();
}
7、企业号调用微信SDK实现扫一扫功能
代码略
相关链接:
DWR官网
http://directwebremoting.org/dwr/
DWR入门讲解(前端)
http://directwebremoting.org/dwr/introduction/getting-started.html
DWR入门讲解(后台)
http://directwebremoting.org/dwr/documentation/server/javaapi.html
DWR下载地址
http://directwebremoting.org/dwr/downloads/index.html
DWR JavaDoc
http://directwebremoting.org/dwr/javadoc/
微信JSSDK
http://qydev.weixin.qq.com/wiki/index.php?title=%E5%BE%AE%E4%BF%A1JS-SDK%E6%8E%A5%E5%8F%A3
附录一 DwrUtil.java
public class DwrUtil {
   /**
    * 调用页面javascript函数
    * @param functionName
    * @param args
    */
   public void invokeJavascriptFunction (String _funcName, List _args){
      final String funcName = _funcName;
      final List args = _args;
      Browser.withAllSessions(new Runnable(){
            private ScriptBuffer script = new ScriptBuffer();
            public void run(){
               //拼接javascript
               script = script.appendScript(funcName+"(");
               for(int i=0; i<args.size(); i++){
                  if(i != 0){
                     script = script.appendScript(",");
                  }
                  script = script.appendData(args.get(i));
               }
               script.appendScript(")");
               //System.out.println(script.toString());

                Collection<ScriptSession> sessions = Browser.getTargetSessions();
                for (ScriptSession scriptSession : sessions){
                    scriptSession.addScript(script);
                }
            }
        });
   }

   public void invokeJavascriptFunctionBySessionId (String sessionId, String _funcName, List _args){
      final String funcName = _funcName;
      final List args = _args;
      Browser.withSession(sessionId, new Runnable(){
            private ScriptBuffer script = new ScriptBuffer();
            public void run(){
               //拼接javascript
               script = script.appendScript(funcName+"(");
               for(int i=0; i<args.size(); i++){
                  if(i != 0){
                     script = script.appendScript(",");
                  }
                  script = script.appendData(args.get(i));
               }
               script.appendScript(")");
               //System.out.println(script.toString());
               Collection<ScriptSession> sessions = Browser.getTargetSessions();
                for (ScriptSession scriptSession : sessions){
                    scriptSession.addScript(script);
                }
            }
        });
   }
}
附录二 服务器使用nginx导致DWR的js无法加载的解决办法
nginx默认是开启代理缓冲的,而DWR的js是动态生成的,无法缓冲。要解决dwr js加载问题需在nginx配置中增加以下语句
proxy_buffering off;