MyBatis
是支持普通 SQL查询,存储过程和高级映射的优秀持久层框架。MyBatis 消除了几乎所有的JDBC代码和参数的手工设置以及结果集的检索。MyBatis 使用简单的 XML或注解用于配置和原始映射,将接口和 Java 的POJOs(Plain Ordinary Java Objects,普通的 Java对象)映射成数据库中的记录。
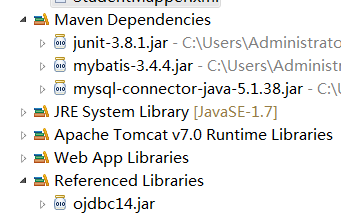
1.首先搭建一个maven项目,引入oracle和mysql配置jar包,本文主要演示mysql
2.在数据库中创建表与数据
CREATE TABLE `student` (
`studentno` int(11) NOT NULL ,
`name` char(10) default NULL,
PRIMARY KEY (`studentno`)
) ENGINE=InnoDB DEFAULT CHARSET=utf8 COMMENT='姓名';
INSERT INTO `student` VALUES ('1', '张三');
INSERT INTO `student` VALUES ('2', '李四');
3.创建表的实体类
public class Student {
    private int studentno;//学生编号
    private String name;//学生姓名
    public int getStudentno() {
        return studentno;
    }
    public void setStudentno(int studentno) {
        this.studentno = studentno;
    }
    public String getName() {
        return name;
    }
    public void setName(String name) {
        this.name = name;
    }

}
4.创建接口StudentMapper和StudentMapper.xml
接口StudentMapper:
public interface StudentMapper {
    public Student selectStudent(int studentno);
}
StudentMapper.xml
<?xml version="1.0" encoding="UTF-8" ?>
<!DOCTYPE mapper
  PUBLIC "-//mybatis.org//DTD Mapper 3.0//EN"
  "http://mybatis.org/dtd/mybatis-3-mapper.dtd">

<mapper namespace="com.qyxy.mapper.StudentMapper">

   <select id="selectStudent" resultType="Student">
    select * from student where studentno = #{studentno}
  </select>

</mapper>
注意:接口中的方法和select中id的名字是一致的
5.接数据库的文件db.properties
jdbc.driverClassName=com.mysql.jdbc.Driver//根据自己数据库,自己改
jdbc.url=jdbc:mysql://localhost:3306/hello//根据自己数据库,自己改
jdbc.username=root//根据自己数据库,自己改
jdbc.password=123456//根据自己数据库,自己改
6.配置config.xml文件(mybatis核心)
<?xml version="1.0" encoding="UTF-8" ?>
<!DOCTYPE configuration
  PUBLIC "-//mybatis.org//DTD Config 3.0//EN"
  "http://mybatis.org/dtd/mybatis-3-config.dtd">
<configuration>

	<!-- properties属性配置文件的引入 -->
	<properties resource="db.properties"></properties>
	<!-- setting设置,调整mybaits运行行为 -->
	<settings>
	  <!-- 匹配下划线到驼峰式命名法 -->
	  <setting name="mapUnderscoreToCamelCase" value="true"/>
	  <setting name="safeRowBoundsEnabled" value="false"/>
	  <setting name="cacheEnabled" value="true"/>
	  <setting name="lazyLoadingEnabled" value="true"/>
	  <setting name="multipleResultSetsEnabled" value="true"/>
	  <setting name="useColumnLabel" value="true"/>
	  <setting name="useGeneratedKeys" value="false"/>
	  <setting name="autoMappingBehavior" value="PARTIAL"/>
	  <setting name="autoMappingUnknownColumnBehavior" value="WARNING"/>
	  <setting name="defaultExecutorType" value="SIMPLE"/>
	  <setting name="defaultStatementTimeout" value="25"/>
	  <setting name="defaultFetchSize" value="100"/>
	  <setting name="localCacheScope" value="SESSION"/>
	  <setting name="jdbcTypeForNull" value="OTHER"/>
	  <setting name="lazyLoadTriggerMethods" value="equals,clone,hashCode,toString"/>
	</settings>
	<!-- 类起别名 -->
	<typeAliases>
		<!-- <typeAlias type="com.qyxy.entity.Dept" alias="Dept"/> -->
		<package name="com.qyxy.entity"/>
	</typeAliases>
	<!-- 设置要使用的数据库环境 -->
	<environments default="mysql">
		<environment id="mysql">
			<transactionManager type="JDBC" />
			<dataSource type="POOLED">
				<property name="driver" value="${jdbc.driverClassName}" />
				<property name="url" value="${jdbc.url}" />
				<property name="username" value="${jdbc.username}" />
				<property name="password" value="${jdbc.password}" />
			</dataSource>
		</environment>

	</environments>

	<!-- 定义不同的数据库厂商标识 -->
	<databaseIdProvider type="DB_VENDOR">
	  <property name="SQL Server" value="sqlserver"/>
	  <property name="DB2" value="db2"/>
	  <property name="Oracle" value="oracle" />
	  <property name="MySql" value="mysql" />
	</databaseIdProvider>

	<!-- 映射的sql文件 -->
	<mappers>
		<mapper resource="StudentMapper.xml" />

	</mappers>
</configuration>
所有的配置,都已经弄好,下面开始编写测试类测试
7.测试类
public class StudentTest {
public static void main(String[] args) throws IOException {
// 指定mybatis配置文件路径和文件名
String resource = "mybatis-config.xml";
InputStream inputStream = Resources.getResourceAsStream(resource);
SqlSessionFactory sqlSessionFactory = new SqlSessionFactoryBuilder()
.build(inputStream);
SqlSession session = sqlSessionFactory.openSession();
try {
// session.selectOne(配置文件中namespace.id,传入参数的值)
//通过接口,调用方法(接口名和namespace名称保持一致,id和方法名保持一致)
StudentMapper mapper = session.getMapper(StudentMapper.class);
Student student = mapper.selectStudent(2);
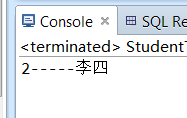
System.out.println(student.getStudentno()+"-----"+student.getName());
} finally {
session.close();
}
}
}
8.测试结果: