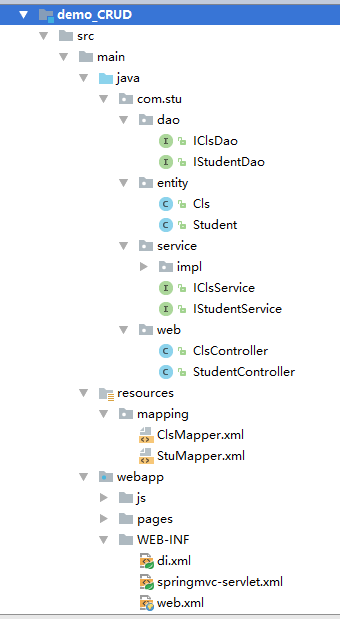
1、包结构
2、配置web.xml
<!DOCTYPE web-app PUBLIC
 "-//Sun Microsystems, Inc.//DTD Web Application 2.3//EN"
 "http://java.sun.com/dtd/web-app_2_3.dtd" >

<web-app xmlns:xsi="http://www.w3.org/2001/XMLSchema-instance"
         xmlns="http://xmlns.jcp.org/xml/ns/javaee"
         xsi:schemaLocation="http://xmlns.jcp.org/xml/ns/javaee http://xmlns.jcp.org/xml/ns/javaee/web-app_3_1.xsd"
         id="WebApp_ID" version="3.1">
  <display-name>demo_CRUD</display-name>

  <welcome-file-list>
    <welcome-file>index.jsp</welcome-file>
    <welcome-file>index.html</welcome-file>
  </welcome-file-list>

  <!--配置Spring前端过滤器,处理中文乱码-->
  <filter>
    <filter-name>characterEncodingFilter</filter-name>
    <filter-class>org.springframework.web.filter.CharacterEncodingFilter</filter-class>
    <init-param>
      <param-name>encoding</param-name>
      <param-value>UTF-8</param-value>
    </init-param>
    <init-param>
      <param-name>forceEncoding</param-name>
      <param-value>true</param-value>
    </init-param>
  </filter>

  <filter-mapping>
    <filter-name>characterEncodingFilter</filter-name>
    <url-pattern>/*</url-pattern>
  </filter-mapping>

  <!--配置Spring MVC核心控制器-->
  <servlet>
    <!--名称 -->
    <servlet-name>springmvc</servlet-name>
    <!-- Servlet类 -->
    <servlet-class>org.springframework.web.servlet.DispatcherServlet</servlet-class>
    <!-- 启动顺序,数字越小,启动越早 -->
    <load-on-startup>1</load-on-startup>
    <init-param>
      <!--SpringMVC配置参数文件的位置 -->
      <param-name>contextConfigLocation</param-name>
      <!--默认名称为ServletName-servlet.xml -->
      <param-value>
        /WEB-INF/springmvc-servlet.xml,
        /WEB-INF/di.xml
      </param-value>
    </init-param>
  </servlet>

  <!--所有请求都会被springmvc拦截 -->
  <servlet-mapping>
    <servlet-name>springmvc</servlet-name>
    <url-pattern>/</url-pattern>
  </servlet-mapping>

</web-app>
3、SpringMVC的配置:springmvc-servlet.xml
<?xml version="1.0" encoding="UTF-8"?>
<beans xmlns="http://www.springframework.org/schema/beans"
    xmlns:xsi="http://www.w3.org/2001/XMLSchema-instance"
    xmlns:mvc="http://www.springframework.org/schema/mvc"
    xsi:schemaLocation="http://www.springframework.org/schema/beans
    http://www.springframework.org/schema/beans/spring-beans-4.3.xsd
    http://www.springframework.org/schema/mvc
    http://www.springframework.org/schema/mvc/spring-mvc-4.3.xsd
    ">

    <!-- Spring MVC不处理静态资源 -->
    <mvc:default-servlet-handler />
    <!-- 支持mvc注解驱动 -->
    <mvc:annotation-driven />

    <!-- 视图解析器 -->
    <bean class="org.springframework.web.servlet.view.InternalResourceViewResolver"
            id="internalResourceViewResolver">
        <!-- 前缀 -->
        <property name="prefix" value="/" />
        <!-- 后缀 -->
        <property name="suffix" value=".jsp" />
    </bean>

    <!-- 全局异常处理 -->
    <bean
            class="org.springframework.web.servlet.handler.SimpleMappingExceptionResolver">
        <!-- 定义默认的异常处理页面,当该异常类型的注册时使用 -->
        <property name="defaultErrorView" value="error"></property>
        <!-- 定义异常处理页面用来获取异常信息的变量名,默认名为exception -->
        <property name="exceptionAttribute" value="ex"></property>
        <!-- 定义需要特殊处理的异常,用类名或完全路径名作为key,异常也页名作为值 -->
        <property name="exceptionMappings">
            <props>
                <prop key="java.lang.Exception">error</prop>
            </props>
        </property>
    </bean>

    <!-- 配置文件上传 -->
    <!--200*1024*1024即200M resolveLazily属性启用是为了推迟文件解析,以便捕获文件大小异常
    <bean id="multipartResolver"
          class="org.springframework.web.multipart.commons.CommonsMultipartResolver">
        <property name="maxUploadSize" value="209715200" />
        <property name="maxUploadSizePerFile" value="2097152"/>
        <property name="defaultEncoding" value="UTF-8" />
        <property name="resolveLazily" value="true" />
    </bean>
 -->
</beans>
4、di.xml配置:
<?xml version="1.0" encoding="UTF-8"?> <beans xmlns="http://www.springframework.org/schema/beans" xmlns:xsi="http://www.w3.org/2001/XMLSchema-instance" xmlns:aop="http://www.springframework.org/schema/aop" xmlns:tx="http://www.springframework.org/schema/tx" xmlns:context="http://www.springframework.org/schema/context" xsi:schemaLocation="http://www.springframework.org/schema/beans http://www.springframework.org/schema/beans/spring-beans-4.3.xsd http://www.springframework.org/schema/aop http://www.springframework.org/schema/aop/spring-aop-4.3.xsd http://www.springframework.org/schema/tx http://www.springframework.org/schema/tx/spring-tx-4.3.xsd http://www.springframework.org/schema/context http://www.springframework.org/schema/context/spring-context-4.3.xsd "> <!-- 开启注解 --> <context:annotation-config/> <!-- 设置扫描范围 --> <context:component-scan base-package="com.stu"/> <!-- 设置自动代理 --> <aop:aspectj-autoproxy/> <!-- 创建数据源(c3p0)--> <bean id="dataSource" class="com.mchange.v2.c3p0.ComboPooledDataSource" destroy-method="close"> <property name="driverClass" value="com.mysql.jdbc.Driver" /> <property name="jdbcUrl" value="jdbc:mysql://localhost:3306/mydb?useUnicode=true&characterEncoding=utf8" /> <property name="user" value="root" /> <property name="password" value="root"/> </bean> <!-- 配置SqlSessionFactory对象 --> <bean id="sqlSessionFactory" class="org.mybatis.spring.SqlSessionFactoryBean"> <!-- 注入数据库连接池 --> <property name="dataSource" ref="dataSource"/> <!-- 扫描entity包 使用别名 --> <property name="typeAliasesPackage" value="com.stu.entity"/> <!-- 扫描sql配置文件:mapping需要的xml文件 --> <property name="mapperLocations" value="classpath:mapping/*.xml"/> </bean> <!-- DAO接口所在包名,Spring会自动查找其下的类 --> <bean class="org.mybatis.spring.mapper.MapperScannerConfigurer"> <property name="basePackage" value="com.stu.dao"/> <property name="sqlSessionFactoryBeanName" value="sqlSessionFactory"></property> </bean> <!-- (事务管理)transaction manager, use JtaTransactionManager for global tx --> <bean id="transactionManager" class="org.springframework.jdbc.datasource.DataSourceTransactionManager"> <property name="dataSource" ref="dataSource"/> </bean> <!-- 设置事务的传播级别 --> <tx:advice id="txAdvice" transaction-manager="transactionManager"> <tx:attributes> <tx:method name="*" propagation="REQUIRED"/> </tx:attributes> </tx:advice> <!-- 构建切面 --> <aop:config> <aop:pointcut expression="execution(* com.stu.service..*.*(..))" id="mycut"/> <aop:advisor advice-ref="txAdvice" pointcut-ref="mycut"/> </aop:config> </beans>
配置好这三个文件之后,我们就可以动手做正事了!!
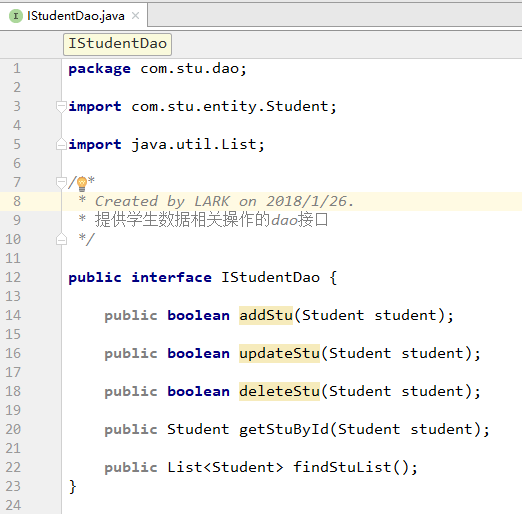
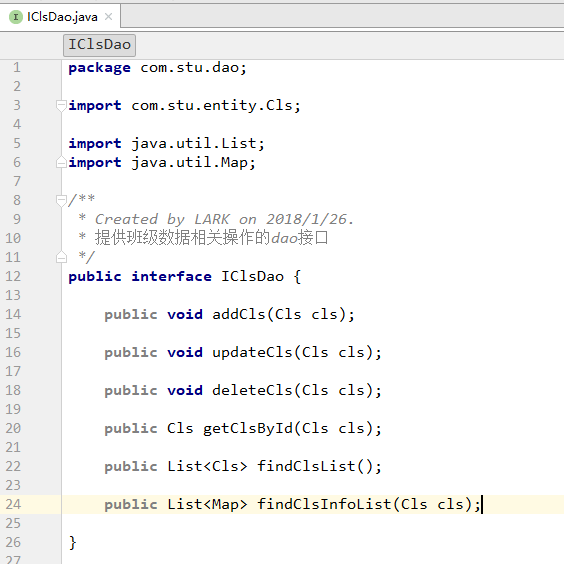
Dao接口代码:
然后是Service部分代码:
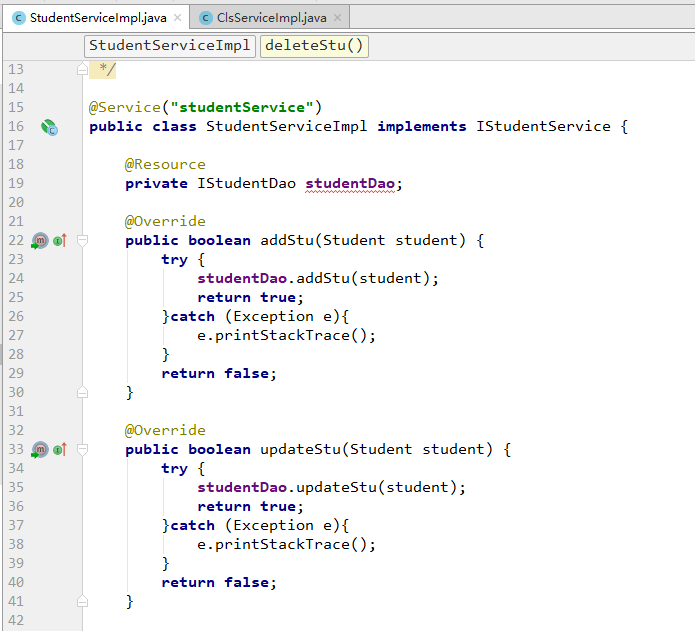

我们可以看到@Resource引入Dao层依赖的时候,会有报错,但其实这不要紧,这是Idea自己干的事,可以忽略这个报错。
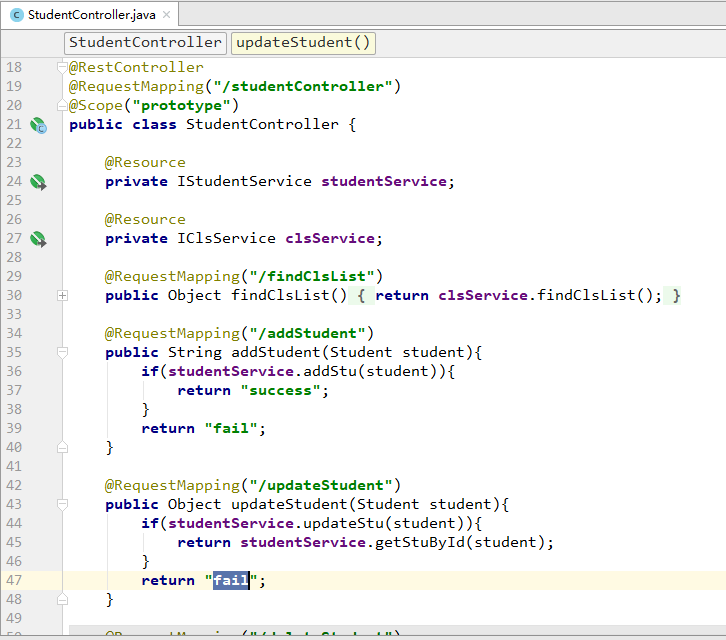
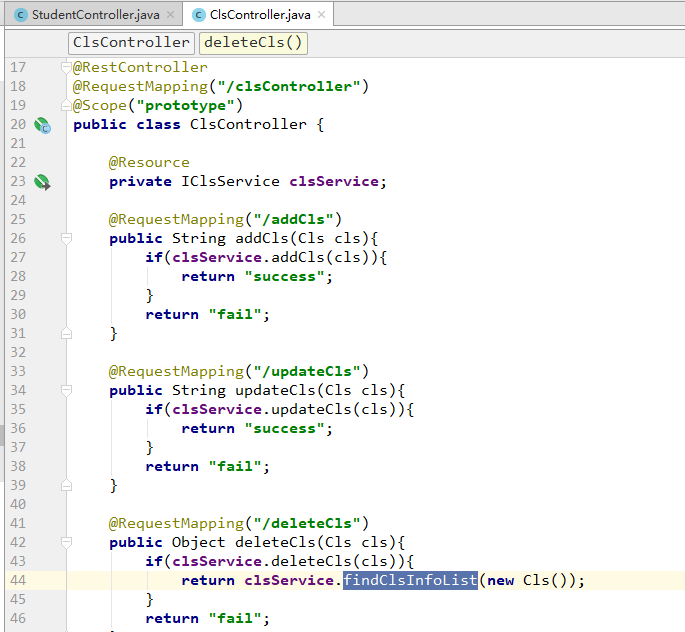
接下来我们看Controller的部分代码:
我们启动服务,看看,能不能取得数据:

数据成功获取,Success!