一共9种选择器:
id选择器、class选择器、标签选择器(前三种用的多,后面的很少用)、id层级选择器、class层级选择器、标签层级选择器、id组合选择器、class组合选择器、属性选择器
三种引入css的方式:
1、在body标签内部通过style属性,来给标签设置css样式
<div style="height: 100px; 100px;border: red 1px solid"></div>
2、head中增加style标签,在style标签内部,通过选择器为目标html配置css样式
第一种:id选择器(只能有一个值,不能有重复值):通过#i1引用
#i1{
    height: 100px;
     100px;
    border: red 1px solid;
}
body中<div id="i1"></div>
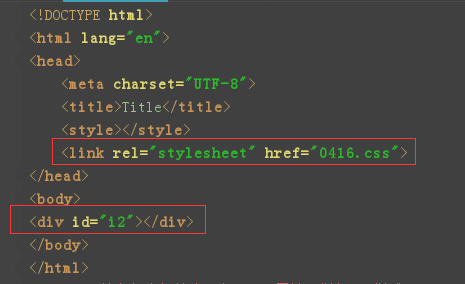
3、引入css,右键新建一个Stylesheet文件,通过编写样式表文件,用link引入到当前html中
<div id="i2"></div>
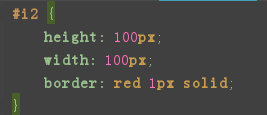
把下图的内容存到0416.css文件里
标签中style优先级最高,其他css样式由下而上依次查找
<div id="i1" style="height: 100px; 100px;background-color: blue"></div> # 优先级最高
<style>
     #i1{
        height: 100px;
         100px;
        background-color: red;
    }
</style>
<link rel="stylesheet" href="0415.css"> # 这个和上个css样式相比,谁在下面谁优先级高
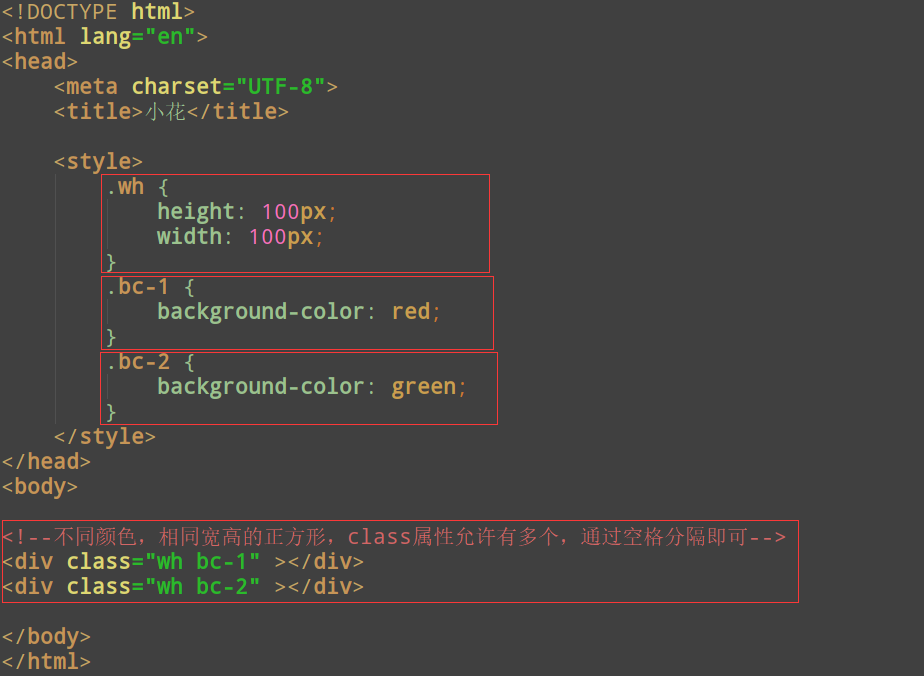
第二种:class选择器(值可以重复):通过.c1引用

不同颜色,相同宽高的正方形,class属性允许有多个,通过空格分隔即可
第三种:标签选择器:通过div 引用(第一个红框div后面有个空格)

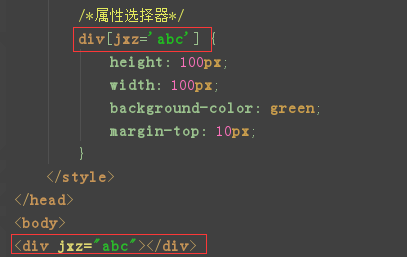
第四种:属性选择器:通过div[jxz='abc']来引用
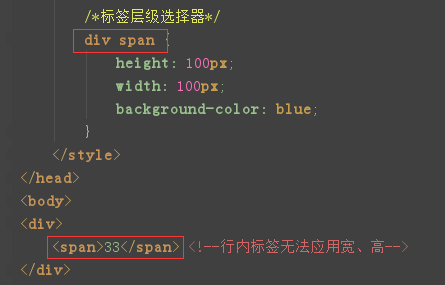
第五种:标签层级选择器:通过div span引用(第一个红框span后面有个空格),行内标签无法应用宽、高,得输入值
第六种:class层级选择器:套两层div,第二个div里输入class="c2",通过.c2 span引用

第七种:id层级选择器:套两层div,第二个div里输入id="i1",通过#i1 span引用

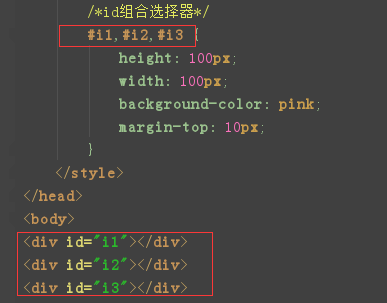
第八种:id组合选择器:多个div,每个div里有一个id,通过#i1,#i2,#i3引用
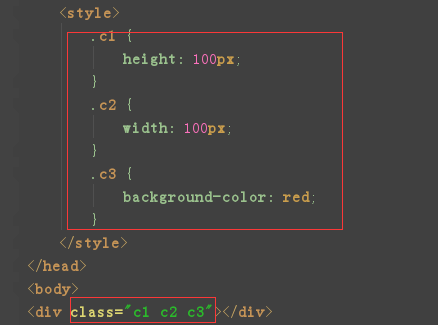
第九种:class组合选择器:多个class,每个div里有一个class,通过.c1,.c2,.c3引用

一个class引用三个样式表
css属性:
height 高度,width 宽度,background-color 背景色
<div style="height: 100px; 100%;background-color: blue"></div>
font-size 字体大小
<div style="height: 100px; 100%;font-size: 100px">大师兄</div>
font-weight 字体粗细,bolder比bold还粗一些
<div style="height: 100px; 100%;font-weight: bolder">大师兄</div>
border: red 1px solid,border是外边框,红色1px,实线
<div style="height: 100px; 100px;border: red 1px solid">大师兄</div>
text-align: center 水平方向居中
<div style="height: 100px; 100px;border: red 1px solid;text-align: center">大师兄</div>
line-height: 100px 垂直居中
    <style>
        .c1{
            height: 100px;
             100px;
            border: red 1px solid;
            text-align: center;
            line-height: 100px;
        }
    </style>
</head>
<body>
<div class="c1">大师兄</div>
</body>
float: left 向左飘
   <style>
        .c1 {
            height: 100px;
             100px;
            border: red 1px solid;
            float: left;
        }
    </style>
</head>
<body>
<div class="c1"></div>
<div class="c1"></div>
<div class="c1"></div>
</body>
float: right 向右飘
   <style>
        .c1 {
            height: 100px;
             100px;
            border: red 1px solid;
            float: right;
        }
    </style>
</head>
<body>
<div class="c1"></div>
<div class="c1"></div>
<div class="c1"></div>
</body>
display: block 属性 行内标签转换成块级标签
<span style="height: 100px; 100px;border: 1px solid;display: block"></span>
display: inline 加入文案 块级标签转换成行内标签

<div style="display: inline">哈哈哈</div>
display: inline-block 行内标签和块级标签兼有
        .dis-inline-block {
            display: inline-block;
        }
    </style>
</head>
<body>
<div class="dis-inline-block wh">既是行内标签也是块级</div>
<span style="height: 100px; 100px;border: 1px solid;display: inline-block"></span>
display: block 块级标签转成行内标签
        .dis-block {
            display: block;
        }
    </style>
</head>
<body>
<!--<div class="dis wh">块级div变成行内标签</div>-->
<div class="dis-block wh">行内标签变成块级div</div>
<!--行内标签必须自己有内容,无法应用宽、高、外边距、内边距-->
<span style="height: 100px; 100px;background-color: green">435</span>
display none 隐藏标签
<span style="height: 100px; 100px;border: 1px solid;display: none"></span>
margin 外边距 外边距针对自身以外进行增长 margin-top,margin-left,margin-right,margin-bottom
<div style="height: 100px; 100%;border: red 1px solid">
    <div style="height: 70px; 70px;margin-top: 5px"></div>
</div>
padding 内边距 内边距针对自身进行增长 padding-top,padding-left,padding-right,padding-bottom
<div style="height: 100px; 100%;border: red 1px solid">
    <div style="height: 70px; 70px;background-color: blue;padding-bottom: 5px"></div>
</div>
position fixed 位置固定
<body style="margin: 0"> # margin: 0 让body贴边
position: fixed 位置固定,拖动滚动条也不会变化,top: 0;left: 0;right: 0 完全撑开顶到头
<div style="height: 48px;position: fixed;top: 0;left: 0;right: 0;text-align:center;line-height: 48px">巨蟹座</div>
<div style="height: 1000px;margin-top: 48px">5555</div> # height: 1000px 控制滚动条,margin-top: 48px 露出文案5555
position relative和absolute连用
<div style="height: 500px; 500px;border: red 1px solid;position: relative">
    <div style="height: 50px; 50px;right: 0;bottom: 0;position: absolute"></div>
    <div style="height: 50px; 50px;right: 0;top: 0;position: absolute"></div>
    <div style="height: 50px; 50px;left: 0;top: 0;position: absolute"></div>
    <div style="height: 50px; 50px;left: 0;bottom: 0;position: absolute"></div>
</div>
z-index 层级关系,分层后通过z-index来记录层级关系,z-index值大的优先显示,可以在源码里修改z-index的值
<div style="height: 100px; 100px;border: 1px solid;position:relative;">
    <div style="height: 100px; 100px;position: absolute;z-index: 1"></div>
    <div style="height: 100px; 100px;position: absolute;z-index: 2"></div>
</div>
cursor: pointer 鼠标悬浮的小手
<input type="button" value="登录" style="cursor: pointer;">
<input type="button" value="登录" style="cursor: move;">
<input type="button" value="登录" style="cursor: crosshair;"> # cursor: crosshair 截图
overflow
overflow: auto 自动增加滚动条
<div style="height: 100px; 100px;overflow: auto"></div>
overflow: hidden 超出部分自动截取
<div style="height: 100px; 100px;overflow: hidden"></div>
overflow: scroll 出现滚动条
<div style="height: 1000px; 1000px;overflow: scroll">
    <img src="logo.jpg">
</div>
hover属性 当鼠标移到上面后,设置其样式
        .c1{
            height: 100px;
             100px;
            background-color: blue;
        }
        .c1:hover{
            background-color: red;
        }
    </style>
</head>
<body>
<div class="c1"></div>
background 是针对背景一些样式设置
background-image 背景图片
background-image 背景图片,图片大小如果小于div的大小,则无限堆叠,水平垂直都堆叠
<div style="height: 1000px; 100%;background-image: url('logo.jpg')"></div>
background-repeat: 控制是否堆叠
background-repeat: no-repeat 不堆叠
<div style="height: 1000px; 100%;background-image: url('logo.jpg');background-repeat: no-repeat"></div>
background-repeat: repeat-x 横向堆叠
<div style="height: 1000px; 100%;background-image: url('logo.jpg');background-repeat: repeat-x"></div>
background-repeat: repeat-y 纵向堆叠
<div style="height: 1000px; 100%;background-image: url('logo.jpg');background-repeat: repeat-y"></div>
background-position-x: 10px # 横向移动图片
background-position-y: 10px # 纵向移动图片
