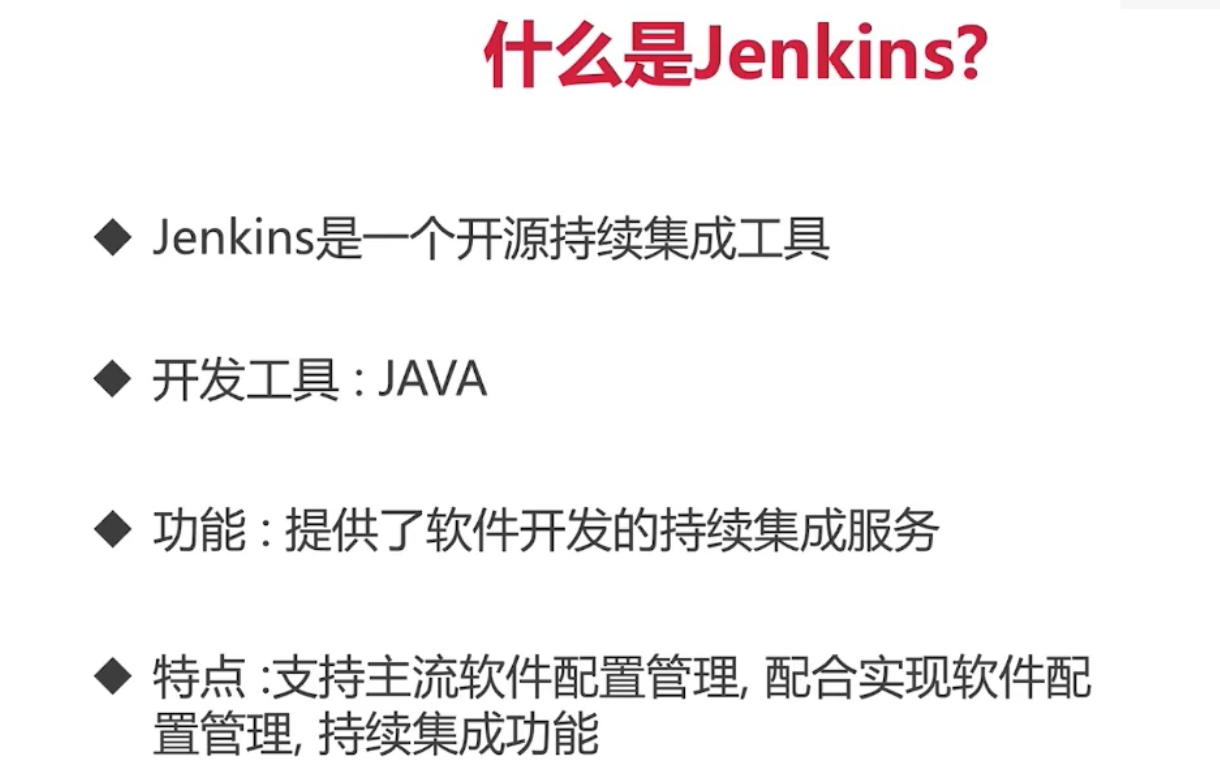
一、什么是 jenkins


二、Jenkins 的安装配置
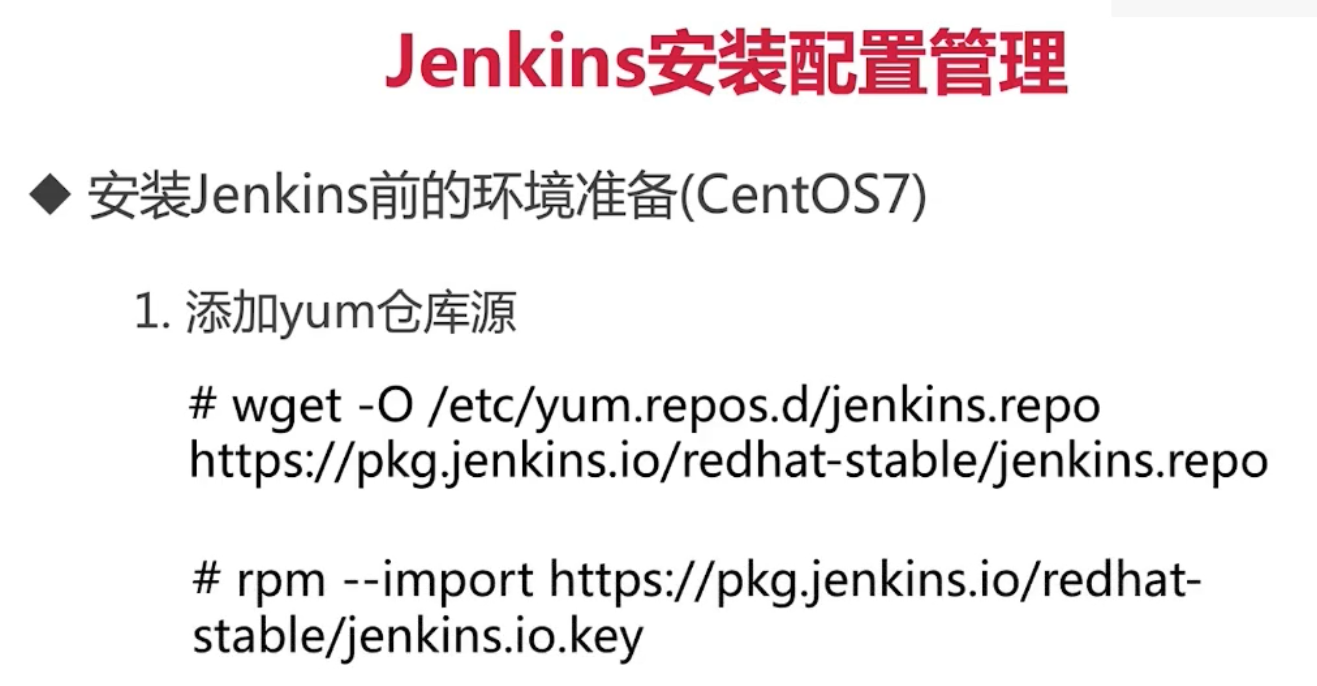
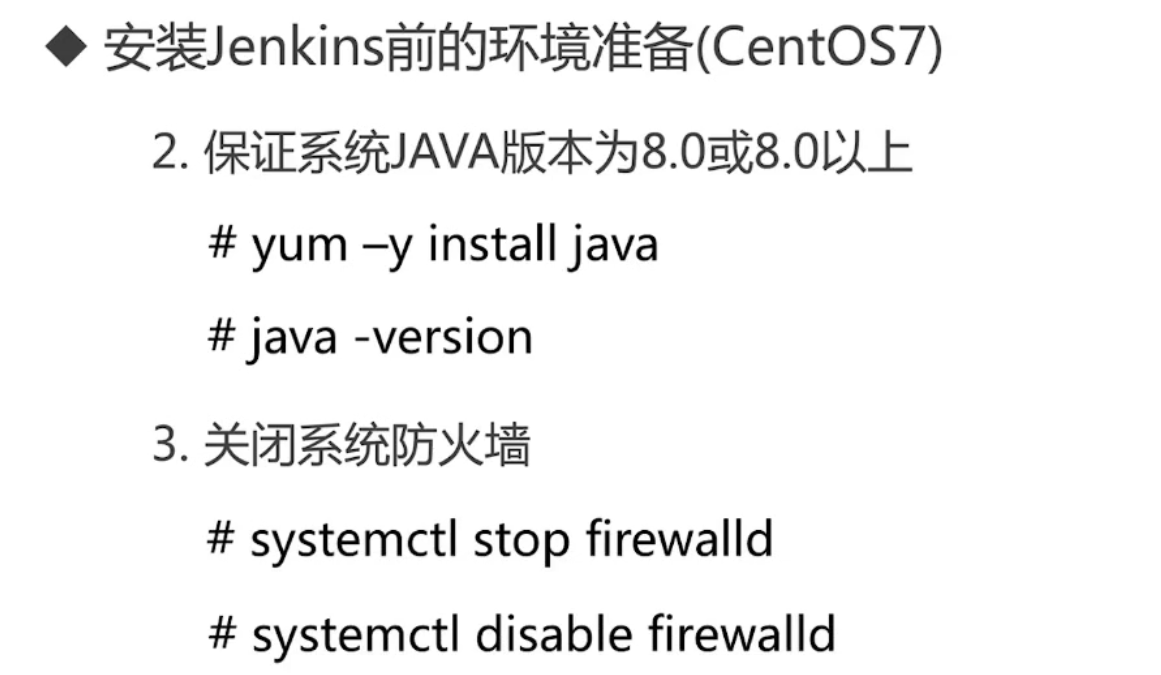
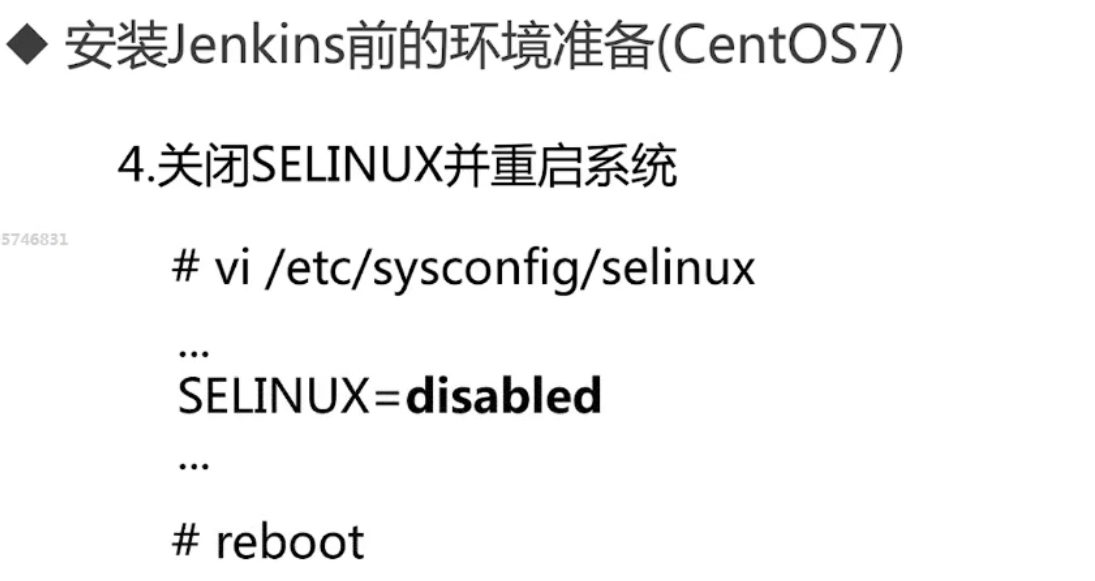

三、安装jenkins 实例演示:
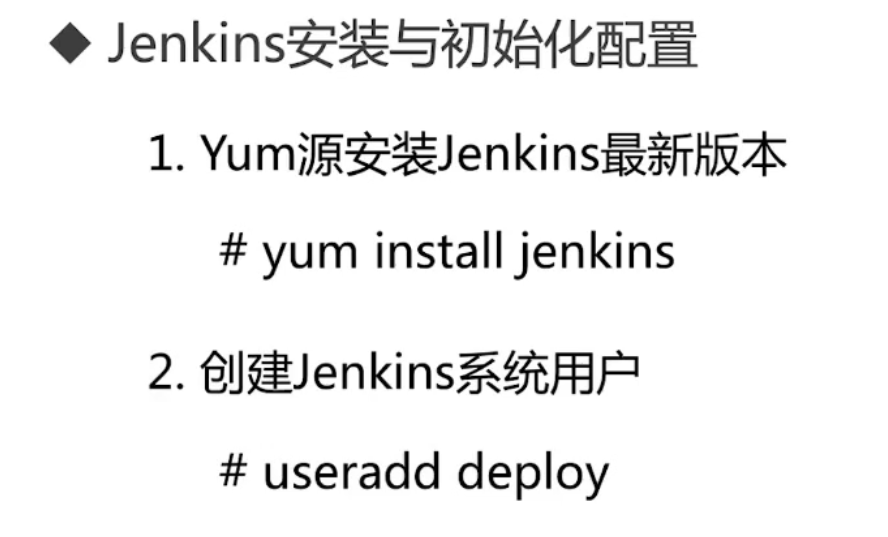
1.系统优化:防火墙、selinux 等

2. 添加 Jenkins 的yum源
~]# wget -O /etc/yum.repos.d/jenkins.repo http://pkg.jenkins.io/redhat-stable/jenkins.repo

~]# rpm --import https://pkg.jenkins.io/redhat-stable/jenkins.io.key

~]# yum -y install java

~]# java -version
java version "1.8.0_171"
Java(TM) SE Runtime Environment (build 1.8.0_171-b11)
Java HotSpot(TM) 64-Bit Server VM (build 25.171-b11, mixed mode)

~]# yum install jenkins -y

~]# useradd deploy

编辑 jenkins 配置文件,user 改为 deploy ,端口确认为 8080
~]# vim /etc/sysconfig/jenkins

JENKINS_USER="deploy"
JENKINS_PORT="8080"

~]# chown -R deploy:deploy /var/lib/jenkins

~]# chown -R deploy:deploy /var/log/jenkins

~]# systemctl start jenkins
故障:jenkins 未能正常启动,报错如下:
[root@jenkins ~]# systemctl status jenkins
● jenkins.service - LSB: Jenkins Automation Server
Loaded: loaded (/etc/rc.d/init.d/jenkins; bad; vendor preset: disabled)
Active: active (exited) since 一 2021-02-08 17:25:34 CST; 3s ago
Docs: man:systemd-sysv-generator(8)
Process: 4970 ExecStop=/etc/rc.d/init.d/jenkins stop (code=exited, status=0/SUCCESS)
Process: 4986 ExecStart=/etc/rc.d/init.d/jenkins start (code=exited, status=0/SUCCESS)
2月 08 17:25:33 jenkins systemd[1]: Starting LSB: Jenkins Automation Server...
2月 08 17:25:33 jenkins runuser[4991]: pam_unix(runuser:session): session opened for user deploy by (uid=0)
2月 08 17:25:34 jenkins systemd[1]: Started LSB: Jenkins Automation Server.
2月 08 17:25:34 jenkins jenkins[4986]: Starting Jenkins [ 确定 ]
排查原因是因为:使用普通用户启动时未给Jenkins的家目录完全授权,遗漏了 /var/cache/jenkins/ 导致。
解决办法:授权后重启 jenkins
~]# chown -R deploy:deploy /var/cache/jenkins/
~]# systemctl restart jenkins
[root@jenkins ~]# lsof -i:8080
COMMAND PID USER FD TYPE DEVICE SIZE/OFF NODE NAME
java 5193 deploy 160u IPv6 64773 0t0 TCP *:webcache (LISTEN)
至此,Jenkins 启动成功。
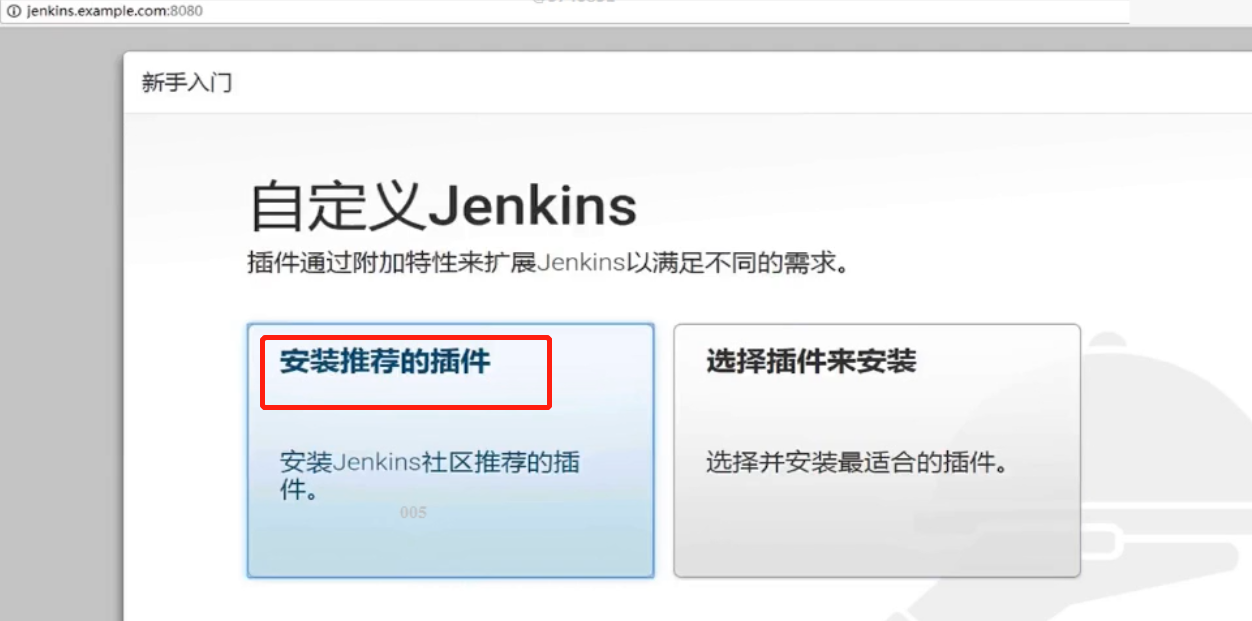
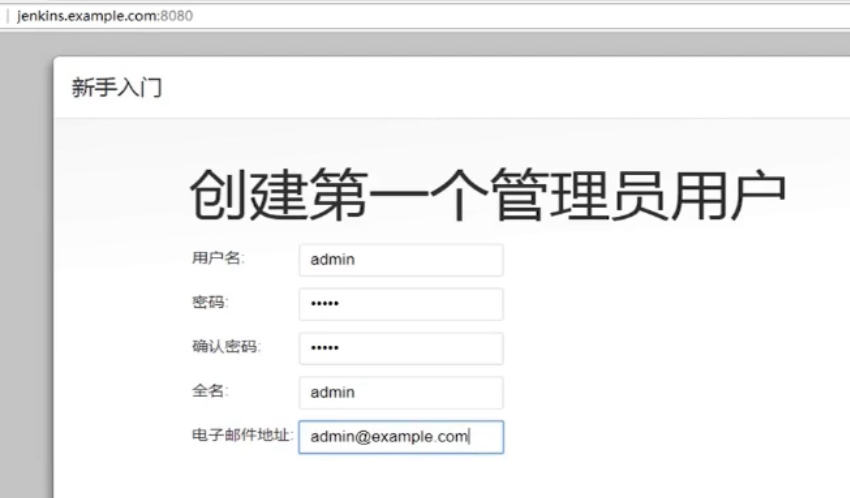
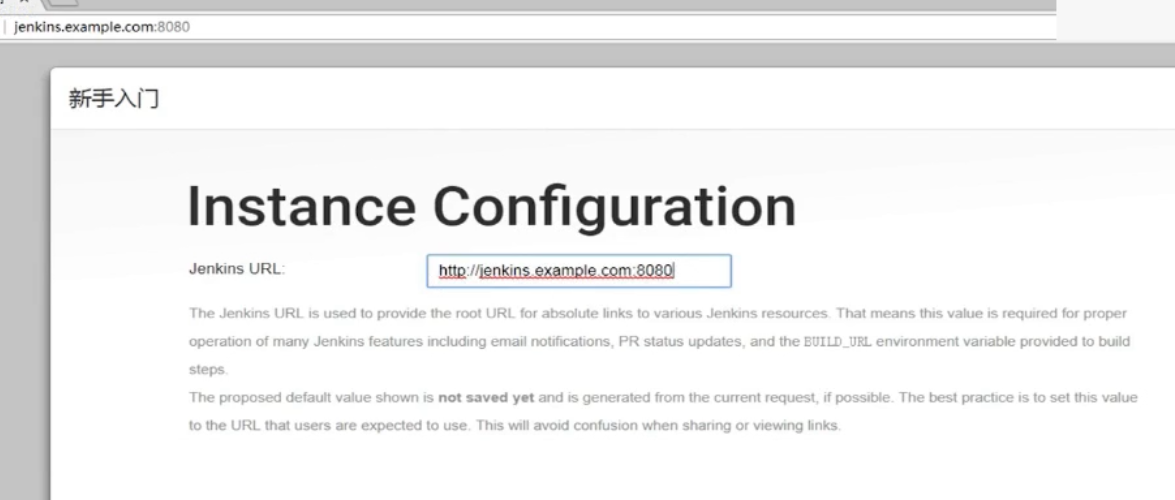
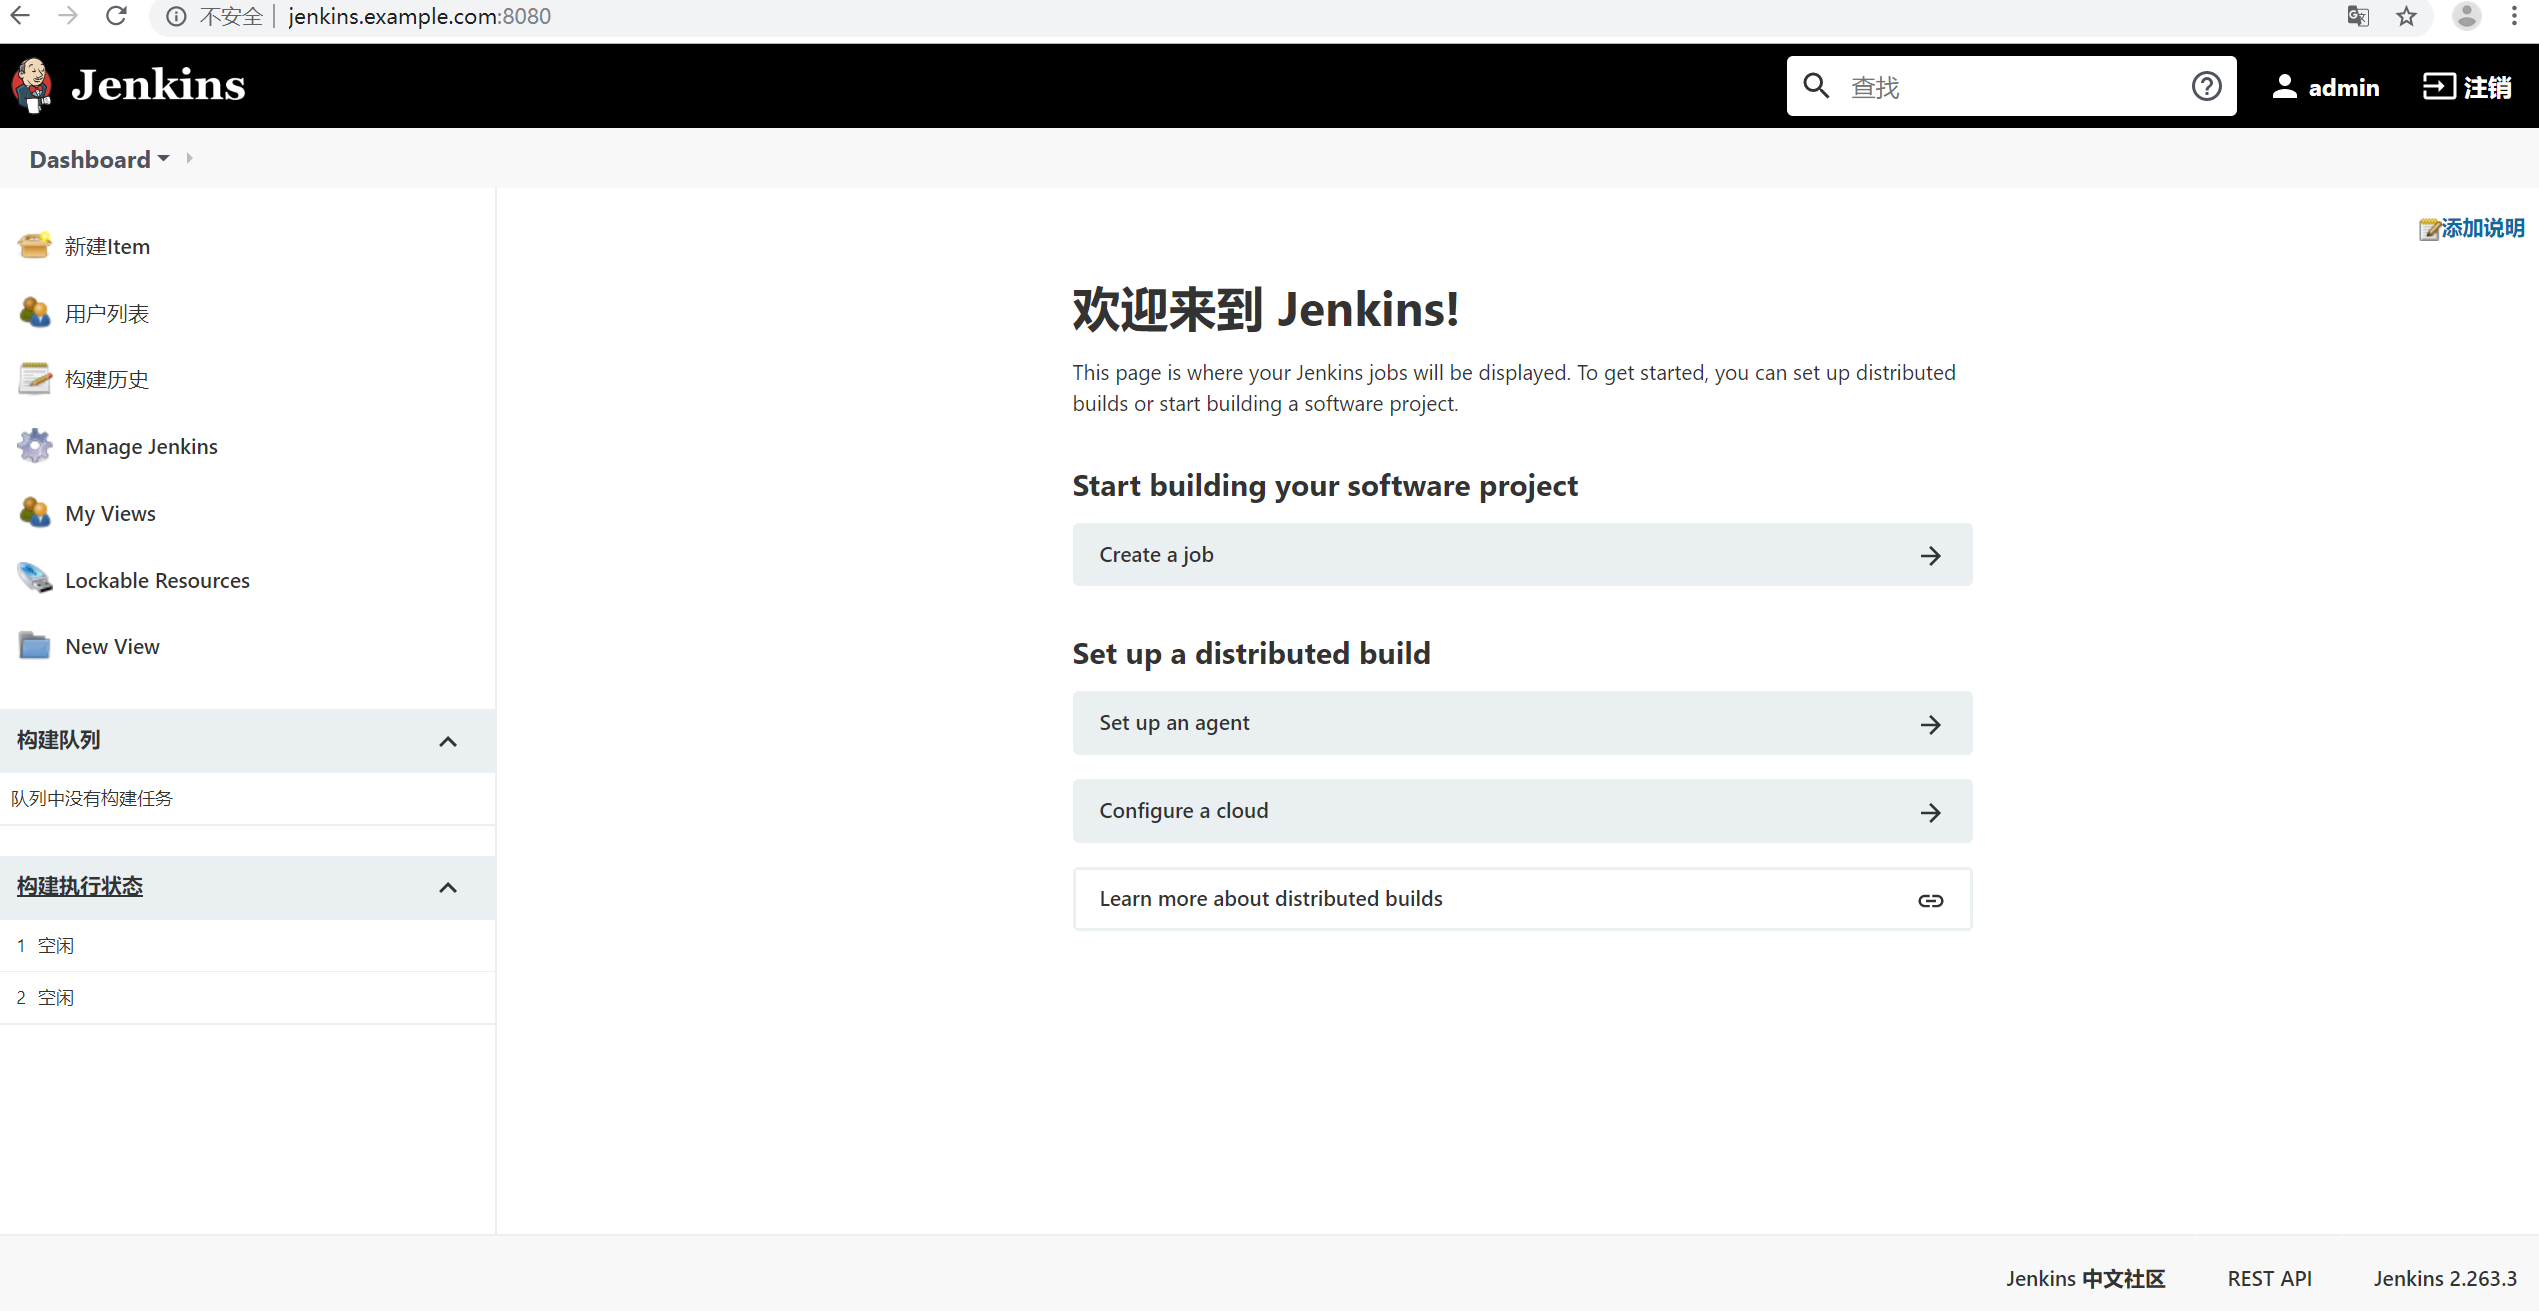
本地hosts 添加解析。浏览器打开 jenkins.example.com:8080


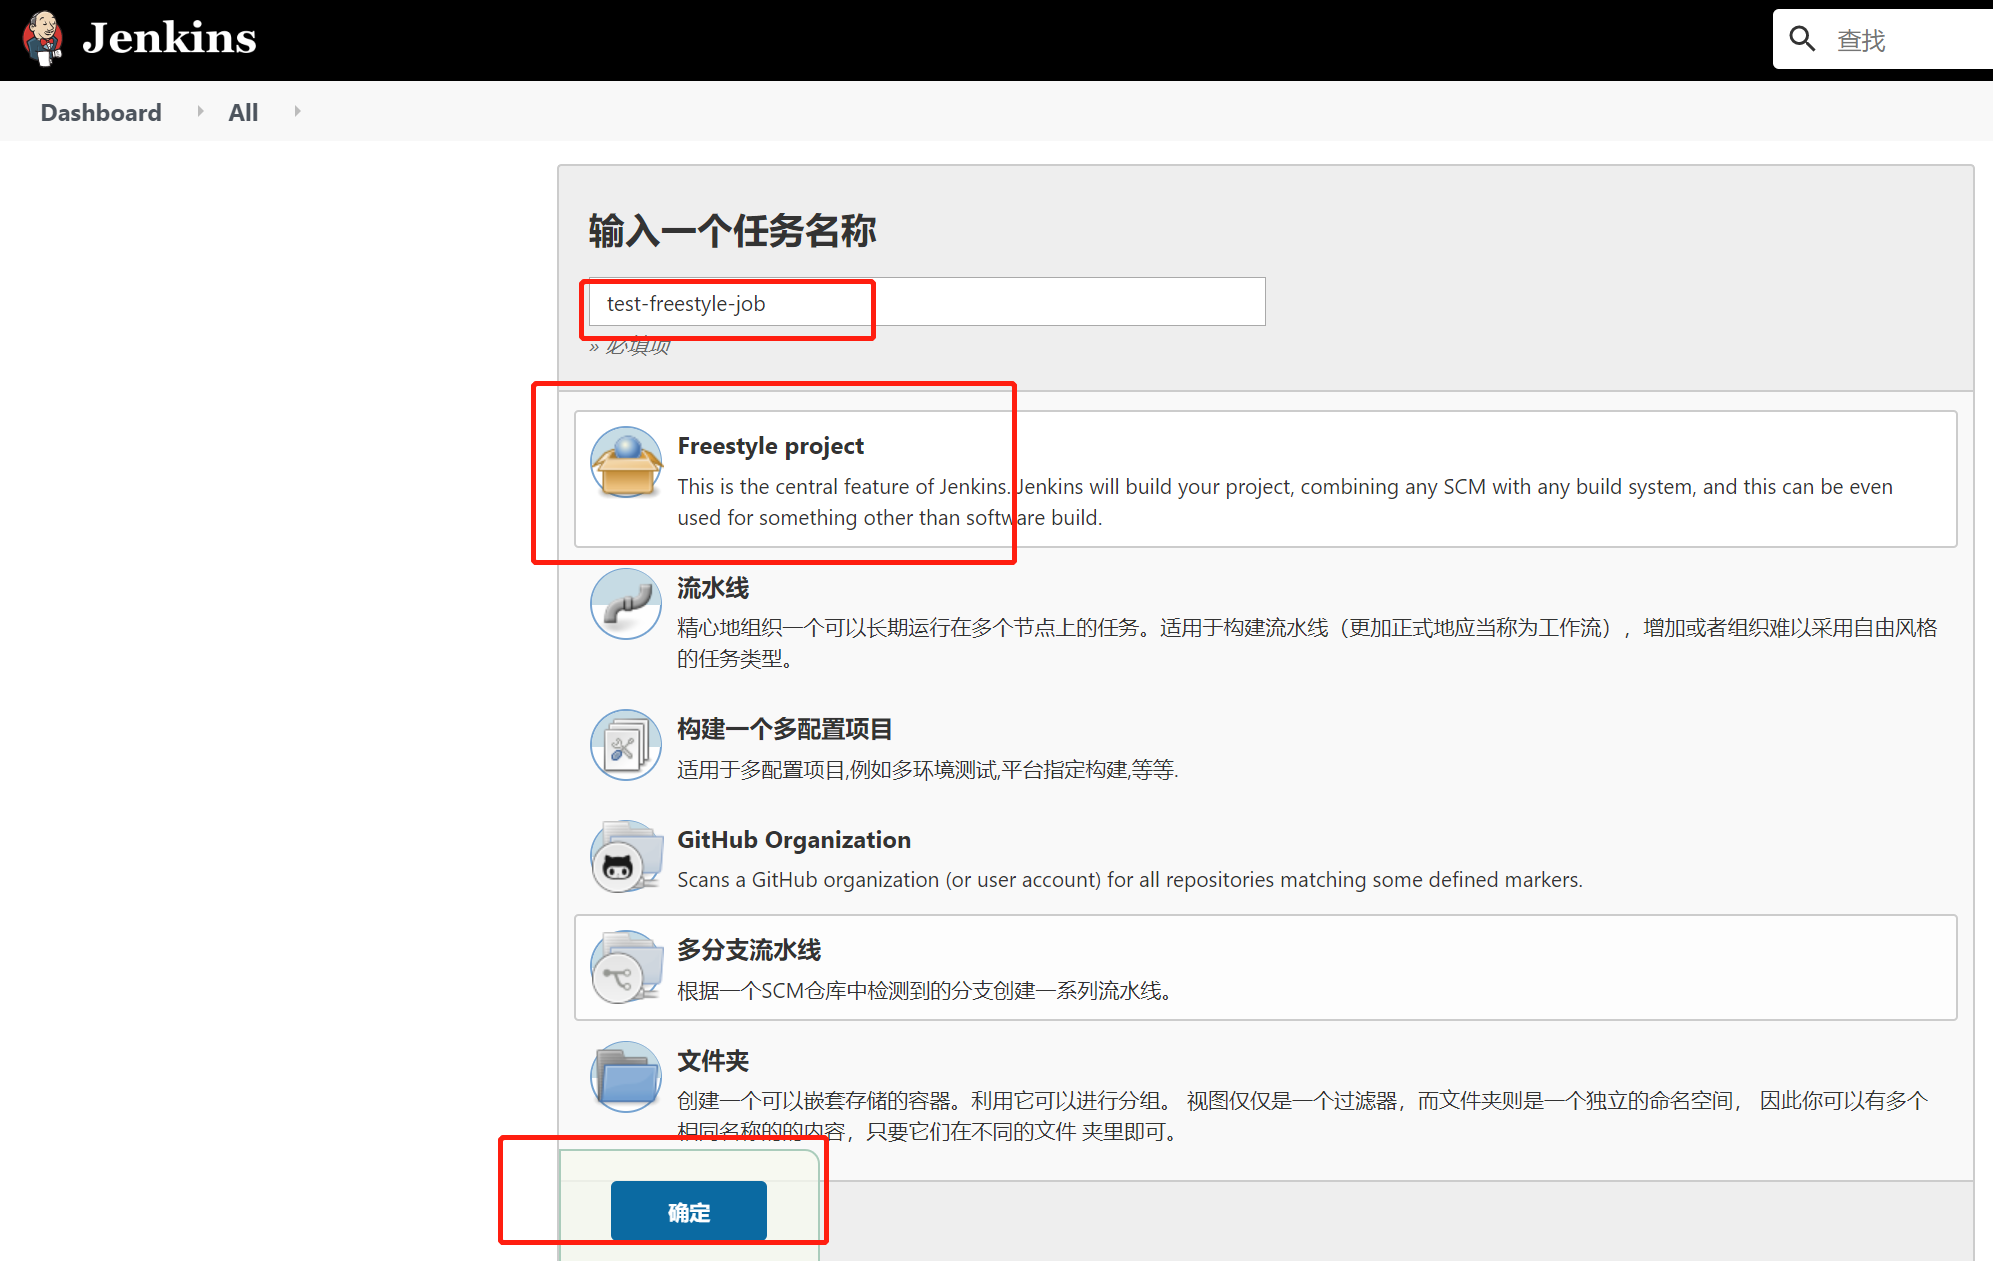
1) 创建一个freestyle 风格的项目

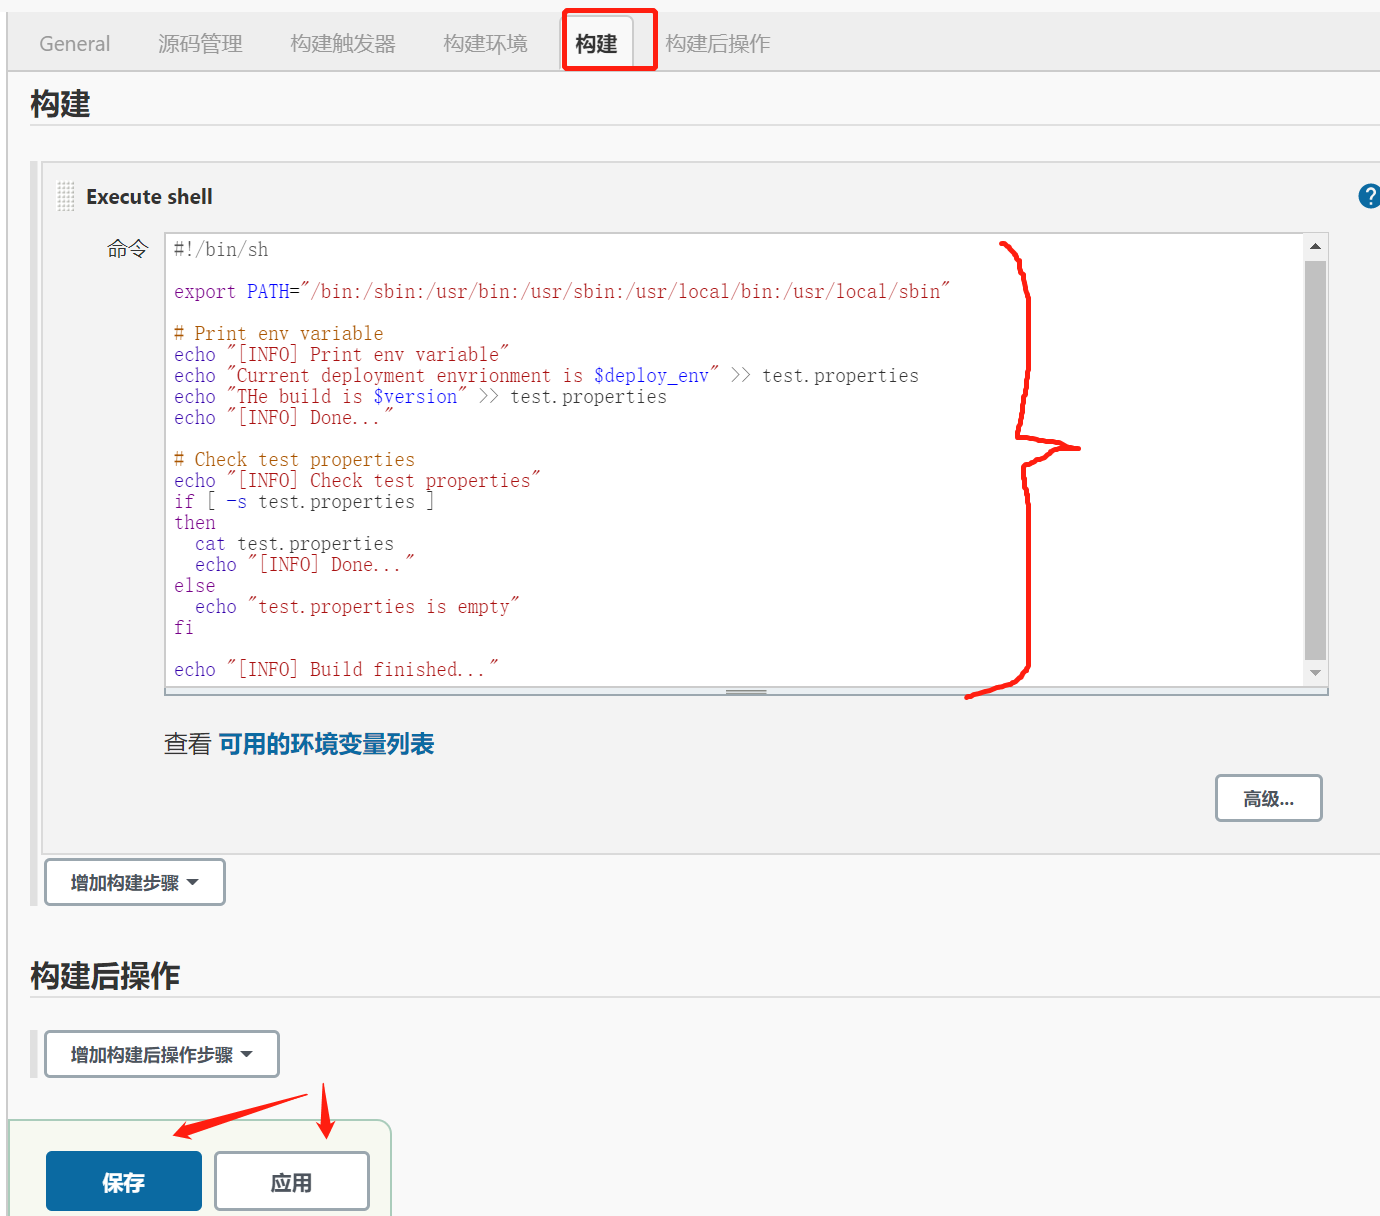
构建--> 执行shell
 View Code
此脚本相当于把上述定义的参数传入脚本中。
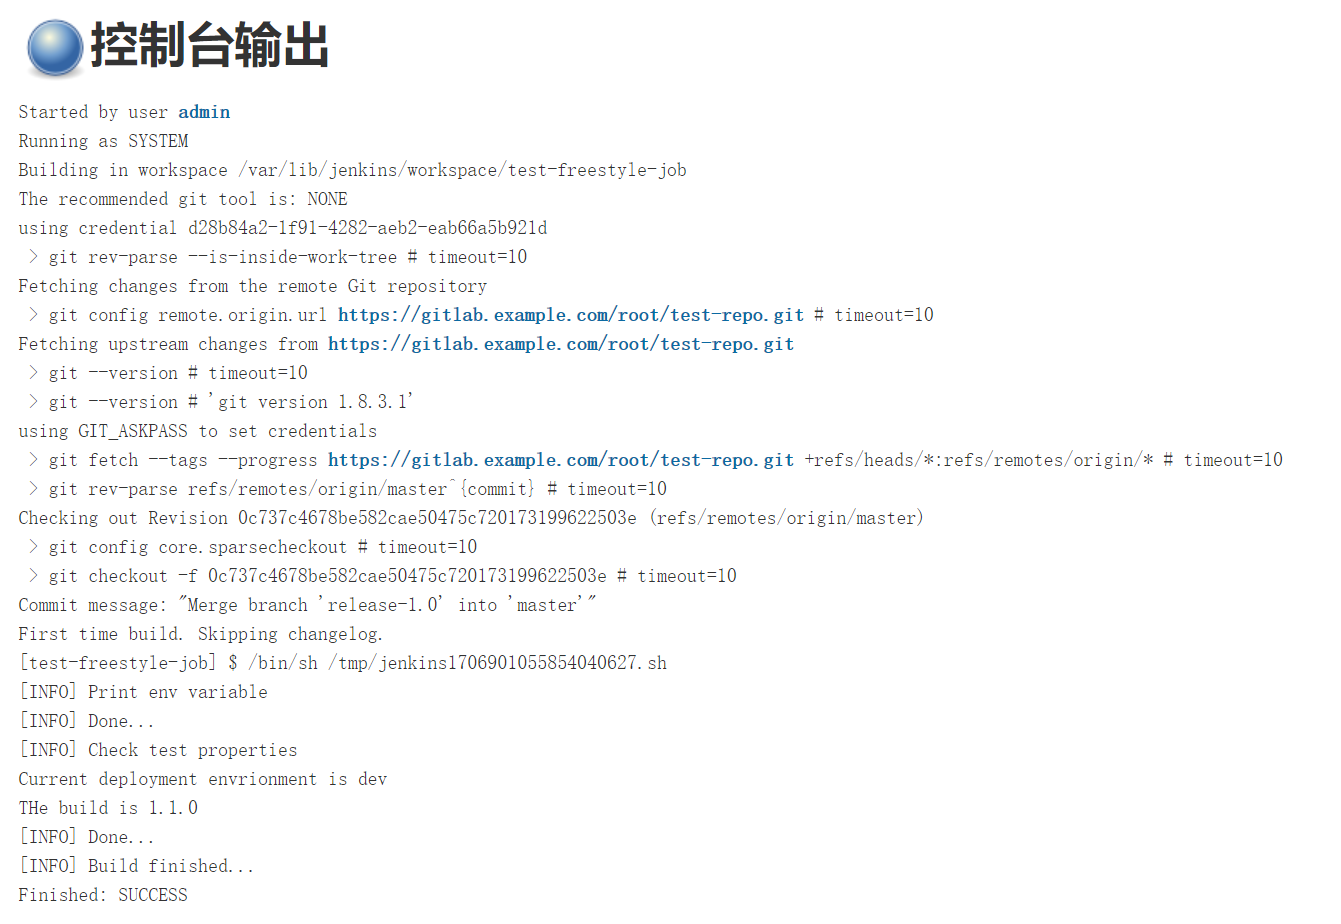
》执行一次构建
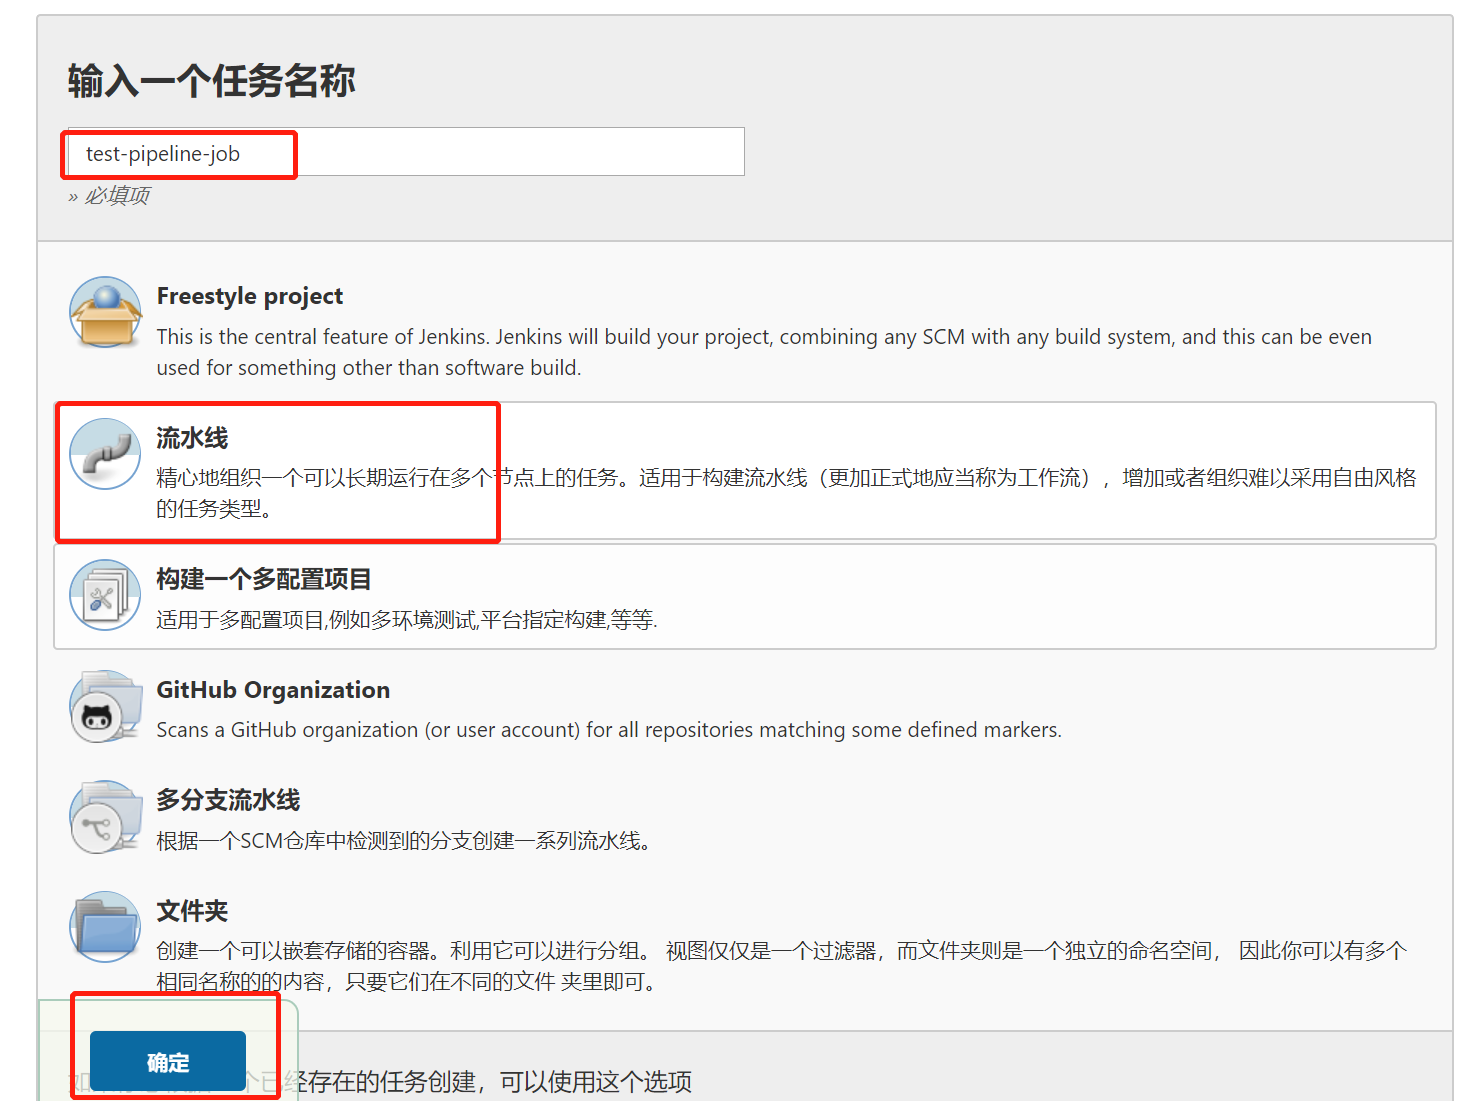
2) 创建一个Pipe line 风格的项目


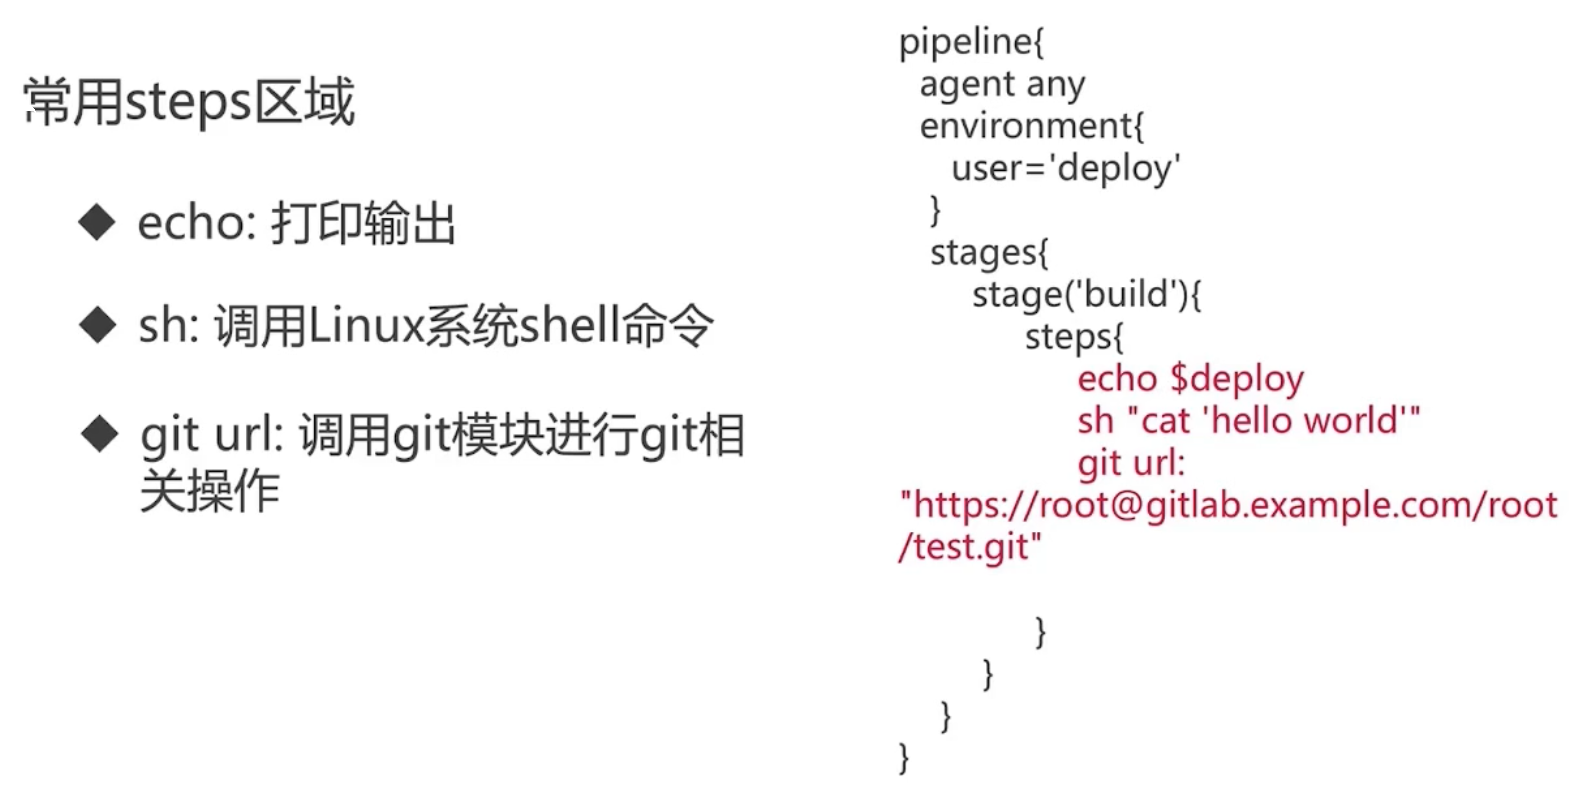
> pipeline 流水线脚本

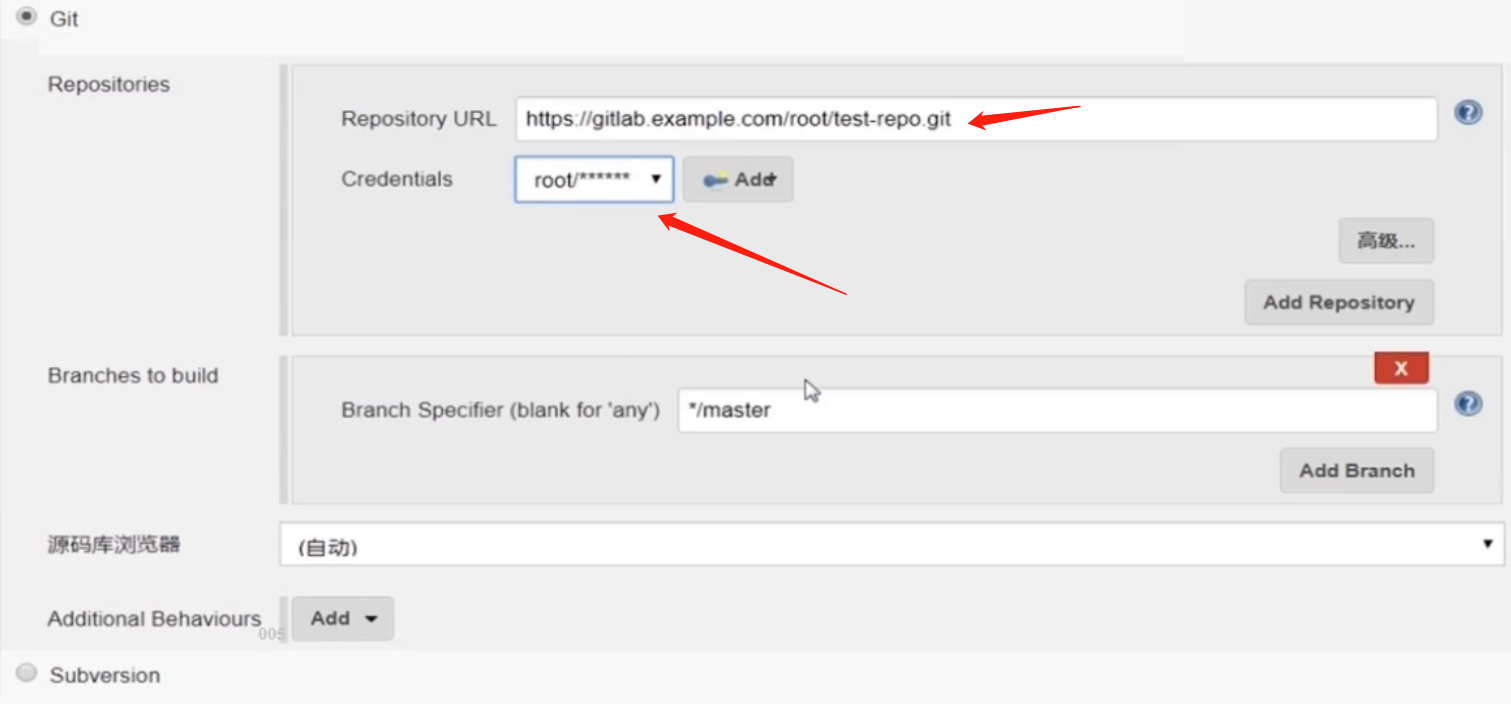
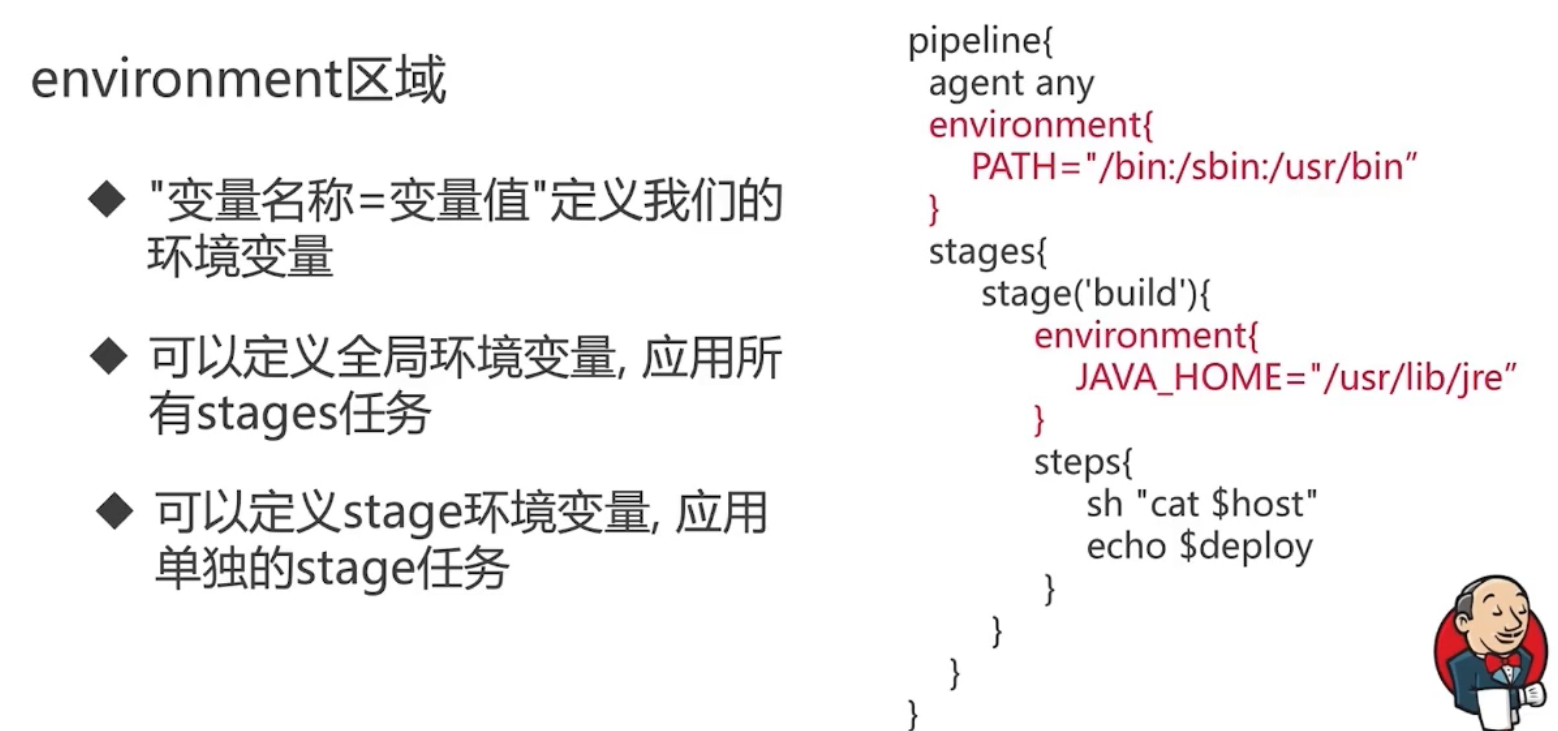
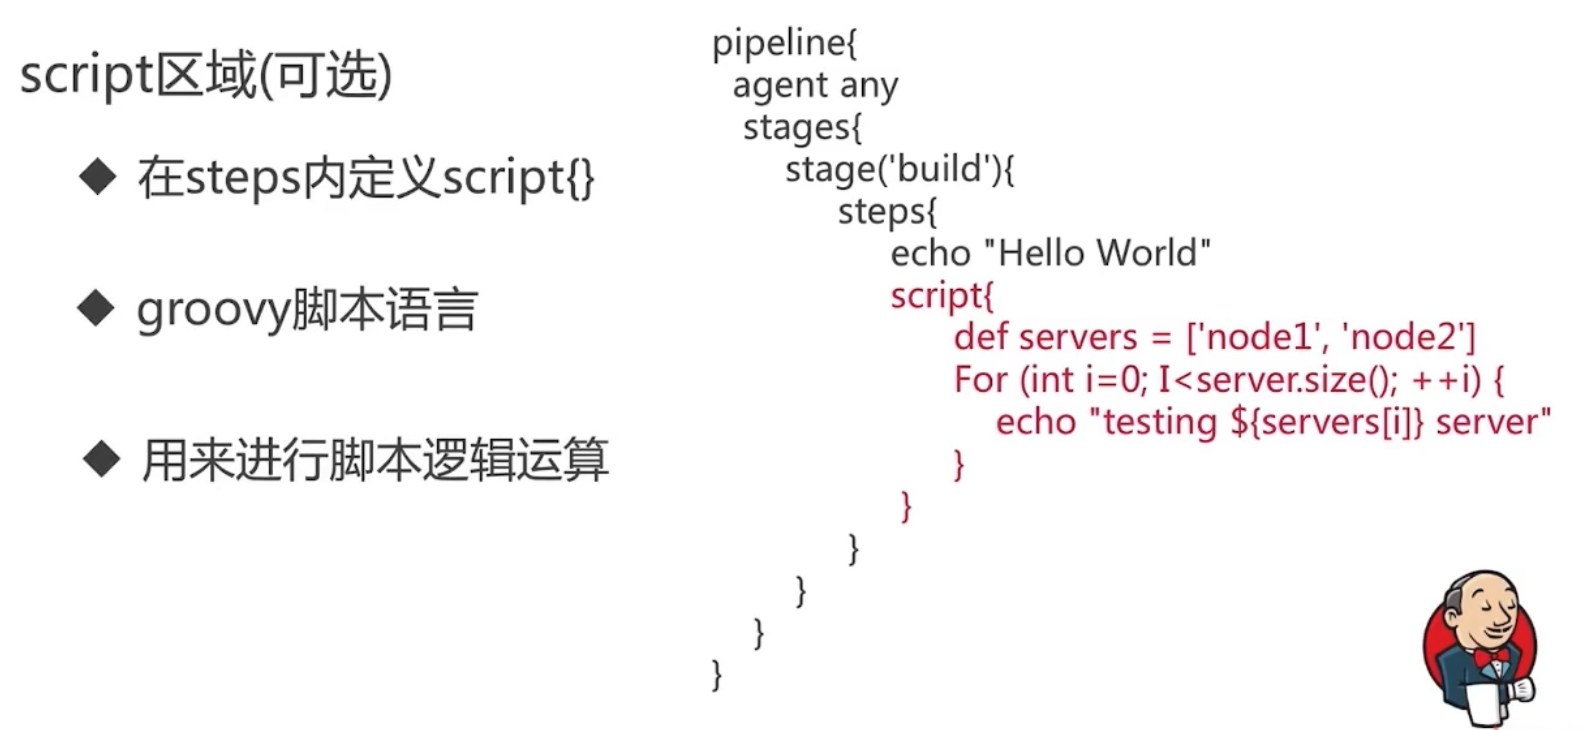
#!groovy

pipeline {
    agent {node {label 'master'}}

    environment {
        PATH="/bin:/sbin:/usr/bin:/usr/sbin:/usr/local/bin"
    }

    parameters {
        choice(
            choices: 'dev
prod',
            description: 'choose deploy environment',
            name: 'deploy_env'
            )
        string (name: 'version', defaultValue: '1.0.0', description: 'build version')
    }

    stages {
        stage("Checkout test repo") {
            steps{
                sh 'git config --global http.sslVerify false'
                dir ("${env.WORKSPACE}") {
                    git branch: 'master', credentialsId:"d28b84a2-1f91-4282-aeb2-eab66a5b921d", url: 'https://root@gitlab.example.com/root/test-repo.git'
                }
            }
        }
        stage("Print env variable") {
            steps {
                dir ("${env.WORKSPACE}") {
                    sh """
                    echo "[INFO] Print env variable"
                    echo "Current deployment environment is $deploy_env" >> test.properties
                    echo "The build is $version" >> test.properties
                    echo "[INFO] Done..."
                    """
                }
            }
        }
        stage("Check test properties") {
            steps{
                dir ("${env.WORKSPACE}") {
                    sh """
                    echo "[INFO] Check test properties"
                    if [ -s test.properties ]
                    then
                        cat test.properties
                        echo "[INFO] Done..."
                    else
                        echo "test.properties is empty"
                    fi
                    """

                    echo "[INFO] Build finished..."
                }
            }
        }
    }
}
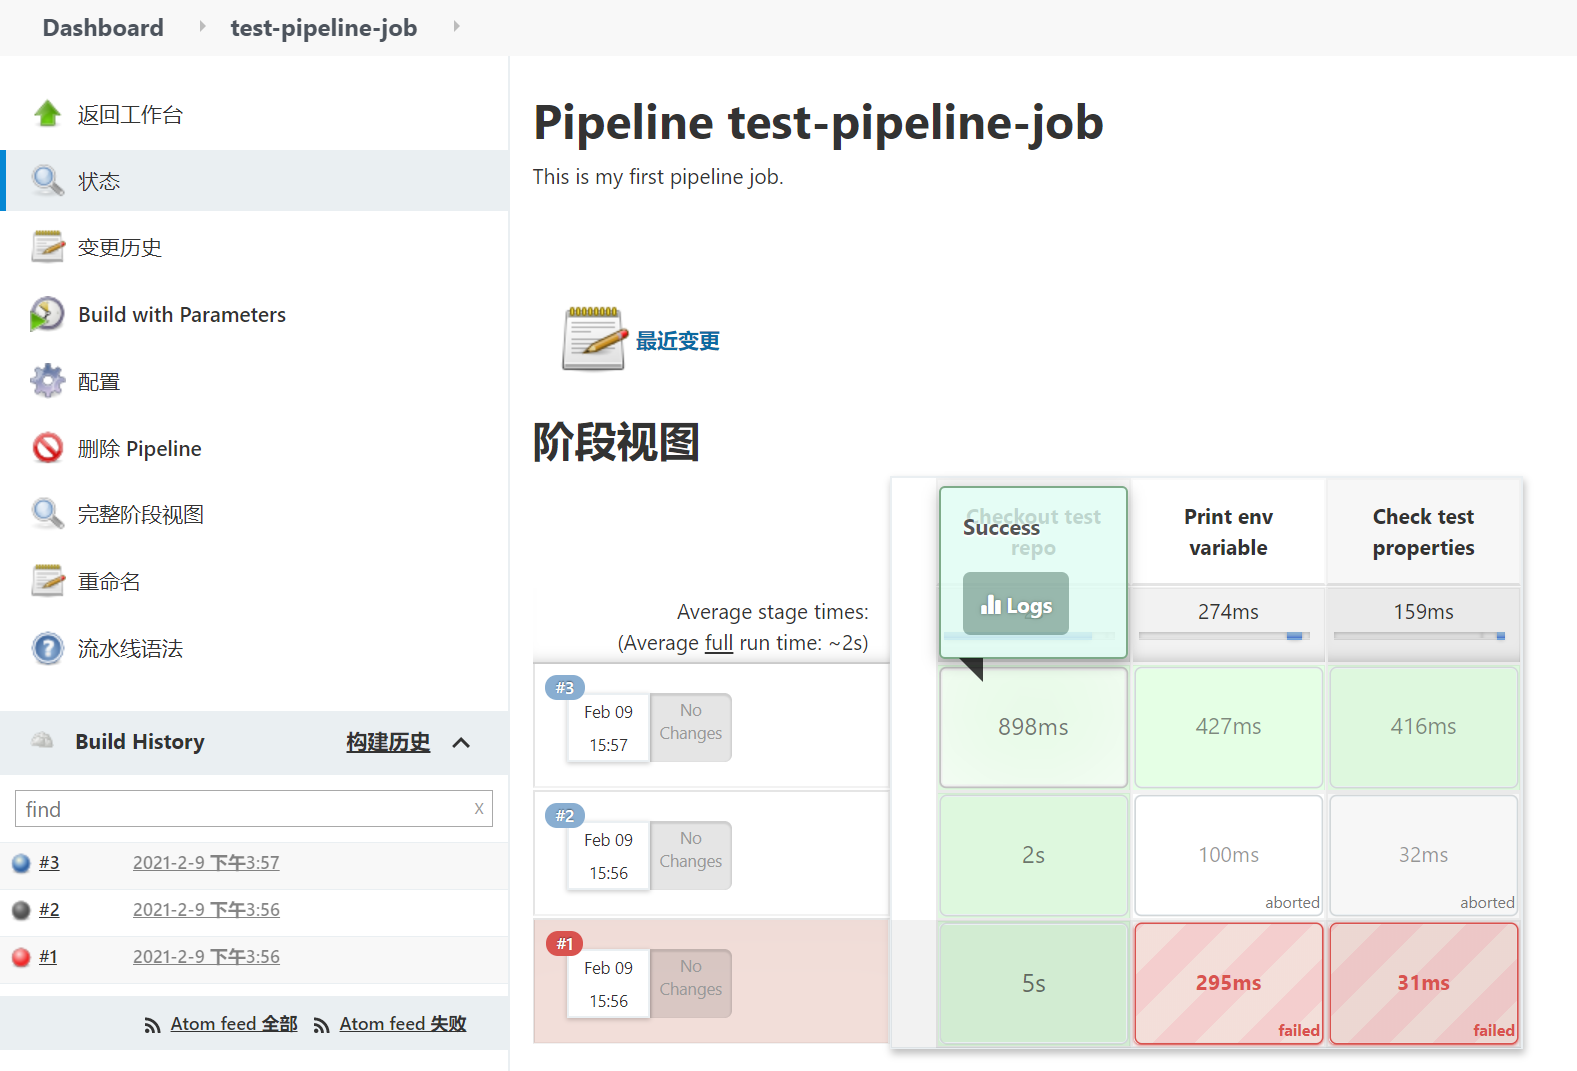
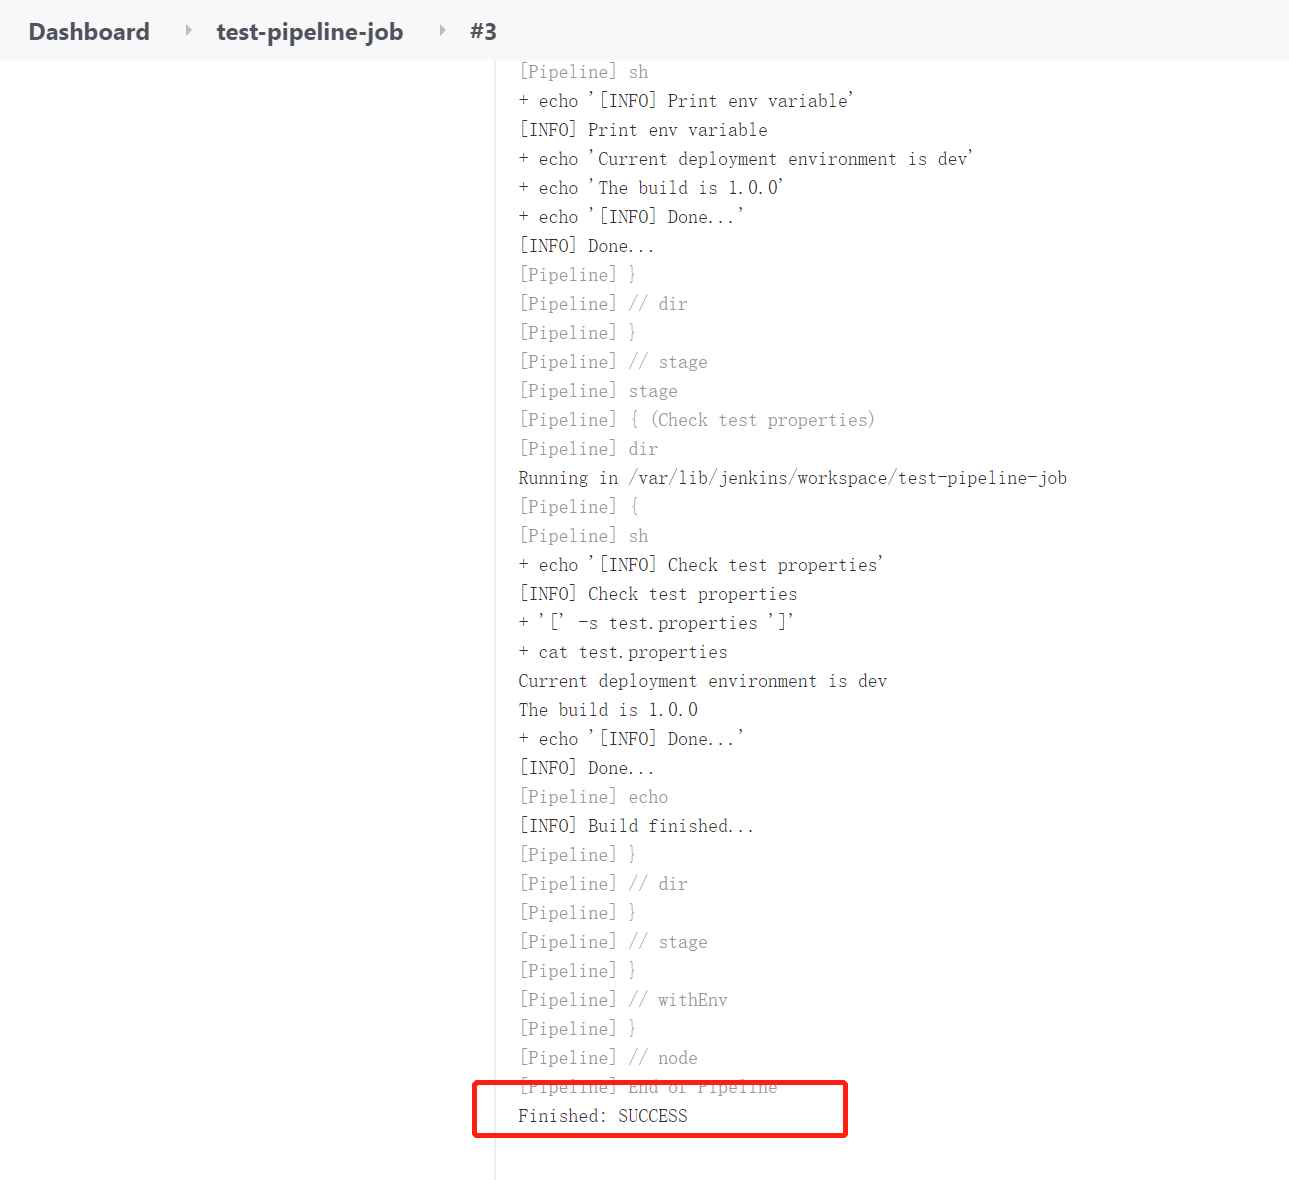
此时,pipeline 流水线项目构建成功。