在以前项目中遇到有上传图片都是用 web Uploader插件上传,因为我现在项目都在使用 layui 所以今天趁着有时间写一个tp5结合layui上传图片的demo
我用的是Tinkphp5.1版本 layui用的是2.1.1 废话不多说 代码如下:
下面的是html代码
<!DOCTYPE html>
<html lang="en">
<head>
    <meta charset="UTF-8">
    <title>tp5 + layui 上传图片</title>
    <link rel="stylesheet" href="/static/plugins/layui/css/layui.css">
    <script src="/static/jquery-1.10.2.min.js"></script>
    <script src="/static/plugins/layui/layui.js"></script>
    <style type="text/css">
        .box{
            margin-top: 10%;
            margin-bottom: 10px;
            color: #FF5722;
            font-size: 18px;
            margin-left: 45%;
        }
        .box1{
            width: 900px;
            height: 500px;
            margin-left: auto;
            border:solid  1px;
            margin-right:auto;
        }
        .box1 .controls{
            margin-left: 45%;
            margin-top: 20%;
        }
        .upload-pre-item{
            position: relative;
        }
        .upload-pre-item .img{
            margin-top: 5px;
            width: 116px;
            height: 76px;
        }
        .upload-pre-item i {
            position: absolute;
            cursor: pointer;
            top: 9px;
            right: 356px;
            background: #2F4056;
            padding: 2px;
            line-height: 15px;
            text-align: center;
            color: #fff;
            margin-left: 1px;
            /* float: left; */
            filter: alpha(opacity=80);
            -moz-opacity: .8;
            -khtml-opacity: .8;
            opacity: .8;
            transition: 1s;
        }
        .upload-pre-item i:hover{transform:rotate(360deg);}

    </style>
</head>
<body>
<div class="box"><span style="">tp5 + layui 上传图片</span></div>
<div class="box1">
    <div class="controls need-img">
        <button type="button" class="layui-btn layui-btn-primary" id="upload_img_icon">上传图片</button>
        <div class="upload-img-box">
        </div>
    </div>
</div>
<script>

    var upurl = "{:url('Index/Index/upload')}"; //上传图片地址
    layui.use(['layer','upload'], function(){
        var layer = layui.layer;
        var upload = layui.upload;
        upload.render({ //上传图片
            elem: '#upload_img_icon',
            url: upurl,
            multiple: true, //是否允许多文件上传。设置 true即可开启。不支持ie8/9
            before: function(obj) {
                layer.msg('图片上传中...', {
                    icon: 16,
                    shade: 0.01,
                    time: 0
                })
            },
            done: function(res) {
                layer.close(layer.msg());
                $('.upload-img-box').append('<dd class="upload-icon-img"><div class="upload-pre-item"><i onclick="deleteImg($(this))" class="layui-icon">�</i><img src="' + res.data + '" class="img" ><input type="hidden" name="icon" value="' + res.data + '" /></div></dd>');
            }
            ,error: function(){
                layer.msg('上传错误!');
            }
        });

    });
    function deleteImg(obj){
        obj.parent().parent('.upload-icon-img').remove();
    }
</script>
</body>
</html>
因为是demo 所以我就把他上传到Index模块index控制器里面了,下面是php代码 我用的是tp5.1的
    public function upload(){
        $pathName  =  $this->request->param('path');//图片存放的目录
        $file = request()->file('file');
        $path =  'static/uploads/images/' . (!empty($pathName) ? $pathName : 'img');
        if(!is_dir($path)){
            mkdir($path, 0755, true);
        }
        $info = $file->move($path);
        if ($info && $info->getPathname()) {
            $data = [
                'status' => 1,
                'data' =>  '/'.$info->getPathname(),
            ];
            echo exit(json_encode($data));
        } else {
            echo exit(json_encode($file->getError()));
        }
    }
如果需要复制上面的html代码 需要引入 jquery 和 layui !!!!!!!!!!!!!!!!!!!!
楼主只写了一些简单的图片上传以及删除 有兴趣的可以写一下图片上传以后图片左右移动,如果有需要tp3.2版本 + layui的 上传图片可以在下方留言 楼主会抽时间也附上tp3.2的,最后 这里附上layui官方 upload上传图片文档的传送门:http://www.layui.com/doc/modules/upload.html
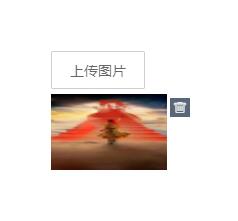
单图上传效果:
多图上传效果:

本文为作者原创文章,转载无需和我联系,但请注明来自:http://www.cnblogs.com/kzfbk/p/8660582.html