系列博客链接:
(第二章第一部分)TensorFlow框架之文件读取流程:https://www.cnblogs.com/kongweisi/p/11050302.html
(第二章第二部分)TensorFlow框架之读取图片数据:https://www.cnblogs.com/kongweisi/p/11050539.html
本文概述:
- 目标
- 应用tf.FixedLengthRecordReader实现二进制文件读取
- 应用tf.decode_raw实现解码二进制数据
- 应用
- CIFAR10类图片数据读取
1、CIFAR10二进制数据集介绍
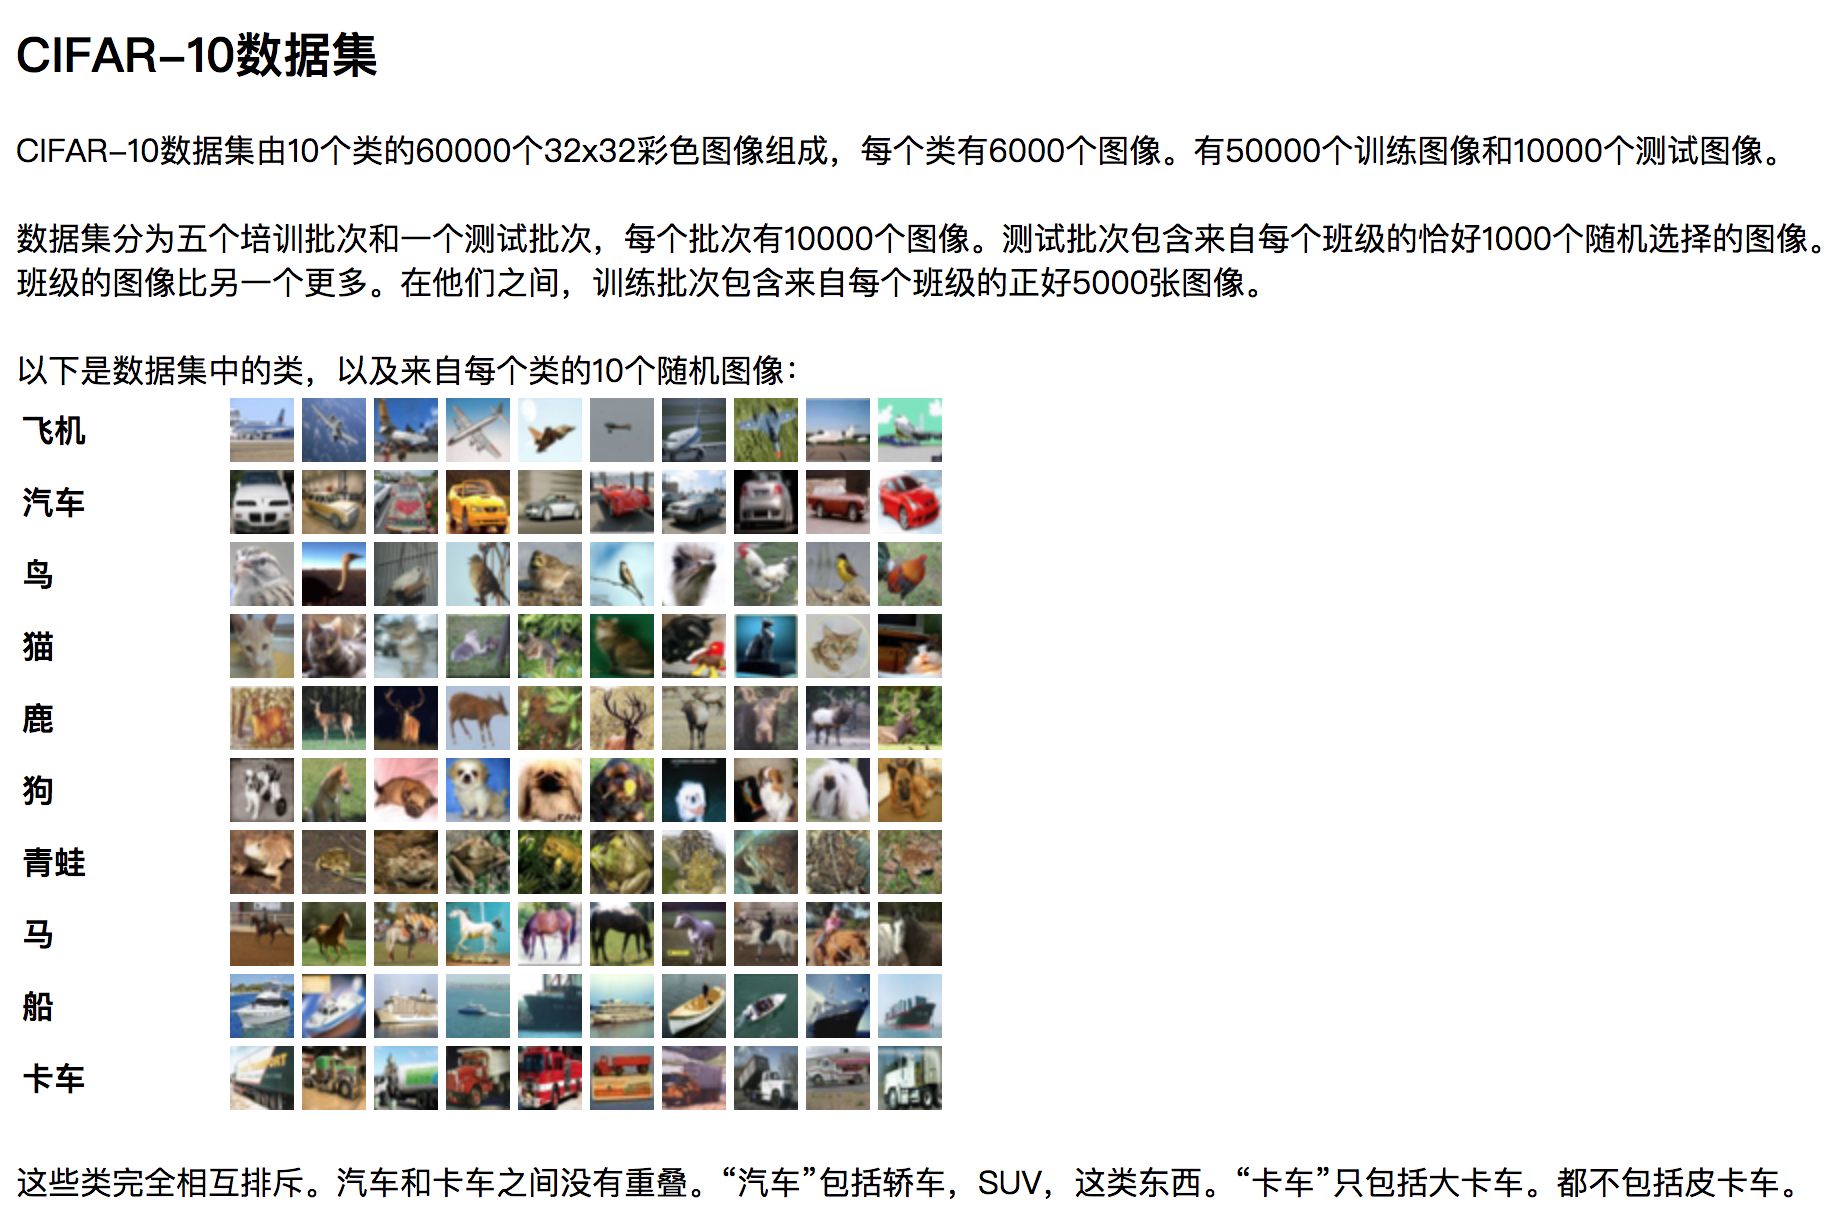
https://www.cs.toronto.edu/~kriz/cifar.html
- 二进制版本数据文件
二进制版本
二进制版本包含文件data_batch_1.bin,data_batch_2.bin,...,data_batch_5.bin以及test_batch.bin。
这些文件中的每一个格式如下,数据中每个样本包含了目标值和特征值:
<1×标签> <3072×像素>
...
<1×标签> <3072×像素>
第一个字节是第一个图像的标签,它是一个0-9范围内的数字。接下来的3072个字节是图像像素的值。前1024个字节是红色通道值,下1024个绿色,最后1024个蓝色。值以行优先顺序存储,因此前32个字节是图像第一行的红色通道值。 每个文件都包含10000个这样的3073字节的“行”图像,但没有任何分隔行的限制。因此每个文件应该完全是30730000字节长。
2、CIFAR10 二进制数据读取
2.1 分析
- 构造文件队列
- 读取二进制数据并进行解码
- 处理图片数据形状以及数据类型,批处理返回
- 开启会话线程运行
2.2 代码
- 定义CIFAR类
class CifarRead(object):
    """
    二进制文件的读取,tfrecords存储读取
    """

    def __init__(self):
        # 定义一些图片的属性
        self.height = 32
        self.width = 32
        self.channel = 3

        self.label_bytes = 1
        self.image_bytes = self.height * self.width * self.channel
        self.bytes = self.label_bytes + self.image_bytes
- 实现读取数据方法read_and_decode(self, file_list)
def read_and_decode(self, file_list):
        """
        读取二进制原始数据,解码成数据张量
        :return:
        """
        # 1、找构造文件队列
        file_queue = tf.train.string_input_producer(file_list)

        # 2、使用二进制读取器读取内容
        # 一共读取 1+3072=3073个字节
        reader = tf.FixedLengthRecordReader(self.bytes)

        # 此时的value是某个文件的某个样本
        key, value = reader.read(file_queue)

        # 3、二进制数据解码 decode_raw
        label_image = tf.decode_raw(value, tf.uint8)

        print(label_image)
        # 把图片的特征值和目标值单独拿出来处理
        # tf.slice切片  label是:[0] 到 [1]  image是:[1] 到 [3072]
        label = tf.slice(label_image, [0], [self.label_bytes])
        image = tf.slice(label_image, [self.label_bytes], [self.image_bytes])

        # 标签、图片的类型转换、形状转换
        label_cast = tf.cast(label, tf.int32)

        # 设置图片的特征值形状
        # 使用reshape去修改形状
        # 图片特征值的数据,如果用于去训练计算,可以转换成float32类型
        image_reshape = tf.reshape(image, [self.height, self.width, self.channel])

        print(label_cast, image_reshape)

        # 4、批处理图片数据
        image_batch, label_batch = tf.train.batch([image_reshape, label_cast], batch_size=10, num_threads=1, capacity=10)

        return image_batch, label_batch
- 会话逻辑
if __name__ == "__main__":
    # 生成路径+文件名的列表
    filename = os.listdir(FLAGS.cifar_datadir)

    # 路径+名字拼接
    file_list = [os.path.join(FLAGS.cifar_datadir, file) for file in filename if file[-3:] == "bin"]
    # file_list = [os.path.join("路径", file) for file in filename]
  # 实例化类
    cr = CifarRead()

    # 从原始二进制文件读取
    image_batch, label_batch = cr.read_and_decode(file_list)


  # 开启会话打印内容
    with tf.Session() as sess:
        # 创建线程协调器
        coord = tf.train.Coordinator()

        # 开启子线程去读取数据
        # 返回子线程实例
        threads = tf.train.start_queue_runners(sess=sess, coord=coord)

        # 获取样本数据去训练
        print(sess.run([image_batch, label_batch]))

        # 关闭子线程,回收
        coord.request_stop()

        coord.join(threads)